Hello and welcome to my first tutorial!
This is exclusive. Try to not repost/leak it. I would really appreciate that!
I am aware that many people struggle to get Stable Diffusion/AnimateDiff running on their own PC for various reasons:
they do not have a very good GPU
they have an AMD GPU
they find runpod and vast expensive (yes, there are people who are really in such a struggle nowadays looking at the economy of the world and at the bad direction which was taken by the entire world with wars, pandemics etc.).
Required things:
1 email address
1 phone number
It includes:
one SD 1.5 model
a few LoRAs (including the LCM one)
a few very good embeddings
AnimateDiff and other custom nodes
all the ControlNets
2 custom upscalers
2 AnimateDiff models and 2 AnimateDiff motion LoRAs
one VAE (the official one).
Steps:
Step 1. Go to https://www.kaggle.com/ and create an account. Then go to "Settings" and add a phone number in the "Phone Verification" field. You will get a six digits code which will be introduced on the site and you now has everything needed to start.


Step 2. Click on the "Create" button and then on "Create a new notebook".

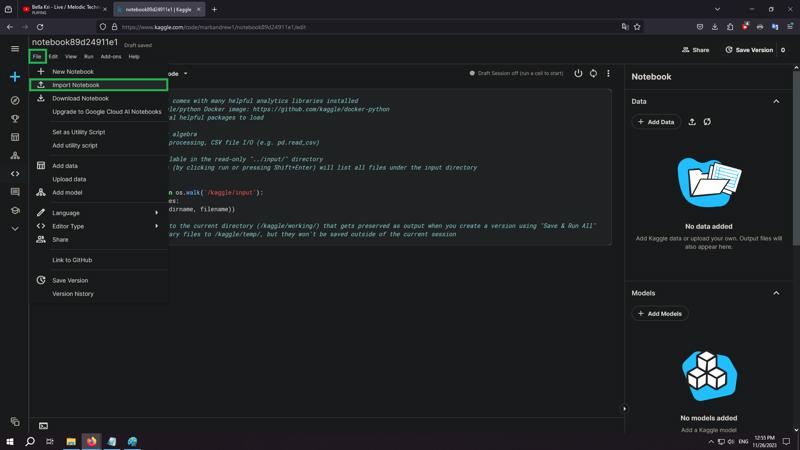
Step 3. Click on "File", then on "Import Notebook". Drag and drop the notebook downloaded from this post and press on "Import".

Step 4. Go to https://ngrok.com/ and make a free account. Verify your email address, return to the ngrok site and copy "Your Authtoken".

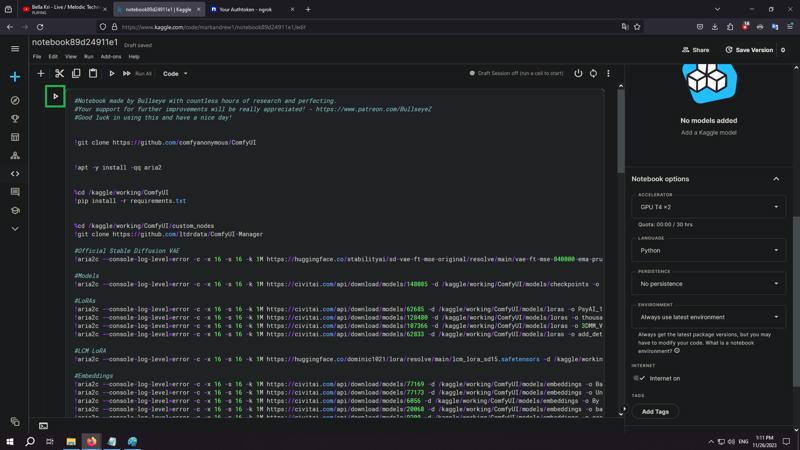
Step 5. Return to the notebook page, go down until you find "ngrok_token="YOUR_NGROK_TOKEN"" and replace "YOUR_NGROK_TOKEN" with your copied token from the Step 4.

Step 6. Make sure that you have "GPU T4 x2", "Python", "No persistence", "Always use the latest environment" and the internet turned on at the "Notebook options".

Step 7. Scroll up and run the cell by clicking on that little "play" button. Scroll down and wait until a ngrok link will appear. Press on it, then on "Visit Site" and congrats! You have ComfyUI up and running.

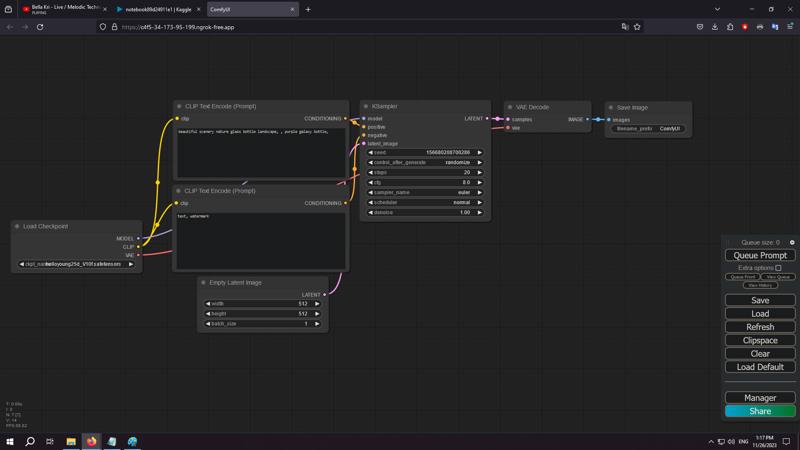
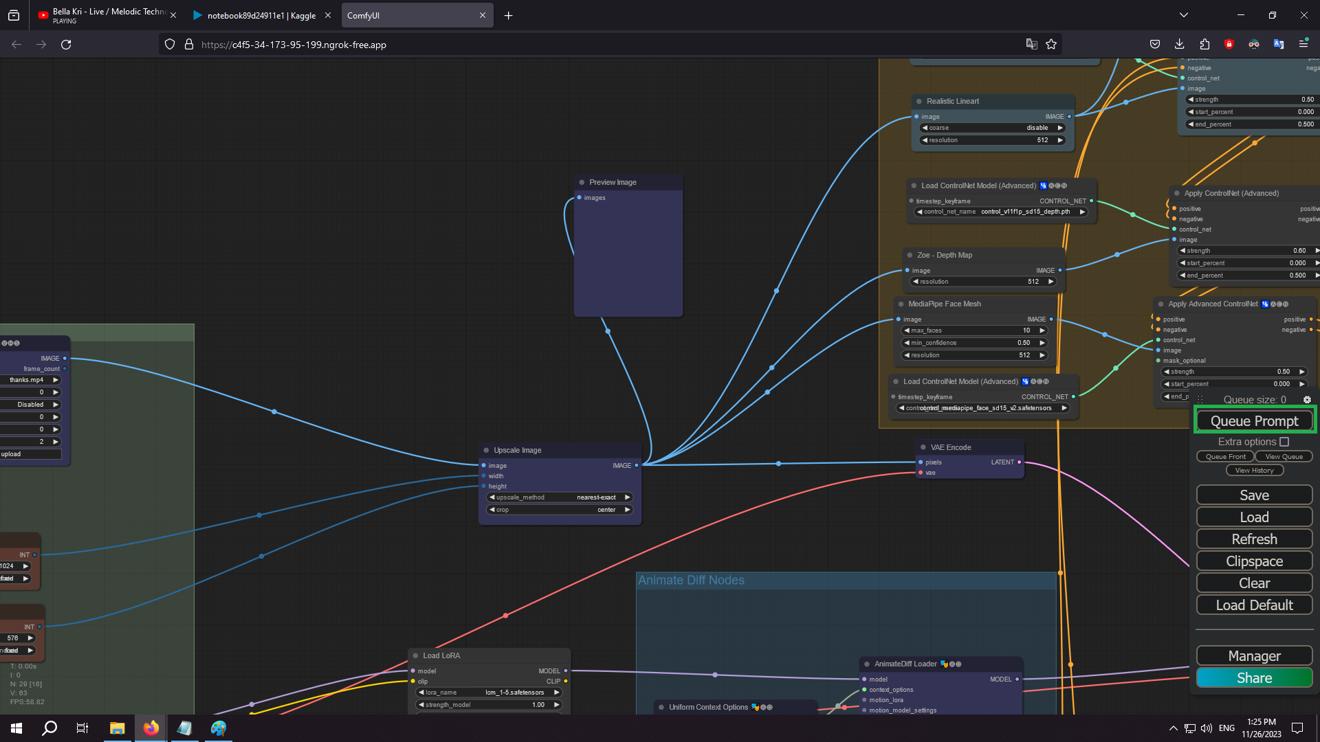
(For AnimateDiff) Step 8. Drag and drop the workflow provided (it was downloaded from someone from Twitter, I'm not the author of the workflow) into the Comfy workplace.
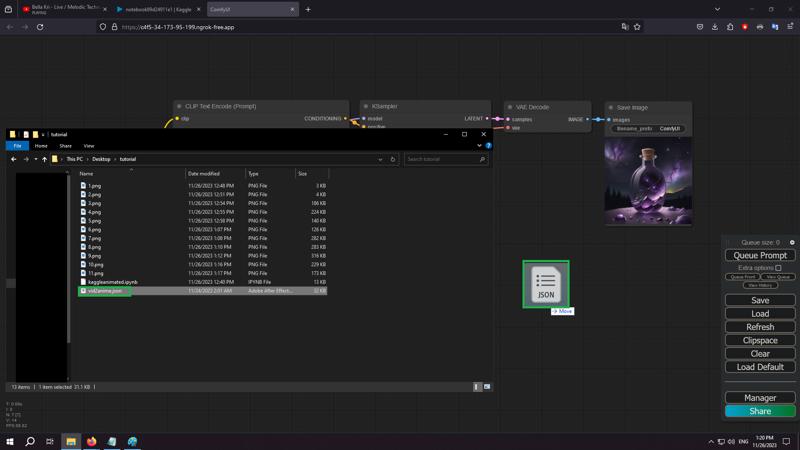
(For AnimateDiff) Step 9. Change all the parameters accordingly and press on "Queue Prompt". The first run could give an error regarding the "Zoe - Depth Map" preprocessor, but click on "Queue Prompt" again after getting that error and it will work normally after.

Optional: For the people who wish to use other ControlNets, go and delete the "#" which is placed before them. Be careful since you have a limited storage of 20 GB (you can download only a few ControlNets -> 3-4.

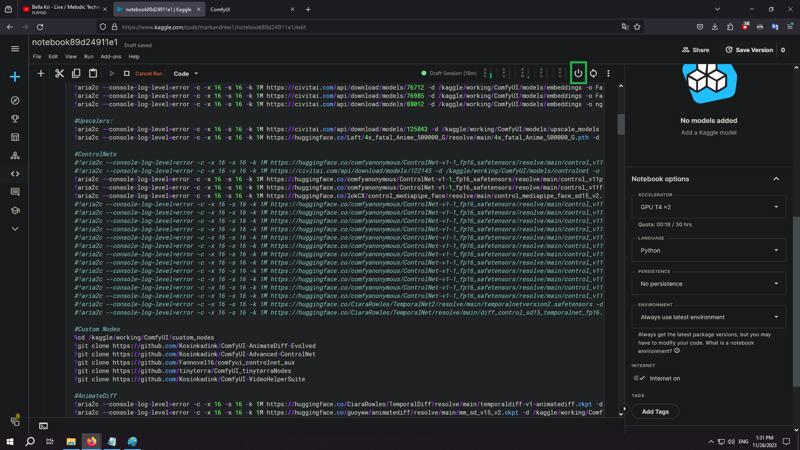
Do not forget to turn off the runtime after you finished your work, because you get 30 free hours per week, so you won't wish to leave it running without doing nothing on ComfyUI.
Thank you!
The support will be highly appreciated - https://www.patreon.com/BullseyeZ
Do not generate NSFW content. Kaggle instantly bans your account for doing that. And it's not even moral. "A better mind, a better soul, a better body".
Have a nice day!
Can't make a videotutorial at this moment, because I'm sick and my voice is...

