The information provided in this article may include references to various websites, resources, or tools that are mentioned based on the personal preference and experience of the author. It is important to note that these mentions do not constitute endorsements or sponsorships by Civitai or its affiliates.
Readers are encouraged to exercise their own discretion and judgment when exploring external websites, resources, or tools mentioned in this article. Neither Civitai and its affiliates, nor the author, assume any responsibility for the content, accuracy, or functionality of third-party sites or tools. Any interactions or transactions with external entities are solely at the reader's own risk.
The views expressed in this article are those of the author and do not necessarily reflect the official stance or opinions of Civitai or its affiliates. We recommend that readers independently verify and assess the suitability of any mentioned websites, resources, or tools for their specific needs and circumstances.
Neither Civitai and its affiliates, nor the author, are liable for any losses, damages, or issues that may arise from the use of external websites, resources, or tools mentioned in this article. Readers are advised to refer to the terms of use and privacy policies of external sites for further information.
By reading this article, you acknowledge and accept the terms of this disclaimer.
Let's get started
Introduction
Hello reader,
Because you've landed here, it's likely because you're eager to delve into image generation through Stable Diffusion. Perhaps you're equipped with a compact PC tailored for image-related tasks, boasting a modest GPU capable of handling heavier image loads in applications like Photoshop or Illustrator. Yet, the desire for more creativity, more output, and a richer experience propels you forward. And if you're like me, you were probably met with the startling discovery that while generating images from a plain text prompt using online services is fun, eventually such services come at a prohibitive cost, be that cost monetary, or temporal. Or in the worst cases, both!
Motivated to liberate yourself from the constraints of online services, you embarked on a journey to craft images independently—utilizing your personal computer, resources, and time. The allure of this endeavor lies in the profound freedom it offers for unleashing creativity, especially with the diverse and distinct Stable Diffusion checkpoint models housed on this platform. However, as you successfully freed one aspect of your creative mind from the shackles, a new restraint emerged— a palpable deficiency in GPU power now hinders your creative freedom.
Renting a GPU
This isn't a physical GPU you can borrow and physically insert into your PC. Instead, it's a GPU hosted in someone else's computer, made available to you for a nominal fee—emphasis on nominal, as low as 20 cents per hour. However, as the adage goes, you get what you pay for. Two platforms that facilitate this service are vast.ai and runpod.io. On these sites, you can start a virtual machine with an attached graphics card for your utilization. In this article, the main focus will be on RunPod and providing guidance on configuring this service for seamless usage.
Getting Setup
Create account
First, head over to https://www.runpod.io and create an account. Creating an account is free and will save you time later when you start to create your first instance. It is a good idea at this point to enter your billing information and add about $10 in credits to your account as this is a good starting point that will allow you plenty of time (close to 20 hours!) to configure the instance and generate the images you need.
Add a SSH Public Key (Optional)
Adding a SSH public key is only needed if you plan to access the terminal of your pod from your own SSH client on your local computer. Each instance has an option to start a Jupyter Notebook alongside the instance. This notebook has a built-in terminal but if you have more than one terminal open at a time, the CLI can start to lag just a little bit. If this is not a problem for you then you then you can skip this section.
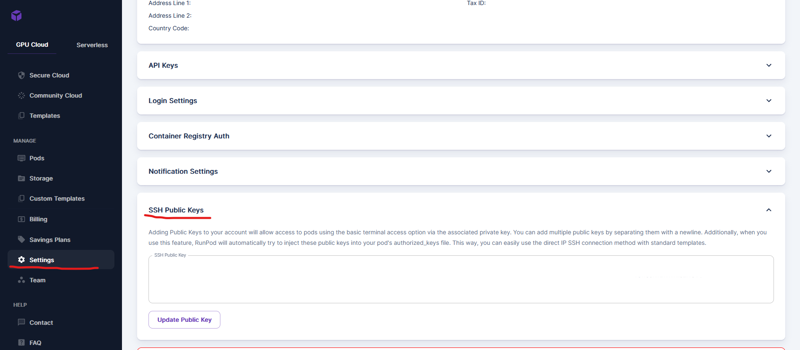
To add a SSH public key, open your terminal on your local PC and type the following command:
ssh-keygenEnter a filename for it and remember where you save it. You will need to rename the public key files later to match what Runpod is expecting when you first connect to the instance with SSH. Follow the prompts and then open your public key file. Copy the contents of this file and close it.
Open the Settings tab in RunPod and scroll down to the SSH Public Keys section. Enter your public key that you just copied here and select Update Public Key. You are done!
Remember where you saved your keyfile so you can rename it later.
Setup Your First Instance
To setup you first instance, go to the Secure Cloud tab and select the instance type you desire. For this guide, I am choosing a 1x RTX 4000 Ada instance as it is the cheapest and has plenty of VRAM for the type of generation that I do.
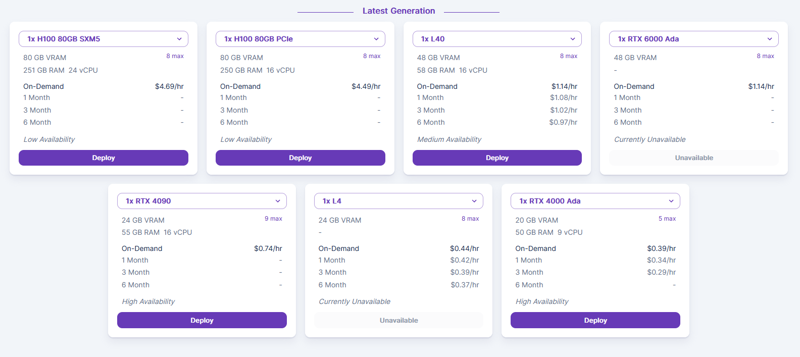
Choosing a Template and Setting up Your First Instance (First Run)
Select the template that best matches the type of instance you need. I like to use ComfyUI so that is the template I will choose.

Setting up Your Instance (First Run)
Now it is time to run your instance for the first time. Select the checkboxes beside SSH Terminal Access (if desired) and Start Jupyter Notebook (required for this guide)
Click "Continue".

On this screen you will be asked to confirm your settings. If everything looks good, then click "Deploy". Wait a few minutes and you will be able to connect to the instance and start using the rented GPU.
Using The Rented GPU
You've made it this far! Great! But nothing is running on your computer at this point, it's all in the cloud, so how do we access it???
If your instance doesn't look like the screenshot below, expand it to see if you see a terminal window or something like my screenshot below:

Connecting to the UI
If everything looks okay, click the "Connect" button. You will have several options.
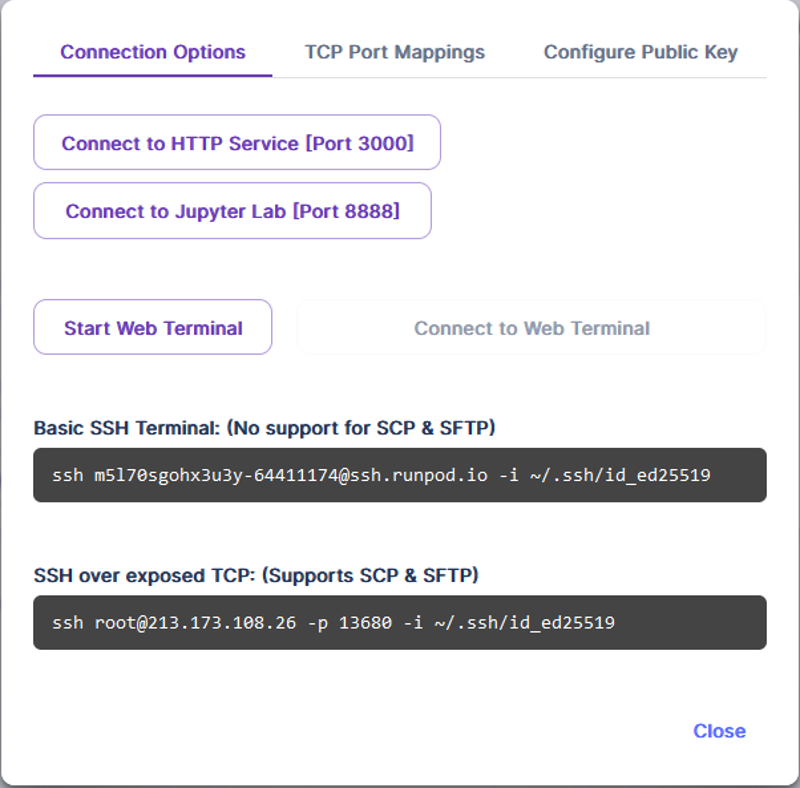
Click "Connect to HTTP Service [Port 3000]" to open the UI.
If you chose ComfyUI as your instance, then you should see a screen similar to this pop open in a new tab!
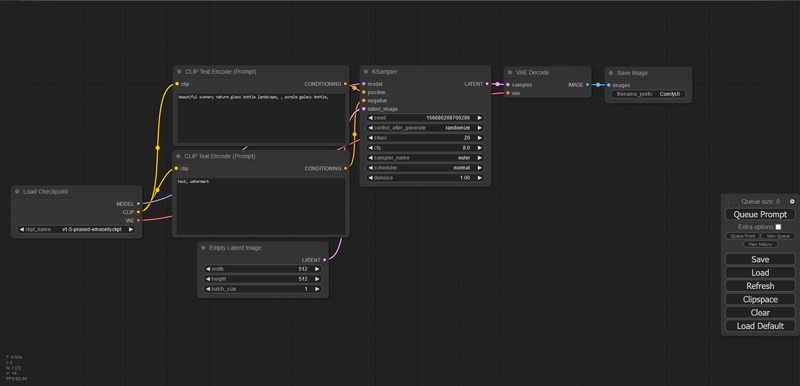
Go ahead and start generating if you wish and then continue to the next section.
Connecting to Jupyter
Tab back over to RunPod and select the "Connect to Jupyter Lab [Port 8888]" option.
Regardless of your instance you will get the same Jupyter instance, but this guide only covers ComfyUI (for now) so I will base everything off of how that is set up.
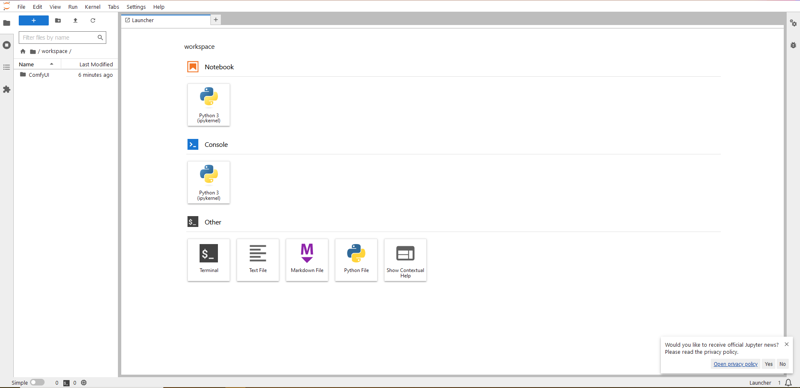
On the main panel you can see an option to start a Terminal. If you do not wish to run an SSH connection on your local machine, this is the only way to do the next part. Otherwise, you will need to open SSH on your local machine to run the script in the next section.
Connecting via SSH (optional)
Tab back over to RunPod and copy the command under "Basic SSH Terminal: (No support for SCP & SFTP)". Because we will be using Jupyter to manage the file system, it's not necessary to support SCP or SFTP to the pod. Open a terminal on your local computer and paste the command and press ENTER to execute it.
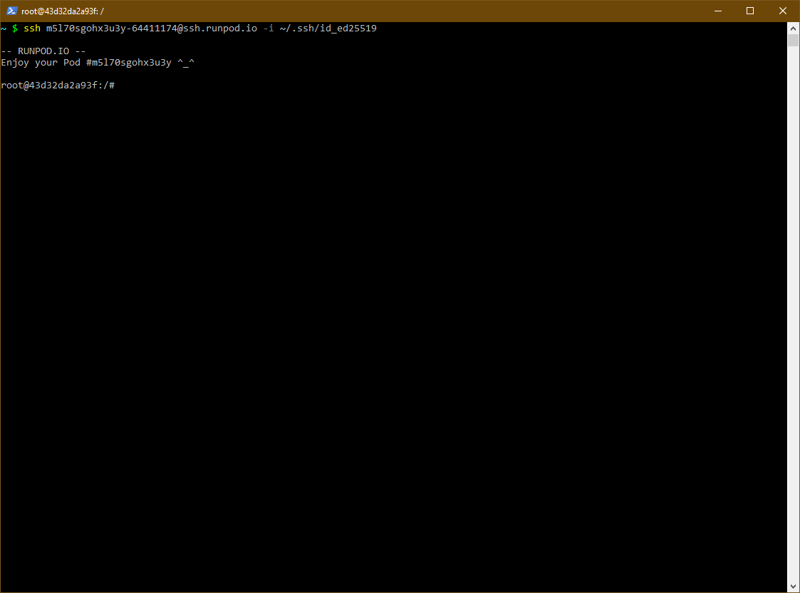
At this point you may need to rename your SSH Public Key file on your computer. If the SSH command fails because of this, rename the file to what the SSH command is expecting, or change the command to match the filename of your SSH Public Key file.
COMMAND EXPLANATION
ssh [email protected] -i ~/.ssh/id_ed25519ssh - the SSH command that will connect to the pod
[email protected] - this is the name of my pod. Yours will be different. I feel safe having this here knowing you cannot connect without my public key. :)
-i ~/.ssh/id_ed25519 - identity -- Selects a file from which the identity (private key) for public key authentication is read. The default is ~/.ssh/identity for protocol version 1, and ~/.ssh/id_dsa, ~/.ssh/id_ecdsa, ~/.ssh/id_ed25519 and ~/.ssh/id_rsa for protocol version 2.
Identity files may also be specified on a per-host basis in the configuration file. It is possible to have multiple -i options (and multiple identities specified in configuration files). If no certificates have been explicitly specified by the CertificateFile directive, ssh will also try to load certificate information from the filename obtained by appending -cert.pub to identity filenames.
Taking Control With A Script
Once you are connected to the terminal it's time to run a script. Using either the terminal in Jupyter or on your local machine, copy and paste the following script.
cd /workspace/ComfyUI && kill $(ps -e | awk '/python/ {print $1}') && python main.py --listen --port 3000COMMAND EXPLANATION
cd - change directory to the path specified in the next input
&& - if the previous command was successful, run the next command
kill - kills whatever PID you enter immediately after
$( ) - nest a command into this command
ps -e - lists every process running on the system, even ones you don't own
| - pipe directive -- quietly funnels the output of the previous command into the next one
awk - text manipulation command. Searches the piped input for whatever you enter and returns either the entire line or whatever fields you want from the line (words separated by spaces are treated as fields)
'/python/ {print $1}' - search for the text "python" and return the first field from that line. In this case it's the PID because that's how the output of the ps -e command is formatted.
python - invokes the local python instance
main.py - the python code to execute
--listen --port 3000 - commands specific to the python code being executed. In this case, --listen is telling it to run as a public server, --port is telling it the next input will be the port number. 3000 is the port we know that the ComfyUI server is running on so we enter it here to keep Comfy accessible.
HOW IT LOOKS
(Screenshot taken from Jupyter)

Now that you can see the output of the ComfyUI terminal, it's time to configure it. Any time you make a change to they ComfyUI code (either by installing a custom node or editing a file yourself) you will need to stop and restart ComfyUI. You can stop it by pressing the CTRL + C key combination in either Jupyter or the terminal of your choosing. Then simply enter the command
python main.py --listen --port 3000and press ENTER to execute it. If this was the last command you entered, you can just press the UP arrow on your keyboard to access the last command entered and press ENTER to execute it.
Once you have done this, you now have control of ComfyUI and it's time to start customizing it.
Customizing Your Instance
Downloading Models
By this time you have probably already started generating images and are starting to wonder, "Why can't I get any good images out of this thing?" Do not worry. The models that come installed on the instance are only the base modes for SD 1.5 and SDXL. You can easily download models from Civitai with a few commands. Open a new terminal in Jupyter and type the following commands:
cd /workspace/ComfyUI/models/checkpoints
ls -l
This will change to the "checkpoints" directory and show you all the models you have installed. Note that it is a -l (lowercase L) and not a -1 (one) following the ls command. It's time to install a new one. Go to the page of your favorite model here on Civitai. For this demo I will be using the RealHotSpice model created by Fusch. Fusch is a great creator and this model promised to deliver some nice images. I will also be using the images I create to review this model, too!
Go to the download link for the model, right-click it and select Copy Link.
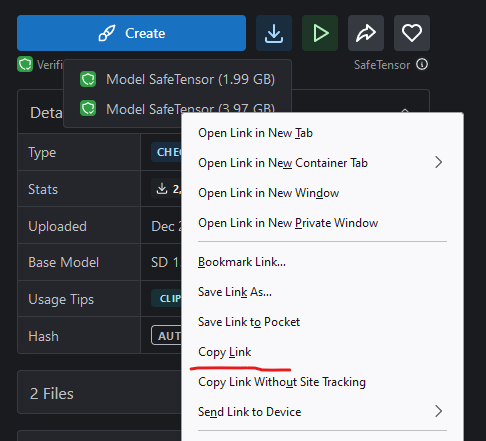
Go into the Jupyter terminal you opened earlier and enter the following command:
wget 'https://civitai.com/api/download/models/247542?type=Model&format=SafeTensor&size=full&fp=fp16' -O realhotspice_v15.safetensorsThe wget command takes the URL entered and resolves it as if the URL were entered into a web browser. The -O option gives the wget command an output filename to download the file into. If you choose a different model, then replace the URL with your model and change the output filename to something more appropriate for your purposes.
NOTE:
> Some models require you to be logged in to the Civitai website to download. You can use the Civitai API instead with the curl command to download these. See the comments section below for more details.
HOW IT LOOKS

Run the ls -l command again to see if your new model is there. If you did it right, you should see a nice, brand-new, shiny .safetensors file there. Great job!

Now you can click on the "Refresh" button in ComfyUI and you should see your new model in the list.
This process is very similar for installing LoRAs and other types of models. Just make sure you cd into the correct directory, copy the URL and paste it into the wget command and give the output a filename with -O! It is generally a good idea to try to keep filenames the same as what the authors gave them so you can find them easier.
Installing Custom Nodes
To install custom nodes for finer image generation, you will need to install the ComfyUI manager. This plugin will allow you to install custom nodes as well as keep your ComfyUI installation up to date.
In your Jupyter terminal (the one you downloaded the model with) enter the following commands:
cd /workspace/ComfyUI/custom_nodes
git clone https://github.com/ltdrdata/ComfyUI-Manager
Tab over to the other Jupyter terminal (the one that is running ComfyUI), press CTRL + C to stop ComfyUI, and then re-enter the command to start ComfyUI. Once it finishes installing the ComfyUI Manger, you should be able to refresh the browser tab for ComfyUI to see the Manager button on your interface. You can now install custom nodes and restart ComfyUI from the browser.
Congratulations! You're all set! You can now generated images to your heart's content without fear of running out of computational power... all for the low, low cost of mere pennies per hour. Be sure to shut off your instances once you're done and terminate them if you're sure you're finished with your tasks to save on the cost of keeping the instances stored. As of the writing of this article it was $0.014/hr to keep a powered-off instance alive, so the cost may very well be worth if if you plan to come back the next day.


