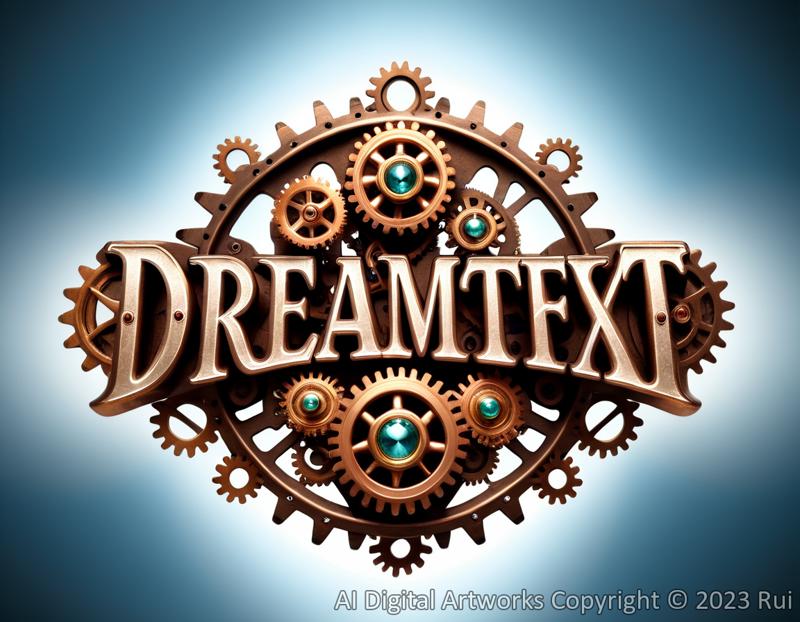
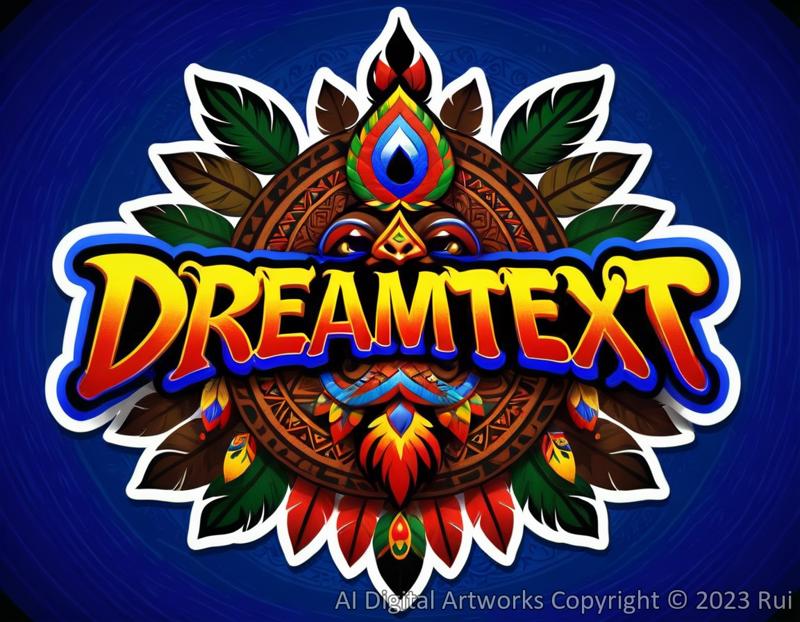
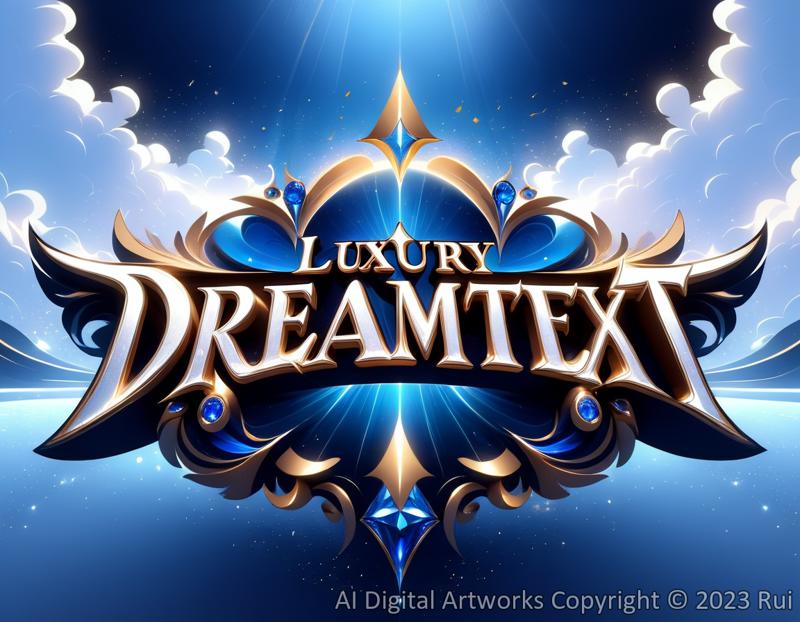
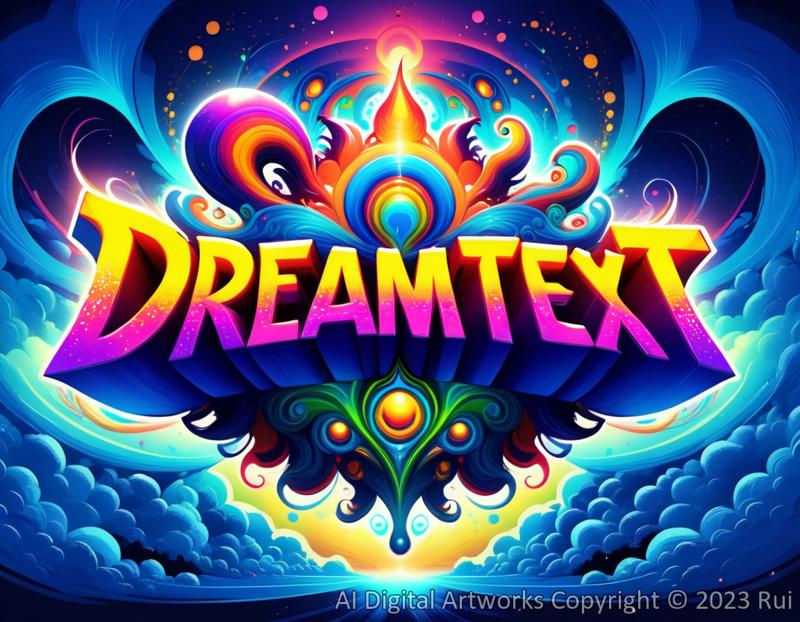
DreamText
Easily create artistic lettering!
Demo Video:
WorkFlow Link:
https://openart.ai/workflows/rui400/dreamtext---easily-create-artistic-lettering/gtoE5UttRTGhyMRcWh8z
————————————————————————————————————
By leveraging the style of reference images through IPA;
Redrawing with low amplitude from the reference image with Image-to-Image;
Relying on the font rendering capability within the SDXL base model;
Coupled with excellent custom fonts such as Harrlogos XL.
This workflow is made possible by combining these four capabilities.
Special thanks to HL for the information and inspiration.
————————————————————————————————————
The base model must use the SDXL model,
different models have certain influence on the final rendering quality.
Recommended: Starlight XL
Download link: https://civitai.com/models/143043
For faster speed, you can use the Turbo model,
Recommended: Realities Edge XL ⊢ ⋅ LCM+SDXLTurbo!
https://civitai.com/models/129666
For IPA part, use: ip-adapter-plus_sdxl_vit-h
For Lora, use: Harrlogos XL
Download link: https://civitai.com/models/176555
Two simple custom nodes have been written with GPT,
which need to be installed.
Download link: https://github.com/rui40000/RUI-Nodes
————————————————————————————————————
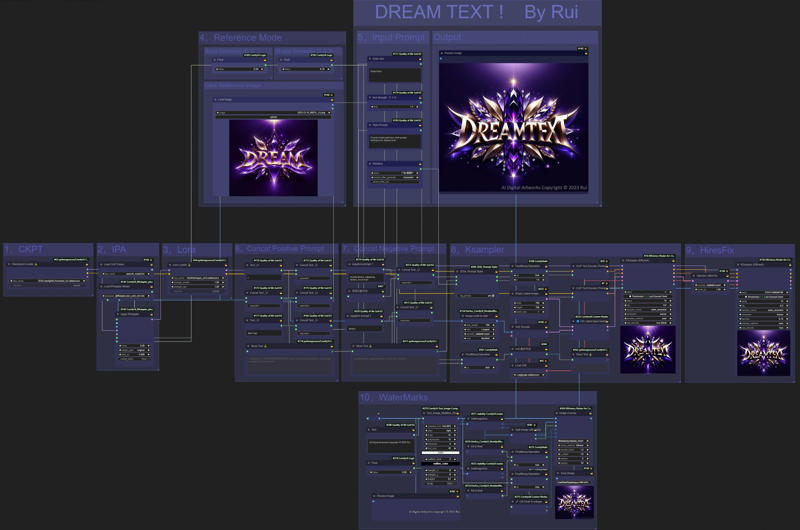
There are a total of 10 modules,
for ease of operation all the options that need to be operated are concentrated in modules 4 and 5.
So no further explanation is given for the other parts, I will just explain the parameters that need to be controlled.
This workflow combines two patterns:
1, Text-to-Image Mode
2, Reference Image Mode
"Text-to-Image Mode" is recommended.
If you want to use Text-to-Image,
please set the two Float parameters in module 4 to zero first.
note!it's essential to have an input reference image in Module 4, otherwise, the workflow won't function properly.
Afterwards, the Switch Latent in module 8 will automatically switch to the first Latent. To achieve this, I used GPT to write a simple calculation node, you need to install it from my Github.
The 'Empty Latent' in module 8 determines the size of the first generated picture, which will be zoomed 1.5 times in module 9.
Module 5, Input Prompt
This is where you control the input for Text-to-Image. From top to bottom:
The first Node "Enter Text", the text entered here will be the text that appears on the final screen,
Avoid extra spaces, capitalization and line breaks are automatically determined by SD, so there is no need for extra input.
The second Node "Text Strength", if the text is not correctly recognized, you can appropriately increase it, this is not very effective. SD has a large randomness.
The third Node "Style Prompt", where you can manually enter the style you want, such as: gold font, purple background, crystal texture.
The fourth Node “Style Presets”, is linked to the SDXL Prompt Styler in the module 8. I used the “Primitive Node” to move the style item here separately for easy centralized operation and adding “Control_after_generate”.
I like to choose “increment” so that you can use “Auto Queue” to realize the experiment of different styles each time. This is very fun.
If you find a style you like, you can choose “Fix” and then make further adjustments.
These are all the parameters to be controlled under Text-to-Image mode.
————————————————————————————————
If you have a favorite image and want to create a similar style, you can use "Reference Mode".
Module 4: Reference Mode
Put the reference image in Input Reference Image, the image should preferably be square.
The size of the image will be scaled according to the longest side being 768 in the "Image scale to side" in module 8,
and module 9 will magnify it by 1.5 times on this size.
There are two parameters here, "Style Similarity" and "Shape Similarity", which are used to balance between the "reference image" and the "final output image".
This is a mysterious thing, it's hard to avoid a lot of randomness, you'd better do a lot of experiments.
Style Similarity will mainly convey the style, when it exceeds 0.7 it will also severely affect the shape of the image.
If the number of words in your reference image is very different from the number of words in the image you want to generate, the Style value should not exceed 0.5.
The smaller the value, the more room for the model to play. The larger the value, the closer the completed picture is to the reference image.
The essence of this parameter is the weight and end time of IPA.
Shape Similarity will convey the contour shape of the reference image, so it cannot be too large, especially when the number of words and layout in your reference image is very different from your target image.
Otherwise, it will seriously affect the correctness of the font. It is recommended to be less than 0.3, you can try more to find the suitable parameters.
The essence of this parameter is the amplitude of redrawing of the sampler, 1 minus the value here is the amplitude of redrawing input into the sampler.