⚠️This guide is outdated, we do not recommend using AUTOMATIC1111/stable-diffusion-webui anymore
tap, tap Is this thing on?
We've been asked how we generate images, so here we go! This guide should be suited to beginners.
This is not the only way of making images, it's just the one we've settled on. Feel free to experiment!
Prerequisites
We use Stable Diffusion web UI which can be found here: https://github.com/AUTOMATIC1111/stable-diffusion-webui
We recommend installing this using
gitinstead of downloading it as a zip. This will make it easier to update later on.
Edit your
webui-user.bat(with your favourite text editor) to include--xformers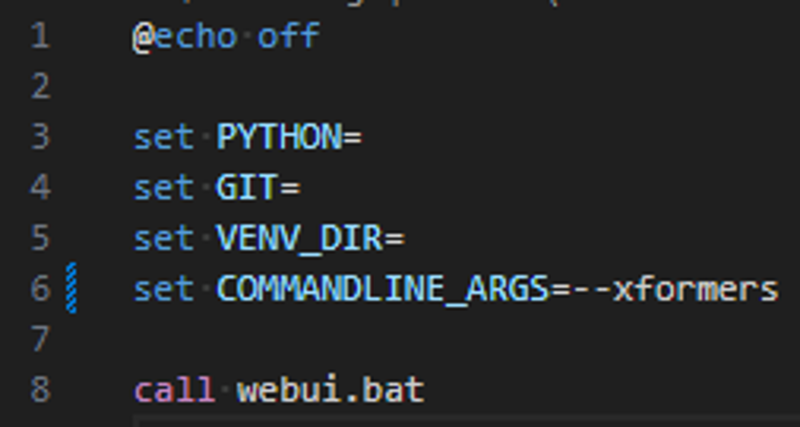
xformers increase generation speed but at a loss of determinism
You always want to start the program via this
webui-user.batfile
We have the following extensions installed. Marked with a red + we think are must-have!

civitai-shortcutallows browsing/installing of civitai resourcessd-webui-lobe-themeGeneral UI theme that looks much better than the default (in our humble opinion)sd-webui-propmt-all-in-oneadds prompt historysd_civitai_extensionadds a LoRA browser, makes working with and managing LoRA's much easier!stable-diffusion-webui-stateKeeps all your settings and configs the same when you restart the program
We use use CyberRealistic as our base model most of the time.
Text to image
Or how to make images out of thin air.
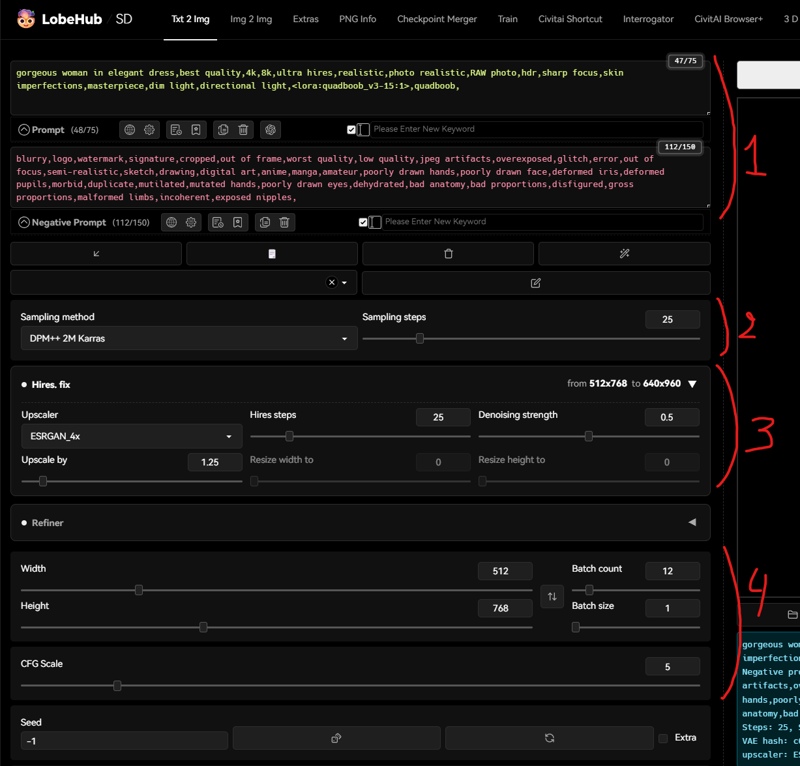
The prompt and negative prompt. This tells the AI what to generate (and what to avoid)
We rarely change the negative prompt, usually just using the same one:
blurry,logo,watermark,signature,cropped,out of frame,worst quality,low quality,jpeg artifacts,overexposed,glitch,error,out of focus,semi-realistic,sketch,drawing,digital art,anime,manga,amateur,poorly drawn hands,poorly drawn face,deformed iris,deformed pupils,morbid,duplicate,mutilated,mutated hands,poorly drawn eyes,dehydrated,bad anatomy,bad proportions,disfigured,gross proportions,malformed limbs,incoherent,
The positive prompt has portions that are often reused, these portions guide the AI into photorealism:
best quality,4k,8k,ultra hires,realistic,photo realistic,RAW photo,hdr,sharp focus,skin imperfections,masterpiece,dim light
In this example, you can also see a LoRA being used
<lora:quadboob_v3-15:1>,quadboob,
Don't remember but after a lot of fiddling, this is the settings we ended settling on. We never change this.
Hires, fixis very important for image quality. We recommend leaving it off while you are exploring/conjuring a prompt, but turning it on once you are happy with your prompt and want to start generating for real.close the box to turn it off
open the box to turn it on
The higher the
Upscale byvalue, the higher the resolution, but also the longer it takes to generate images. Depending on how beefy your GPU/patience is you can go higher, but we don't recommend going lower than1.2(otherwise you might as well turn it off)
Always generate images at one of the following sizes:
512x512,768x512, or512x768and useHires, fixto upscale to higher resolutions. We usually generate images inbatch count 12, that way we can pick the best images from a selection. Keep CGF scale at 5
Saving images
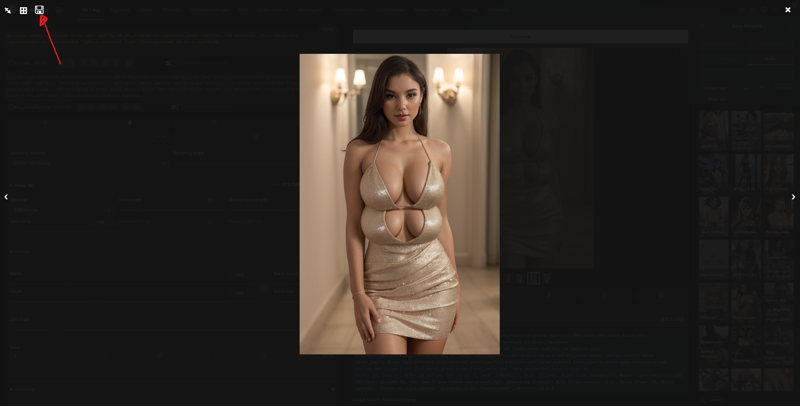
Click on an image to open the gallery view, then click on the save button to save this image to your favorites folder. This is a good way of curating 'good' generations from all the random garbage ones.
You can change this folder in Settings > Paths for saving > Directory for saving images using the Save button
Png info
Once you have generated a bunch of images, you'll want to pick the best one out of the set and clean it up manually.

Go to the PNG info tab and drag the image from your favourites folder into the box to copy its settings in the UI, then click on Send to inpaint
Note: if you generated a low res image while hires, fix was turned off, but you'd like to scale it up, you can also use this method for going back to text2img with the exact same settings, but this time you can turn hires, fix on.
Inpainting
Where the real magic happens
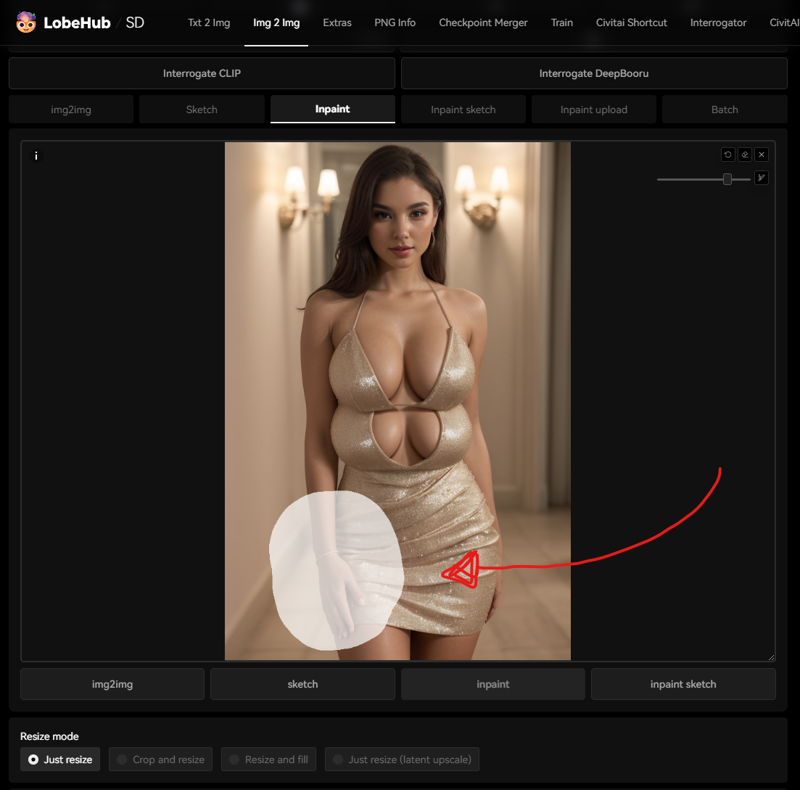
Mask the portion of the image that you'd like to change. You might want to change the prompt accordingly. In this example, since we want to fix the hand, we might add feminine hand, to the start of the prompt.
Drawing a good mask is a skill that can be improved over time. Controlling which parts of the image the AI is allowed to change is very powerful.
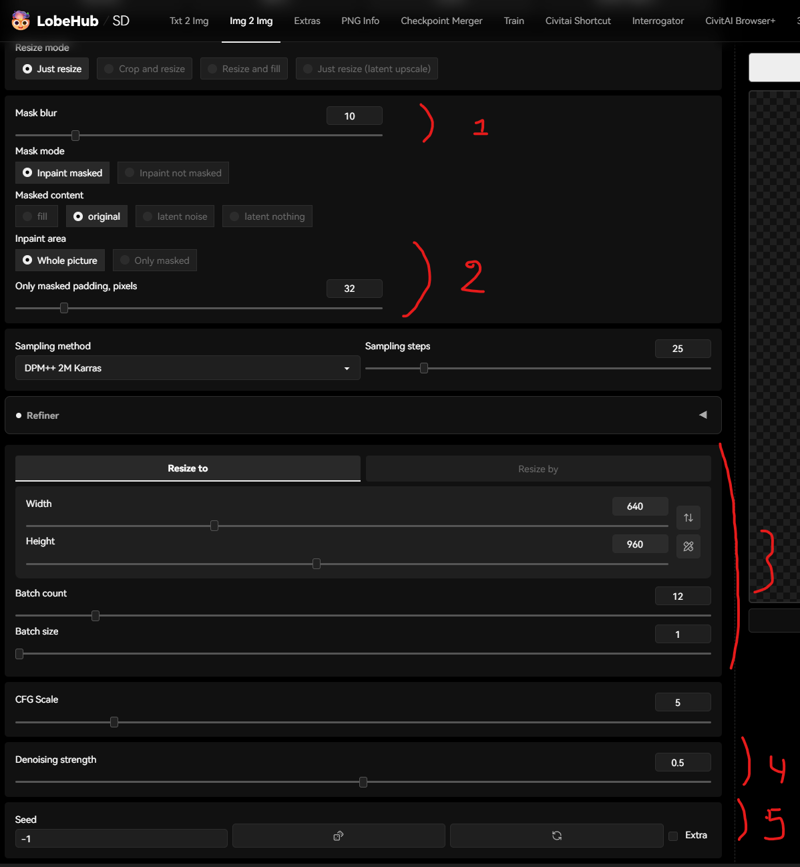
We set the mask blur to
10because we find the default4to be too low. A Higher value creates a smoother blend between the static part of the image and the newly generated one.This is an important setting but also a complicated one to explain. We frequently use both modes here, depending on the situation. When using
only masked, we will change the padding to anywhere between64-200depending on how much of the original image is needed to preserve 'context'. This is one of those settings that needs practice to really understand the way in which it affects generation.Make sure width / height match your original image, otherwise it will get stretched. We use a batch count of
12, so we can generate a few variations and pick the best one.Denoising strength is the most important setting here. The lower the value, the less the original will be changed, and vice versa. This controls how much free reign the AI will have when generating. A higher value is more creative, but also less coherent with the rest of the image. We usually stick between
3.5and7.5, but not always.make sure your seed is set to
-1otherwise it will keep generating the same image (if your image is coming from the PNG info tab, it will have the seed of the original image)
Inpainting is an iterative process. Bit by bit you can improve your image and fix mistakes. We regularily iterate anywhere between 25-150 times on an individual image until we are 100% happy with it.
Photoshop
We won't go into too much depth here, but we also use Photoshop extensively between inpainting iterations to guide the AI. Here's an example of what's possible.
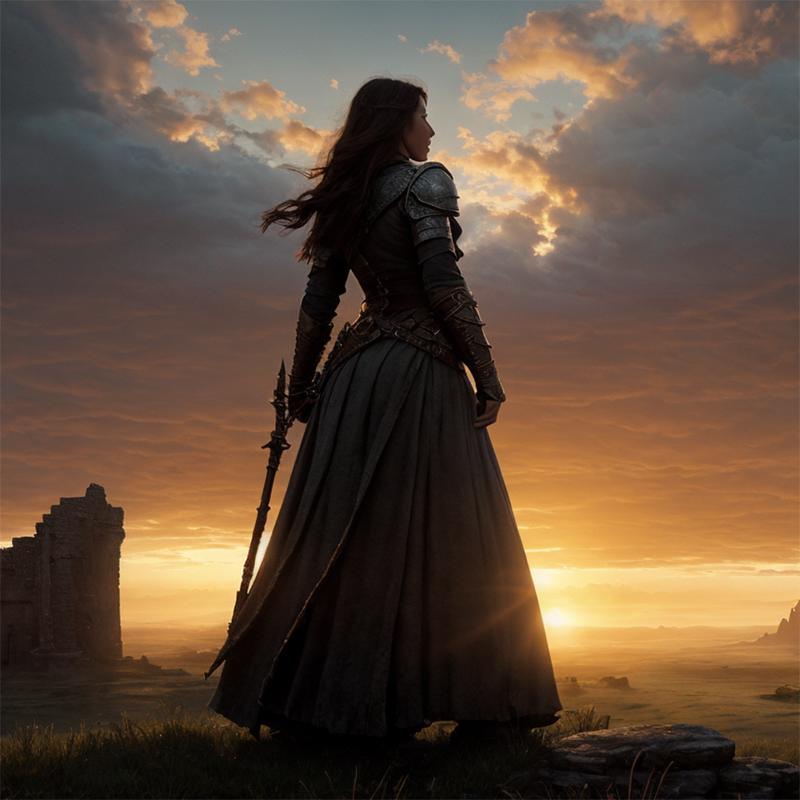
Starting with this image (generated in txt2img)
In Photoshop, we'll roughly draw some scaffolding for the AI to use:
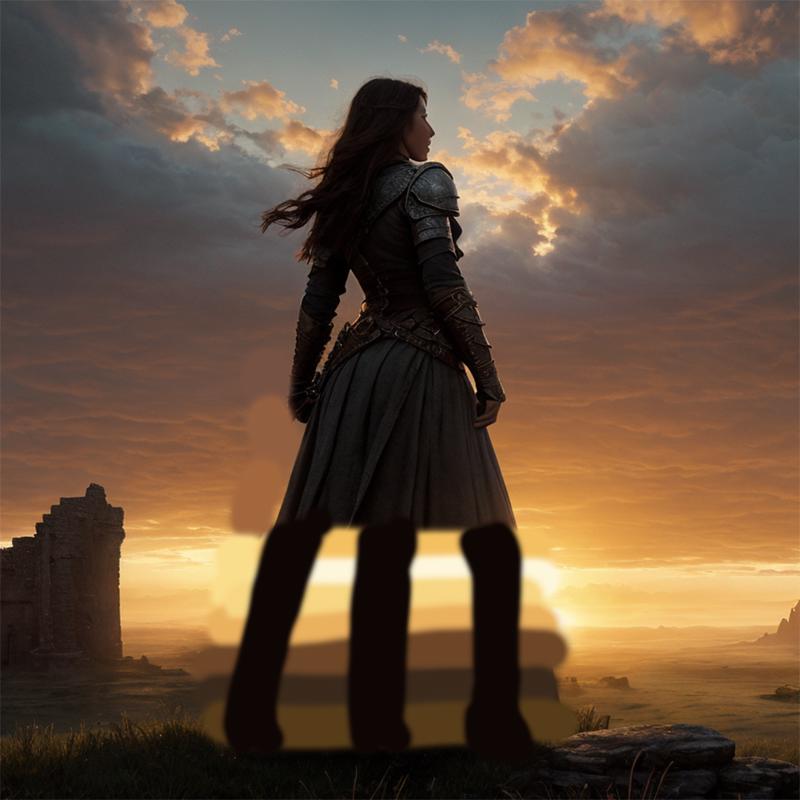
Note: You don't need to be very precise when doing this. The AI is very good at adding detail. What's important is to have the right colors, shading and shapes.
Then send it back to inpainting, masking appropriately.
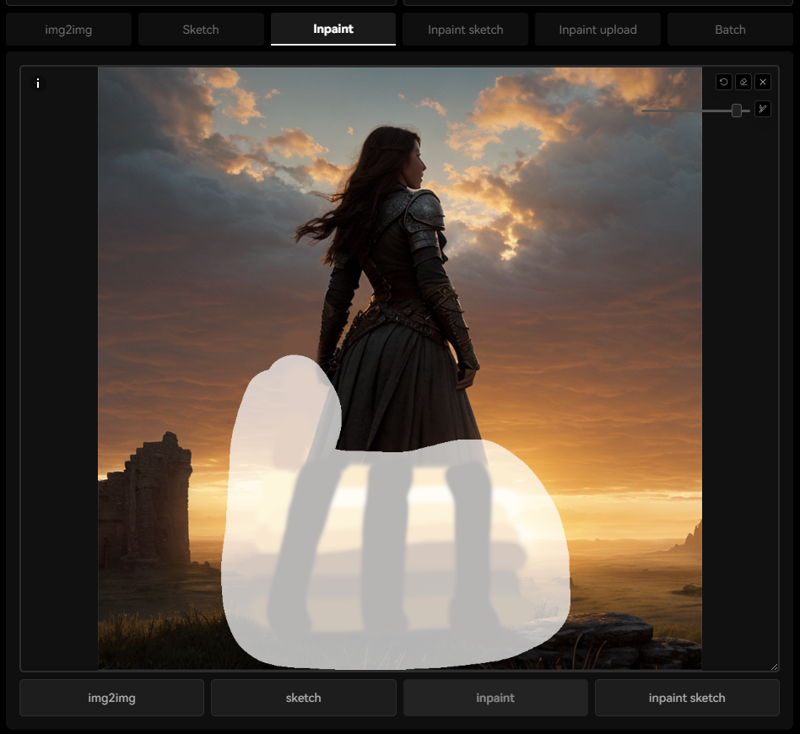
Hit generate, and pick the best result. Change your prompt if needed, in this case we added <lora:trileg_v2:1>, trileg,
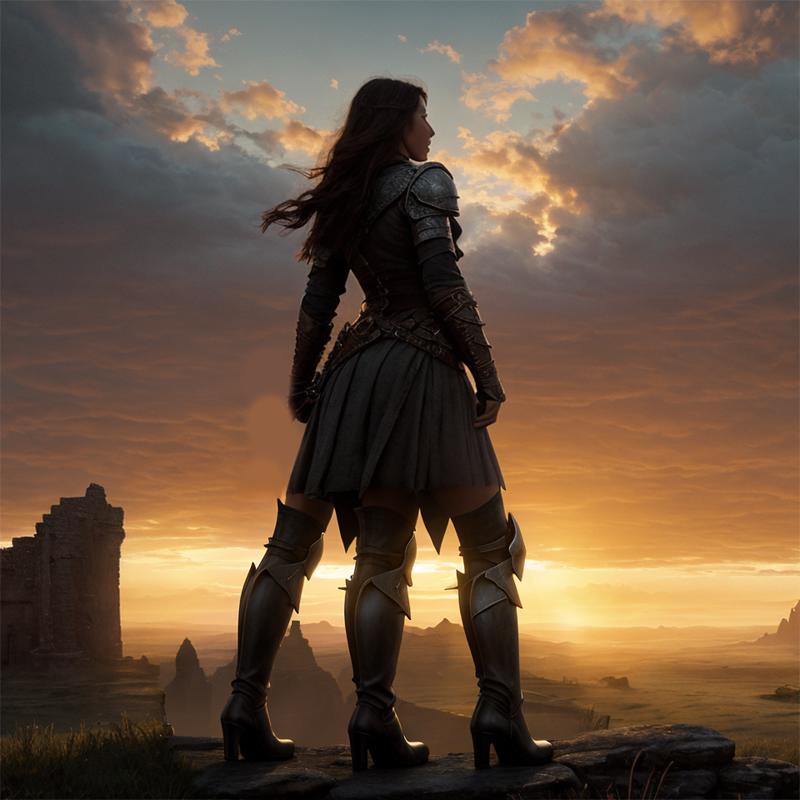
Now repeat this process another 100 times until every little detail has been fixed.

