Hello, here is a tutorial of what I do to make my videos, which are not the coolest in the world, but considering how easy it is to do it, they are not bad either.
(I have an Nvidia RTX 4050, so if you have another graphics card I don't know if what I'm telling you is also valid.)
The first thing is to have the Automatic1111.
If you don't have it installed and don't know how to do it, I recommend following this tutorial, which is the one I used: https://www.youtube.com/watch?v=3cvP7yJotUM
Once that's done, you have to install a lot of things to make everything work.
The first thing is to go to the extensions tab and install these extensions:
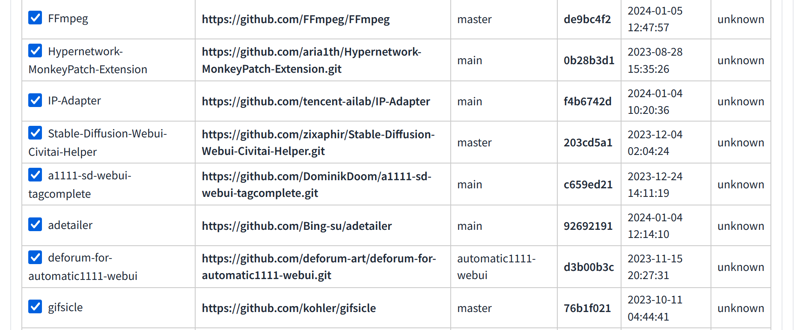
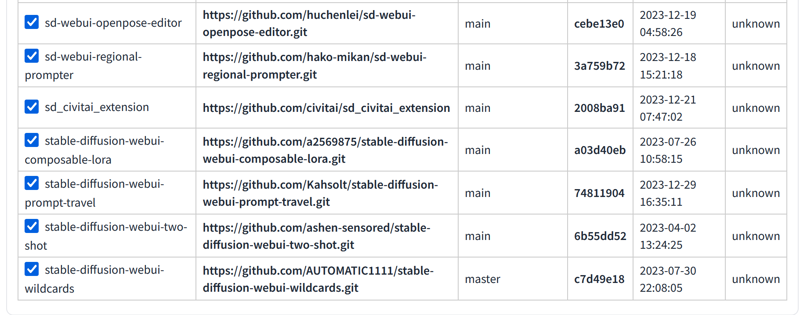
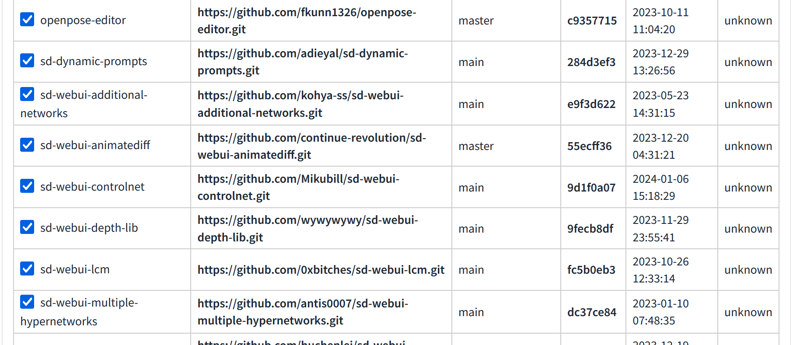
The second thing is to install some things in Windows:
ffmpeg: https://www.ffmpeg.org/download.html
T2I adapter: https://github.com/TencentARC/T2I-Adapter/tree/SD
https://github.com/FFmpeg/FFmpeg
https://github.com/open-mmlab/mmpose
https://github.com/tencent-ailab/IP-Adapter
https://github.com/kohler/gifsicle
https://github.com/0xbitches/sd-webui-lcm
https://huggingface.co/TencentARC/T2I-Adapter
For some things we will have to install using pip, for that we will have to press the windows key + r, and this little window will appear.
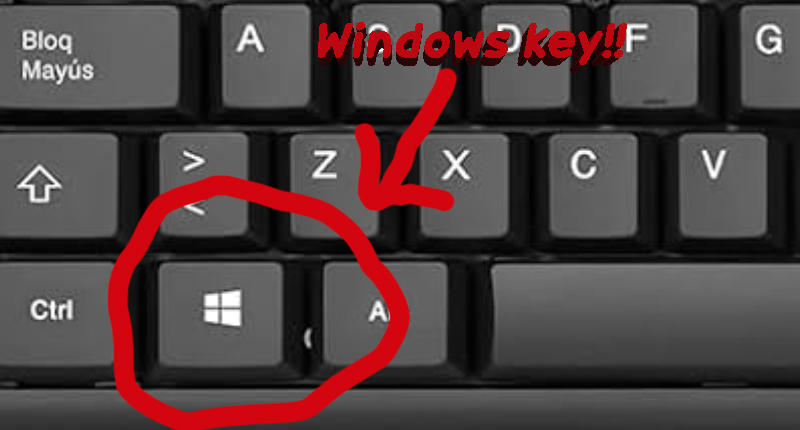
You must write pip install (and the address of what you need to install)
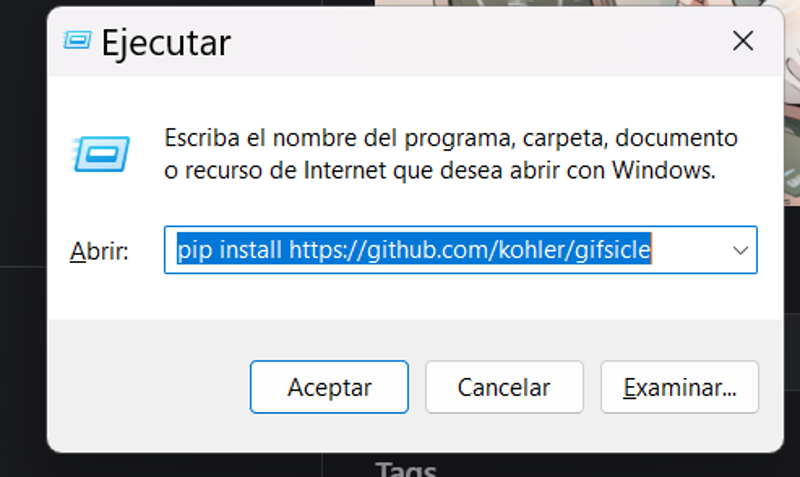
You need install
gifsicle: pip install https://github.com/kohler/gifsicle
xformers: pip install xformers
pipeline: pip install pipeline
torch: pip3 install torch torchvision torchaudio --index-url https://download.pytorch.org/whl/cu118
Once this is installed, we go to the folder where we have Automatic1111 and look for the file: webui-user.bat
We click the right mouse button and look for the "edit" option. We must have this text in the file.
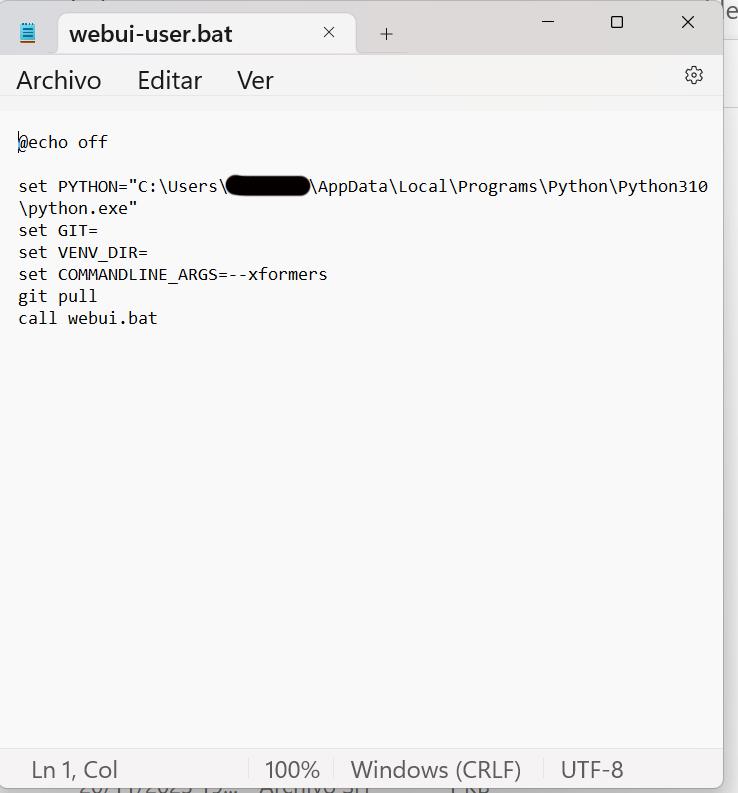
We save the file and open Automatic1111.
Then we go to settings and we will have to change some things:
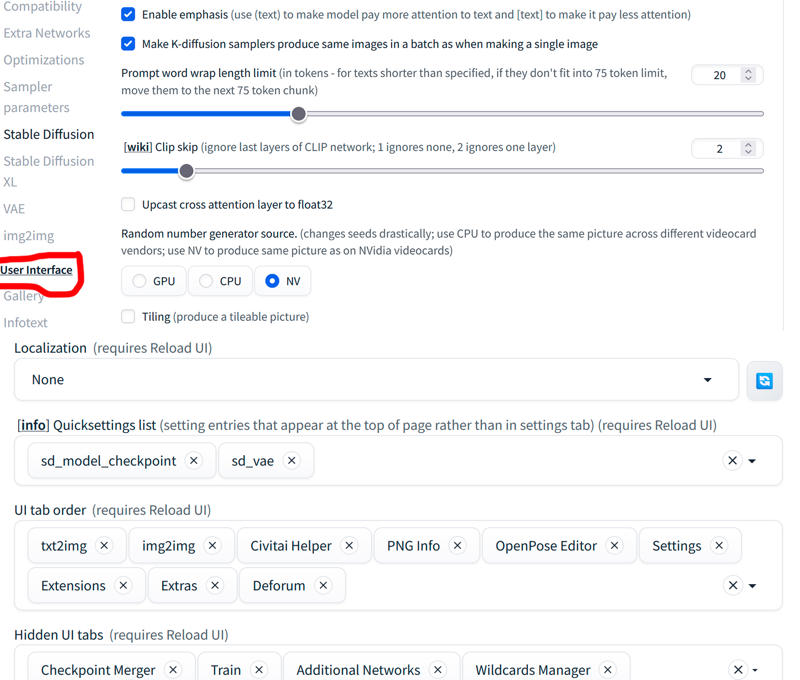
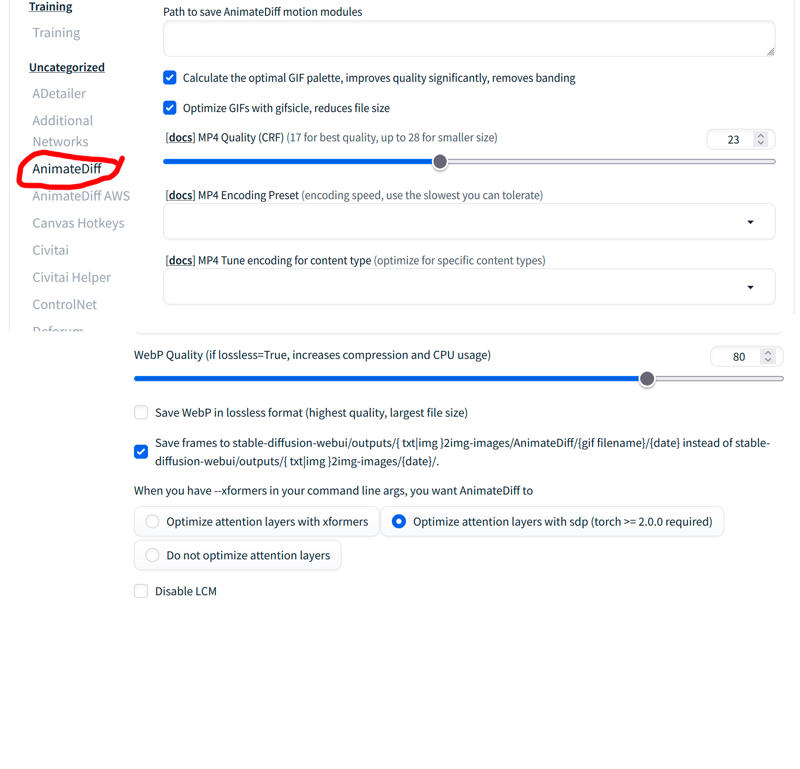
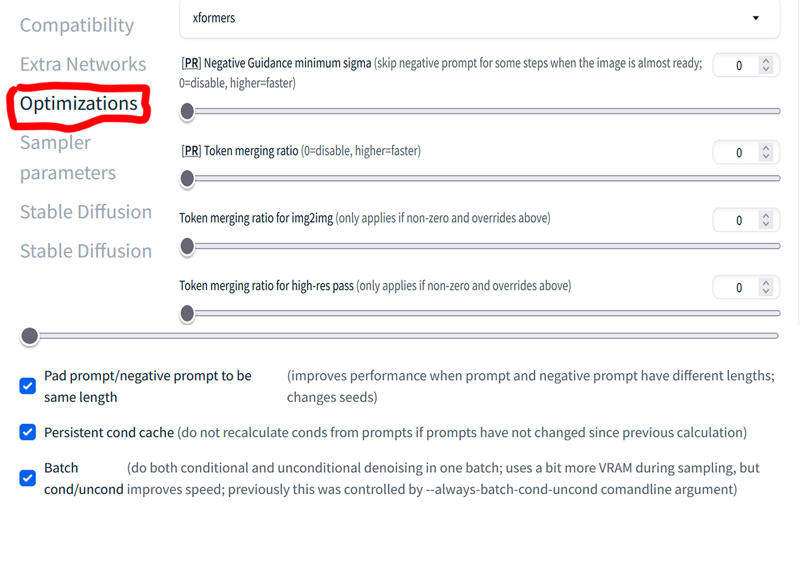
Once this is done, we can finally make videos! (The good thing is that all of this only has to be done once! Yay!!)
The first thing I do is activate Additional Networks:
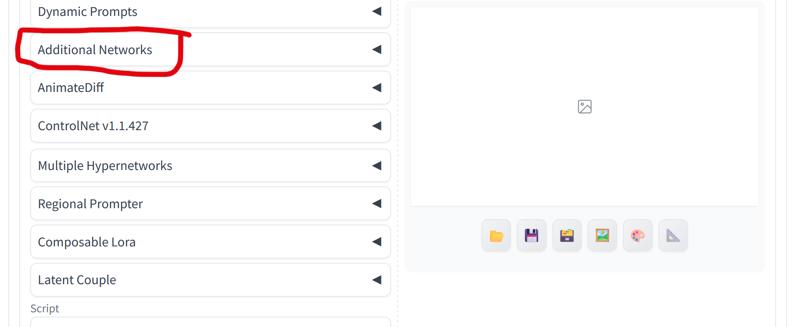
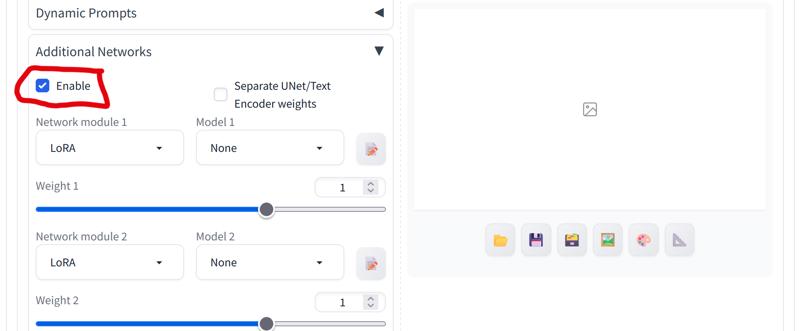
Now I prepare the Automatic1111 to make impressive images!
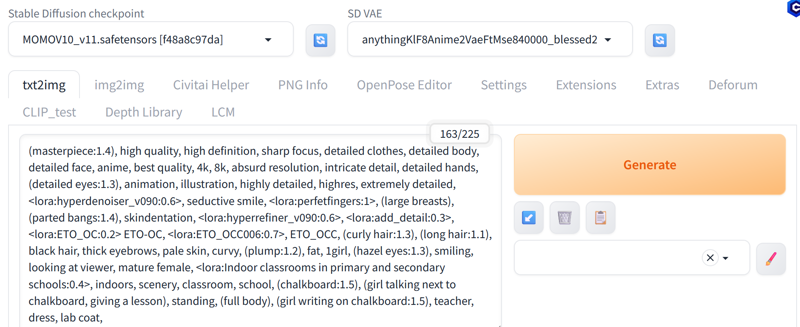
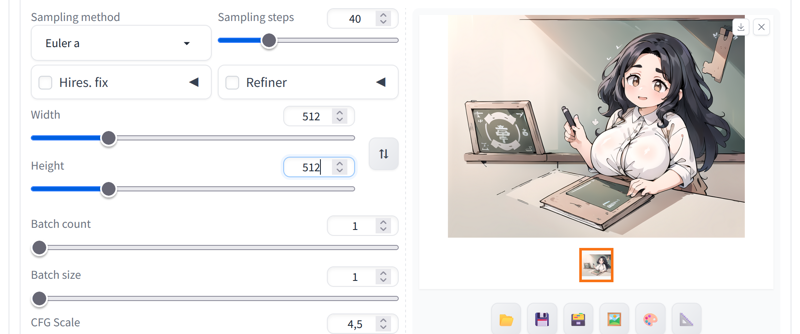
When I want to make a video, I make images until I see that the prompts I use make the image I want to see, I raise or lower the weight of the prompts and the Loras until I like it.
If I see that the chalkboard in the picture is not good for me, I increase the weight or lower it depending on how I see the result: (chalkboard:1.4) etc...
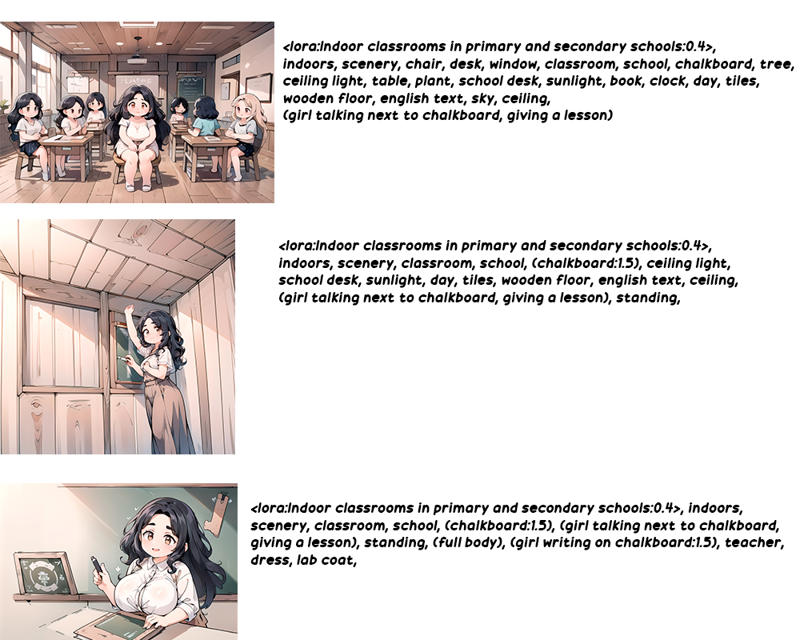
Once we have an image we like, we proceed to prepare to make the video.
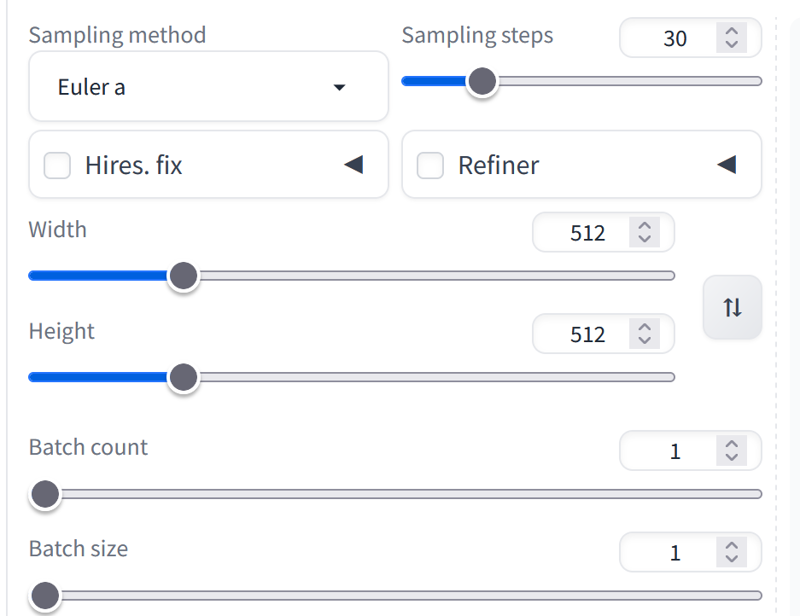
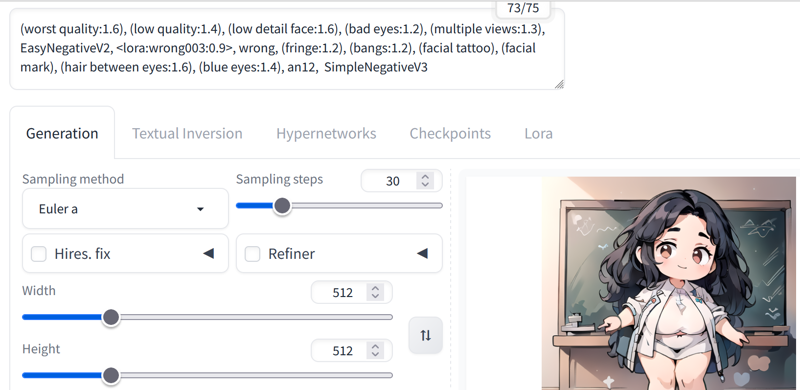
I usually make it a maximum of 768x512. Larger than that it takes a long time, at least with my computer. With 30 steps good videos come out. Euler A is the best because it makes the videos faster than the others.
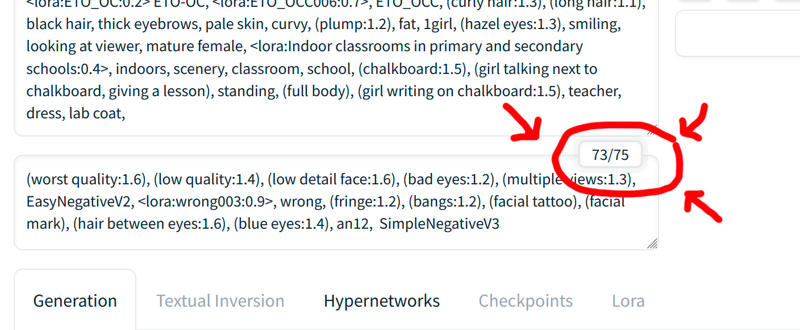
Important!! You must have less than 75 tokens in the negative prompts, otherwise it will take a long time to make the video or it will make 2 different videos instead of just one!!
I always make an image with the negative prompts changed until having less than 75 tokens and with the dimensions and steps that I am going to use in the animatediff to see how it will turn out approximately, this is what I got:
Now let's prepare Animatediff to make our video:
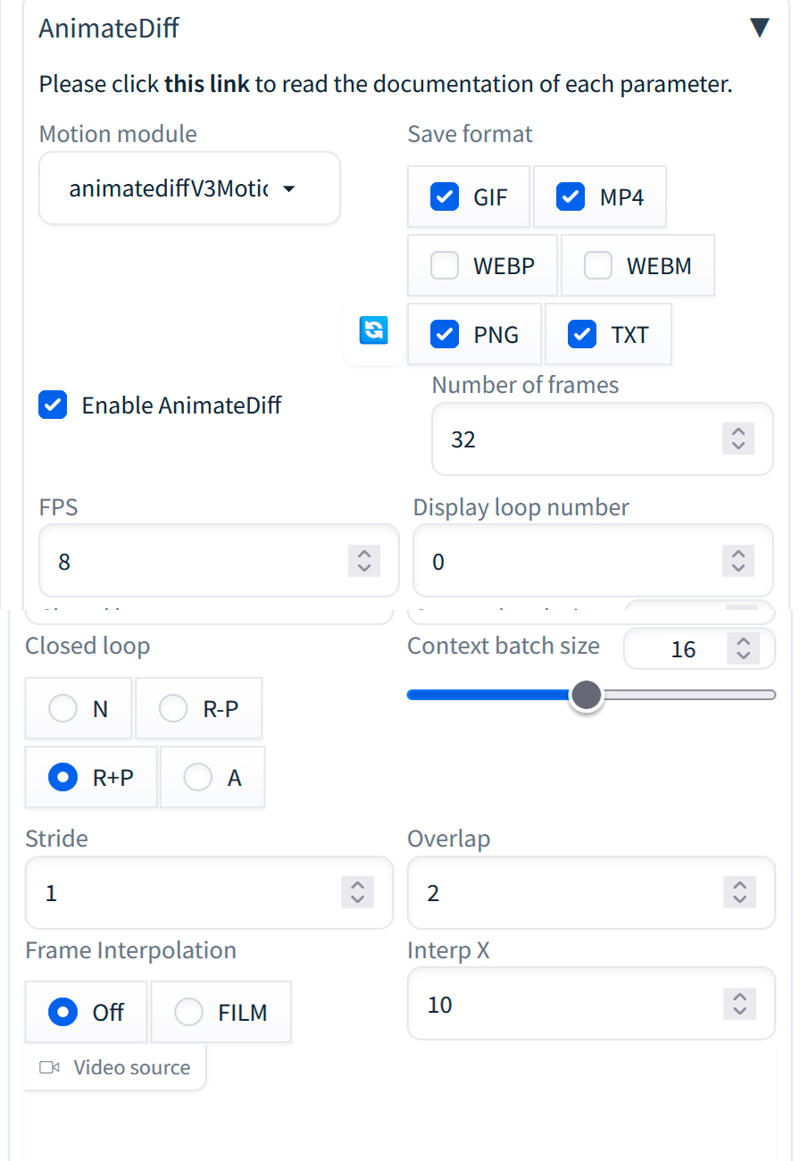
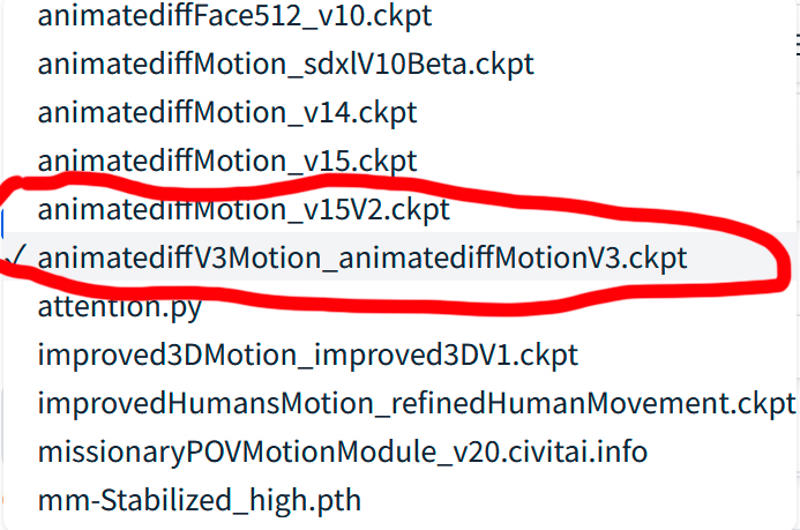
On the animatediff website https://github.com/guoyww/AnimateDiff#setup-for-inference you have models to make videos and on civitai too, I have tried several and the one I like the most is:
animatediffV3Motion_animatediffMotionV3: (I can't put a link because I can't find it and if I upload the model to civitai they delete it because it says it's already there, but I can't find it.)
Here are animatediff v3 models: https://civitai.com/models/239419/animatediff-v3-models
animatediffMotionv15V2
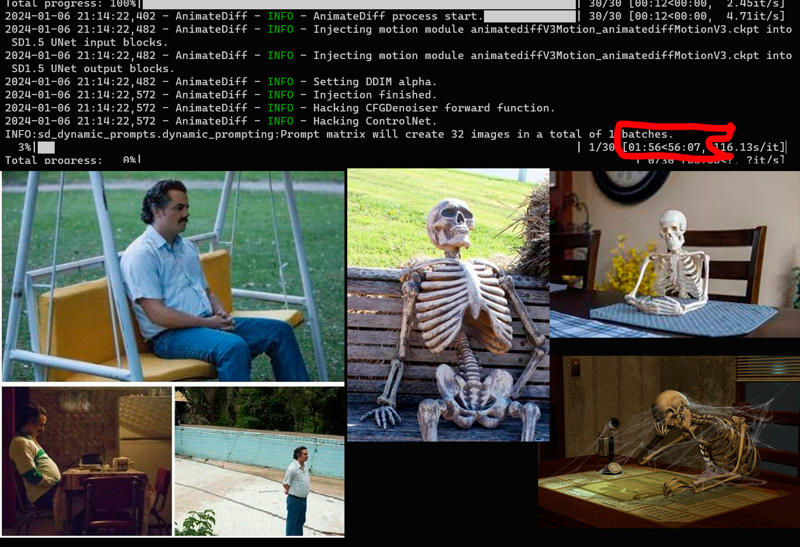
Then we generate the video and wait!!
And finally we have the video!

