Objetive : use scripts to check different settings and compare the result in a grid
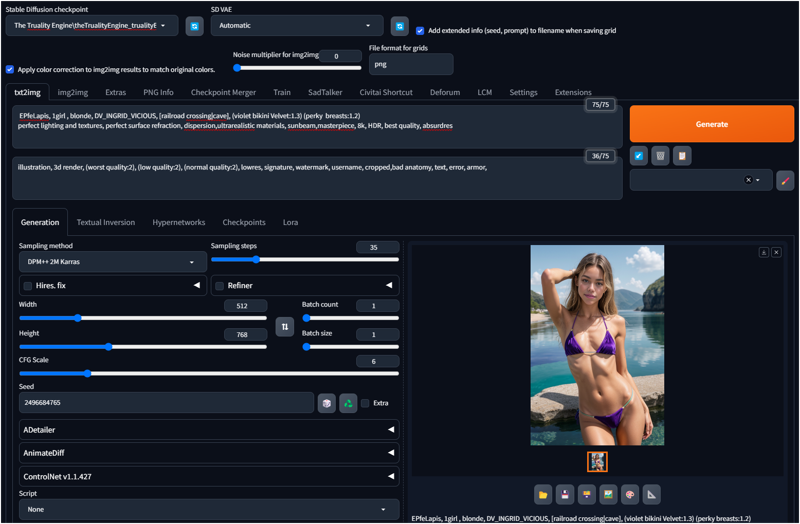
In my prompt I used Ingrid Vicious ( https://civitai.com/models/241699/ingrid-vicious ) to keep consistency with the person in the different images.
Prompt:
EPfeLapis, 1girl , blonde, DV_INGRID_VICIOUS, [railroad crossing|cave], (violet bikini Velvet:1.3) (perky breasts:1.2)
perfect lighting and textures, perfect surface refraction, dispersion,ultrarealistic materials, sunbeam, masterpiece, 8k, HDR, best quality, absurdres
Negative prompt:
illustration, 3d render, (worst quality:2), (low quality:2), (normal quality:2), lowres, signature, watermark, username, cropped,bad anatomy, text, error, armor,
Steps: 35, Sampler: DPM++ 2M Karras, CFG scale: 6, Seed: 2496684765, Face restoration: GFPGAN, Size: 512x768, Model hash: e73d775ff9, Model: theTrualityEngine_trualityENGINEPRO, Token merging ratio: 0.1, RNG: CPU, TI hashes: "DV_Ingrid_Vicious: 5fc1955a9911", Version: v1.7.0
Seed
Set a seed instead of -1 to see the differences with the same seed.
Select the script
In the script select "X/Y/Z Plot"
To keep it simple I will select only 2 parameters.
One parameter will be the steps: I can write different values of steps separated by comma.
The other parameters is "Prompt S/R" , this is a word in in the prompt, the system will replace the first word with the other words. In this case first will be blonde, then brunette, red hair and green hair.
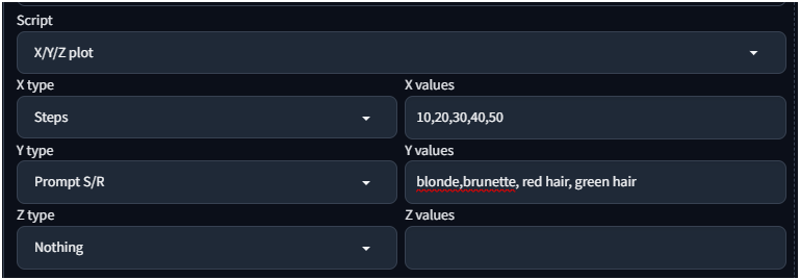
When you clic generate you have to wait the generation of all the images, in this case will be 5x4 different images=20 images.
You will see also the grid with the different settings for each image.
You notice the quality with less steps and more steps and different colors of hair ..

There are many options that you can select, here I decided to use:
Parameter 1) Checkpoint Name => I choose 4 checkpoint for the ones available in my system
Parameter 2) Prompt S/R=> Always replacing the hair color
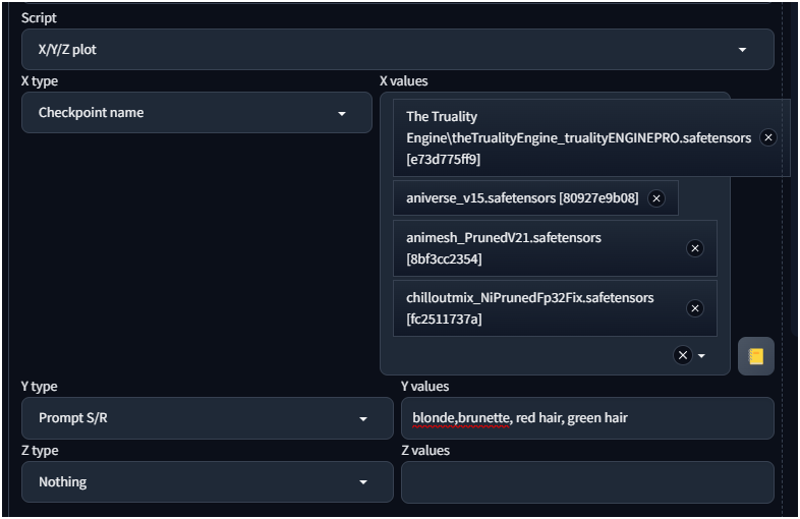
Result are 4x4 images with different checkpoint and hair color:

Another test with Lora weight_slider_v2
I this example I changed my prompt adding the weight slider.
https://civitai.com/models/112552?modelVersionId=126824
Prompt:
EPfeLapis, 1girl ,( blonde:1.3), DV_INGRID_VICIOUS, [railroad crossing|cave], (violet bikini Velvet:1.3) (perky breasts:1.2) perfect lighting and textures, perfect surface refraction, dispersion,ultrarealistic materials, sunbeam,masterpiece, 8k, HDR, best quality, absurdres
<lora:weight_slider_v2:-3>
This slider work from -3 (very thin) to 3 (fat) .
I setup 2 "Prompt S/R",
1) Prompt S/R : Here I wrote the <lora:weight_slider_v2:-3> and after other values that I wanted to try.
2) Promt S/R : Here I wrote other clothes instead of bikini, red short dress, wetsuit and blue long dress.
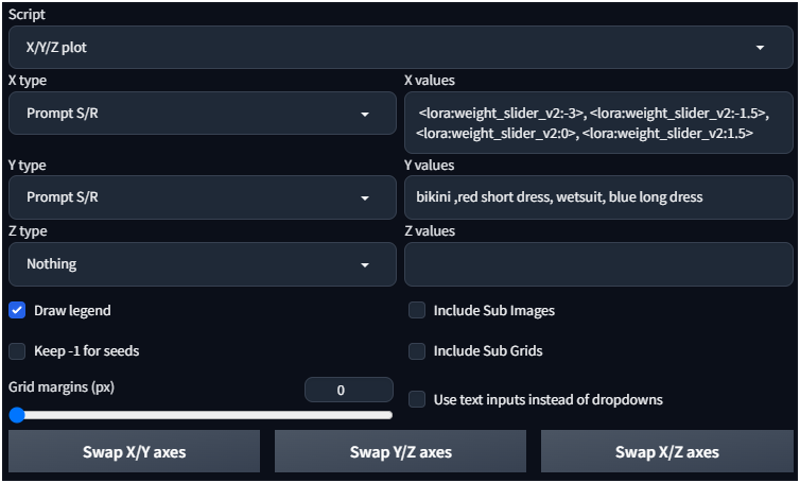
Here are the result, you can notice how the slider lora has applied the different weight and the clothes has changes.

I really enjoy testing the loras with this options to understand the settings and the differences.
Making a little video
Another idea could be to take the pictures and make a short video with the changes, this is cool when you add many values in the parameters with little changes.
my prompt:
EPfeLapis, 1girl ,( blonde:1.3), DV_INGRID_VICIOUS, [railroad crossing|cave], (red bikini latex :1.4) (perky breasts:1.2) perfect lighting and textures, perfect surface refraction, dispersion,ultrarealistic materials, sunbeam,masterpiece, 8k, HDR, best quality, absurdres <lora:weight_slider_v2:-3>
I set only one prompt S/R with many values in the lora.
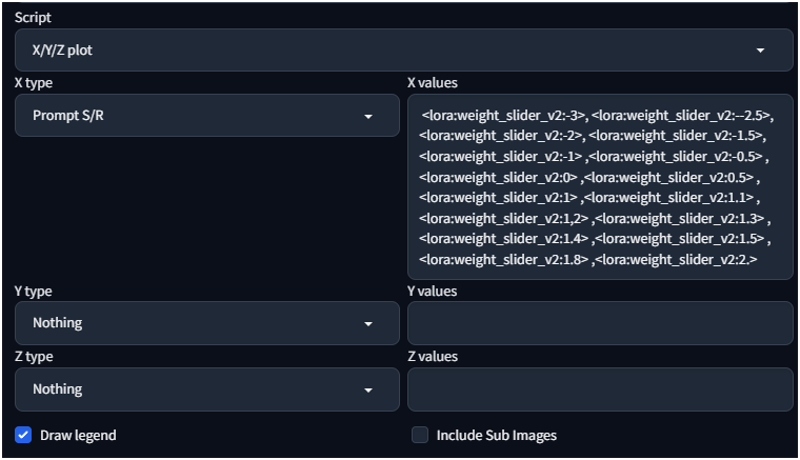
The result are many images in a single row.

I take the images and I put them in a video editor (I user screentoGif, check other my article to check how it works) and generate the video.
Here I attached a webp image (not the best quality but Civitai has some limitation on animated images on the articles)
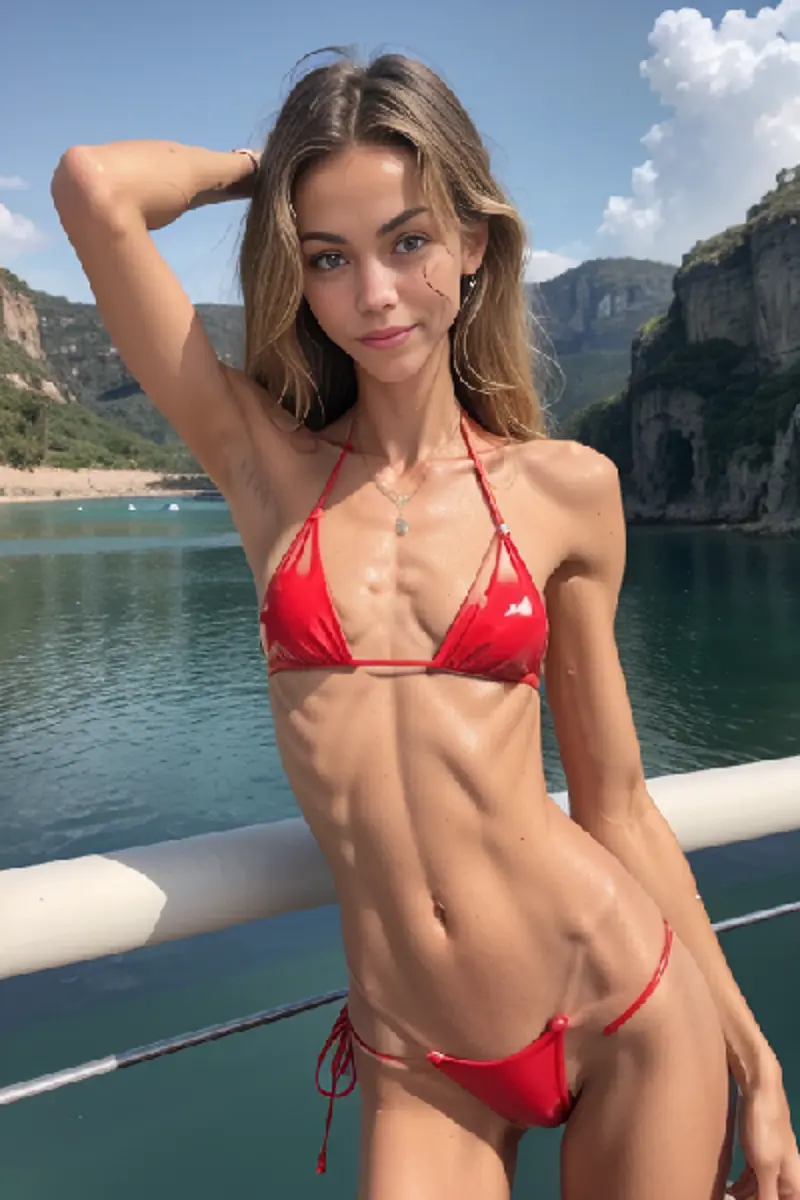
(as you notice the position of the images changes, and this is not really good, to avoid this I can set ControlNet with openPose to keep the image in the right place)
Using ControlNet
To keep the girl in the same position I can setup ControlNet with OpenPose.
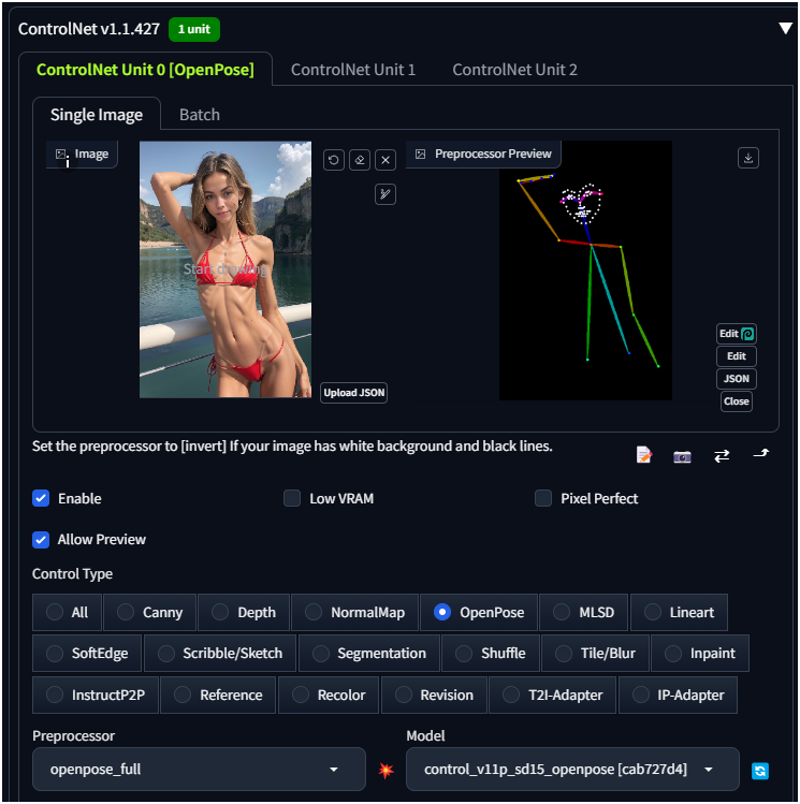
Now the result are similar , the background changes but not the girl.
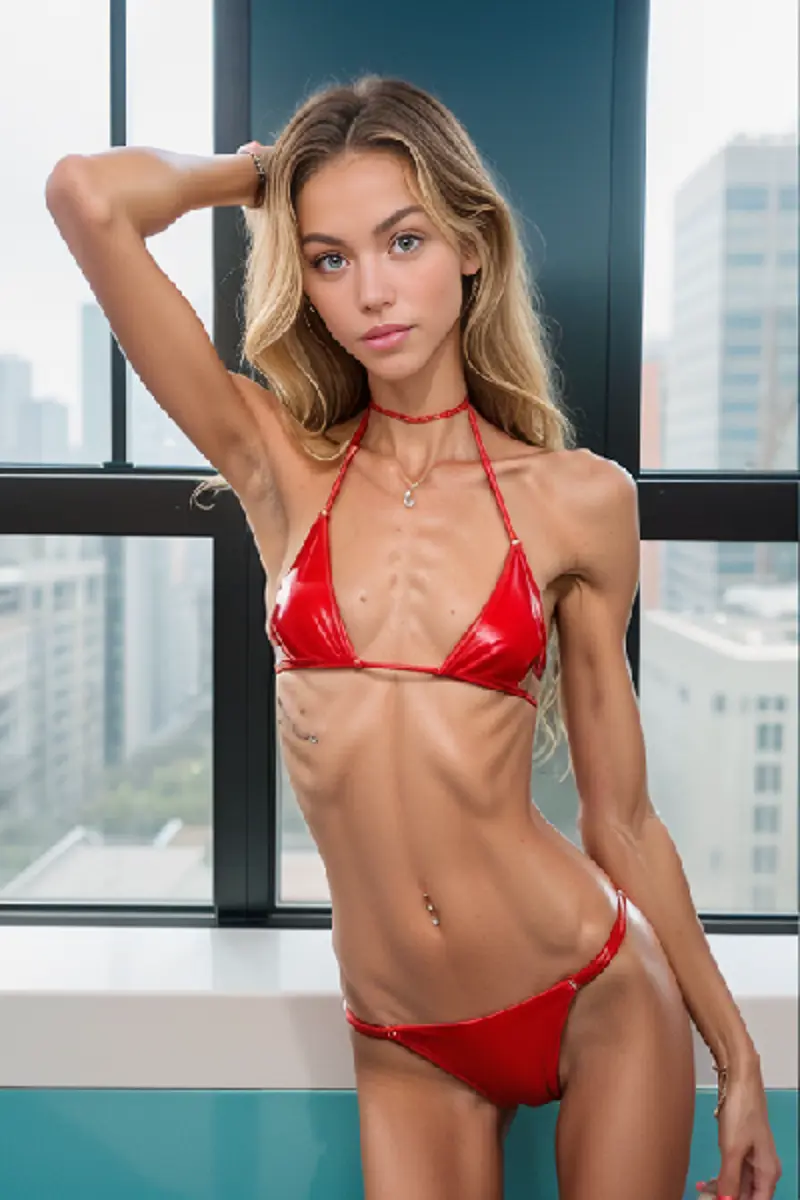
About the background we can remove it .. but will be in a next article..
I how you enjoy this article.

