Introduction
ComfyUI, once an underdog due to its intimidating complexity, spiked in usage after the public release of Stable Diffusion XL (SDXL). Its native modularity allowed it to swiftly support the radical architectural change Stability introduced with SDXL’s dual-model generation. While contributors to most other interfaces faced the challenge of restructuring their entire platform to accommodate this curveball, ComfyUI required far fewer modifications, needing only a few new nodes in its boilerplate event chain. Comfy's early support of the SDXL models forced the most eager AI image creators, myself included, to make the transition.
Even now, a large community still favors Stable Diffusion’s version 1.5 model over SDXL. Criticisms of SDXL range from greater hardware demands to the use of a more censored training dataset. I suspect that for many, these principled stances mask their primary grievance: the time and effort cost of transitioning to ComfyUI. Early adopters of Stable Diffusion have been tracking the development of compatible interfaces since the beginning, learning added complexities in small, digestible chunks, synchronously with development. Now there's sudden pressure to dive headfirst into ComfyUI’s fully matured but completely foreign ecosystem. It’s truly daunting. No wonder so many people stick with what they know! Even after other interfaces caught up to support SDXL, they were more bloated, fragile, patchwork, and slower compared to ComfyUI.
So, what if we start learning from scratch again but reskin that experience for ComfyUI? What if we begin with the barest of implementations and add complexity only when we explicitly see a need for it? No gargantuan workflows, no infinite shelf of parameters, no custom nodes, no node spaghetti (hopefully). Let's approach workflow customization as a series of small, approachable problems, each with a small, approachable solution. In this workflow building series, we'll learn added customizations in digestible chunks, synchronous with our workflow's development, and one update at a time.
Text to Image: Build Your First Workflow
By the end of this article, you will have a fully functioning text to image workflow in ComfyUI built entirely from scratch. I will make only these assumptions before we get started:
You have ComfyUI installed. There are abundant guides and resources for this, so I’m not going to reinvent the dead horse. The official documentation is great.
You have downloaded the base SDXL 1.0 model and put it in ComfyUI’s models folder. Bonus points for the refiner model, but we’re not there yet. Pretend it doesn’t exist.
1. ComfyUI
First, get ComfyUI up and running. Admire that empty workspace.
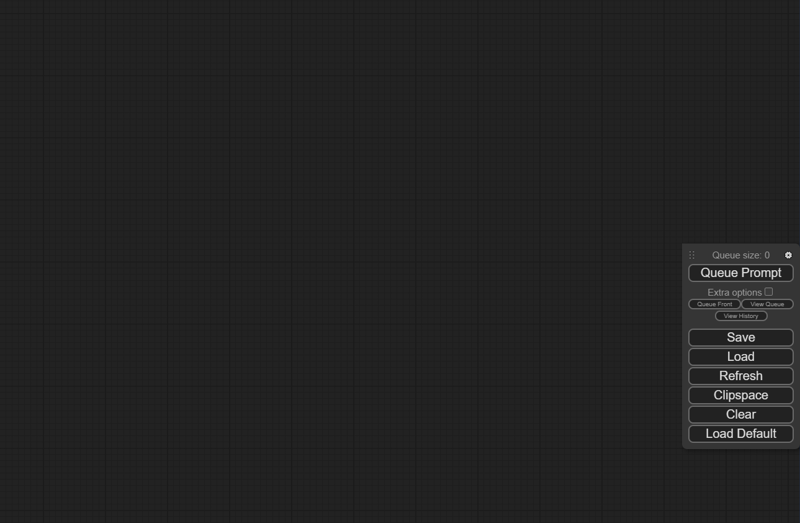
This is the canvas for "nodes," which are little building blocks that do one very specific task. Each node can link to other nodes to create more complex jobs.
If a non-empty default workspace has loaded, click the Clear button on the right to empty it. We’re starting from zero and building a hero.
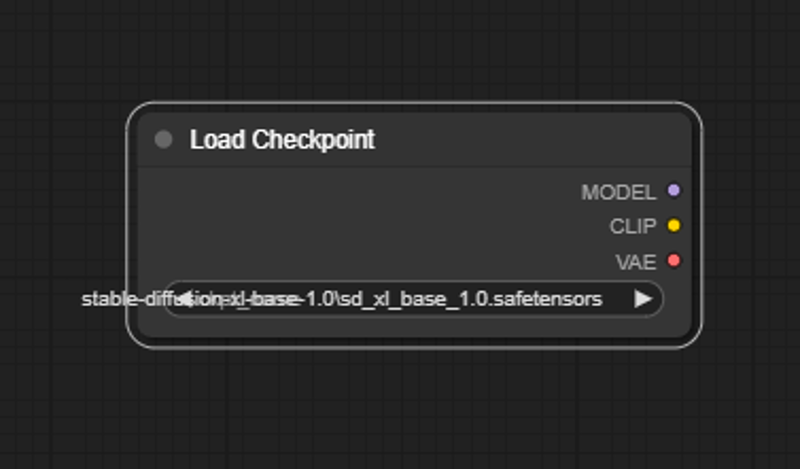
Click that text at the bottom and select the SDXL 1.0 model file that you downloaded. If you don’t see it, make sure the model file (.safetensors or .ckpt) is located in ComfyUI’s models folder.
2. KSampler
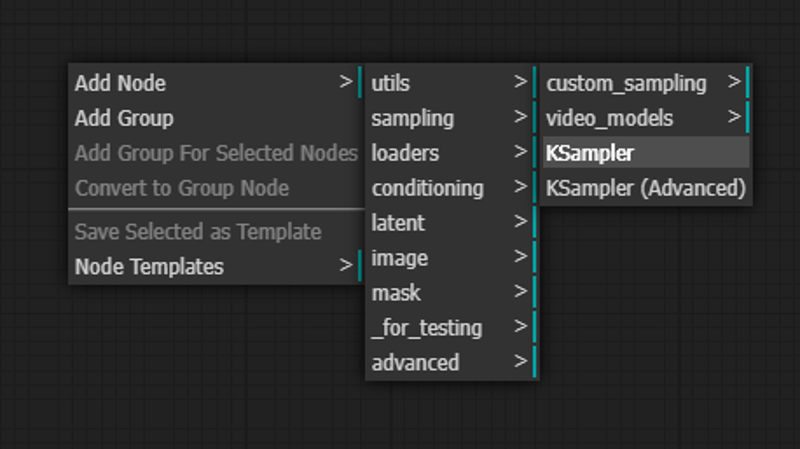
The first node you’ll need is the KSampler. Right click and Navigate to:
Add Node > sampling > KSampler
The KSampler is the workhorse of the generation process.
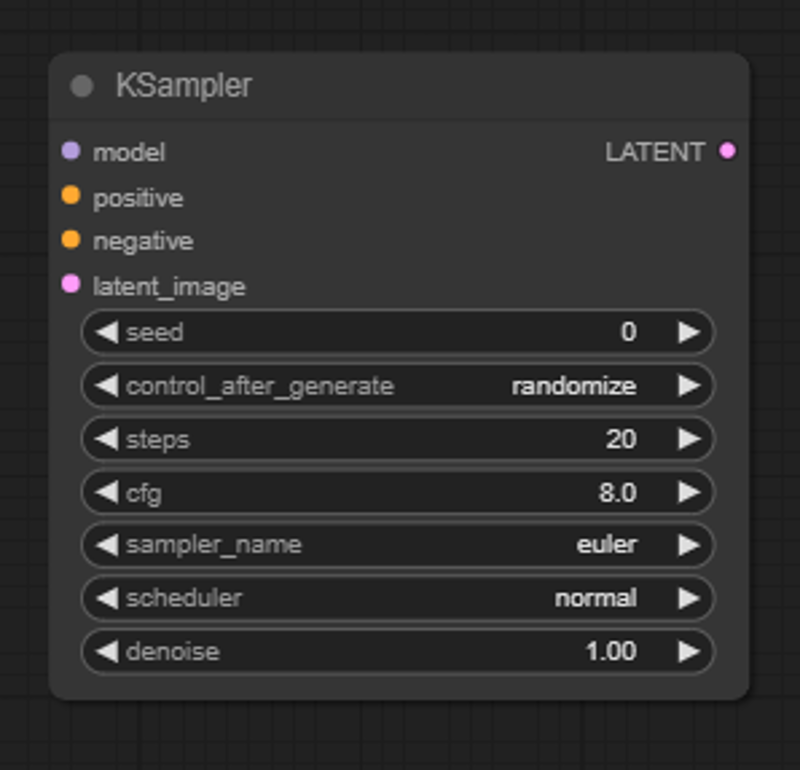
It takes random image noise then tries to find a coherent image in the noise. This is called “sampling.” It makes that image slightly less noisy based on what it thinks it sees, then looks at it again. Rinse and repeat as many times as you tell it to.
It’s like if you were trying to imagine a shape in a randomly cut lump of clay. Then you sculpt the shape of that clay a teensy bit to look more like what you see in it. You keep sculpting a little bit at a time until you can convince your friend to see the same thing you do.
3. Load Checkpoint
You can’t envision a shape you’ve never heard of! Neither can the KSampler. That’s what the model file is for. Think of it like a big dictionary. It's an impossible task (and a huge waste of space) for your local Webster’s to put a picture next to every word in the dictionary. But the entry for, say, “Cat” will have lots of other information about what makes a thing a cat, generally. Probably enough information for you to imagine one.
While the model doesn’t contain any image data, it contains lots of other information about the kinds of things that can be represented with image data—Enough for the KSampler to imagine those things.
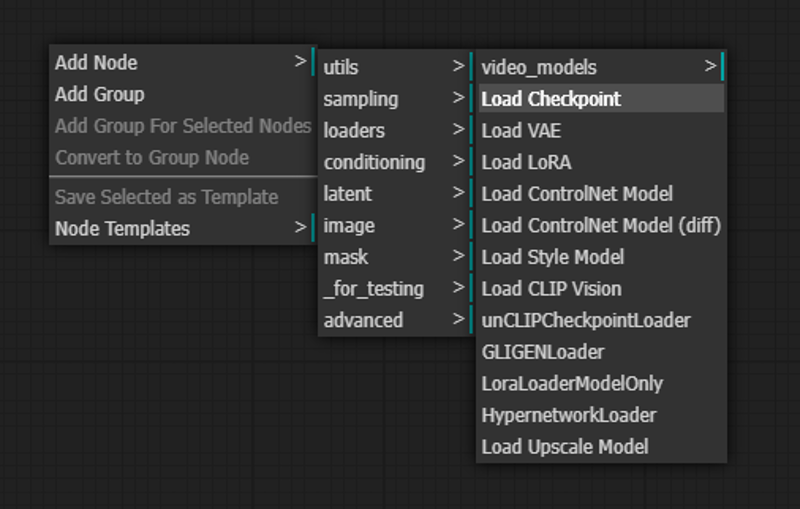
Let's get the model file into the workspace. Right click on the workspace and navigate the submenus to:
Add Node > Loaders > Load Checkpoint.
You’ll see this node on the canvas with slightly different text at the bottom:
4. Node Connections
On the right side of every node is that node’s output. The left side of every node is the input. Let’s help the KSampler’s imagination by connecting the MODEL output dot on the right side of the Load Checkpoint node to the model input dot on the KSampler node with a simple mouse drag motion.

When a node finishes the job it was designed to do, it sends its results to all the following nodes its output is connected to. Here you just told the Load Checkpoint node to send the model file it loaded to the KSampler. The KSampler now has access to the model’s entire dictionary of concepts.
5. CLIP Text Encode (Positive Prompt)
Out of all the things the KSampler now knows how to imagine, how do you tell it what you want it to imagine? This is the text prompt’s job.
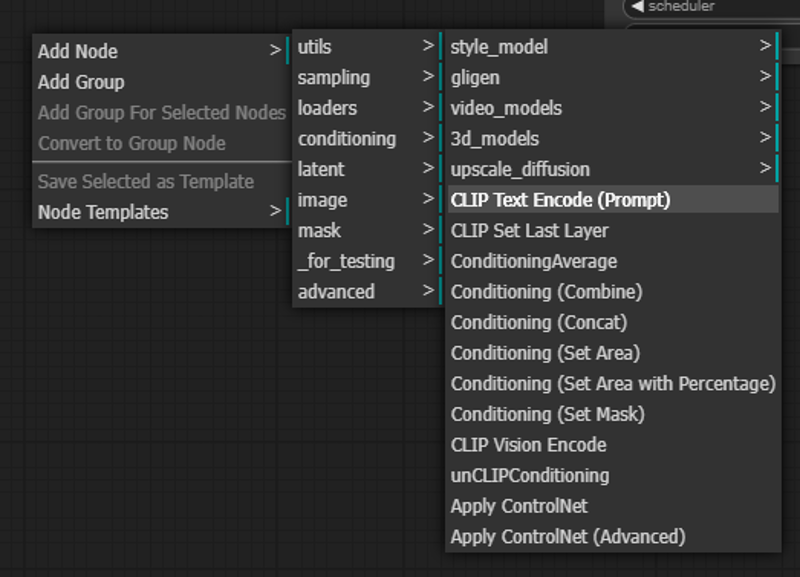
Right click on any empty space and navigate to:
Add Node > Conditioning > CLIP Text Encode (Prompt)
CLIP is another kind of dictionary which is embedded into our SDXL file and works like a translation dictionary between English and the language the AI understands. The AI doesn’t speak in words, it speaks in “tokens,” or meaningful bundles of words and numbers that map to the concepts the model file has its giant dictionary.
Take the CLIP output dot from the Load Checkpoint node and connect it to the clip input dot. Then connect the conditioning dots from the output of the CLIP Text Encode (Prompt) node to the positive input dot of the KSampler node

This sends CLIP into your prompt box to eat up the words, convert them to tokens, and then spit out a “conditioning” for the KSampler. Conditioning is the term used when you coax the KSampler into looking for specific things in the random noise it starts with. It’s using your English-to-token translated prompt to guide its imagination.
6. CLIP Text Encode (Negative Prompt)
Conditioning goes both ways. You can tell the KSampler to look for something specific and simultaneously tell it to avoid something specific. That’s the difference between the positive and negative prompts.
You’ll need a second CLIP Text Encode (Prompt) node for your negative prompt, so right click an empty space and navigate again to:
Add Node > Conditioning > CLIP Text Encode (Prompt)
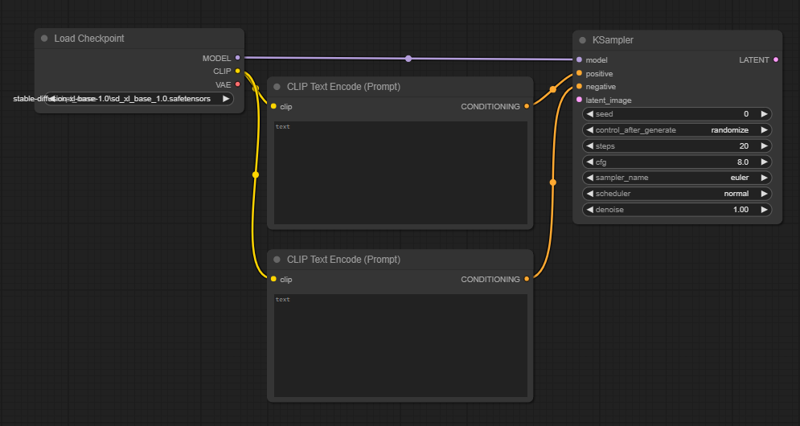
Connect the CLIP output dot from the Load Checkpoint again. Link up the CONDITIONING output dot to the negative input dot on the KSampler.
7. Empty Latent Image
Now we have to explicitly give the KSampler a place to start by giving it an “empty latent image.” An empty latent image is like a blank sheet of drawing paper. We give a blank sheet of paper to the KSampler so it has a place to draw the thing we tell it to draw.
Right click any empty space and select:
Add Node > latent > Empty Latent Image.
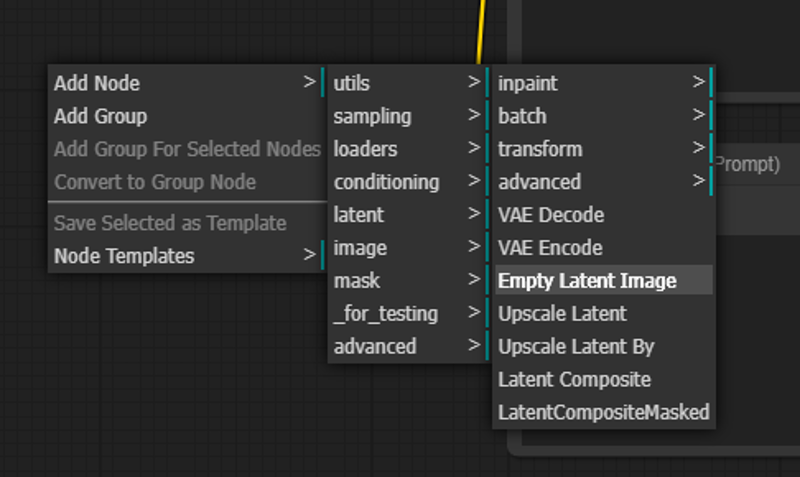
Connect the LATENT dot to the latent_image input on the KSampler.
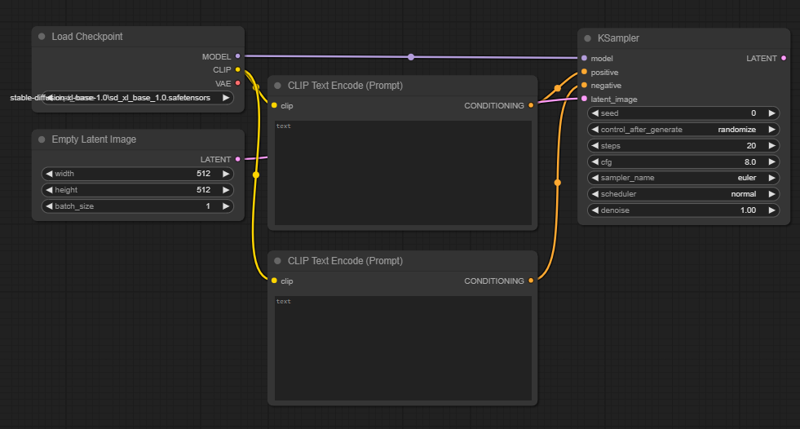
Because of the dataset the SDXL models were trained on, this KSampler will want a big sheet of paper. It can draw at any size, but it draws best when drawing on a sheet that’s the same size as the images used to build the model's dictionary of concepts.
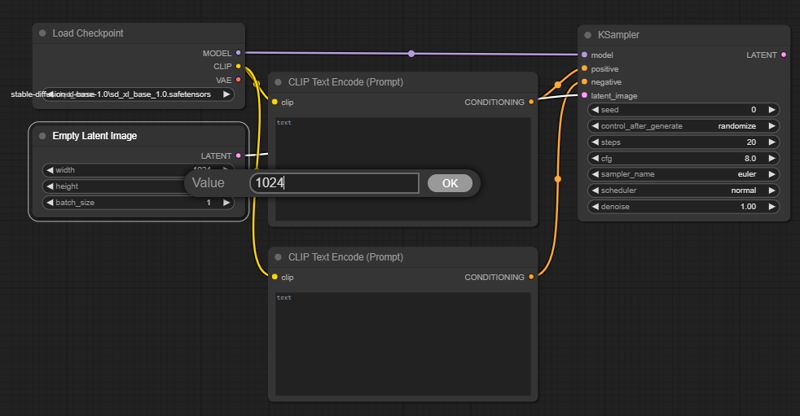
Click the width and height boxes in the Empty Latent Image node and change both values both to 1024 pixels.
8. VAE Decode
The empty latent image contains so many mathematical layers and dimensions that we humans can’t see it the way we can see a normal sheet of paper or digital image. The multifaceted latent image has to be collapsed into something much simpler. We must "decode" it down to a grid of square pixels to display on our modest, two-dimensional screens. This is done by a "VAE" (Variational Auto Encoder), which is also conveniently embedded into the SDXL model.
Add the VAE Decode node by right clicking and navigating to:
Add Node > latent > VAE Decode.
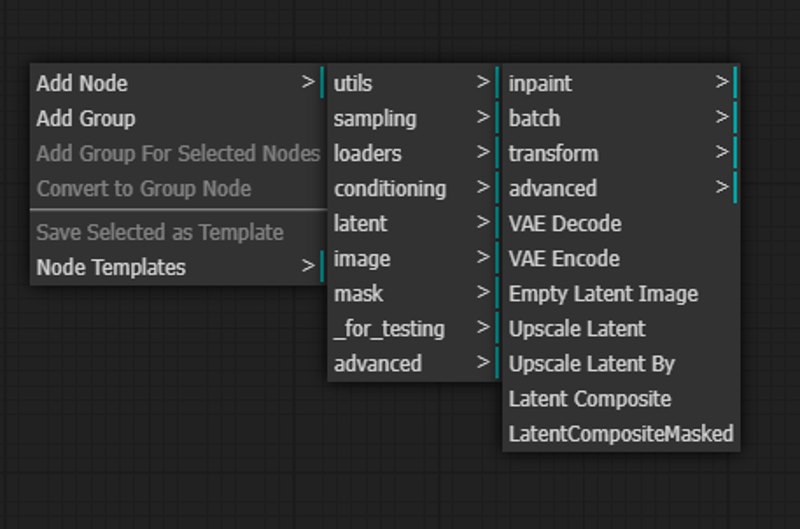
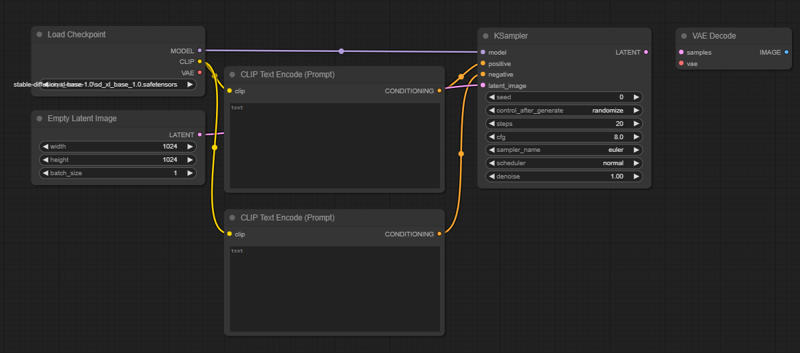
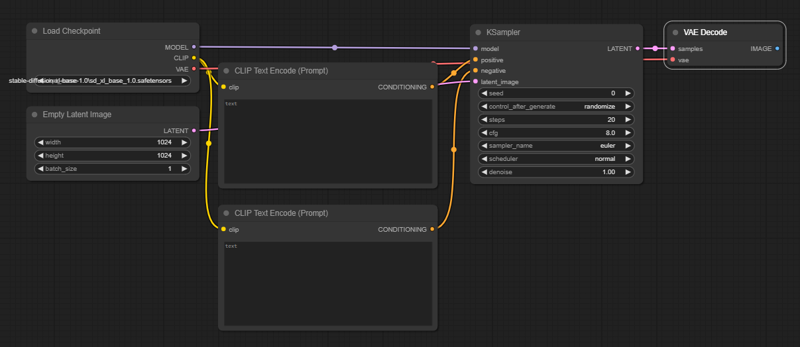
In order for the VAE Decode node to do its job collapsing the KSampler’s image into a human-visible PNG, it needs two things: The drawing the KSampler made on the empty latent image and a VAE to know exactly how to translate that drawing back into pixels.
Connect the KSampler’s LATENT output to the samples input on the VAE Decode node. Then look all the way back at the Load Checkpoint node and connect the VAE output to the vae input.
9. Save Image
We just need one more very simple node and we’re done. We need a node to save the image to the computer! Right click an empty space and select:
Add Node > image > Save Image.
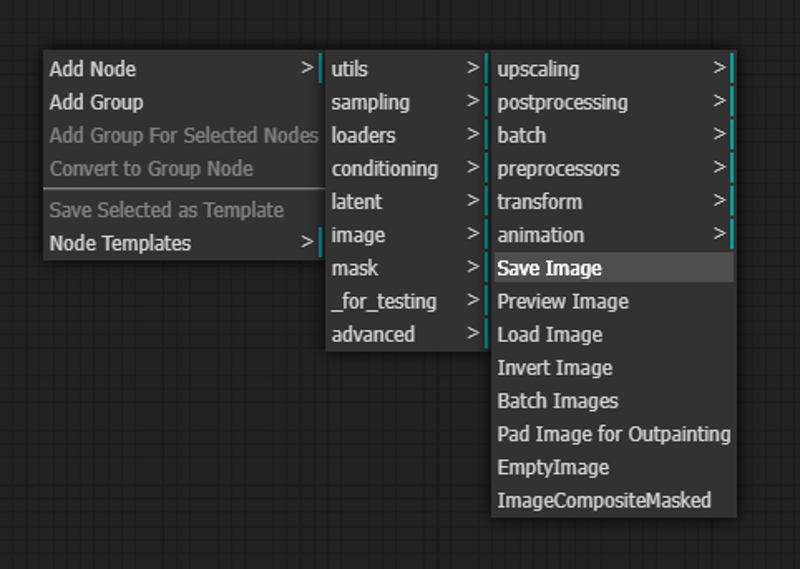
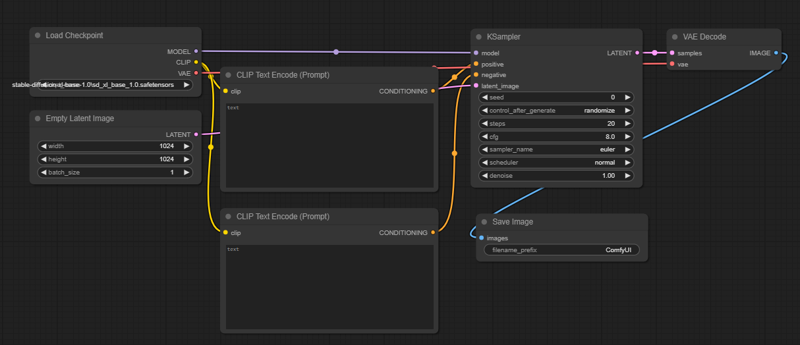
Then connect the VAE Decode node’s output to the Save Image node’s input.
10. The Workflow
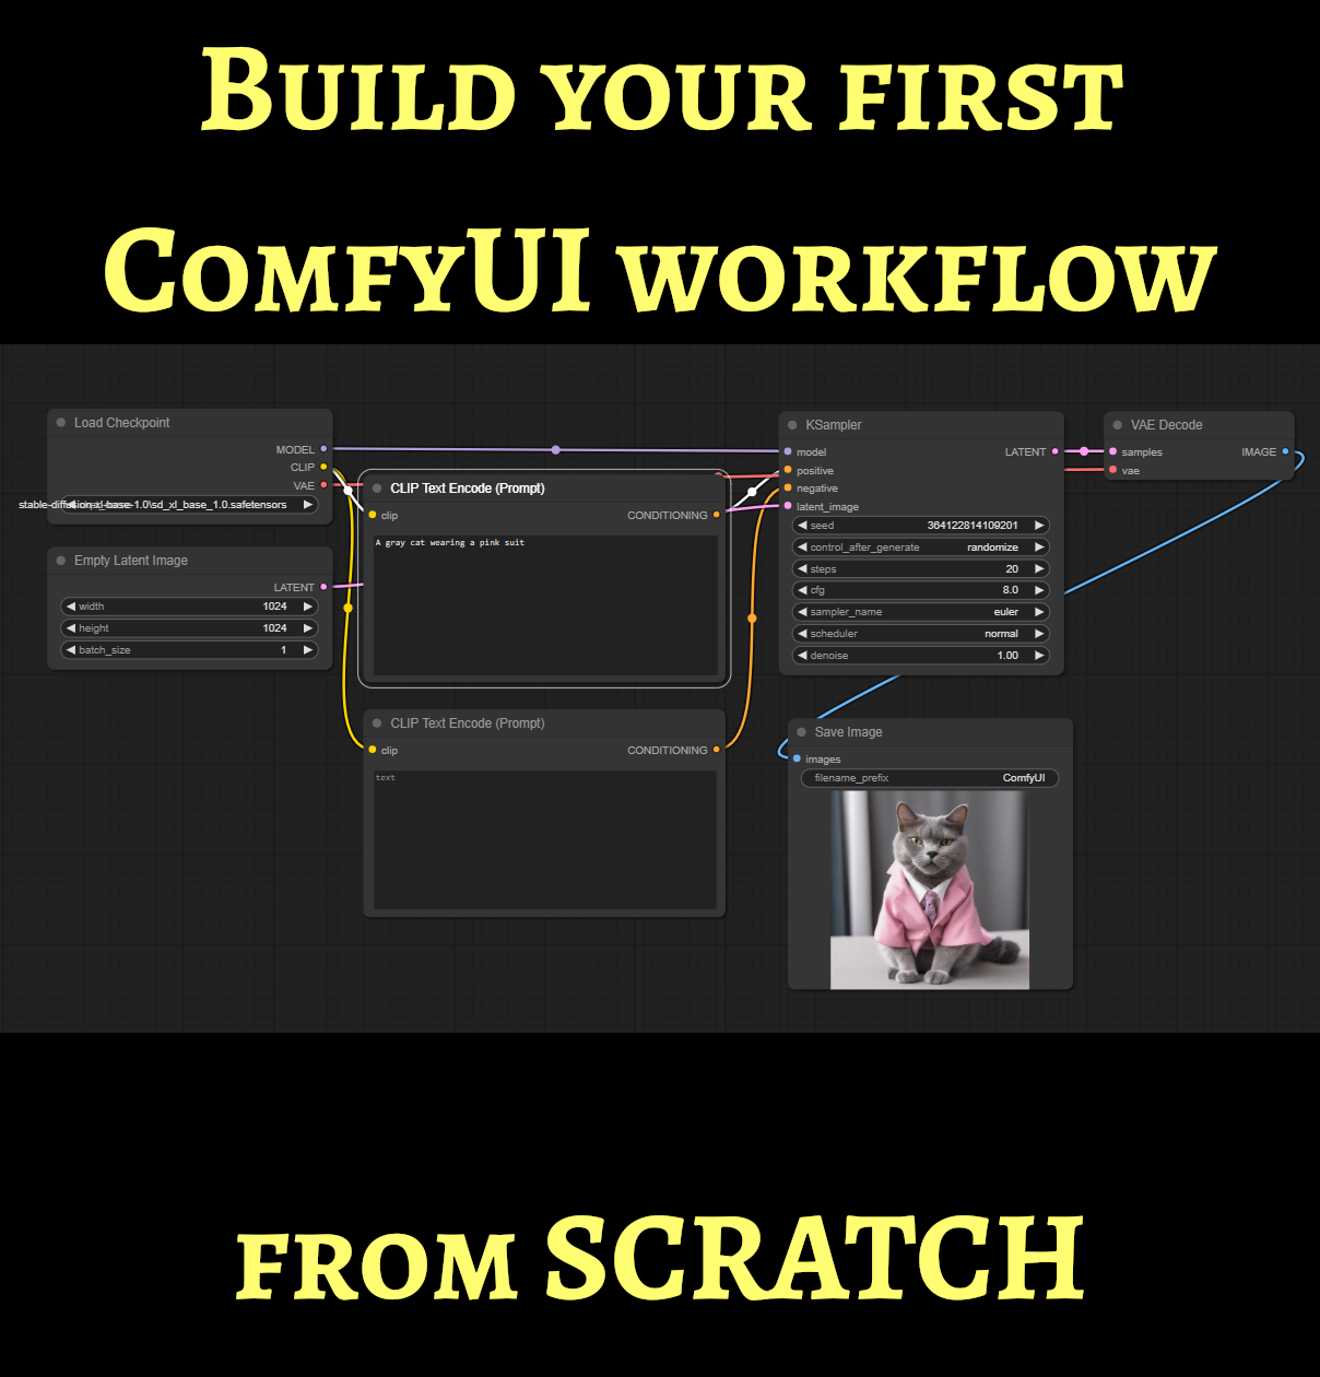
Every node on the workspace has its inputs and outputs connected. Our workflow is complete! There’s nothing left to do but try it out. Type something into the CLIP Text Encode text box that’s attached to the “positive” input on the KSampler.
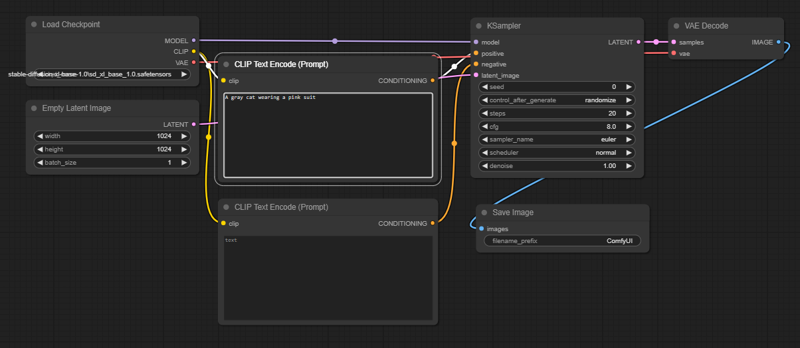
Now click Queue Prompt on the right.
That’s it... That’s the whole thing! Every text-to-image workflow ever is just an expansion or variation of these seven nodes!
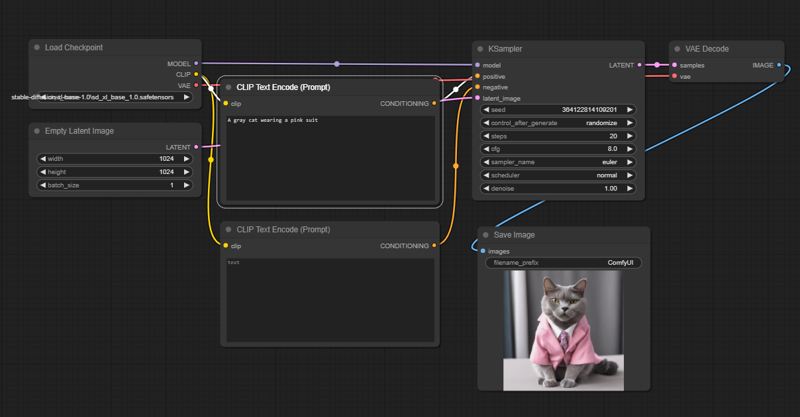
If you haven’t been following along on your own ComfyUI canvas, the completed workflow is attached here as a .json file. Simply download the file and drag it directly onto your own ComfyUI canvas to explore the workflow yourself!

In Part 2, we’ll look at some early limitations of this setup and see what we can do to fix them.

