I was trying to create a loop in comfyui without the limitations of the xy plot (which is really great but cannot be used for everything...).
Using nodes of the impact pack (https://github.com/ltdrdata/ComfyUI-Impact-Pack) I was able to loop a number from 0 to anything you want to...
Please use the comfyui manager to install all the missing nodes.

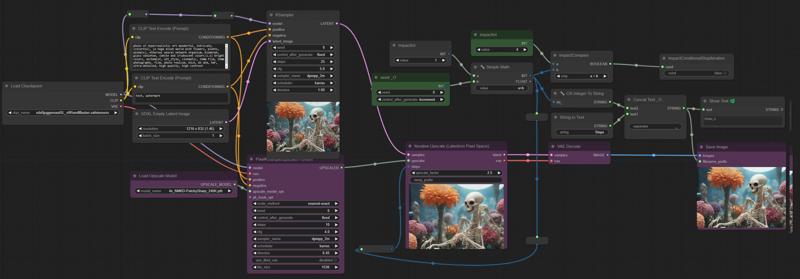
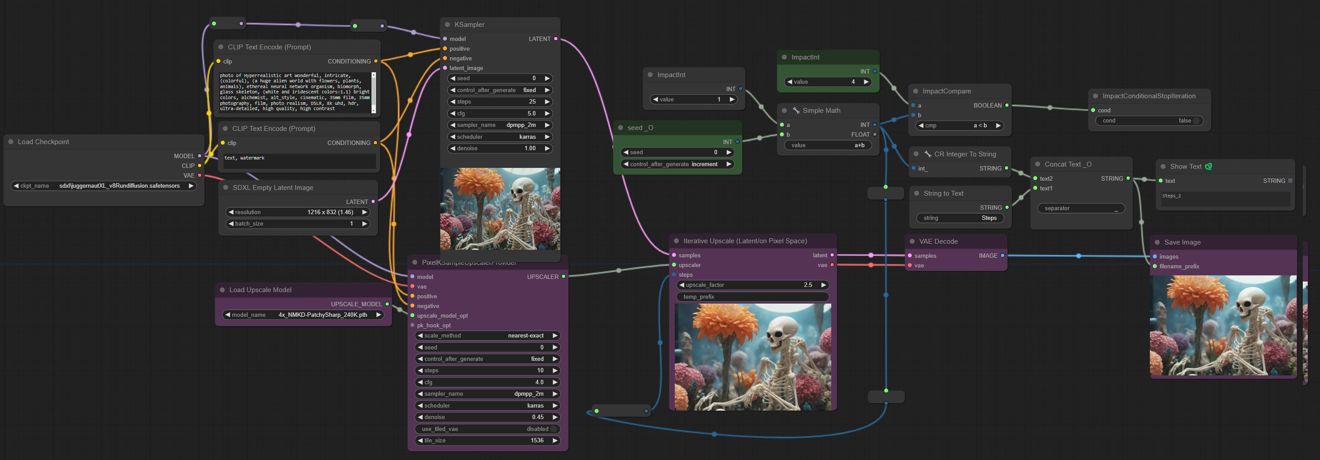
I am using the seed generator (green box "seed_O") using "increment" to get a new number on every run. To simplify things for my example I always add "1" to the seed - this number is the input for the number of steps for an interative upscale on latent space (the purple boxes).

==> Important: You have to reset the number to "0" each time you want to start the loop from the beginning!
And you have to ensure, that "Auto Queue" is selected in the "Extra options" of comyui... otherwise the loop will not continue by its own!
I limit the loop until the number exceeds the upper green box ("ImpactInt"). I did not change the node names that they can be found more easily.
In this example workflow the seed is incremented by one that it can be used from 1 on (0 steps do not work on the iterative upscale...)
To build the loop I compare the number using "ImpactCompare" with the last number of my loop using "a<b" wich results in "false" as long as the loop isn't finished. The boolean than goes to the "ImpactConditionalStopItearation" node which ends the loop as soon as the results becomes true.

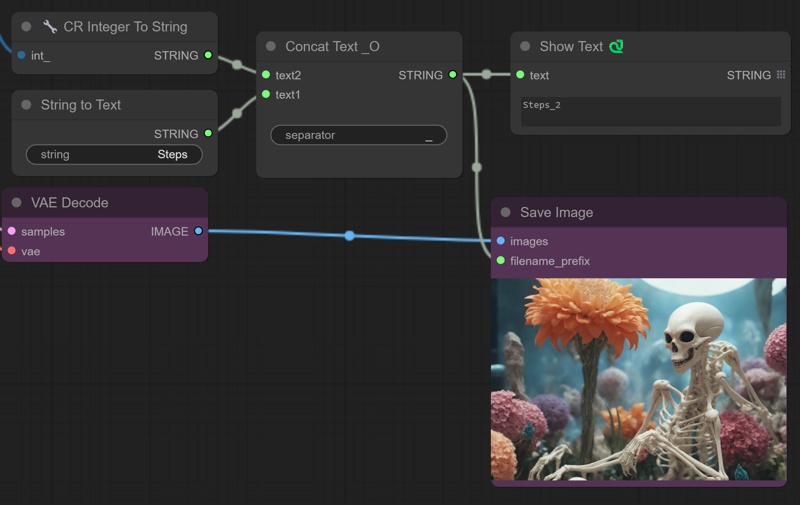
I am using the number to generate a specific file prefix for the save image node - this is of course not really necessary for the loop...

If you want to iterate other values you can easily adjust the start- and end-value in the green boxes.
To iterate float numbers you can to a calculation based on the integer values using Simple Math.
To iterate through texts you can add a "Impact String Selector" which allowes you to select single lines of a text in a box to be used.
Hope this helps the one or another person out there...
Of course there are other ways of doing that - but that solution was the one I found...
If anyone knows a better way, please let me know in the comments...
