Intro
Currently it's way easier to train loras... Just use AI-Toolkit defaults and be happy!!!
But if you want details.... here we go (I may update with Flux Klein and Z-Image soon):
Models used for training (SD-1, SDXL, Flux1.Dev):
For SD 1.5 realistic photos:
Training: Realistic Vision 5.1
This one was added on may merges and is also part of a merge. Then works good with almost all other realistic models. The v6 for some reason does not work well the same way.Generation: Realistic Vision 5.1, and a img2img with a denoise of 0.1 using PicX Real 1.0. RV alone do the job, but I liked this combo.
For SD 1.5 Anime:
Training: AnyLora
This one is a classic for training.Generation: Azure Anime v5
For SDXL overall:
Training: SDXL Base model
Generation: Dreamshaper XL Turbo. I use 7 steps, and then I do a img2img with the same prompt but a new seed, then the result is nice!
For FLUX overall:
Model: flux1-Dev-Fp8.safetensors (11.1 GB file)
VAE: ae.safetensors
Clip: clip_l.safetensors
T5 Encoder: t5xxl_fp8_e4m3fn.safetensors
16Gb Vram needed. But you can try this other article here
Tools I use
Training: Kohya_ss
But sometimes I just run a script I made to speed up the process, it call the Kohya scripts with all parameters. I'll talk about it at the end.
Installing Kohya is beyond the scope of this guide.Generation: InvokeAI
Sorry people, I have Automatic1111 and ComfyUI here, but I Love InvokeAI.Lora Metadata Viewer: https://civitai.com/models/249721
Dataset preparation
This is the most important part. You have to collect images from the person, object or whatever you want to train.
There are some things to consider
Avoid low resolitions or pixelated images. I don't recommend upscaling.
Avoid images too different from one another. I usually stick to portraits.
Avoid images with too much makeup, lots of earrings and necklaces, strange poses.
HANDS. Avoid images where hands appear too much in strange positions.
I crop one by one to make sure they include only the subject to train, removing logos, other people, wasted spaces, etc.
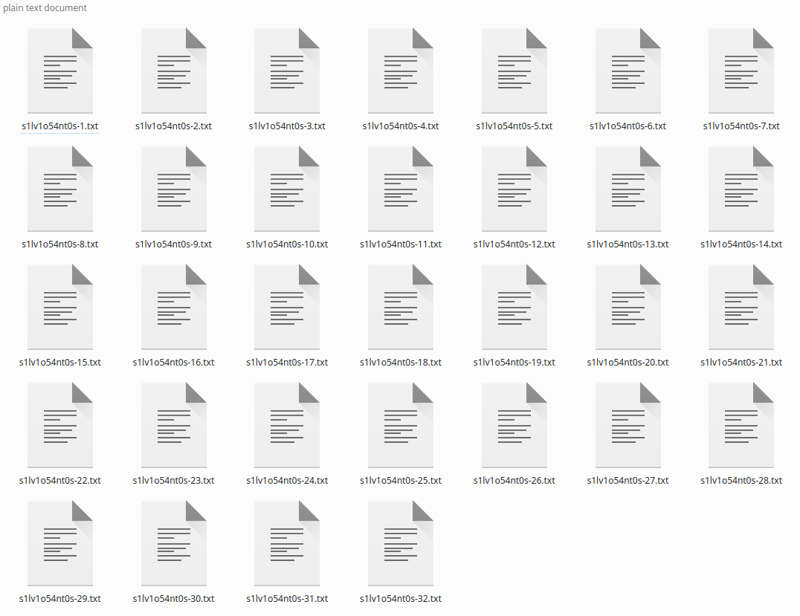
Let me show the dataset I got for Silvio Santos lora:

You can see that they are all portraits. Different backgrounds and cloth colors are a MUST. Faces looking to different sides too.
Note about symmetry
Check if all images the person right and left sides are consistent. This may not be the case with selfies that are usually inverted.
The human face is not symmetrical, then if you have a mixed side orientation during your training, the result may be like this:
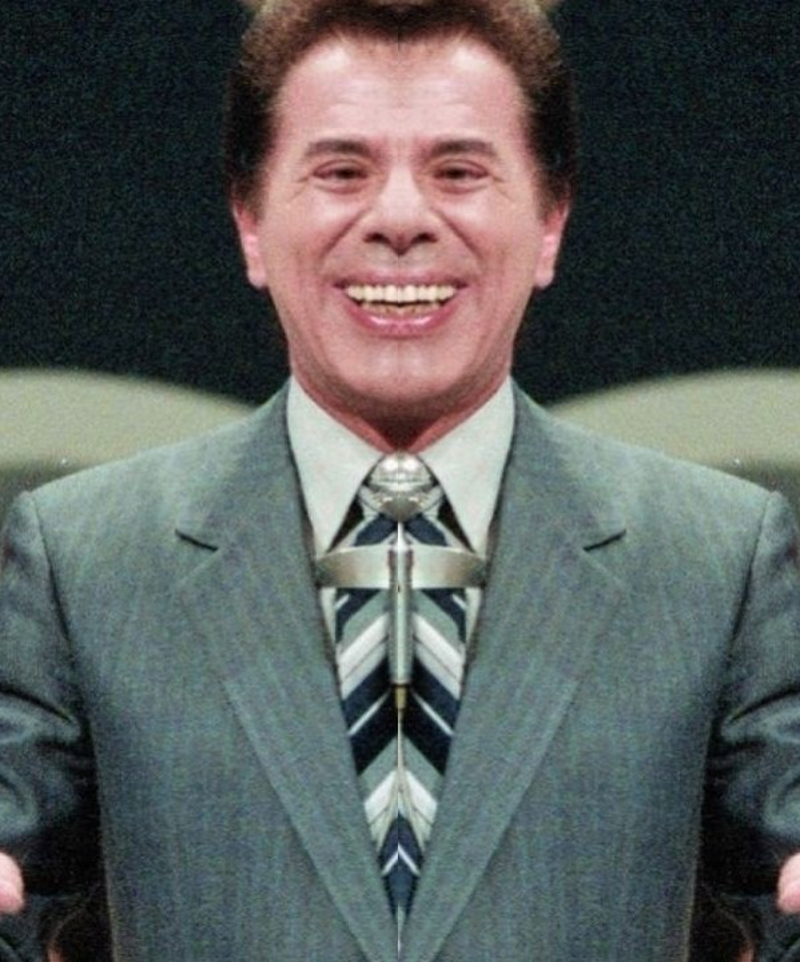
Please revise the orientation of your entire dataset!!
If the preview images after a while starts to be all the same, this may be the reason, as SD will try to learning both sides and the difference in symmetry may cause the loss to be a bit higher in some inverted images, then the learning will stuck in some few images.
Number of images
5 to 10: Your Lora won't have much variations, but can work
11 to 20: Good spot. Can generate a good lora.
21 to 50: This wide range is what we want!
50 to 100: Too much, but works when you want to add portraits AND full body mixed.
> 100: Waste of work.
Resolution
The resolution can vary from 256x to 2048x. Avoid images below or above these values. You don't need to resize if they are inside these values, as the training will do that automatically in buckets:

The folder structure:
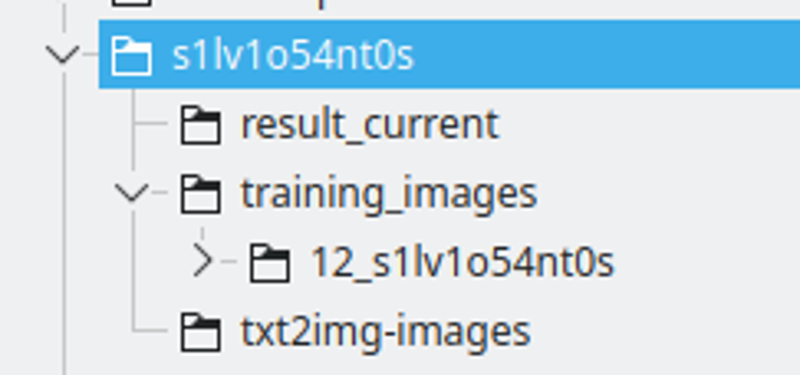
I create a folder with the LoRA string name. I name the string replacing some letters with numbers, to make sure it will be a unique token across many models.
The result_current will be the place where Kohya will save the results
The training images will have the directory containing the training images. The name convention is: 400 / number of images, an underscore and the lora string. This will be the number of repeats Kohya will do. I find this number a good spot to have a good interval between epochs.
txt2img-images is where I store generated images using the LoRA - Optional.
Captioning
This is the process where you will describe what each image is, then SD will know how to use the existing model to build the training images from the noise.
In Kohya, in utilities tab, we have Blip captioning. I use this with these configs:
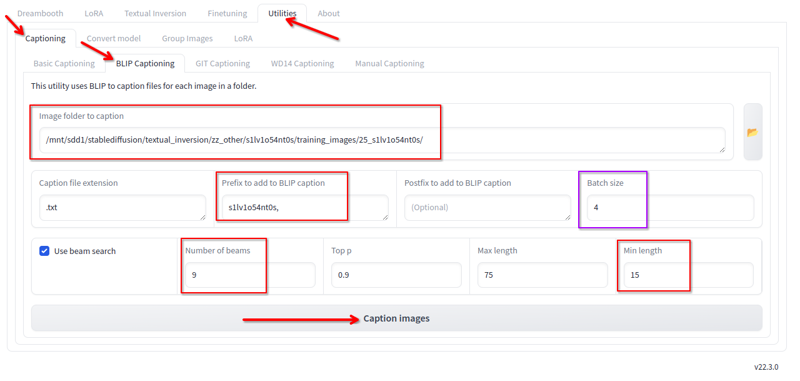
I change the following:
Folder where the images are.
Prefix is the lora name and a comma
Number of beams 9
Min lenght 15
Batch size 4
All other values I keep the default.
Click in caption and it will, after a while, generate the captions:
If you have few images, you may fix the captions, as Blip LOVES adding phrases like "holding a remote control" or "With a microphone in the hand" with that's not being true. I just ignore and it have been working that way, as the overall captioning is good.
*You may say that this "basic" captioning is not good for Flux, that a better captioning using LLM is better, but it have been working fine for me.
Regularization folder
In the past, for the first loras I published, I used a regularization folder with more than 4K woman images. I stopped using it as it only is required when your dataset is not captioned and more varied.
Using it will double the time and steps required.
Do not use.
Running the training
Here we will run the training. For SD1.5 these configs require 8GB Vram, SDXL requires 10GB Vram, Flux requires 16GB Vram.
Installing Kohya is beyond the scope of this guide.
Kohya Configurations
See the attached JSON files on this article.
Just load these files in the Kohya LORA tab -- NOT THE DREAMBOOT TAB -- click in configuration file and load it.
Configs you HAVE TO change:
Model and Folders section:
Image folder - the training_images folder we created before. NOT the folder with the number, the parent folder.
Output folder - the result_current folder we created before
Output namer - the string name of the lora
Parameters tab > Advanced > Samples:
Change the prompt. It must be simple, it will be used to generate the sample images. Keep it simple
Parameters tab > Basic:
You may change the number of epochs, but I would keep 6 to start.
Search the internet about what each field means, it's out of the scope for now explain them all, ut you can read here: LoRA training parameters
Note that Kohya has some built-in templates in the "Parameters" section that will fill most of the parameters for you, in case you don't want to use my sample files for some reason.
* For FLUX, I'm limiting the training to 1800 steps (already in the config file above) but around 1200 steps the LoRA is good already.
* Also for FLUX, my settings above was not converging the training for ANIMES and CARTOONS. So, you may have to increase the --learning_rate=0.0004 --unet_lr=0.0004 to 0.001 or 0.002. With that the training becomes good in less steps, but may overfit easier.
Hardware utilization
Most of the configurations changes the hardware requirements.
These are the ones that worked for me, using a RTX2060 super ith 12GB Vram -- For FLUX I upgraded to a RTX 4060 TI 16GB Vram.
For example, my RTX2060 does not supports bf16 like the 3060s, then I use fp16. This would save me memory, but it is what it is and with 12G has worked.
After changing all that, click in "Start training". You will see this in the console:
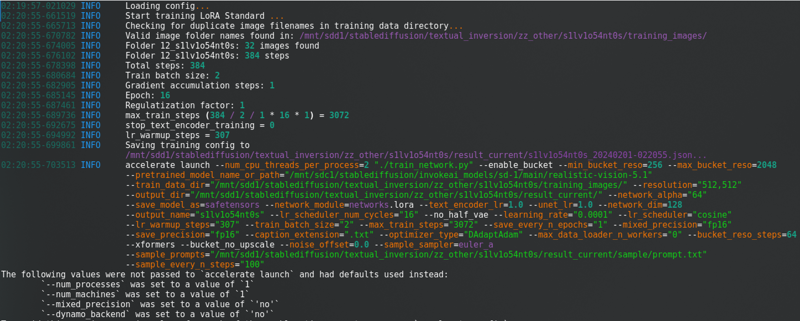

With a loooong progress bar.
SD1.5: I don't cache latents to disk. It's faster, but use almost the same Vram as SDXL.
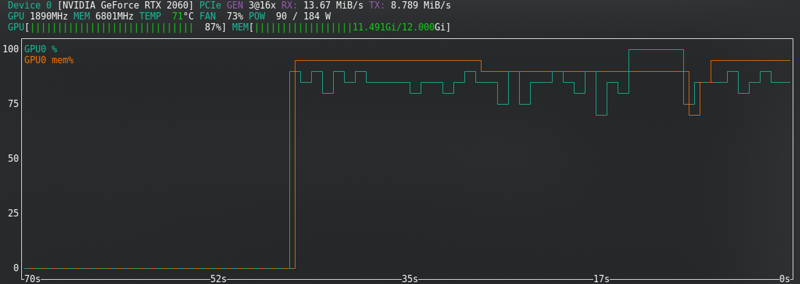

SDXL:
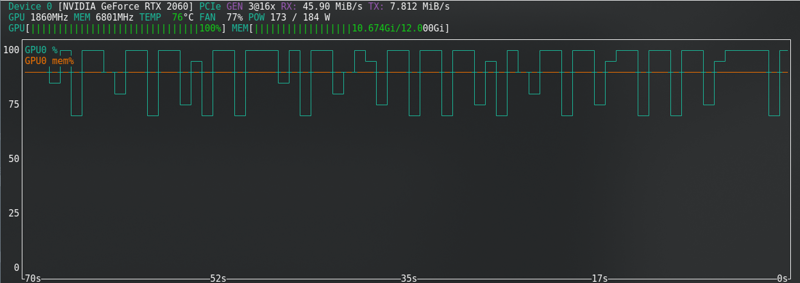

FLUX: Near the limit even with the new card!!!!!
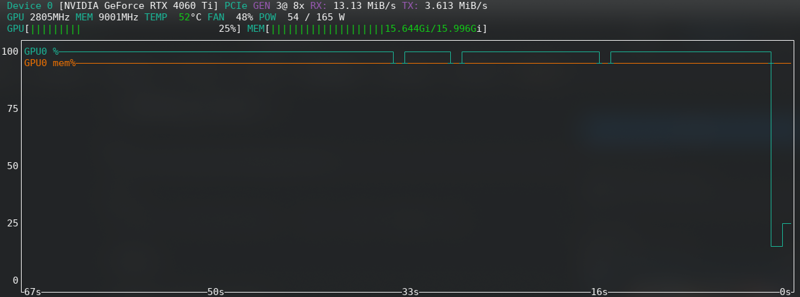
Out of memory error
If you receive CUDA out fo memory errors, then you are at limit. Enable cache latents to disk, change from fp16 to bf16 if your HW supports, reduce the Batch size from 2 to 1.
For Flux, you can enable "Split mode". This reduces a lot of VRAM, but almost doubles the training time.
Other options are: Close all programs, disconnect your 2nd monitor, lower the display resolution, if on Linux change to a lighter desktop environment temporarily, once triggering the training close the browser and check the status only with the command prompt opened.
If you can't solve it, search the internet. If still getting errors, then give up and train in CivitAI.
Training preview
Each 100 steps (you can change it) the training will create a sample image in the results_current/sample folder, then you can have an idea if it's working or not.
The results will improve over time as it's learning.

Training results
When it finishes, the directory will look like that:
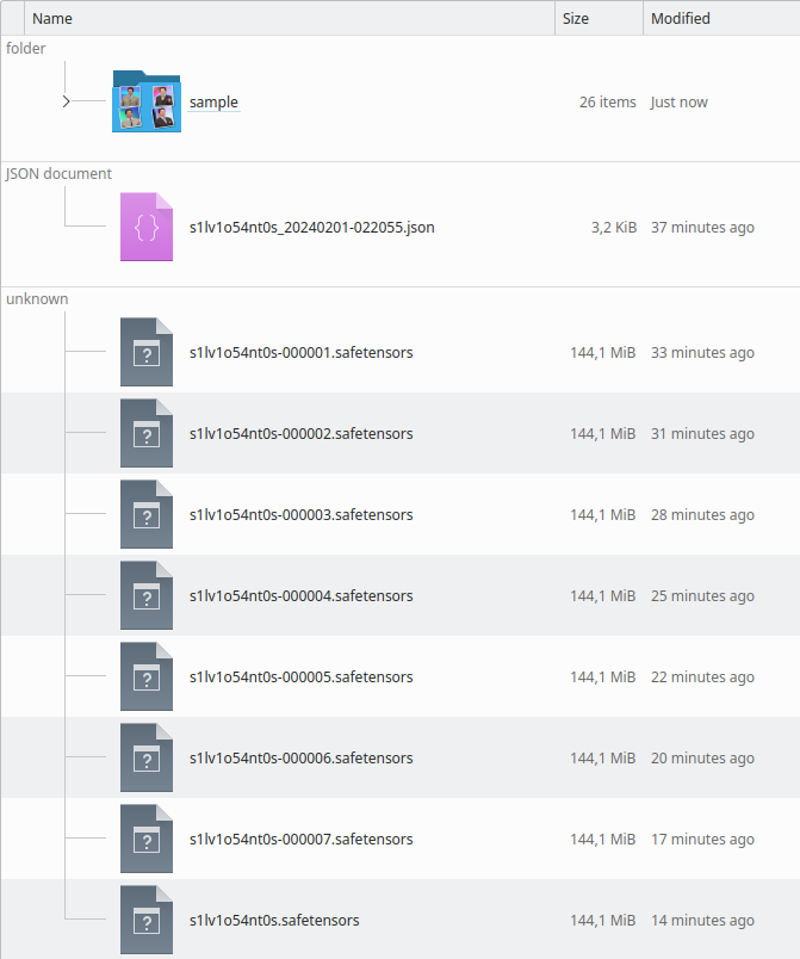
You can check by the sample images if it's overtrained or undertrained. You will see it when running the LoRA also.
Overtrained
If the model is overtrained, the images will be "pixelated made of clay"... I don't know how to describe. The preview images will start to distort.
See with your eyes, a generated image:

Sometimes it does not get this bad result, but the face STOPS looking like the trained person until it deforms in later epochs.

The solution is simple: Just test previous epochs and see the most recent one that works well. Based on the sample image you can easily find the good one and find the LoRA file generated around the same time.
It's HARD TO PICK ONE!!! But must be done. Test the most as you can.
Undertrained
If it's undertrained (The portrait face does not look like the person and seems a misc of generic person from SD model, or the object don't have the desired details yet) you can resume the training.

This example image you see that details are missing, like the Microphone merging with the tie.
The difference from overtraining is lack of detail.
If you closed Kohya, no problem, just load the json it creates in the result directory and all confiigs used will be loaded.
In Parameters > Basic, you have the field LoRA network weights where you can add any lora you want to keep training.
Rename the last one you got to any other name, copy it's location to this field, change the epochs to 2 or 3 (it depends on how much you will need to keep training) and click in start training again. It will resume the training.
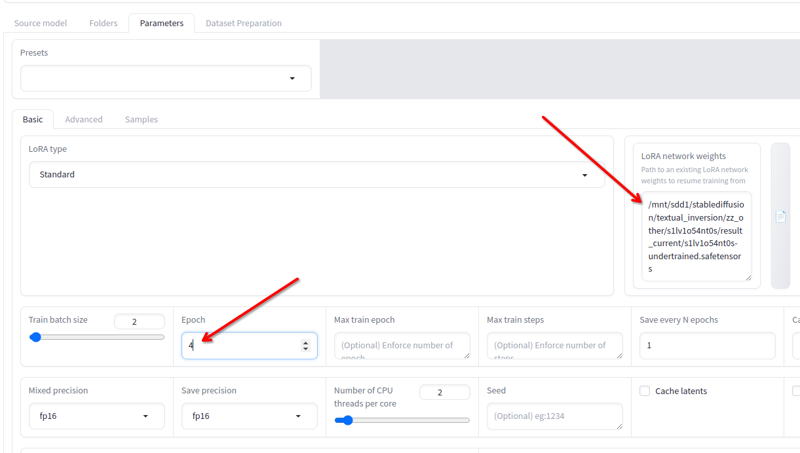
You can do that until it's good!
Finished!
Rename the final lora epoch you want (or keep if the final result is good) and use it.
This is the SD1.5 example:

This is the Flux example:

CivitAI training
I have not tried SD.15 on CivitAI, only SDXL.
Many of the SDXL loras I have were trained in CivitAI. Sd1.5 training should be similar. Just keep the configs in line with the offline ones.
Steps:
Select character and add the lora name.
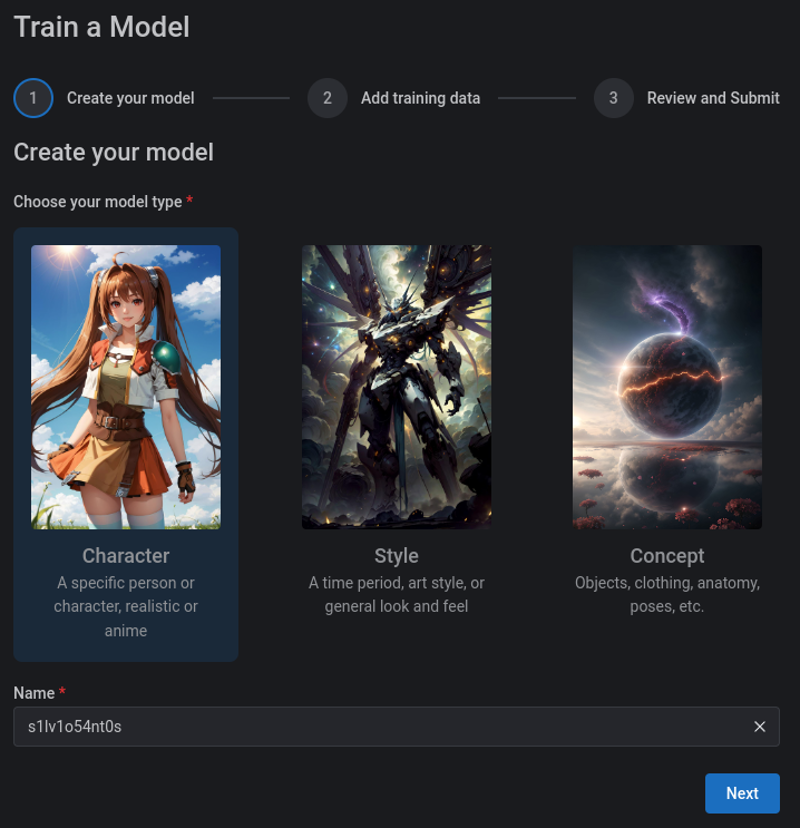
Upload a zip file containing the images and the captions. You can caption manually in the CivitAI, but have it captioned beforehand is better:
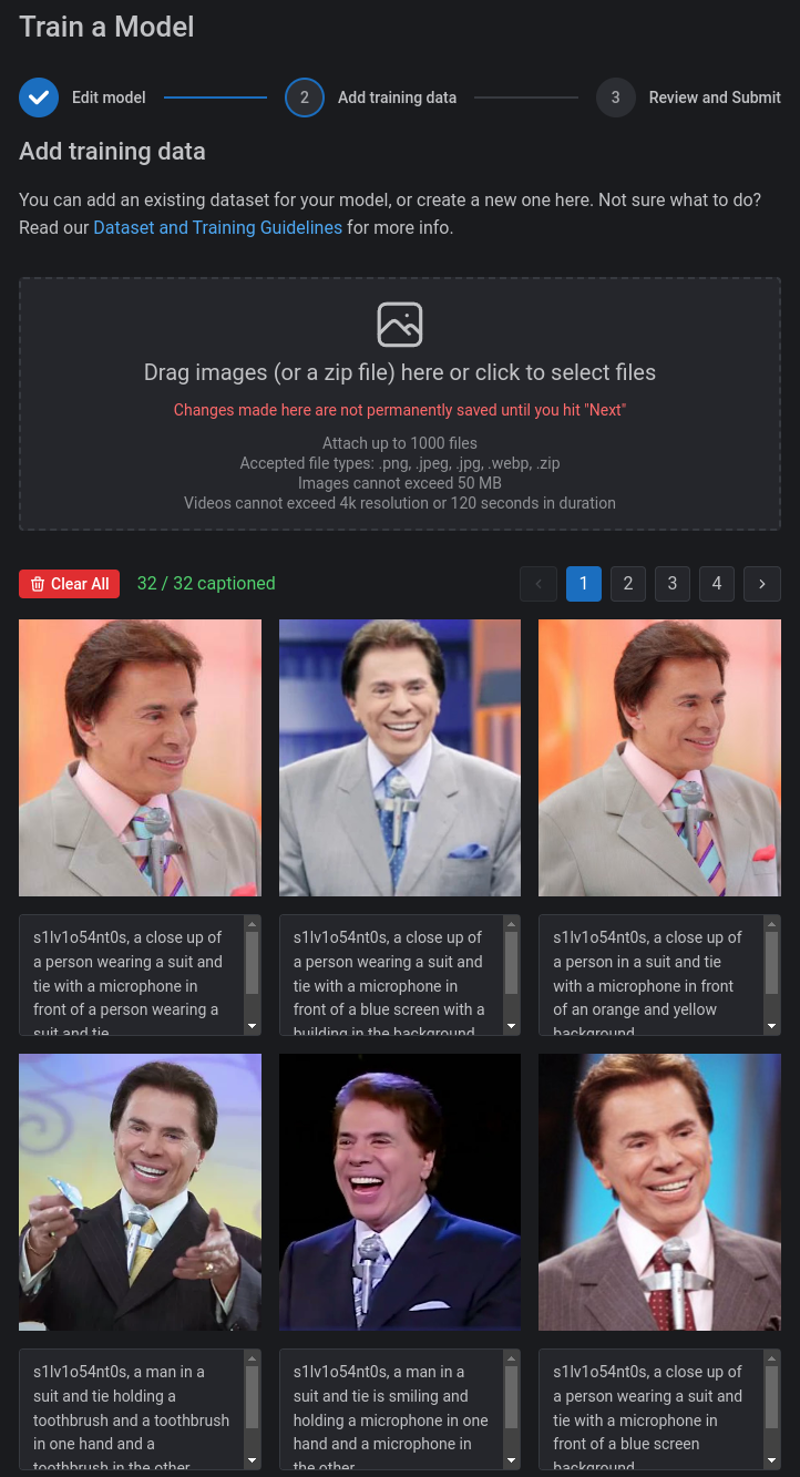
Then change the configs. They are a bit different from the offline, but not too much.
The Repeats I use the same formula: 400/number of images. THIS IS FOR SDXL:
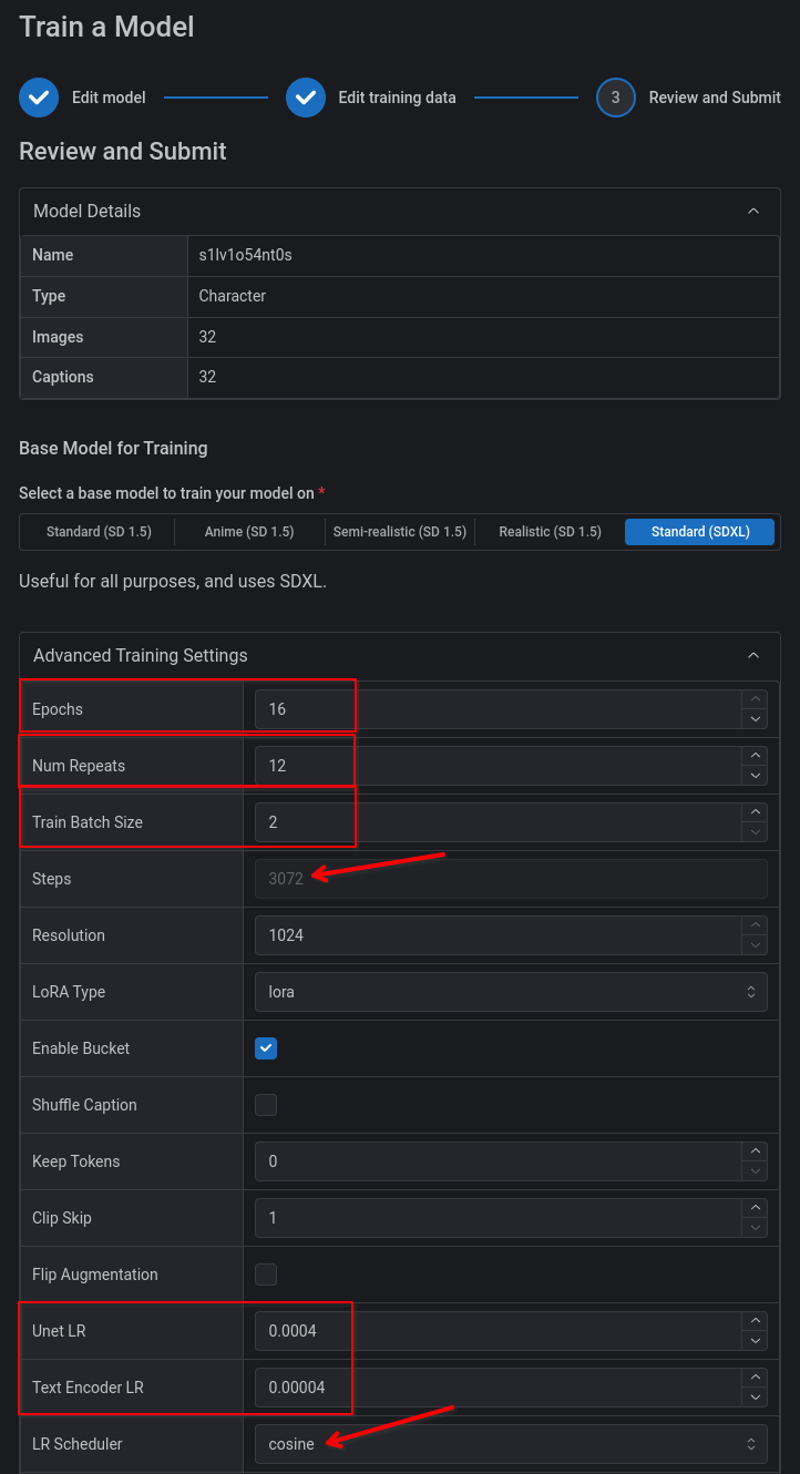
{ "unetLR": 0.0004,
 "clipSkip": 1,
 "loraType": "lora",
 "keepTokens": 0,
 "networkDim": 32,
 "numRepeats": 12,
 "resolution": 1024,
 "lrScheduler": "cosine",
 "minSnrGamma": 5,
 "targetSteps": 3072, --> This changes dynamically depending on other values
 "enableBucket": true,
 "networkAlpha": 16,
 "optimizerArgs": "weight_decay=0.1",
 "optimizerType": "AdamW8Bit",
 "textEncoderLR": 0.00004,
 "maxTrainEpochs": 16,
 "shuffleCaption": false,
 "trainBatchSize": 2,
 "flipAugmentation": false,
 "lrSchedulerNumCycles": 3 }
You may have better settings, but these have worked well for me.
The training costs 500 Buzz (The FLux training costs 2000 Buzz)
You can view the status in the Model > training page:

You receive an email when it finishes.
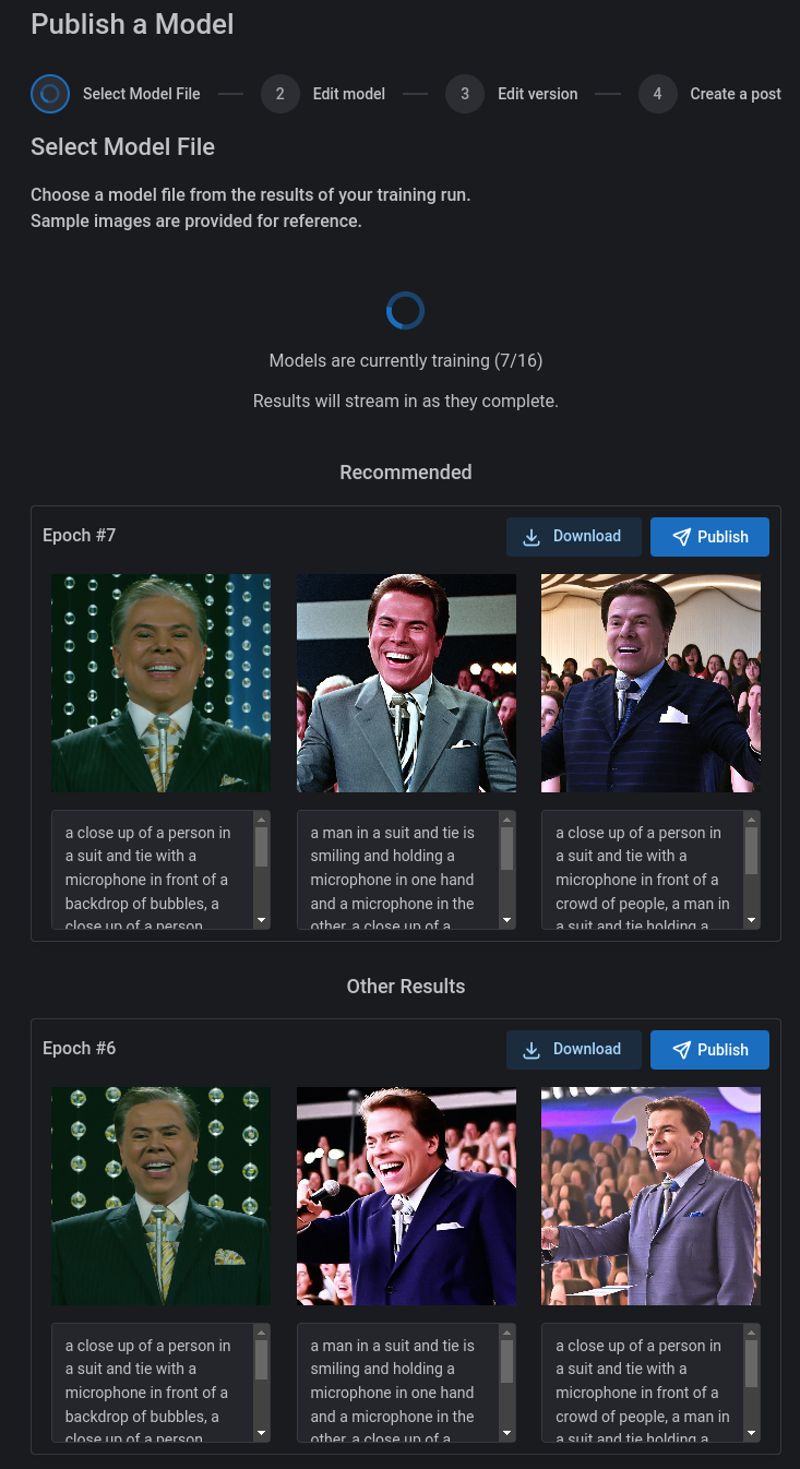
The sample images aren't good as when offline, but helps to have an idea.
If the model is overtrained, the solution is simple: Just test previous epochs one by one until you find a good one.
The bad thing is that if the model is under trained, then you can't resume in CivitAI. I usually download and continue the training doing more 2 or 3 epochs. Some require even more. Depends on the person, dataset, etc, etc, etc. But at some point we get the result.
You can publish directly from the training results page and even share the dataset. I don't do that. I download, test, and then publish it after the validation.
Script and automation
Kohya has an option to just print the training command. I used it to get the command, then I can load the Kohya venv manually and run the command directly.
Then I created this Linux shell script that does everythinng for me:
Once I have all images, it renames, convert to png and creates the folder structure
Caption them all
Run the training
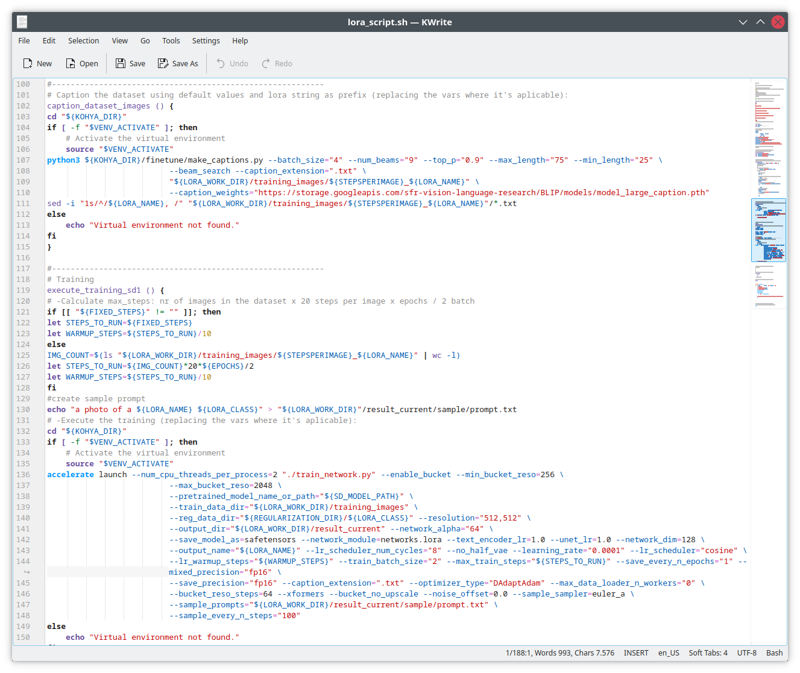
As it's too specific to my build, filesystems and still requires some work, I won't share it for now. But I'll someday.

