Update
2024/06/17: I've added a workaround over the CR Text List returns an error below.
Motivations
I'm bad with hairstyles. I don't even know my hairstyle (on my actual head) is called!! I can't tell my barber what hairstyle I want. So when it comes to girl hairstyles, it becomes much more difficult for me.
So I need some kind of reference. I need a table of hairstyles with pictures so I know what hairstyle I want to use for a particular image.
Overall concept
Basically I need a way to create multiple images with pretty much the same settings except one prompt token, the hairstyle!
Then, the images will be put with a label saying whatever the hairstyle is called.
After that, the images will be stiched together to create one large image containing everything.
Requirements
First of all, you need a ComfyUI web ui for this guide (it's said in the title so...). For A1111 user you might want to experiment yourself.
Then, below custom nodes are required.
Personally I used a couple more of custom nodes for convienient purpose. You should be able to follow the guide without them, but I highly recommend the following.
The other nodes in the screenshot are more convienient, some of the built-in one should work just fine.
Now let's get started.
Prompts
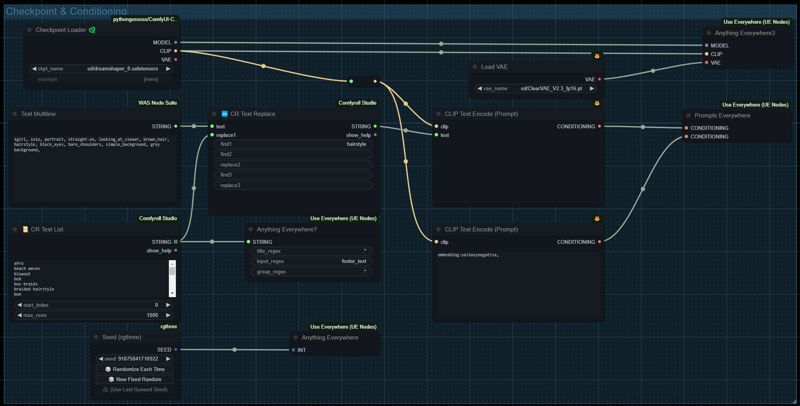
So now we wants to create a way to create the prompts. EasyNegative works well enough for the negative prompt.
As for the positive prompts, I have one Text Multiline node from WAS node suite for anything static (the primitive node will work just fine), and the CR Text List for the variable keyword/token.
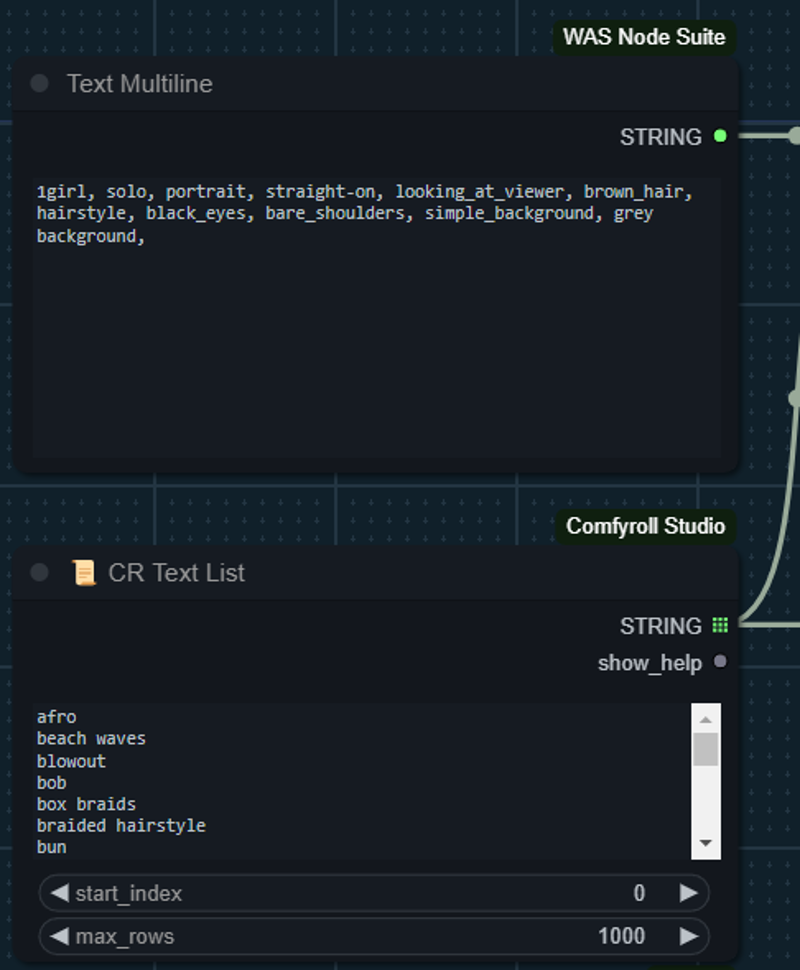
Here's the static prompts:
1girl, solo, portrait, straight-on, looking_at_viewer, brown_hair, hairstyle, black_eyes, bare_shoulders, simple_background, grey background,And this is the list of the hairstyle I use, copied from 200+ Wildcards (NSFW and SFW)
afro
beach waves
blowout
bob
box braids
braided hairstyle
bun
buzz cut
choppy bob
cornrows
crimped hair
curly hair
dreadlocks
drill hair
dutch braid
fauxhawk
fishtail braid
french twist
fringe
frohawk
graduated bob
hair flaps
half-up half-down hairstyle
layered hair
lob
long hair
medium hair
messy hair
mohawk
perm
pixie bob
pixie cut
pixie cut with bangs
pointy hair
ponytail
prom hairstyle
quiff
razor cut
ringlets
shag
shaggy hair
short hair
sleek hair
spiked hair
spiky hair
straight hair
textured hair
twin drills
twist-out
updo
updo hairstyle
waterfall braid
wavy hair
wedge cut
wet-look hairstyle
CR Text List plays the major role here. Basically it returns a line when it's called, and it returns the lines starting from the start_index for the max_rows (or the exact number of the line the node has, whichever is smaller). If you hook up the node to the CLIPText Encode node and push Queue Prompt, it will generate max_rows images.
But we want to combines the two text sources. Notice that in the Text Multiline has a word hairstyle. I'm going to replace it with what ever the CR Text List gives. I'm using CR Text Replace node for this purpose.
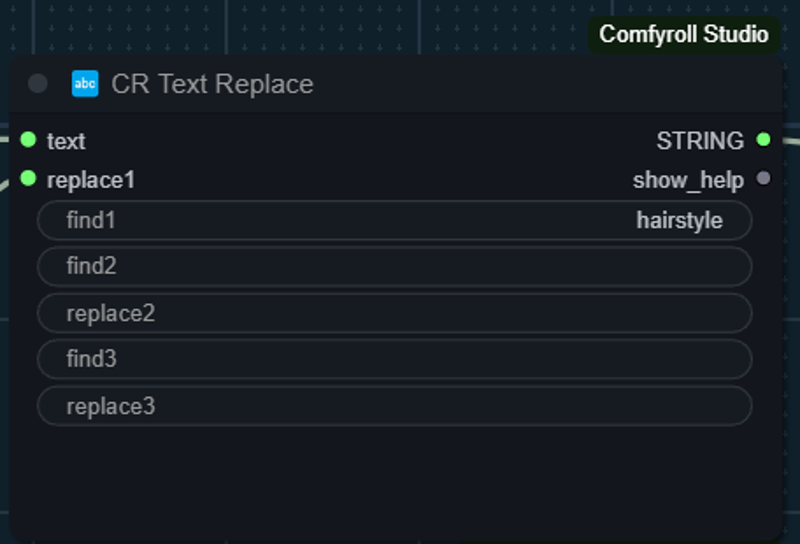
For those of you who are still new to ComfyUI, you might notice that at first the field replace1 is not a pin like in the screenshot, but rather an input field. Most of the input fields in ComfyUI's nodes can be converted to pins by right click the node and choose Convert XXXX to input. In this case it's Convert replace1 to input.
Oh and I have my CR Text List hooked up to Use Anywhere? node. This will be used later
Now we have the text, but we have to encode it somehow. We use the old friend CLIPText Encode (Prompt) here. Just convert the text to input, and drag a link into it.
Now we have the conditions. Let's make a image out of it.
Creating an individual image

At the begining, we just use KSampler node to create latents based on the condition we give it, then decode it using VAE Decode node to get an image out of it. Simple as that. In the screenshot here you might notice some of the missing lines, that's the Use Everywhere in the play. You can just create links instead if you don't have that custom node installed.
After you have the image generated, we are going to put a label on it. I'm using CR Page Layout node to attach a text at the bottom of the image.
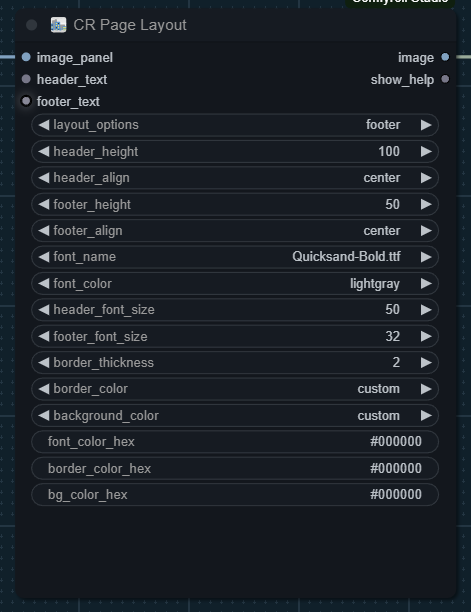
CR Page Layout can create header text, footer text, or both. Try adjusting the value until satisfy the result. Again the header_text/footer_text here is convertted from the input field (widget).
You might notice that again I don't have a line connected to the footer text. This is again USE Everywhere node. If you don't have that install, try create a link from the CR Text List node.
As an alternative, you can also try the CR Text Overlay node as well.
Now we have all of the images with label. It's time to combine them.
Combine Images
For creating a grid of image, we will be using CR Image Grid Panel node. However if you just link the CR Page Layout above to the CR Image Grid Panel directly, you'd ended up having a bunch of individual images.
We need to convert the image list to image batch before. We will be using Impact Pack's Image List to Image Batch node for this.
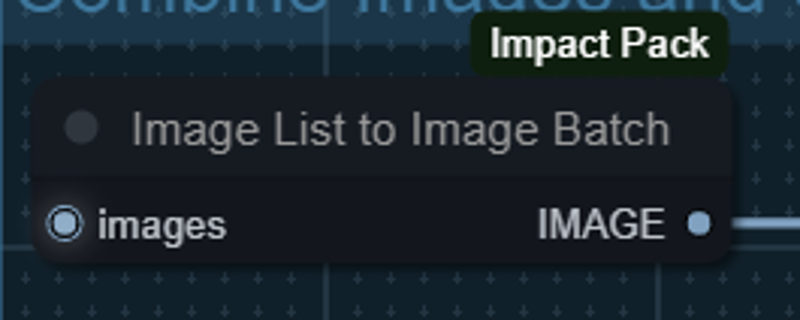
Then we are ready to combine!
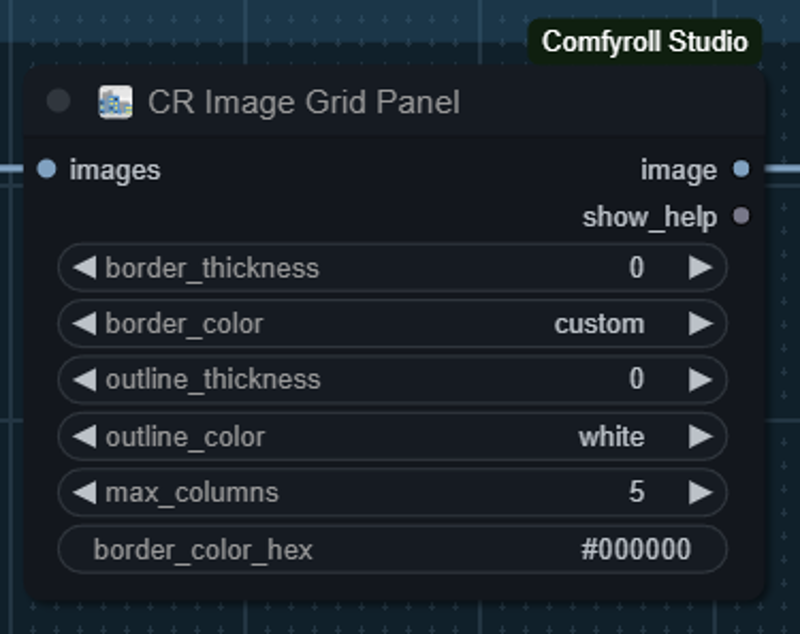
Try playing with the settings. Be warned that this affect the overall size/dimension of output image. You might want to think about how wide the output image should be. I usually go with 5 columns as the individual image width I use is 512, and 512*5 gives somewhere around 2500. That's my monitor's resolution on the width side.
And then finally, just save it to file or preview. Give it a whirl.
Closing
This tutorial use hairstyles as an example. You can actually apply the same concepts to things like, clothings or expression or whatever you want. It's up to you. I do have a few things already created and it's kinda interesting.
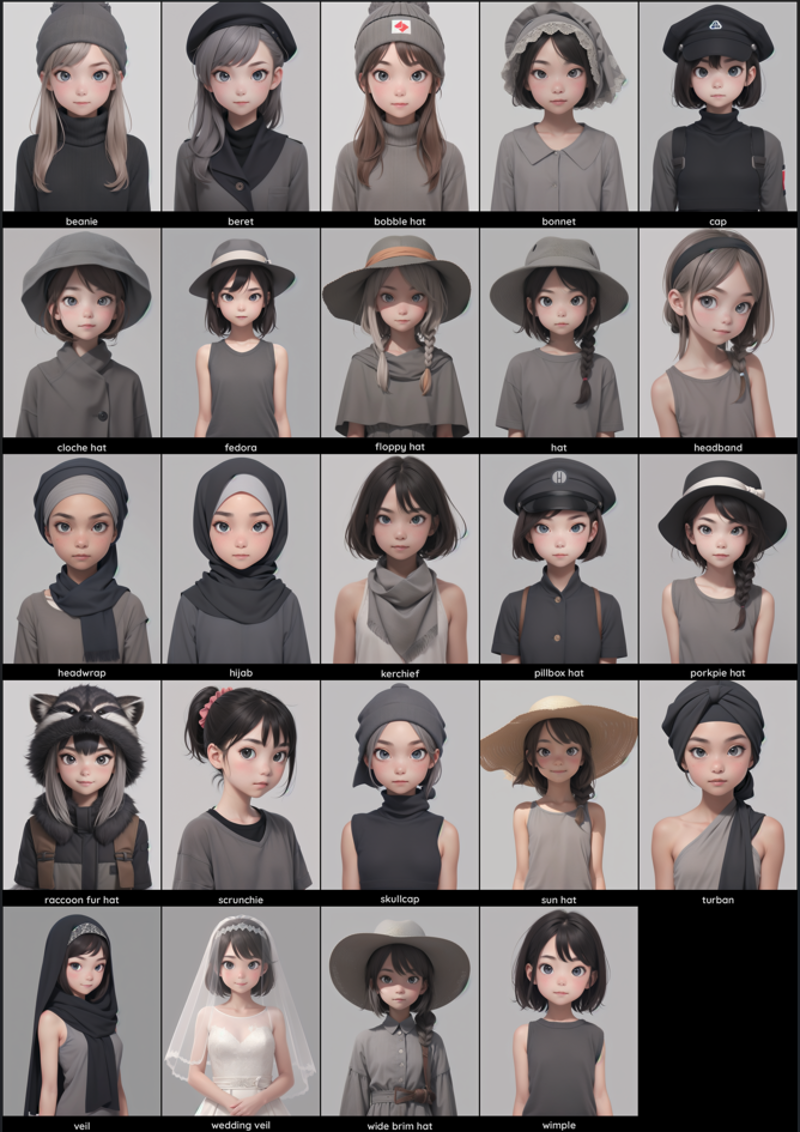
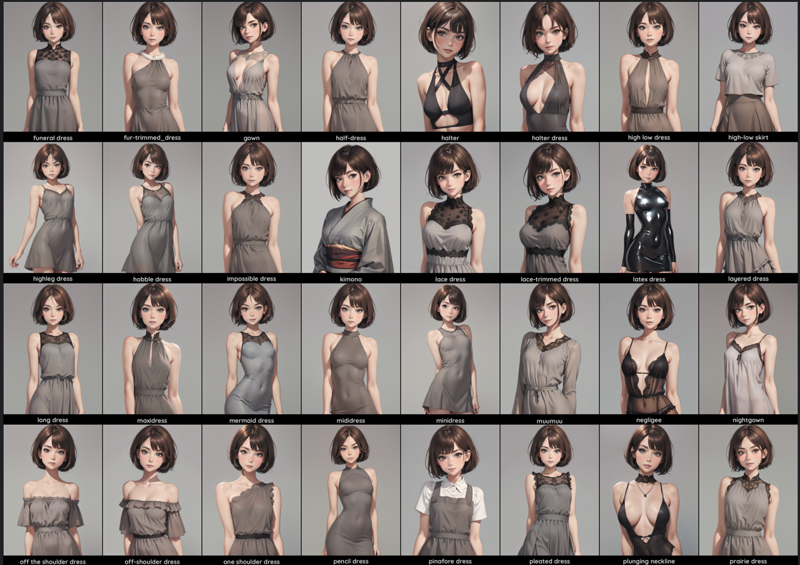
One thing you should know is, combining images like this create a huge image. This kind of image will drag your browser down if you're not careful. If you find that the output image is too large, you can hook up a scale image node right at the end. Just make sure the text size is large enough.
Also you might notice I don't mention about seed value at all. It's actually fine to leave it random. The image list is actually created with the same seed value as they are from the same queue. The images will look quite similar to each other as a result.
I would like to also encourage you to play with the settings. For starter, if you ended up create something with say fullbody images, you might found that 20 steps on euler sampler is undersampling. Things like that.
Oh and the images SD creates might not depict the actual hairstyle. This is to how SD reacts to the hairstyle token. Some of them are not very accurate. I cannot help with that. Google would be your second best friend here. Oh and some of the hairstyle will causes the overall body/facial features to change especially to African. I'm not being racist here. It's just the way it is.
I'd like to appologize for the confusion the Use Anywhere might have cause here. I'm just too lazy to create one without it. If there are too many complain I might come back to update the article. Just make sure to file you complaints!
Notice
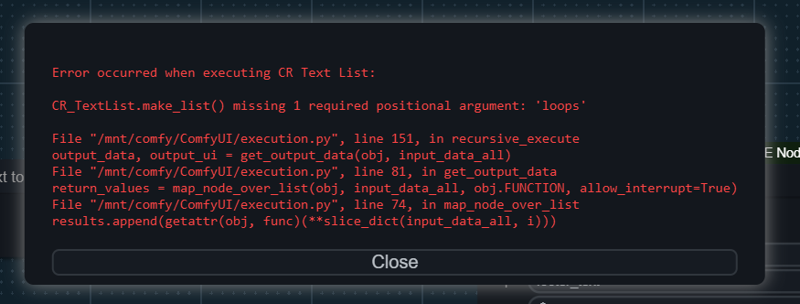
As of the time of writting (2024/02/03), CR Text List node is not working properly. The issue is logged in Github already. Please give the author some time to resolve it.
Workaround Method#1
If you are comfortable making changes to custom node code, you can try correcting the code below yourself.
Open the file nodes/nodes_list.py under ComfyUI_ComfyRoll_CustomNodes. Look for class CR_TextList under def make_list() function inside the class, remove the loops parameter. It should looks like this
class CR_TextList:

    @classmethod
    def INPUT_TYPES(s):

        return {"required": {"multiline_text": ("STRING", {"multiline": True, "default": "text"}),
                             "start_index": ("INT", {"default": 0, "min": 0, "max": 9999}),
                             "max_rows": ("INT", {"default": 1000, "min": 1, "max": 9999}),
                            }
        }

    RETURN_TYPES = ("STRING", "STRING", )
    RETURN_NAMES = ("STRING", "show_help", )
    OUTPUT_IS_LIST = (True, False)
    FUNCTION = "make_list"
    CATEGORY = icons.get("Comfyroll/List")

    def make_list(self, multiline_text, start_index, max_rows):

        show_help = "https://github.com/Suzie1/ComfyUI_Comfyroll_CustomNodes/wiki/Other-Nodes#cr-text-list"

        lines = multiline_text.split('\n')

        # Ensure start_index is within the bounds of the list
        start_index = max(0, min(start_index, len(lines) - 1))

        # Calculate the end index based on max_rows
        end_index = min(start_index + max_rows, len(lines))

        # Extract the desired portion of the list
        selected_rows = lines[start_index:end_index]

        return (selected_rows, show_help, )
After changing the code, restart ComfyUI once and try execute the prompt again.
Workaround Method #2
This is for those who does not prefer changing codes. I'll use CR Simple List instead of CR Text List. This method is less flexible, as CR Simple Text does not have things like start_index or max_rows. That means it always run through everything in the list.
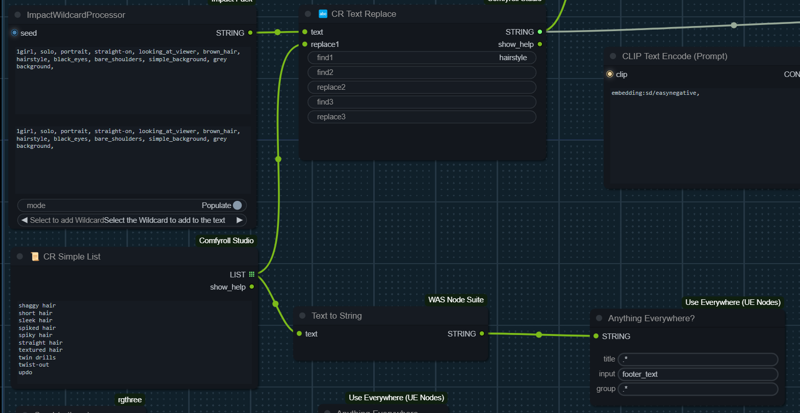
Also the output of this node is LIST not STRING LIST. This is perfectly fine in most case, but for some node that takes input with any type (eg. Anything Everywhere), it might not realize that the input we put in there is infact a text. In this case you have to change the type to text or string. I'm using WAS Node Suite's Text to String node to convert the type.