INTRO
I want to start straight off the bat stating that quantity!=quality no matter how you look at it. if you want to train your models fast, pop new one twice or more times a day and in general you hate digging into the stuff to the core to refine it to its best - then this guide is not for you.
I will be writing this guide over a long period of time, step by step since I don't want to rush it, so keep following for updates.
DATASET
There's a few steps to my dataset gathering:
quality check - better the original images are, easier it will be to pack them into a proper dataset and one of the best ways to get exactly the images you want is either generating/drawing them yourself or taking pictures of the subject yourself. currently I use LG V40 for all my photography needs. time consuming?! - yes! quality?! - yes! If you want to push the quality even further, I can't stress enough how some light investment into lighting equipment will go a long, long way.
fixing up - some non-destructive upscaling and photoshop/lightroom touch up is a must to get things looking just exactly the way you want, don't skip this step.
captioning- this is one of the crucial parts of training, many sources might tell you that you don't need captions and that might appear to be true to an extent because text encoder corruption it causes isn't as easy thing to notice, especially to an unexperienced eye - but here in this guide we want everything to be at its best so we will be captioning our dataset by the book and then some more.
You can use either blip or wd14 way of tagging, it depends on your checkpoint you're using for training and which type of captions it can understand better. to put it in it's simplest form: during captioning everything you caption "sucks" up certain portion of the image, so if you have an image of a "grey cat playing in the sunny valley" and you caption it like this: "grey cat,valley, grass, sun, sky, clouds, XYZPlaceholder" - then everything you didn't captioned, which in this case would be style since we already moved ""grey cat, valley, grass, sun, sky, clouds" - to their respective captions, all of that leftover concept/style/visual information will be sucked up into "XYZPlaceholder" - which can be any made up word of your choice, which you can later call in your prompts when using the lycoris.
Example 1: in case I am using BLIP style captioning, to extract cybernetic details as style/concept, i would caption following image like this:
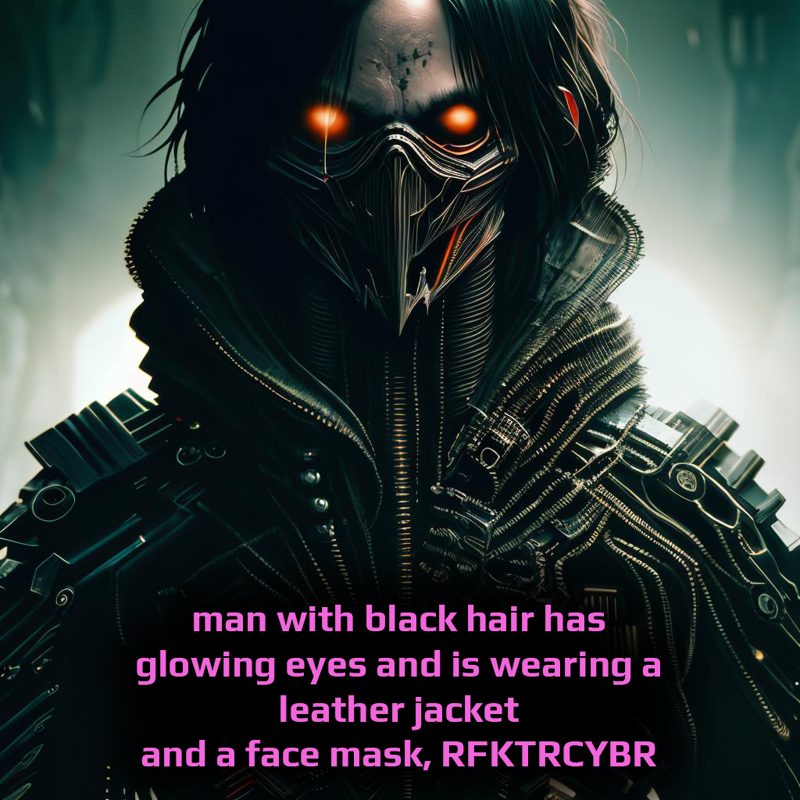
Where 'RFKTRCYBR' stands for a style keyword and will absorb everything that's left after the initial prompt. Alternatively, you can use 'TECHWEAR,' 'CYBERNETIC,' or 'BIOMECHANICAL' as style keywords - If you want to add the style data to an existing cluster of data and modify it instead of creating a brand new style keyword, it depends on your goals. For example, this technique works well when training celebrity models. You might have also noticed that I try to avoid using commas in the initial prompt. From my experience, this helps with tokenization and yields better results. Unless it's absolutely necessary to separate the initial prompt with a comma, you should try to avoid it.
Now, let's discuss resolution. Even if you're limited to training at 512x512 or 768x768, if your training software allows, you should always use the highest resolution that your hardware can handle. In my case, Kohya-SS has built-in bucketing, so I don't need to have my images exactly at 512x512/768x768 or even the same aspect ratio. Everything will be handled for me. The higher the resolution of the dataset images, the better the results will be.
DATASET SATURATION BALANCE [DSB]
Link to DSB tool: https://civitai.com/articles/7753
I brought this concept from photography, as I have been working as a professional photographer for a while. It is often referred to as "white balance" or "black balance." The perfect balance, with 50% black and 50% white, can be likened to the yin and yang symbol.
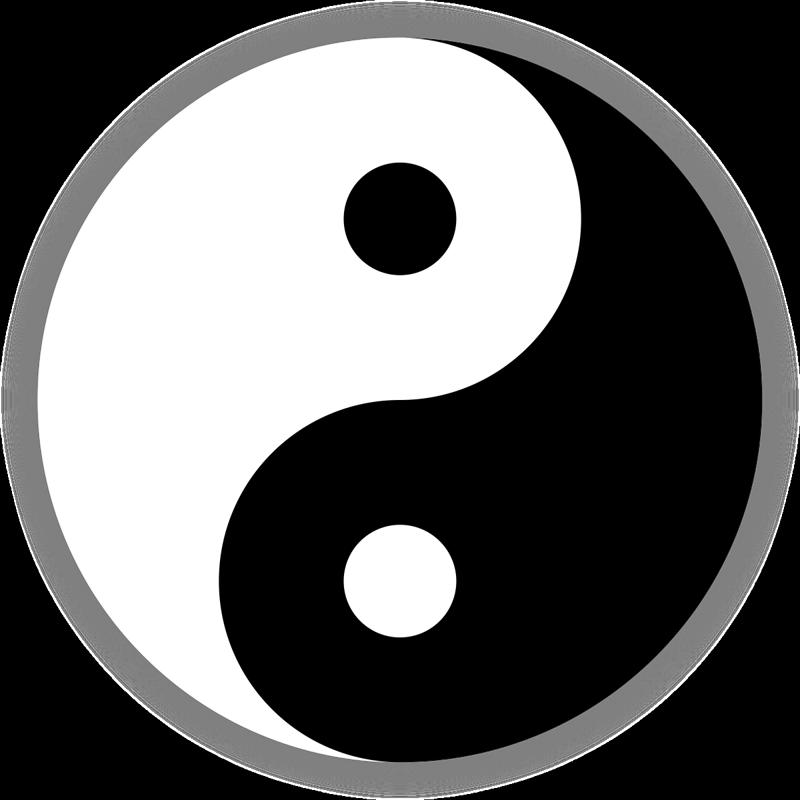
Even if images aren't as clear-cut as the yin and yang symbol, we can still discern the black and white balance to some extent. However, it requires time and a trained eye.
I will provide you with a few tips on how to read the balance in an image that lacks well-defined balance values, similar to the yin and yang symbol:
example 1:
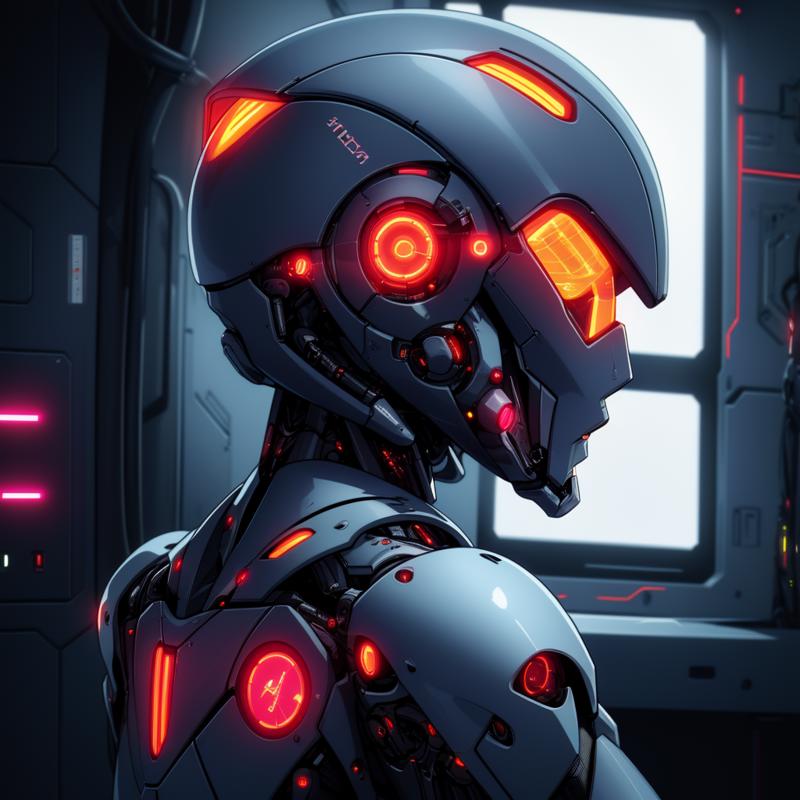
In example 1, it is quite difficult to determine the exact white-to-black ratio. Therefore, the first step would be to desaturate the image, which can be done using any photo editing software.
example 2:
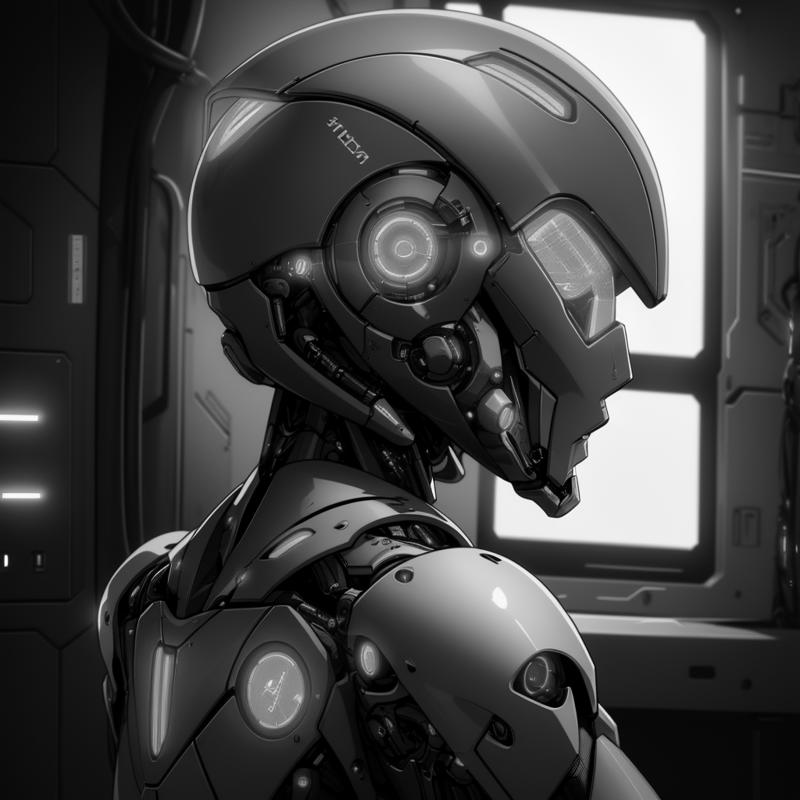
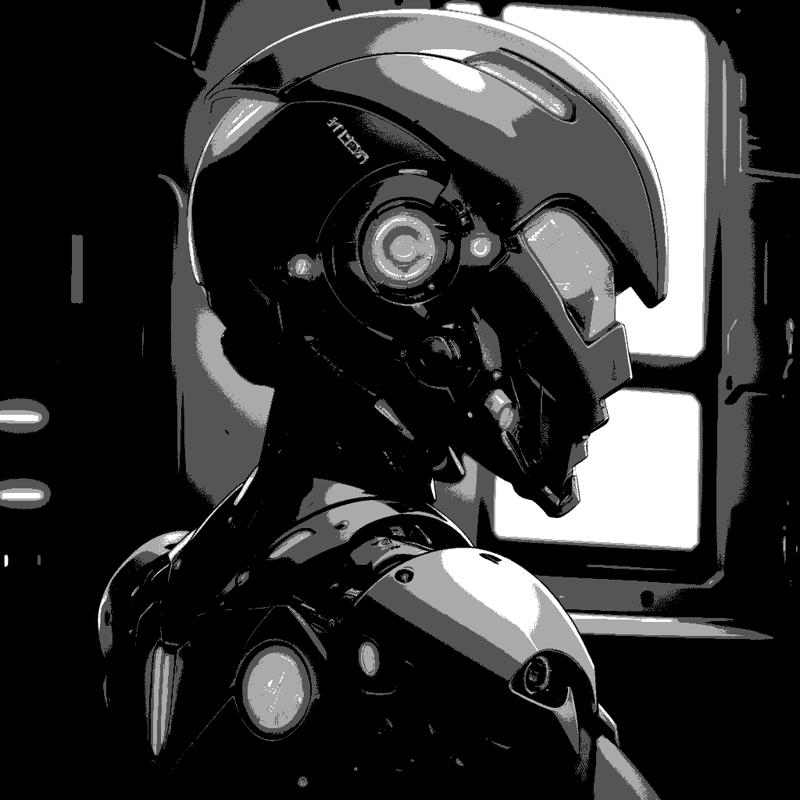
In example 2, the white-to-black contrast is much more visible. However, it can still be challenging to identify every individual white and black area using this method. Therefore, you can enhance clarity by posterizing the image to around 4 tones.
example 3:
example 4:

For black and white images, determining the center of balance is easy—it lies right in the middle, as demonstrated in example 4 (saturation scale). Now, the task is to capture every shade of white in example 3 that falls on the right-hand side of this scale. This becomes much easier when we have 4 tones, as 2 of them would be to the right and 2 to the left of the saturation scale, as shown below:
example 5:
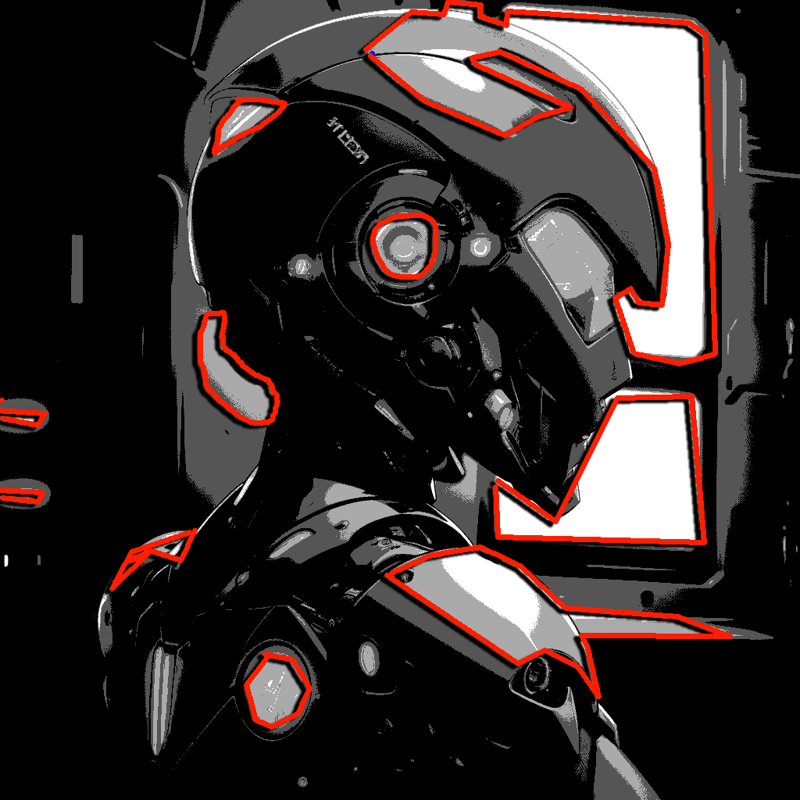
Keep in mind that you don't have to be overly precise initially. Having a rough idea of the white-to-black ratio in an image is sufficient to start. As you practice these steps and your eye adjusts, you will be able to estimate this ratio by simply looking at the image and automatically performing all the necessary steps in your mind.
In example 5, it is evident that the whites (shades on the right-hand side of the black and white scale) account for approximately 30% of the image, indicating a mediocre balance.
Now, let's quickly review the calculation of the DSB (Darkness to Saturation Balance) before delving into its specifics. Suppose you have a dataset of 5 images, and you wish to calculate their DSB. It would resemble something like this:
Image - White% / Black%
1 - 30% / 70%
2 - 5% / 95%
3 - 40% / 60%
4 - 55% / 45%
5 - 15% / 85%
The formula for calculating DSB (Darkness to Saturation Balance) is as follows:
((white) / amount of images) | (black) / amount of images
Using this formula with the given dataset, we get:
(30 + 5 + 40 + 55 + 15) / 5 = 29% white | (70 + 95 + 60 + 45 + 85) / 4 = 71% black
It's important to note that you can only calculate either the black or white percentage and then deduct that from 100%.
As a result, for this specific dataset, the DSB would be: 29%W | 71%B
So, what is DSB? It represents the collective "white balance" of a dataset.
What does it do? After theorizing and extensively testing the concept of "white balance" translation into AI, I have come to the conclusion that achieving the right balance can significantly improve your results in terms of how well training learns given dataset and its details. I trained the same dataset while manipulating its DSB towards both sides of the saturation scale, and the results were as follows:
If the DSB leans towards either side above 70%, let's call it mediocre.
If the DSB is below 55%, for example, 52%W | 48%B, it ends up being generic and often easily overtrained, but still better than being above 70%.
The DSB of around 60% ± 5% seems to yield the best results.
In the case of my example dataset, it is obvious that image 2 (5%W | 95%B) and image 5 (15%W/ 85%B) should be removed in order to fix the DSB, which would bring it from mediocre, to desirable range.
(30 + 40 + 55) / 3 = 41% white | (70 + 60 + 45) / 3= 59% black
This is just one of the many ways to clean out your dataset intentionally instead of randomly assuming which image is causing the training to fail.
GENERAL TRAINING
Now that we have our dataset ready, there are a few things to note about training. First of all, from my experience, it's generally not a good idea to have one "go-to" setting for all of your trainings because each dataset varies and requires different settings. I look at it as creating a piece of art, and each one requires a different approach.
Before we move on to our full training, what we can do is conduct a series of small test trainings, each consisting of around 500-1000 steps, to get an idea of how things vary. I usually do 10 or maybe 20 test trainings before I find the settings combination that fits the dataset. I know this might sound like a lot of time investment, but it's an extra step to push the quality at the cost of time, something that not many are willing to take. However, we're here to push the quality.
One exception to the rule would be very similar datasets where you train two characters in the same style that have similar attributes. In this case, more or less similar settings often work. But if you're like me, always striving to create something new, then this won't happen that often.
Epochs are also something I'd like to touch upon. From my experience, which is around four-digit numbers of conducted trainings at this point, (5 epochs x 100 steps) almost always gives better results than (1 epoch x 500 steps). Usually, I like to keep the step count low (around 100-200 per epoch) and the epoch count as high as my HDD allows when I'm training dreambooth models.
Step count is one thing that highly varies from dataset to dataset, so there's no set step threshold that is enough for all datasets to properly train. I've gotten terrible results and amazing results on a similar looking, similar size datasets at the same step count, Therefore, it also needs testing on a per-dataset basis.
HOW TO PICK A BASE
In terms of importance i would give this 5/10, it's important enough to give you some visibly better results but not important enough that can ruin your training in most cases, unless you picked a base with extremely corrupted or unconventional text encoder like "RPG" for example, i love it as a checkpoint but for training - nope.
Other than abovementioned, there's also logical side to it, if you're training anime character - it's only logical that model that is good at generating anime characters would be best as a base, same goes for every other subject, for example I train most of my horror/uncanny/royal vampire related stuff on RFKTR's Darkdream which is the model I trained on my artworks that is quite horror/uncanny/royal vampire centric. There's too many bases and it's impossible to list all of them here, however I'll list few that I use very often and know to give good results.
There's too many bases and it's impossible to list all of them here, however I'll list few that I use very often and know to give good results.
RFKTR's Darkdream - this is my model which I use for almost all horror/uncanny/royal vampire related stuff, uses exclusively BLIP so WD14 captions won't give as good results as BLIP.
NeverEnding Dream (NED) - it's great model from lykon, I use for character and specific subject training - you can use it whether you use BLIP or WD14.
Anything V5/Ink - Anything V3 was the model that started it all for anime style in AUTO1111, this is next version from the same author. WD14 captioning gives better results with this one.
ReV Animated - if I had to name one model that I would call dependable/predictable, it would be this one, when I'm not content with the results on other models, I go to this one.
Kotosmix - I find this one hands down the best model for training NSFW (mostly anime/hentai/semi-anime) stuff, it uses WD14 tagging but BLIP also works quite well.
TEXT ENCODER CORRUPTION [TEC]
I think we need to at least scratch the surface of TEC because many checkpoints you can find over the internet are victims of TEC. This means that part of the TEC is transferred to the model you train, when using that checkpoint as a base.
To understand what TEC exactly is, we should first understand what a text encoder itself is. In the simplest terms, a text encoder is like language to us. TEC is like when you're learning a foreign language and someone accidentally teaches you that a cat is named a dog. It can never be zero, but in the best-case scenario, it can be close to zero. If we take 1.5 vanilla, it has the closest-to-zero TEC, which would make it the best training base. However, this isn't true due to its lack of concept knowledge.
In the best-case, close-to-zero scenario, TEC looks like this:
[Example 1: From my personal checkpoint trained for experimentation tasks]

As it starts to shift away from zero, you can see how it starts to lose full knowledge of the airplane:
[Example 2: From my first-ever DarkDream Diffusion checkpoint version]

as it continues, it is extremely corrupted to the point that it barely retains knowledge of what's what outside of very small amount of words:
[Example 3: This is my Sengoku checkpoint, which is trained to create Sengoku era samurais in a very specific, flat, discolored style exclusively. So, everywhere else, TEC is extremely high]

Now that we know how TEC affects checkpoints, you might ask how it affects our models. Unfortunately, it rarely has a positive impact. TEC always transfers partially to our model, which makes selecting the right base even more crucial.
Sometimes the bases I use are not perfect close-to-zero cases, but I always ensure that they are suitable for the concept I'm training. In the future, I will also explain how to combat TEC and train models with as little TEC as possible. But for now, consider this as an introduction to TEC.
STYLE TRAINING [precision method]
This is one of the methods I use quite often, which I think is best for preserving precision. Usually, style is a very nebulous concept. When people use the word 'style,' it might refer to linework, specific colors that a particular author uses, or themes that are prominent and recurring in an artist's works. Therefore, it's essential to define all of these aspects and closely analyze them before we decide to train the style.
There's one more important thing that is often ignored when people train styles, and that is the concept of time. You see, no artist has a single 'style,' so to speak. They have a myriad of styles that change, merge, and progress over time. For example, let's take a look at one of my favorite artist's works, H.R. Giger:
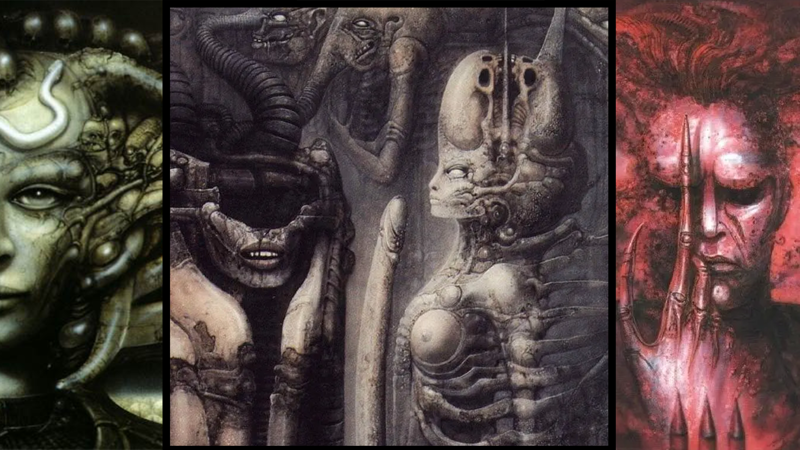
The themes, color palettes, as well as linework and detailwork in all three of these examples are different. The third image doesn't even fit into the 'biomechanical' genre that H.R. Giger is known for. If I were to take all these images and throw them together in a dataset, the result I would get would be an amalgamation of all three, which bears some resemblance to each of them but isn't really close to any one of them and often fails to capture the spirit of the original author. I refer to this problem as 'style shift.'
In the method I'm about to explain, we aim to minimize style shift. To start, we will need one, two, or maybe three (but often one is enough) very high-resolution images - the higher, the better. We will then cut this image into smaller sectors and create a dataset from it.
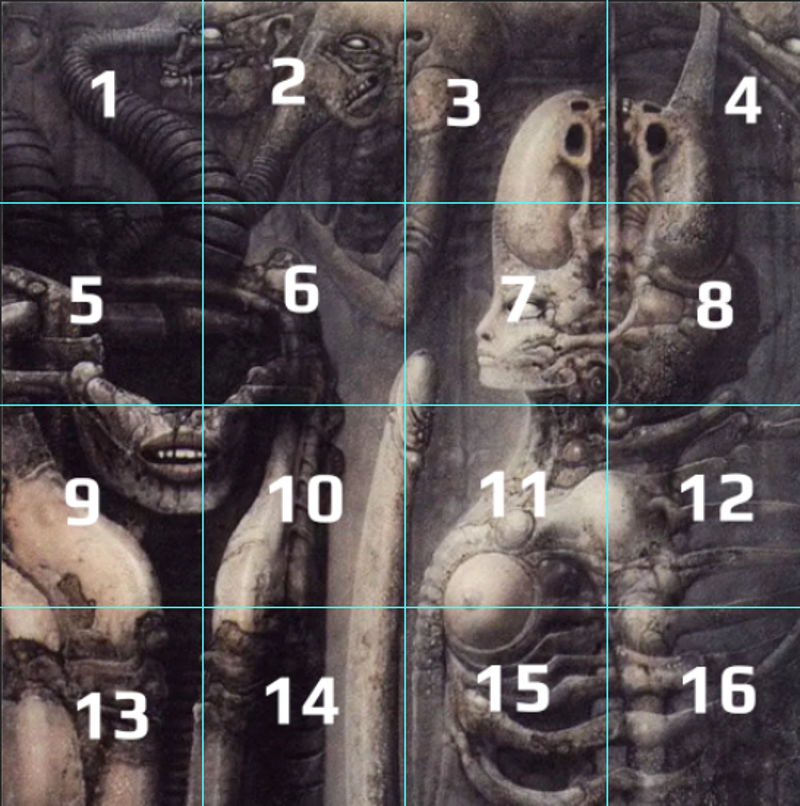
...and just like that, we have 16 images for our dataset that match in color selection, linework, and aesthetic.
One important thing to note when using this method is that it doesn't always work right away. In such cases, you need to go in and start removing sectors that don't contain much information. In this case, I would remove images 11 and 12 due to the strong blur and exposure in those parts, which could result in hazy generations. Keep removing images until you achieve satisfying results.
Another important aspect is intent. If you haven't analyzed the style and precisely what you're trying to capture, you might struggle with this method more than if you were to combine various works from different authors. This method requires precise training to capture something specific, and it only works if you know what that specific thing is.
KOHYA SETTINGS 101
Unet learning rate
The Unet functions as a rough counterpart to visual memory, capturing and retaining information about the relationships between learned elements and their positions within a structure.
Care must be taken with the Unet's configuration to avoid undesirable outcomes. If the generated results appear incorrect, it is likely due to either overcooking or undercooking.
on the surface you can observe whether it's overcooked or undercooked - if it produces images with high noise or extremely high contrast, then it's most likely overcooked, however if model produces incompetent results that lack the details or details are mashed together like faces being smudged and so on. - then it's most likely undercooked.
good values to start with when it comes to loras is: 1e-4 (0.0001) to 5e-4 (0.0005)
when it comes to base models it's around: 1e-6 (0.000001) to 3e-6 (0.000003)
of course this is not set in stone, these are just values I start training from then tune them based on specific dataset.
Text encoder learning rate
The text encoder plays a crucial role in how the AI comprehends text prompts during the generation process and establishes associations with noise chunks in latent space during training. high values here are destructive in terms of TEC (Text Encoder Corruption) increase, so as a rule of thumb i always set it to 1/4th- 1/6th of Unet learning rate value.
Based on the data I collected from the conducted trainings, it was observed that increasing the values of the text encoder leads to the training process capturing more details from the dataset. However, it also results in an increase in TEC (Text Encoder Corruption). Therefore, finding the optimal balance or "sweet spot" for the text encoder values must be determined based on the characteristics of the dataset.
I pay great attention to the intricate details of a dataset. For instance, if the dataset contains highly detailed patterns, I tend to utilize a higher learning rate compared to when training a dataset consisting of smooth, stylized 3D renders with minimal intricate details.
Batch size, epochs, steps, repeats
The batch size refers to the number of samples that are processed together before the model is updated. In other words, instead of updating the model after each individual sample, the model is updated after a group of samples, known as a batch, is processed.
On the other hand, the number of epochs signifies how many complete passes the learning algorithm makes through the entire training dataset. During each epoch, the algorithm goes through all the training samples, updating the model based on the accumulated information from the batches.
repeats is how many times, each individual image gets passed repeatedly as a sample. you enter the value of repeats at the start of the folder name where your dataset is located, for example:
"15_catdiffusion" - means it will run 15 repeats per image in dataset.
Steps are simply measure of whole training process from start to finish, time each step takes might vary depending on batch size and GPU load, so even if batch reduces amount of steps, it's not as cut and dry in terms of reducing actual time required for training.
formula for calculating steps is the following - ((image count * repeats) / batch size) * epoch = required steps till finish.
you can use this formula in a reverse way - for example if you need to train 10 image for 3500 steps, you need to do the following:
divide training steps over the amount of images: 3500/10=350
divide the result over the amount of epochs you want it to train, let's say 10 epochs as an example: 350/9=38.88888888888889, I advice to always round up so it would be 39.
this means you will need 39 repeats to end up at roughly 3500 steps. now let's see if the math checks out:
((10*35)/1)*9=3,150
if we increase batch size to 4 ( my personal recommendation is to never use batch size greater than 4 for a myriad of reasons.) then the amount of realtime steps we will need would be:
((10*35)/4)*9=787.5 (kohya itself will round this up automatically)
However one thing you must keep in mind is this - from my observations, even if batch size of 4 cuts amount of steps needed x4 times short at the expense of GPU load, results won't be absolutely identical compared to batch size 1, I'm not saying difference will be like sky and earth but it will be noticeable, so if you're aiming towards quality, give your trainings some time and love, only use high batch size when you are testing something, for final training batch size of 1 or 2 is recommended.
as for epochs, it's quite the opposite, more epochs usually bears better results, so don't expect 3150x1 epoch to be the same quality as 315x10, I always use minimum of 10 epochs in each of my trainings, but there's been specific cases where I needed to use around 100 epochs and more.
long story short - be careful with high batch counts and use high epoch counts freely.
Precision [FP16/BF16]
To understand what precision does exactly in kohya training, let's get some idea why they were created in the first place. The IEEE Standard for Floating-Point Arithmetic (IEEE 754) is a technical standard for floating-point arithmetic established in 1985 by the Institute of Electrical and Electronics Engineers (IEEE). The standard addressed many problems found in the diverse floating-point implementations that made them difficult to use reliably and portably. Many hardware floating-point units use the IEEE 754 standard.
However, as deep learning progressed, it became apparent that newer algorithms don't always need IEEE 754 double or even single precision. Lower precision on the other hand, allows more effective use of memory, thus significantly reducing training speeds. that's where we end up having FP16 or half precision/floating point precision as it is often called.
BF16 on the other hand tries to mimic IEEE 754 single point precision by having same exponent of 8 as FP32 but retaining 16 bit count of FP16. As a result it ends up having dynamic range almost similar to IEEE 754 single point precision, dynamic ranges are as follows:
FP32: 83.38
BF16: 78.57
FP16: 12.04
Due to the fact that BF16 being used by many AI projects google introduced, it quickly became golden standard of deep learning.
Now we got this out of the way, what they do in actual, practical use?!
first of all, contrary to popular belief, based on the data I possess BF16 isn't always better than FP16, also another popular belief is that BF16 requires more resources, which is also false, it requires more recent GPU architecture, not more resources since the amount of bits it operates within is the same.
case where FP16 gives significantly better results than BF16 is but not limited to when you train specific types of subjects: outfits, hairstyles, color themes, when you want to copy artists style without copying the subject artist is drawing.
reason for this is that FP16 due to its extremely limited dynamic range will pick up much less extra information you might not want to be trained in the model, than BF16, however in almost all of the cases BF16 will be much more precise in whatever it picks up than FP16 and it will often take much less steps to get to the same point as FP16, so using either one of them must be decided per case basis and it's give or take situation where you must analyze what you need and what you don't in a specific scenario.
==TO BE CONTINUED==
P.S. I am creating this guide on my free time to the best of my abilities, so there's no set end date to when the full thing will be out. If you're in a rush and want to be ahead of the curve, I charge 200$ per 1 hour of Q&A, so you can contact me either here in the comment sections or on discord about it.


