I am trying to replicate This face swap tool but I can't seem to get it quite the same using comfyUI
I tried the following guide from https://www.comflowy.com/blog/face-swap and I think its likely using IPAdapter.
Here's the guide:
How to swap faces using ComfyUI?
In the last issue, we introduced how to use ComfyUI to generate an App Logo, and in this issue we are going to explain how to use ComfyUI for face swapping.
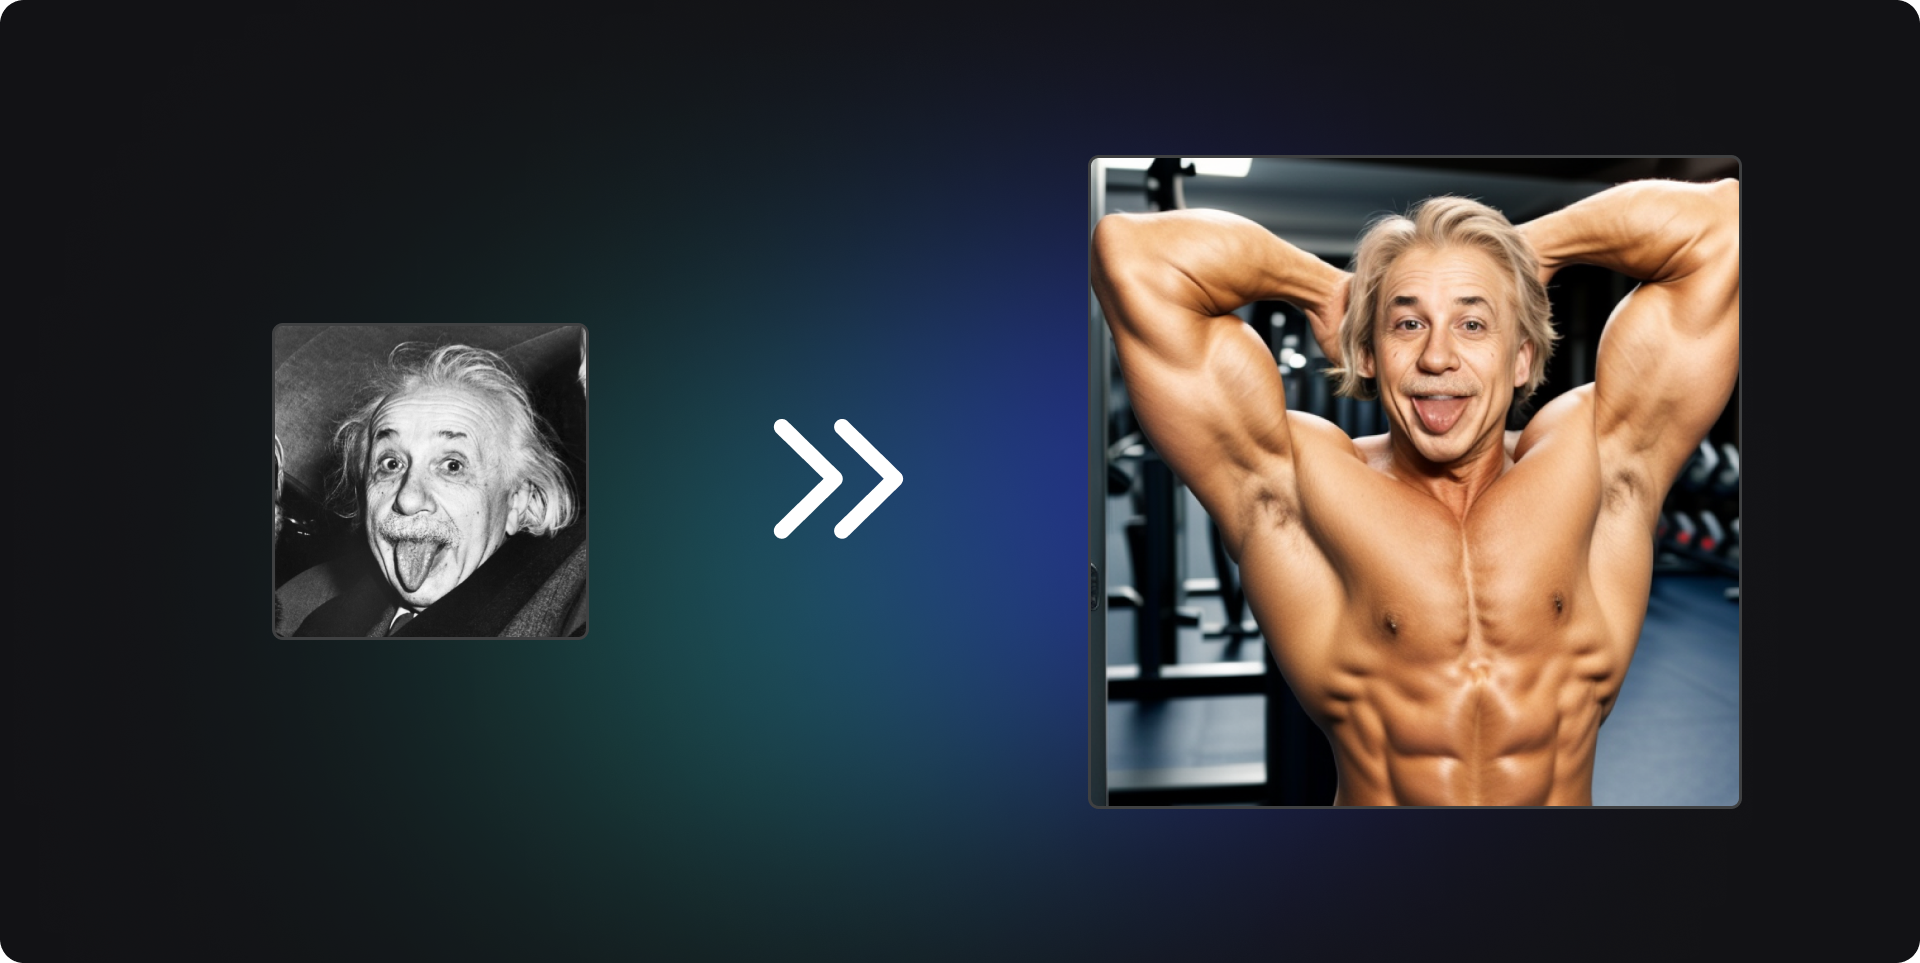
1. ReActor
The first method is to use the ReActor plugin, and the results achieved with this method would look something like this:
Setting up the Workflow is straightforward. First, you need to install the ReActor plugin(opens in a new tab). If you're not sure how to install plugins, you can refer to another tutorial I've written: Installing Plugins.
Adding a ReActor Node
Start by loading our default workflow, then double-click in a blank area and enter ReActor. Then add the ReActor Fast Face Swap node. Next, link the input image from this node to the image from the VAE Decode.
Adding other Loader Nodes
Add a load image node, select a picture you want to swap faces with, and connect it to the input face of the ReActor node. Finally, add a save image node and connect it to the image of the ReActor node. The final workflow is as follows:
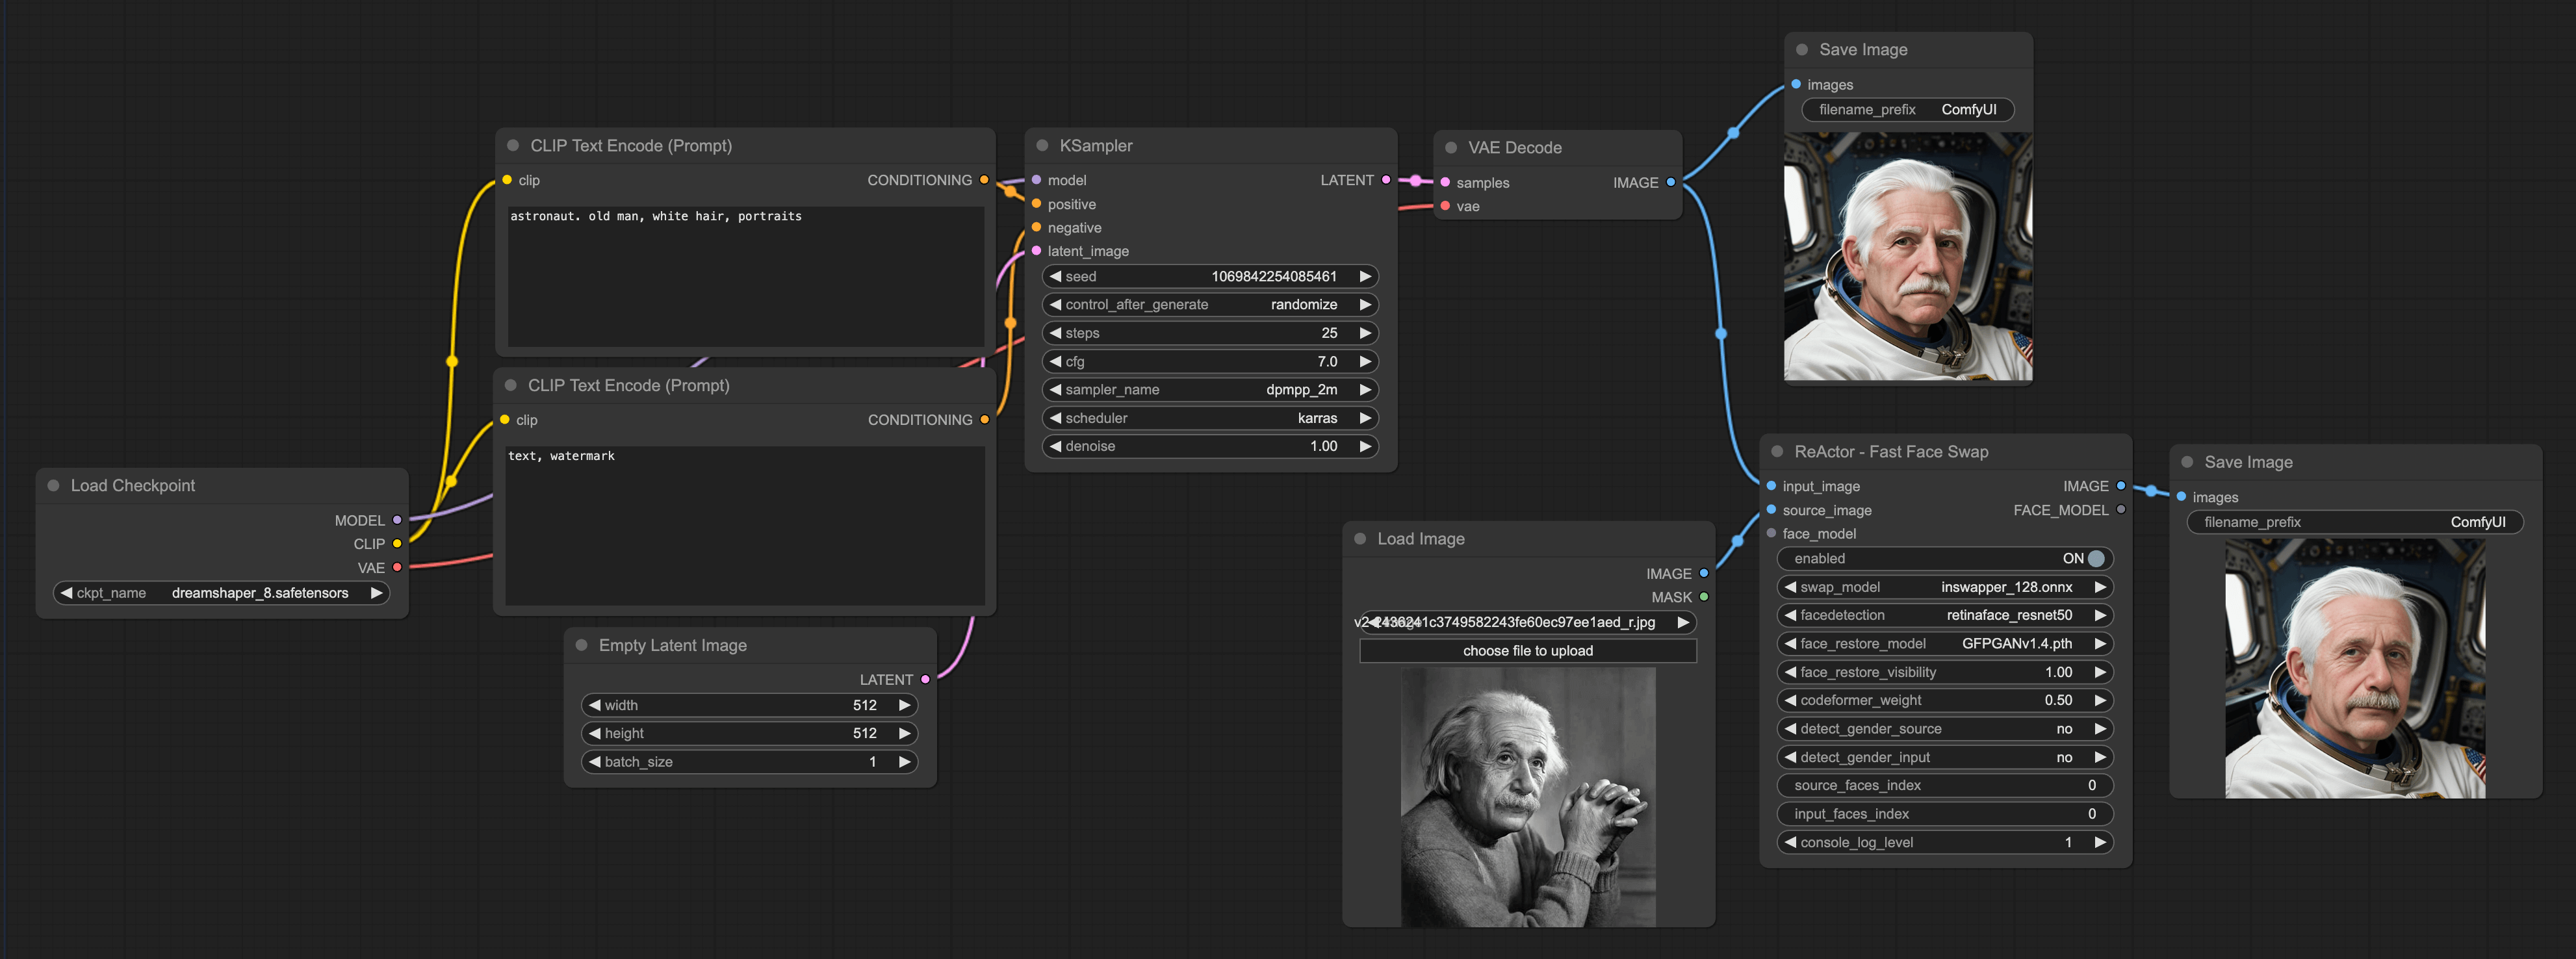
Finally, there are a few parameters that need attention on the ReActor Fast Face Swap:
Swap model: You can't replace it, just use the default one.
Face detection: Method of detecting faces, you can choose according to your actual situation, but I usually choose the first one.
Face restore model: There are two models to choose from:
After downloading the model, you need to place it in the ComfyUI\models\facerestore_models folder. I generally choose the second one.
The rest of the parameters are quite self-explanatory, and you can adjust them according to your needs.
2. IPAdapter
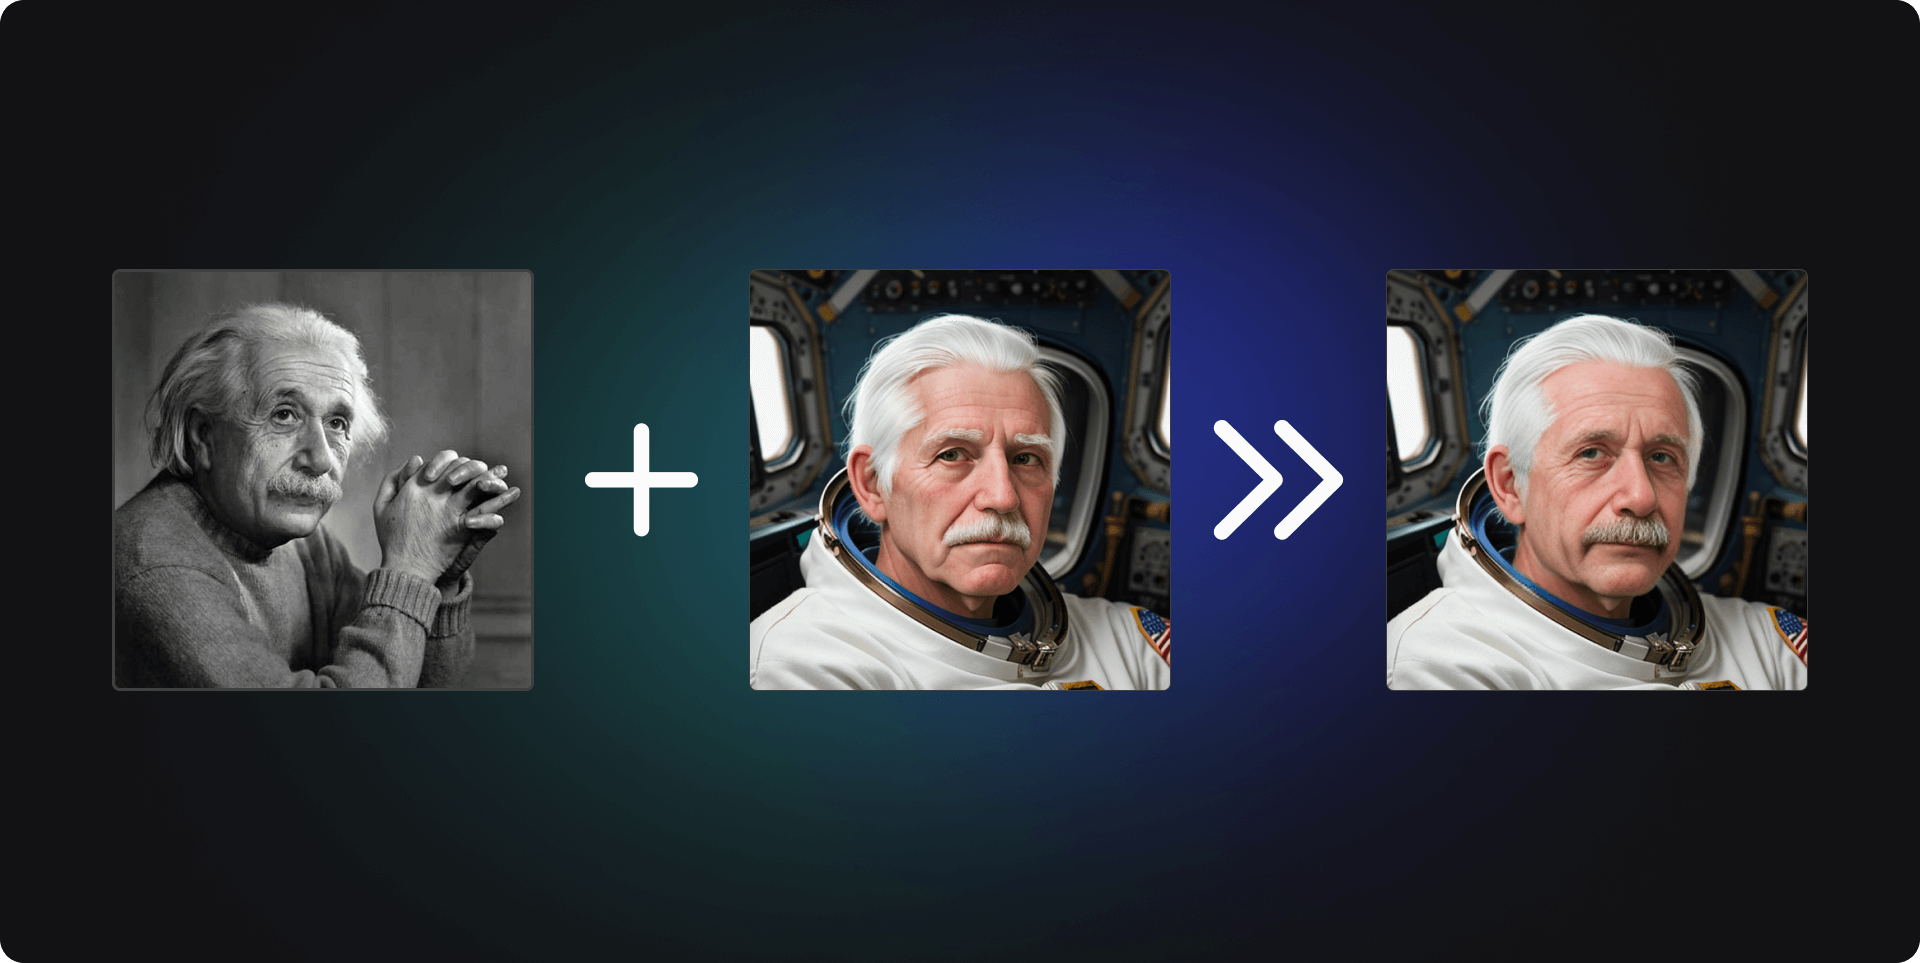
The second method achieves a result similar to Face Swap, but it can also let AI generate a picture consistent with a certain face. The results would look something like this:
However, compared to the first method, this one takes an original image as input and lets the AI generate a picture consistent with a certain face. There are two advantages to this:
It's not just applicable to humans; you can also use animal faces.
The ReActor method focuses more on face swapping. Its handlings of hair are slightly weaker. Take the above picture of Einstein for example, you will find that the picture generated by the IPAdapter is more like the original hair.
To achieve this effect, I recommend using the ComfyUI IPAdapter Plus(opens in a new tab) plugin.
Note that after installing the plugin, you can't use it right away:
You need to create a folder named
ipadapterin theComfyUI/models/directory, then download the corresponding IPAdapter model and place it in this folder.In addition to the IPAdapter model, you need to download image encoders and put them in the
ComfyUI/models/clip_vision/directory.
Only after completing these two steps can you use this plugin. Also, based on my testing, I would recommend the following combinations (for more combinations, you can check out the ReadMe document of ComfyUI IPAdapter Plus(opens in a new tab)):
SD VersionCheckpointIPAdapter ModelImage encoderSD 1.5realisticVisionV51_v51VAE(opens in a new tab)ip-adapter-full-face_sd15(opens in a new tab)ViT-H(opens in a new tab)SD XLJuggernaut XL(opens in a new tab)ip-adapter-plus-face_sdxl_vit-h(opens in a new tab)ViT-H(opens in a new tab)
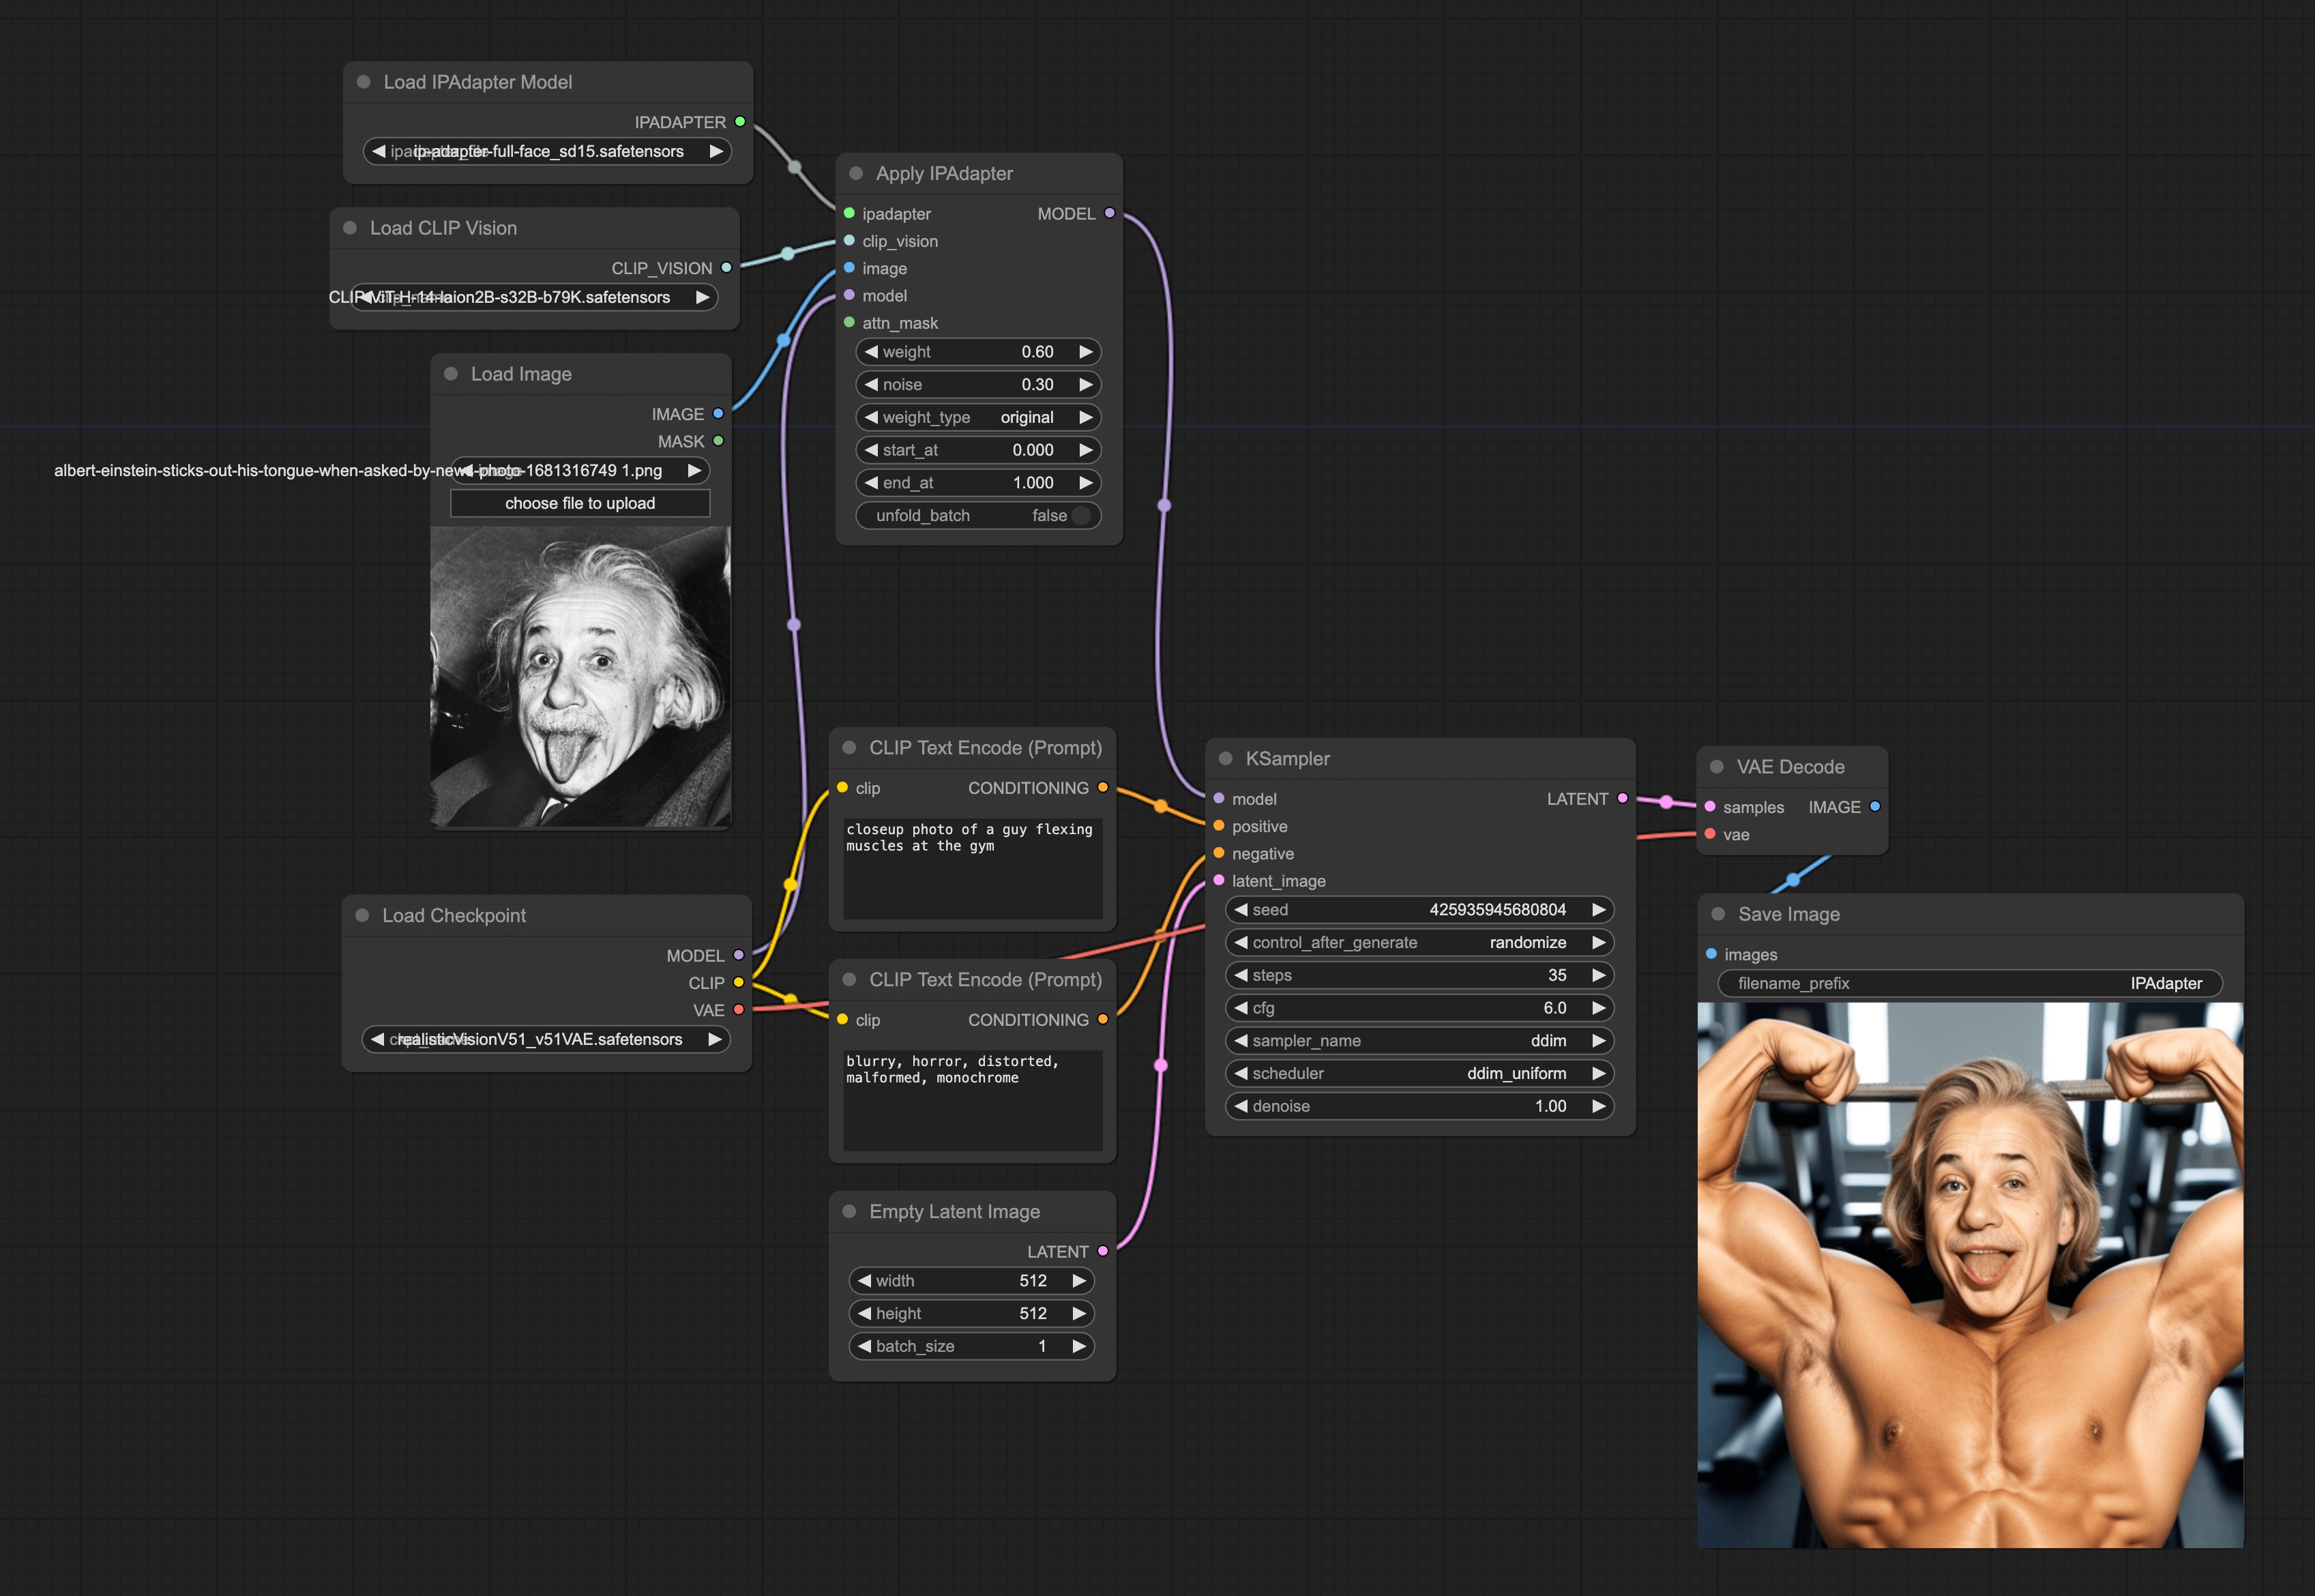
Once you've downloaded the corresponding models, you can build our workflow.
Adding the Apply IPAdapter Node
Start by loading our default workflow, then double-click in a blank area and enter Apply IPAdapter, and then add it to the workflow. Then you can adjust the weight to less than 0.8. Then the noise can be adjusted based on the actual output, it can be minimized to 0.01.
Adding other Loader Nodes
Then add in order:
Load Image node: Select a picture you want the AI to generate. Here, it should be noted that since the picture will be encoded by the CLIP model, the encoder will resize the image to 224x224 and crop it to the center. So, the face in the picture you import should be in the middle, and the picture is better in square shape. Otherwise, the final generated effect will not be good.
Load CLIP Version node: Select the ViT-H model.
Load IPAdapter Model node: Choose the corresponding IPAdapter model based on the model loaded in your Checkpoint. Finally, connect these three nodes to the Apply IPAdapter node sequentially.
Setting the KSampler Node
Finally, set the KSampler node:
Steps usually need more than 10 steps above the normal, for example, if you normally take 25, it needs 35 here.
CFG is recommended to be set smaller. The final workflow is as follows:
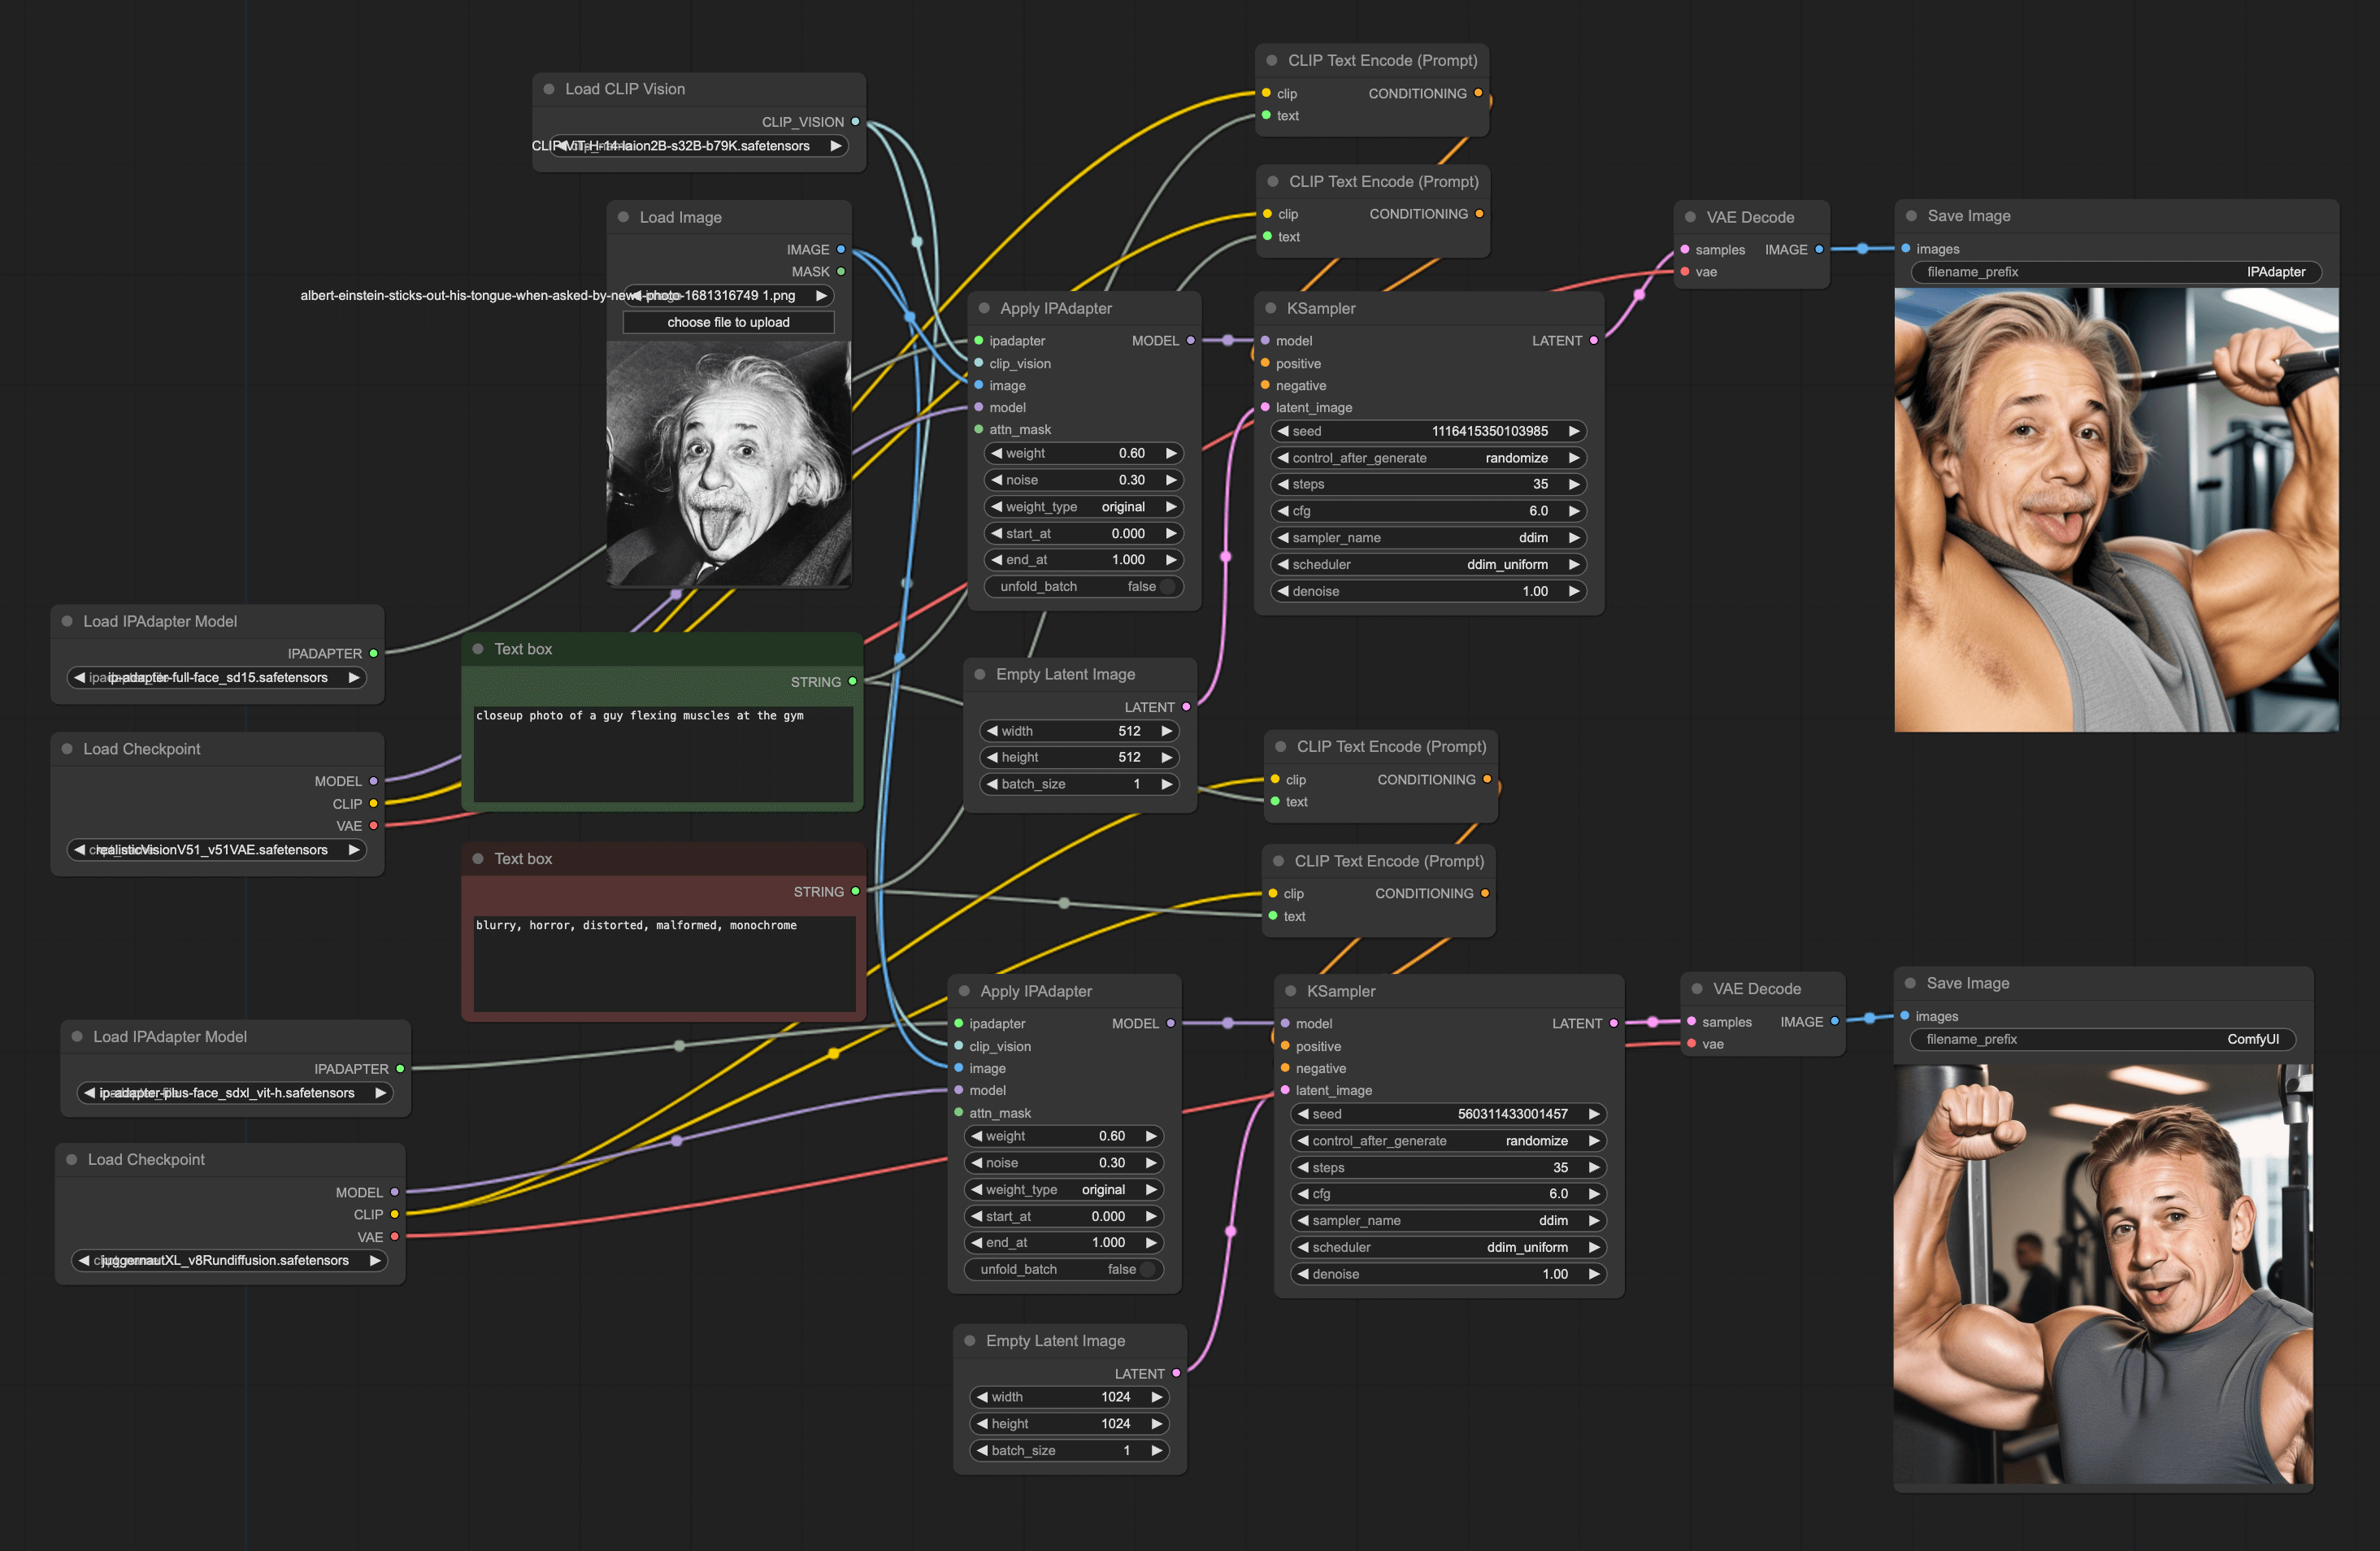
In addition, I will teach you another trick. You can try to add multiple Apply IPAdapter nodes in the Workflow and connect them to different KSampler nodes. This allows you to use different models to generate pictures. The following workflow adds the Checkpoint of SDXL and SD 1.5, so you can see the results of two models under one workflow:
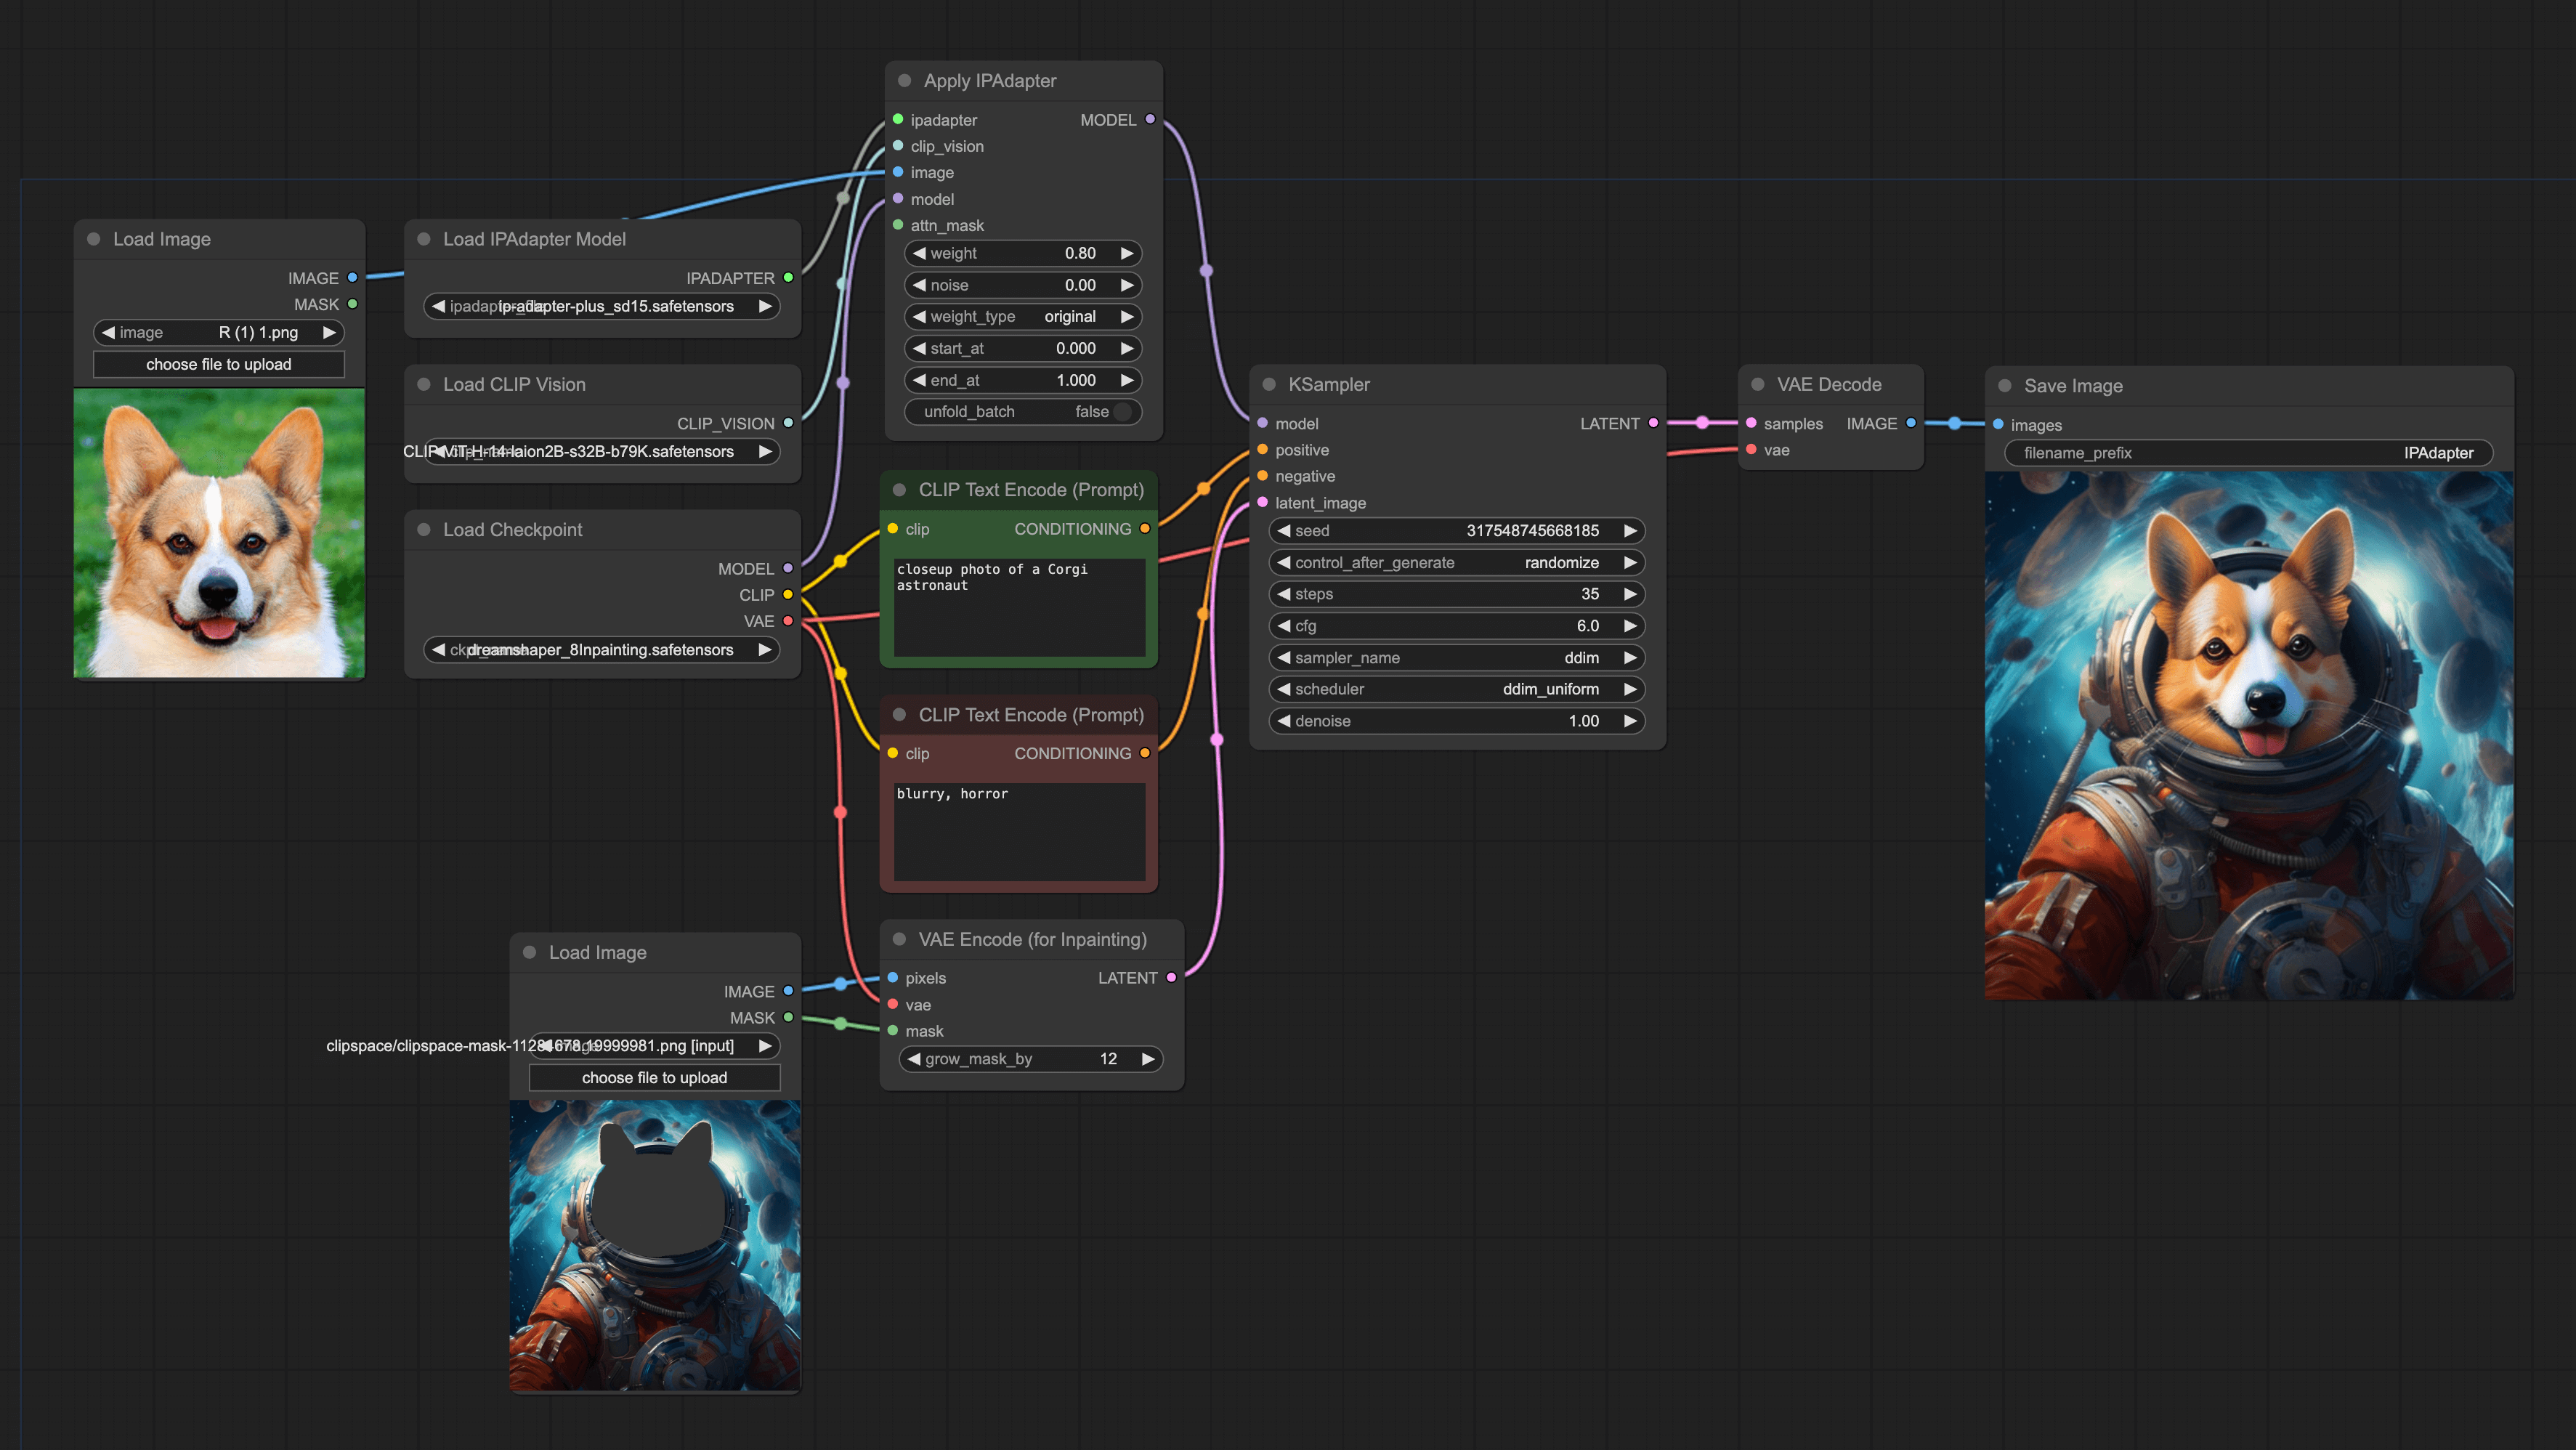
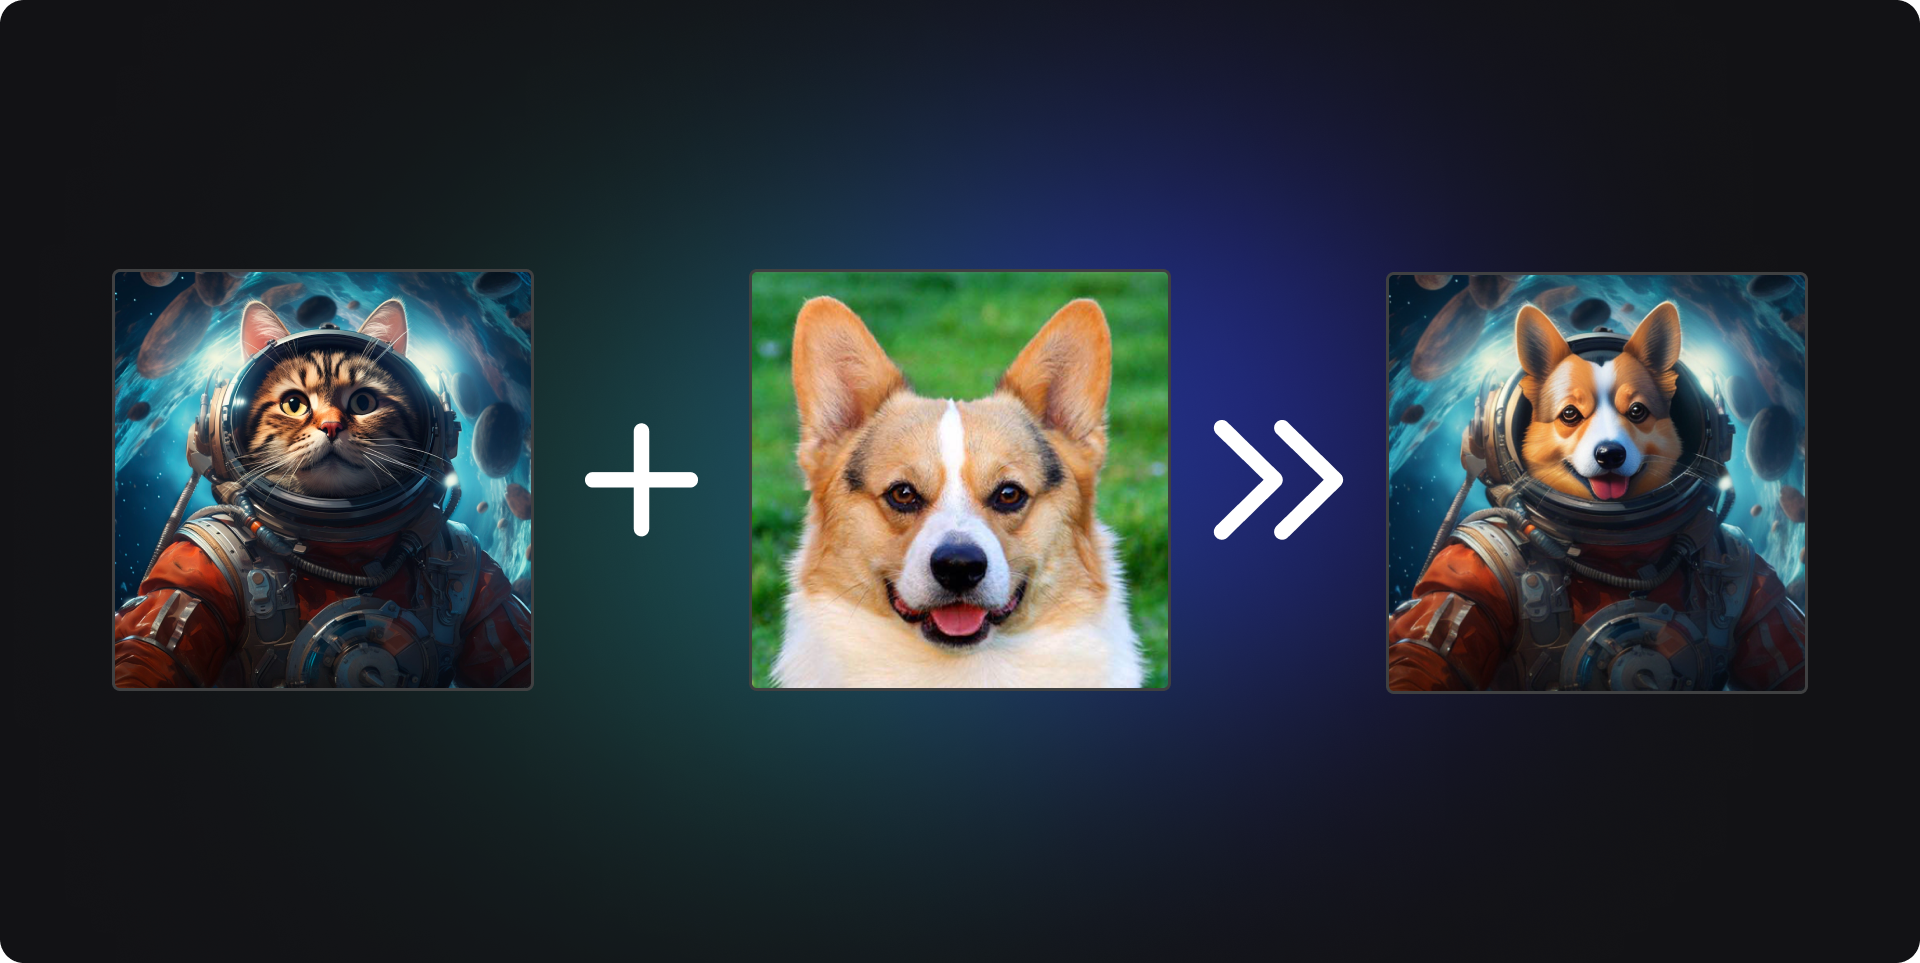
3. IPAdapter Inpainting
The second method always generates new pictures each time it runs, so it cannot achieve face swap by importing a second image like the first method.
The third method can solve this problem. We're still going to use IPAdapter, but in addition, we'll use the Inpainting function. This way, we can replace a certain part of picture A with picture B. For example, we can replace the cat face in the first picture with the second picture, and finally generate an astronaut corgi:
The construction of the Workflow is quite simple. You can add an IPAdapter to the Upscale workflow (how to use Upscale can be found in my another tutorial). The final workflow is as follows: