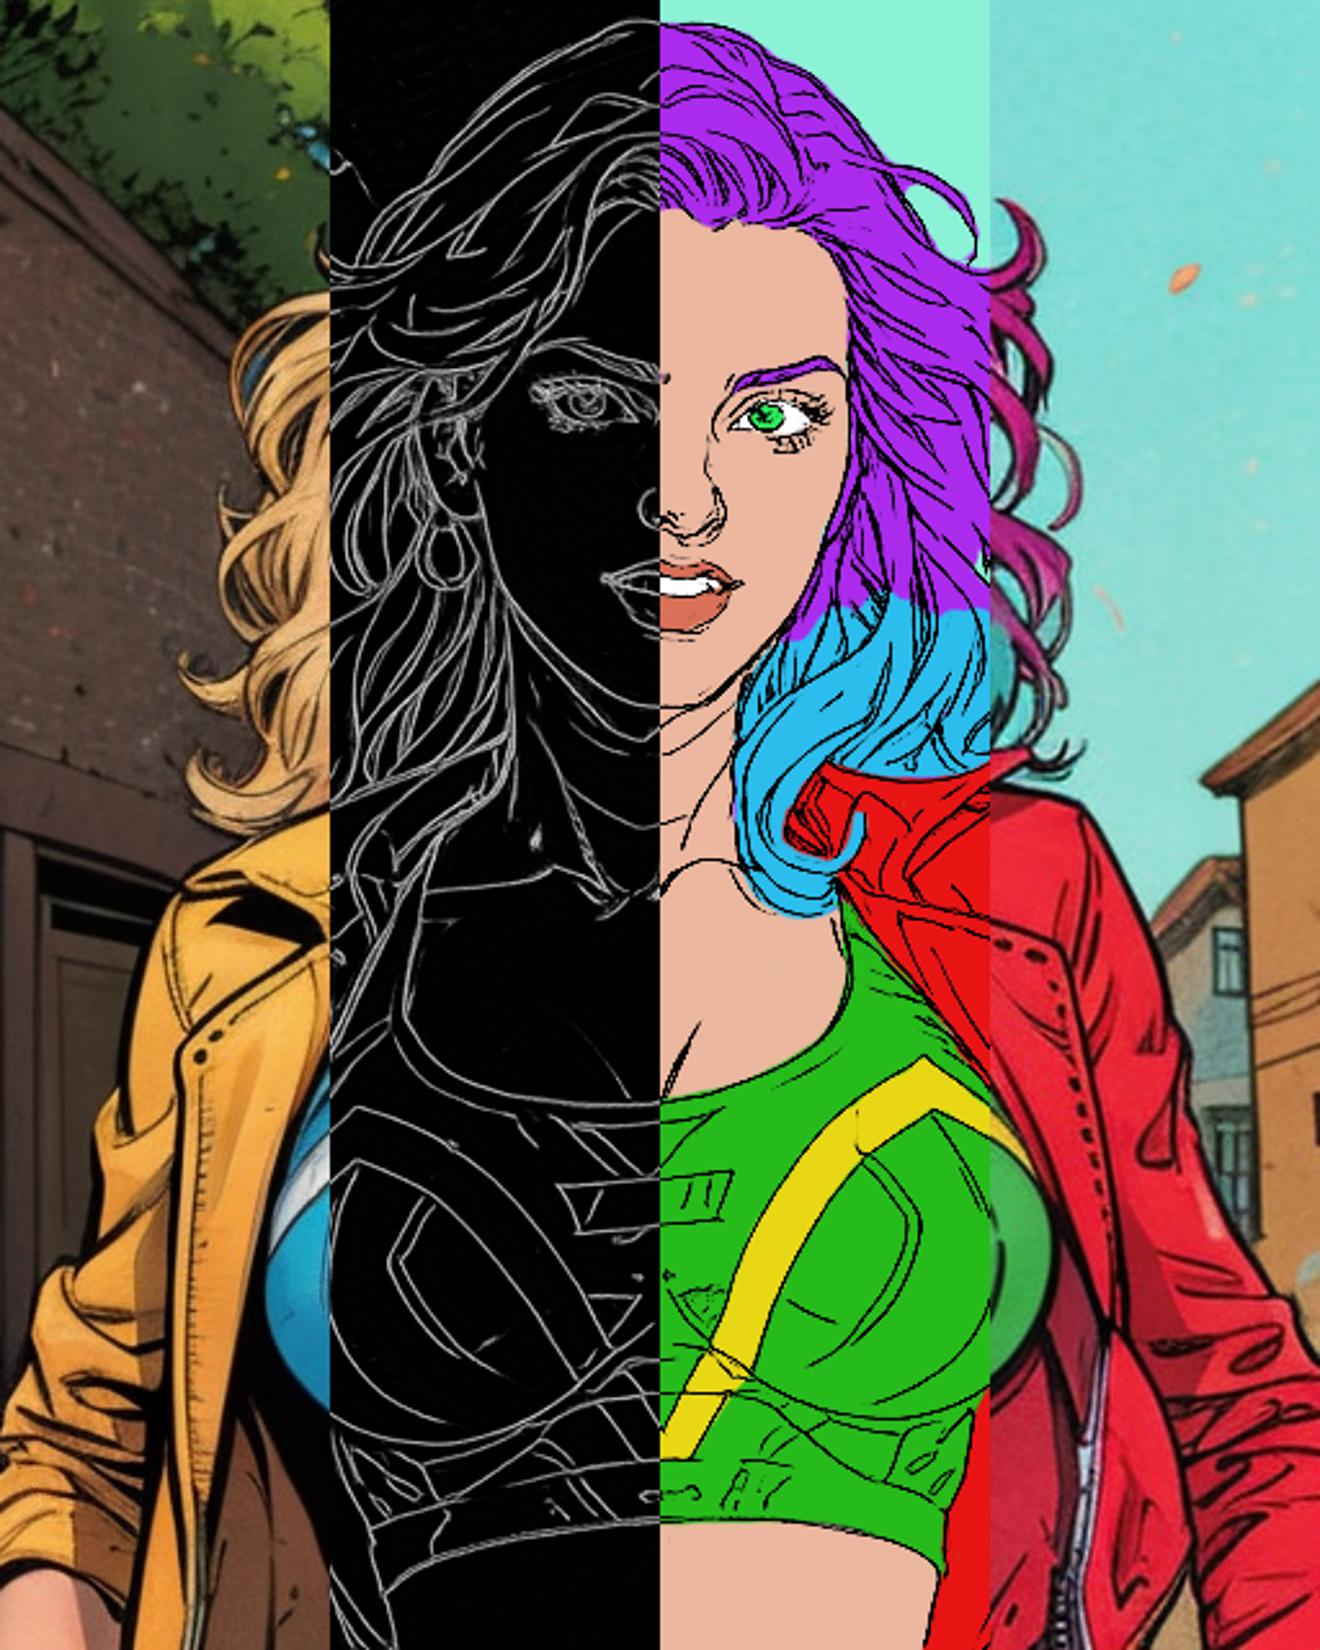
Disclaimer: To be honest, this method is quite labor intensive and only works really well for stylized images!
Intro
With stable diffusion it is often difficult, if not impossible, to get colors exactly where you want them and the more colors you have, the more chaotic the whole thing becomes. In order to get this under control, I have developed a, probably unnecessarily complex, method to become master of the colors.
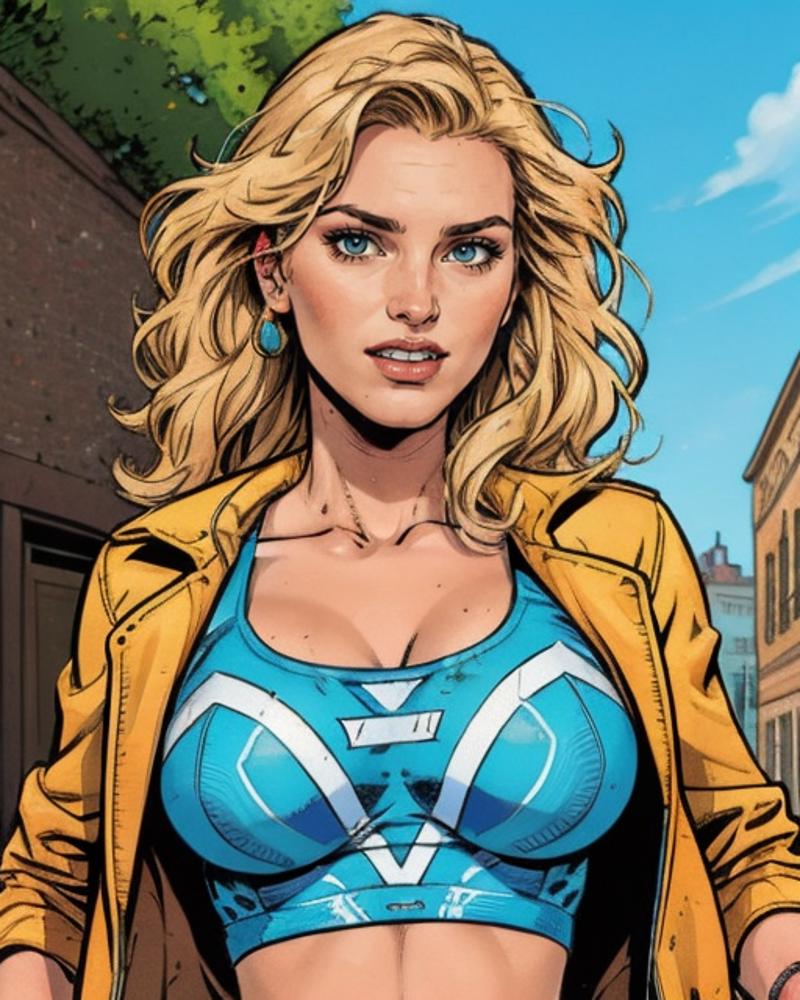
1. Generate the image
First we generate our image and only worry about the composition, pose etc. We ignore the colors completely for now.
2. Turn it into Line Art
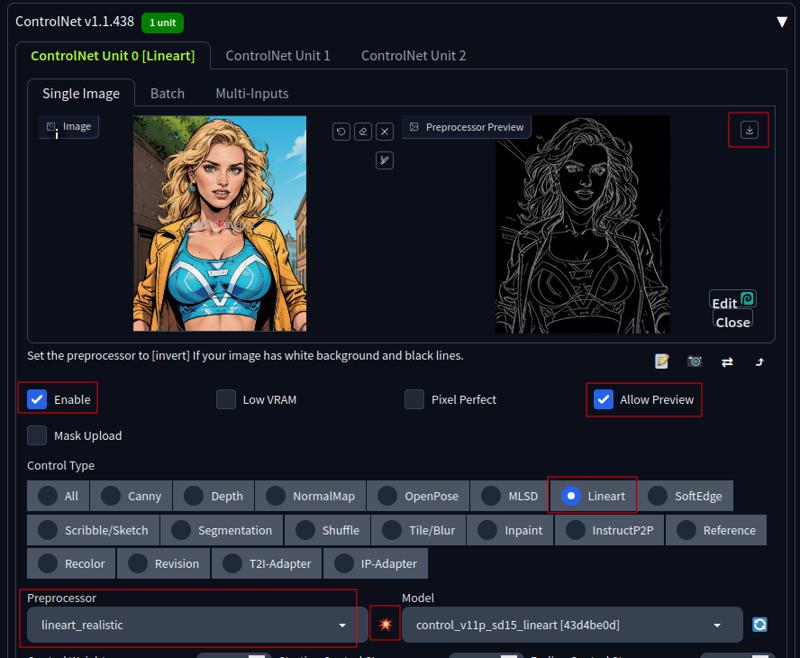
Now we use ControlNets Line Art preprocessor to turn our image into an inverted "sketch". Load your image, check enable and allow preview, select Lineart_realistic as preprocessor and then press the small explosion to let ControlNet work.
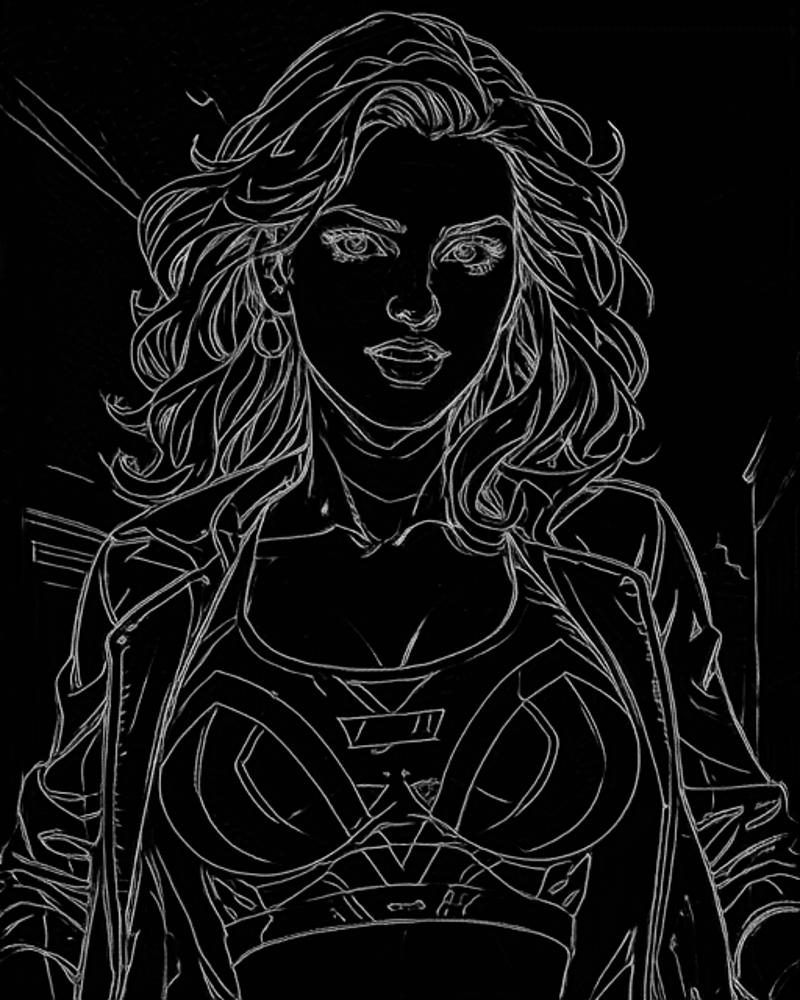
As an output we now get an image with a black background and white lines. We can download it as a .png using the small arrow at the top right.
3. Image editing with 3rd party tools
You can do the next steps in the editing program of your choice, but then you need to know how to use the program. I'll show you how to do the whole thing in the free web app Photopea.
Load your black and white image and then go to image -> adjust -> invert
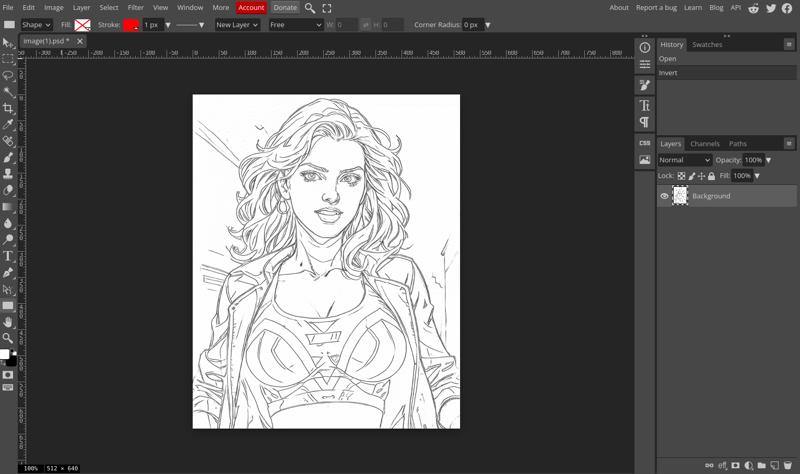
Now we go to Layer -> new Adjustment Layer -> Selective Color
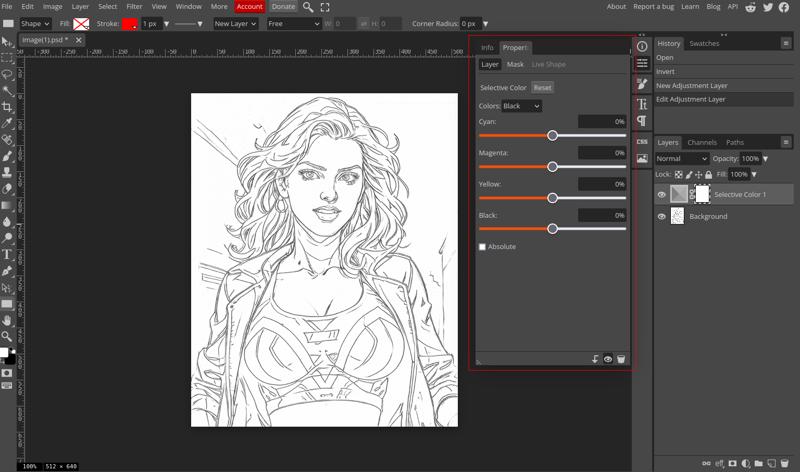
In the Layer properties select "black" as color and push the black slider to 100%. We do the same for "neutral" (should be called grey! Neutral is not a color XD). Now we have nice sharp lines.
Right click the Selective color layer in the layer list on the right and select "Merge down".
Go to select -> Color Range. Select a white spot with your mouse and set "Fuzziness" to 200.
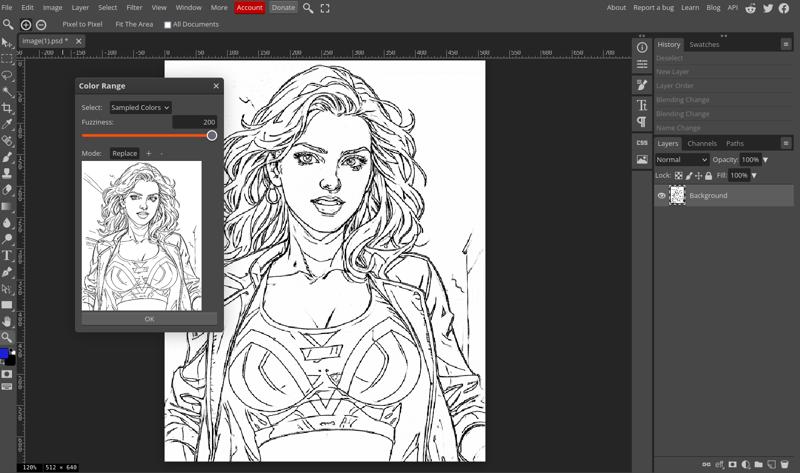
With everything white now selected we press "Delete" on the Keyboard. Now go to Select -> Deselect
4. Now it's time to Paint
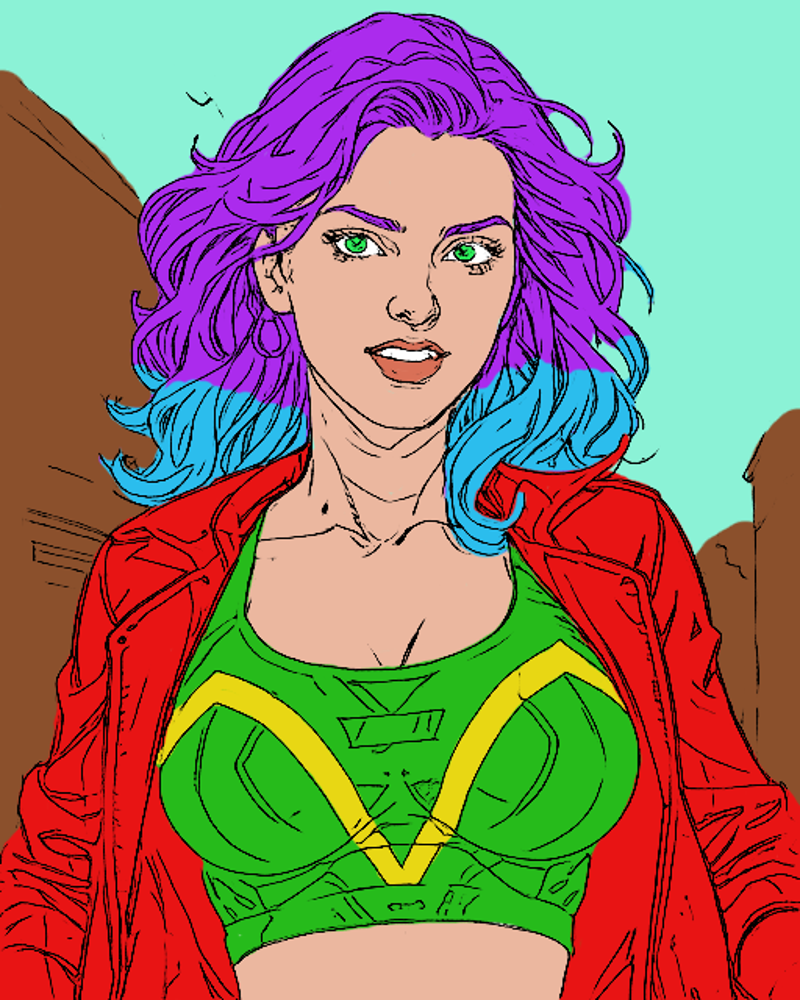
Now comes the work-intensive part of the whole thing: We paint everything in color.
But first we need to create a new layer on which we can paint. Go to Layer -> New -> Layer. You can sort your Layers in the Layerlist on the right by draging them, make sure the Layer with your black lineart is on top and set the blendmode to "multiply"
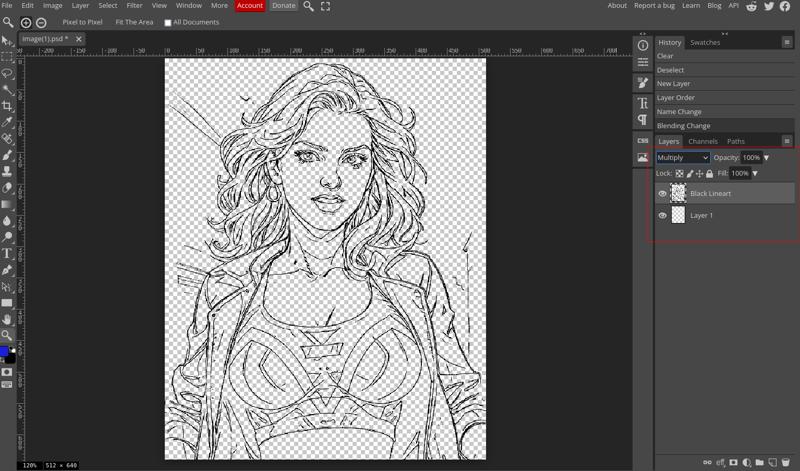
Make sure you have your new empty layer selected and then we can start painting.
5. Back to Stable Diffusion
Some people will now think "That looks like shit" and yes it does, but with our original prompt and the seed we can use img2img to ... well ... we will make it look cool again! And now with the colors we wanted.
In Stable Diffusion in the PNG info tab, load your original image and then press “send to img2img”. In the img2img tab we now exchange our original image for the “self-painted” image and adapt our prompt to the colors.(purple hair with blue tips, green sportsbra with yellow markings, red jacket, green eyes)
Note: I usually generate 3 runs with img2img, the first with Denoising strength 0.35, the second with 0.20 and the third with 0.10 and face inpainting (Addetailer) but depending on the model, Lora etc. it may be different for you. Here you just have to play around with the settings and maybe use more or fewer runs to get the desired result.
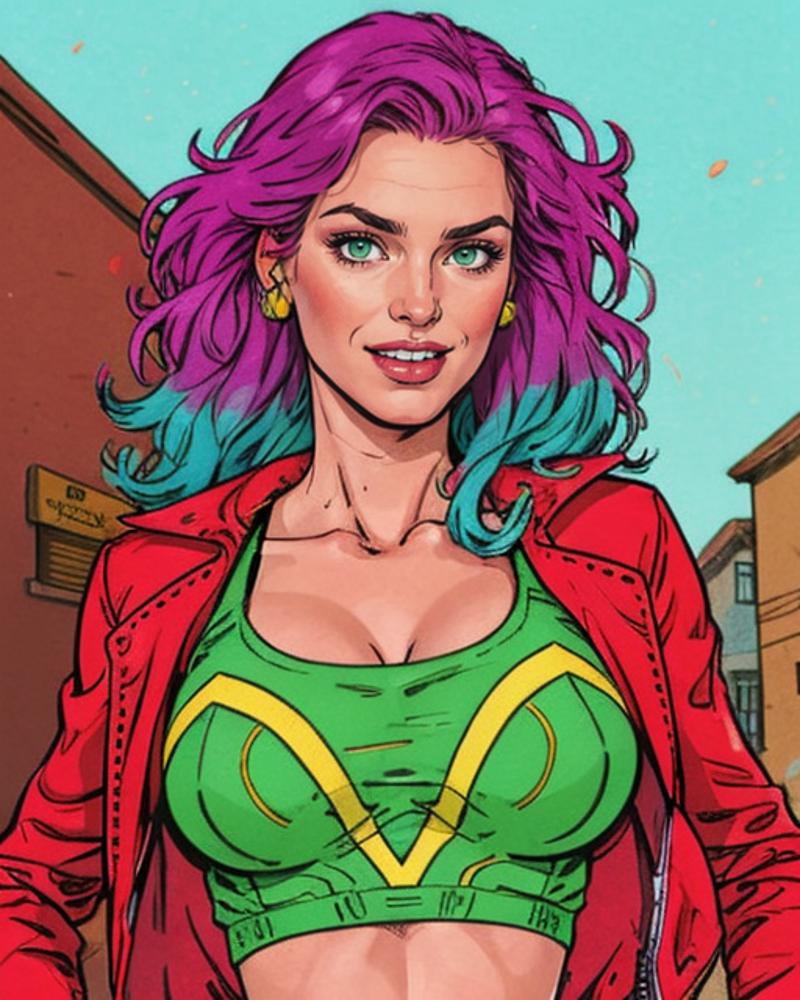
As you can see we have minimal change in composition and pose but all our colors.
If you are interested in western comic art, we would be happy to welcome you to our AI Comic Corner Discord server. We are a small community based around AI comics. Join us and make new friends, share your art or just chat with like-minded people.

