


If you find our articles informative, please follow me to receive updates. It would be even better if you could also follow our ko-fi, where there are many more articles and tutorials that I believe would be very beneficial for you!
如果你觉得我们的文章有料,请关注我获得更新通知,如果能同时关注我们的 ko-fi 就更好了,那里有多得多的文章和教程! 相信能使您获益良多.
For collaboration and article reprint inquiries, please send an email to [email protected]
合作和文章转载 请发送邮件至 [email protected]
By: Ash0080
AI girls more beautiful than real people? After stable diffusion emerged, there are increasingly more AI-generated beautiful women powered by AI appearing on major social platforms. Are we tired of the uniform and flawless transformations of beautiful women? Follow the author's perspective and explore more possibilities of AI. This article mainly utilizes stable diffusion to extend more creative ideas and styles. It requires a basic understanding of plugins and their basic applications. The large model (CKPT) used this time is ALLBoyMix by bodlo on Citivai, along with tools such as control net and Photoshop.
Composition
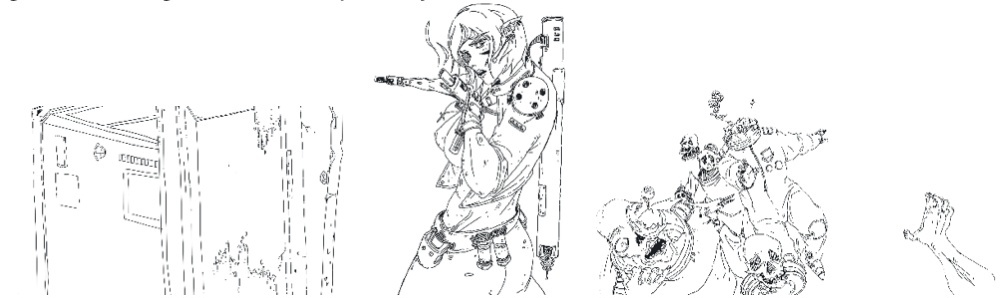
How can we better control the visual composition? We need a sketch to determine the desired visual effect. In my case, I want a super cool female protagonist fighting zombies. After creating the sketch, we can proceed to image generation using stable diffusion.
Layered Imaging
When entering stable diffusion, our goal is to add color to the sketch. There are many methods to colorize sketches, but in general, for complex images like this, AI recognition may not achieve the desired effect. Therefore, before applying prompts and other parameters, we need to separate the image into scenes, characters, and monsters, and generate images for each separately.
Character Coloring
Starting with the characters, there are many methods for coloring. Here, I chose a simple method using Photoshop (PS) to separate the character's body from the clothing. I used 3D openpose to capture the character's pose. Coloring only requires AI to recognize the color regions without focusing too much on details. With prompts, it can correct some erroneous details in the image (provided the perspective is not too complicated, as AI may have difficulty accurately judging it).If AI cannot recognize it well enough, you can search for photos to import separately and use the model to unify the style or directly hand-draw (to enhance the structural accuracy of special perspectives). Finally, through continuous adjustments, obtain an almost error-free image.
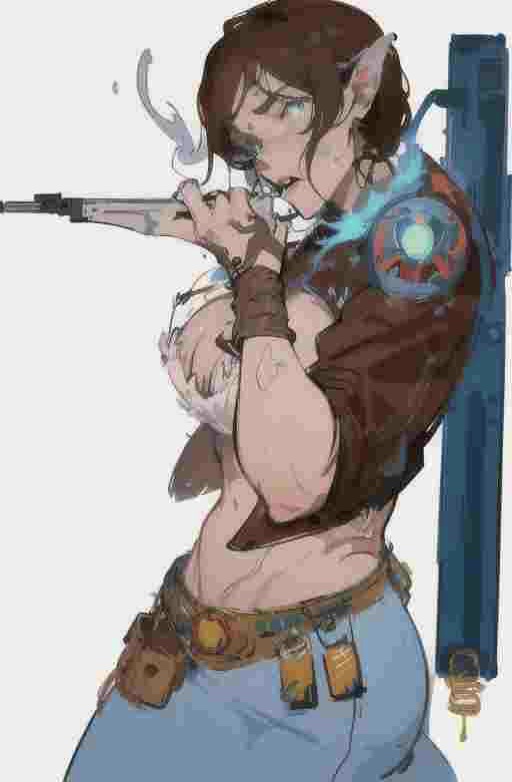
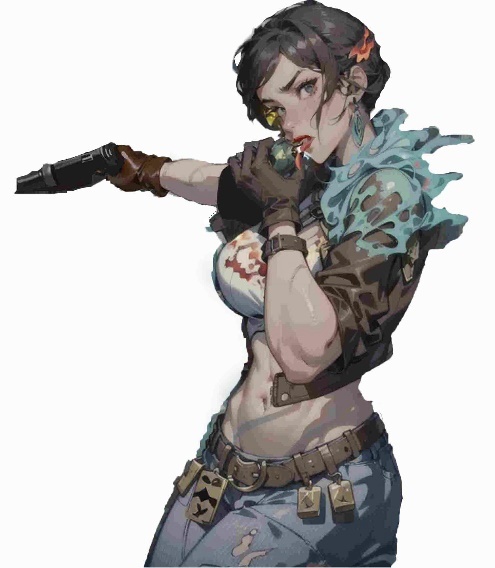
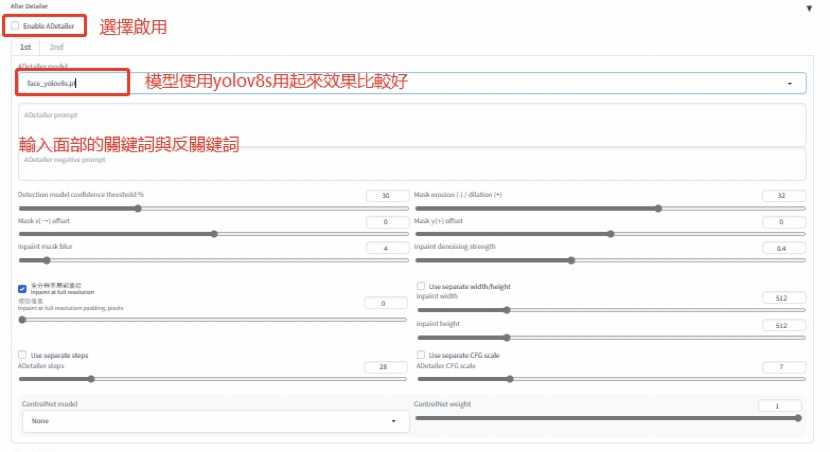
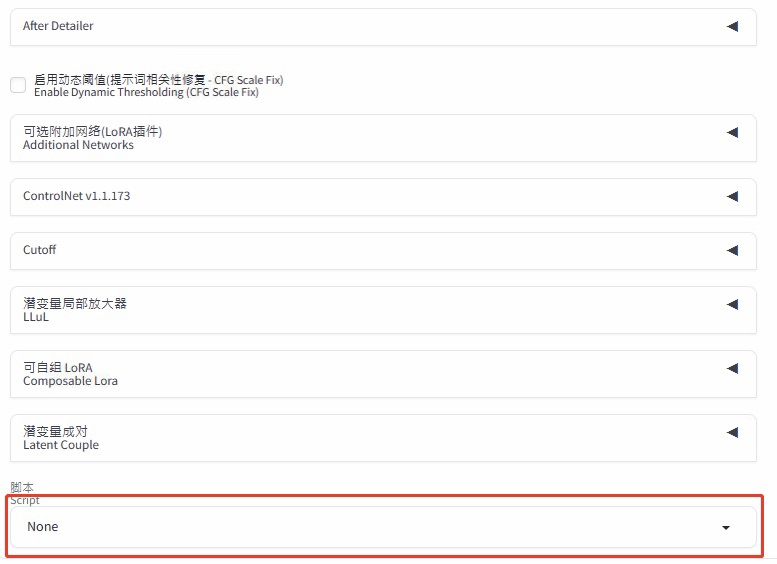
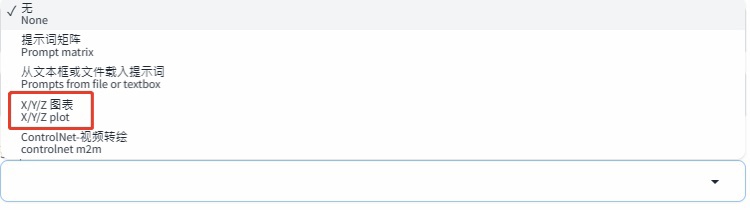
If the face keeps collapsing, we can find facial repair options in the sampling method surrounding it. If there are still problems, a facial repair plugin called "after detailer" can be used. It is recommended to use this plugin after being satisfied with other styling tones, as it takes a longer time to process. If it's your first time using it and you're not familiar with the differences the parameters bring, to avoid generating ineffective images and getting stuck in a situation where there are always problems no matter how you run it, you can use the "xyzplot" in the script plugin to find suitable parameters, iteration steps, and redraw amplitude for a satisfactory result, and then apply them.
Scene Coloring
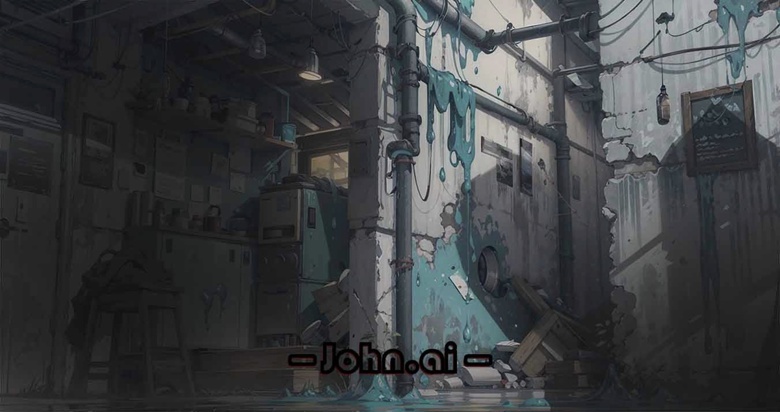
For the scene, the line art or canny in the control net of the sketch can be used to generate images using textual prompts. Different redraw amplitudes can be tried, and finally, select a more satisfactory one for upscaling. If there are no satisfactory images, find a relatively detailed image, import it again into the image generation process, and refine the content of the scene. Adding a background with LoRa that has comic-style lines generated a good effect.
Monster Coloring
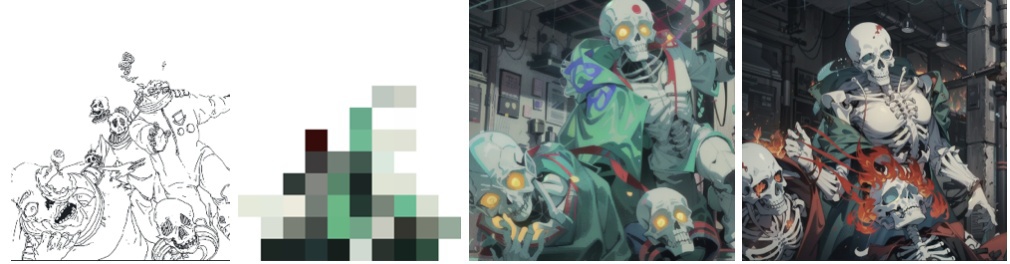
The same applies to zombies. Originally, the model I used had difficulty recognizing zombies, so I changed it to a skeleton. Finally, all the elements are recombined, and with a low redraw amplitude, the image is rerun to achieve the desired effect. For coloring, I used the color iteration results from control net.
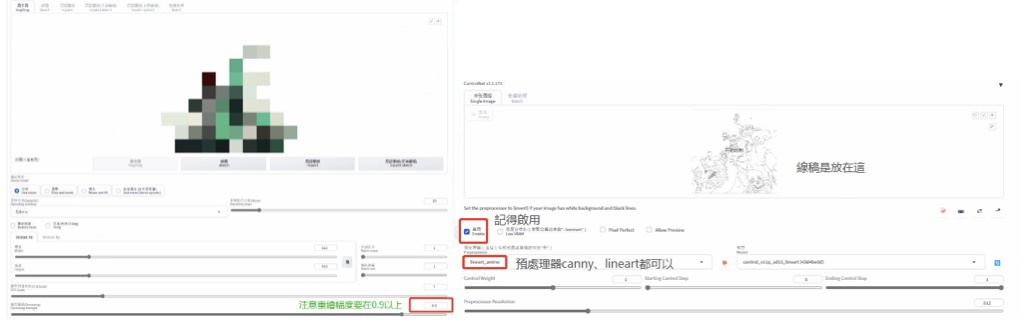
Using the control net color preprocessor model to generate color blocks, drag it into the image generation process, set the redraw amplitude to 0.9, and switch the control net preprocessor to the line art model with the same settings enabled. This will result in a good colorized image. This way, a colorized zombie image is obtained, but it feels a bit off. Many kills and the effects of damaging the zombie's face are not ideal. In this case, take the colorized image back to the image generation process, increase the redraw amplitude to give AI more imagination space.
Style Consistency
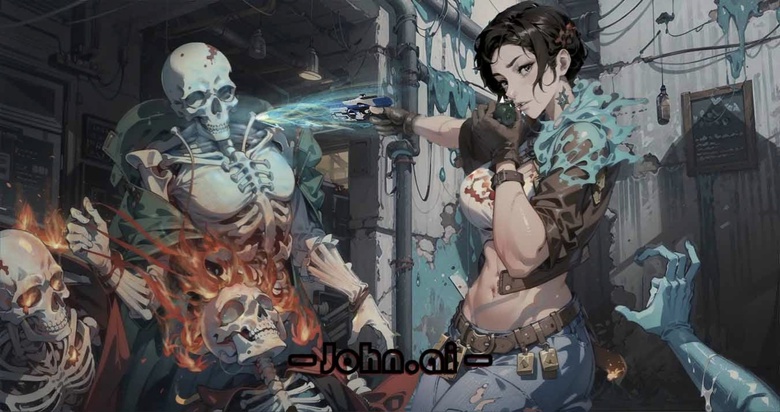
After locally redrawing all the materials and combining them, lower the redraw amplitude for overall redrawing. This is done to ensure style consistency or to find good materials through a large number of image generations, import them into Photoshop for collaging, and finally, apply the "Ultimate SD Upscale" plugin to automatically upscale the entire image.
Conclusion
As an auxiliary tool, with more subjective consciousness in content generation, we can generally achieve good results. Enhancing the visual interest and diversity can better avoid the troubles of AI-generated homogeneous images. In terms of efficiency, the entire process took about two and a half days. Before starting, optimizing the workflow once can further improve efficiency and precision. By focusing on areas we are good at and letting subjective consciousness take the lead instead of blindly relying on chance, we can explore more possibilities in image generation.