Summary
First part of a video series to know how to use AnimateDiff Evolved and all the options within the custom nodes.
In this video, we start with a txt2video workflow example from the AnimateDiff evolved repository. After a basic description of how the workflow works, we adjust it to be able to use Generation 2 nodes. After a basic indication of how to use the different models and loras, we delve into the different possibilities to use in the AnimateDiff Apply Advanced node: scale and effect multival; AnimateDiff keyframes and the use of start and end percent.
In the next video, we will learn the construction vid2vid animations, prompt travelling, controlnet and the use of context options and sample settings. All in one video is too much, so better to split it in two.
👉Get some of the workflow examples of part one, for FREE, in ko-fi ☕
🎥👉Click here to watch Part 1
🎥👉Click here to watch Part 2
********************************************************************************************************
👉 Check my runnable workflows in OpenArt.ai:
Workflow development and tutorials not only take part of my time, but also consume resources. Please consider a donation or to use the services of one of my affiliate links:
🚨 Use Runpod and I will get credits! 🤗
Run ComfyUI without installation with:
********************************************************************************************************
Starting with AnimateDiff Evolved
The video tutorial follow basically the guidelines from the AnimateDiff Evolved repository found at:
Kosinkadink/ComfyUI-AnimateDiff-Evolved: Improved AnimateDiff for ComfyUI and Advanced Sampling Support (github.com)
The starting point is the txt2video workflow from the examples, can be dragged and dropped to the ComfyUI canvas.
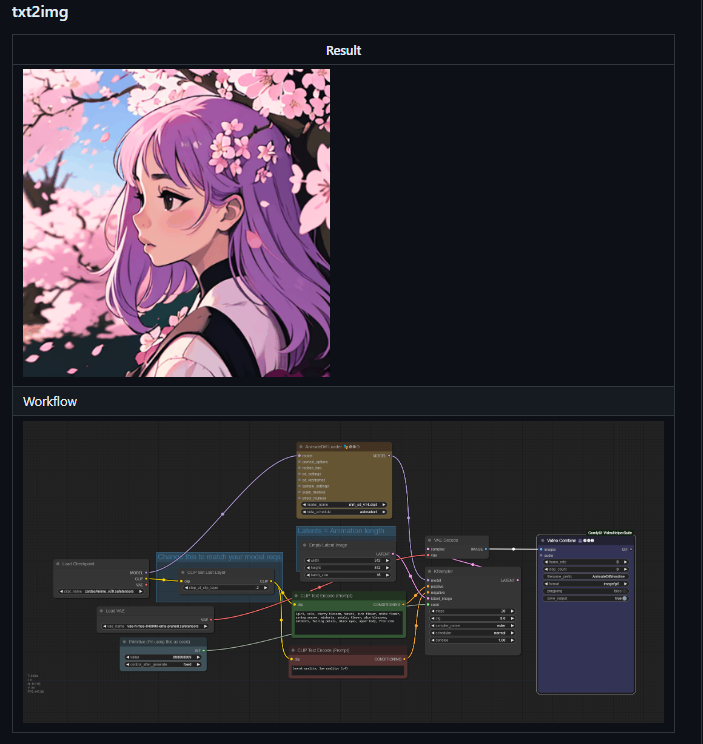
The workflow is very similar to any txt2img workflow, but with two main differences:
The checkpoint connects to the AnimateDiff Loader node, which is then connected to the K Sampler
The empty latent is repeated 16 times
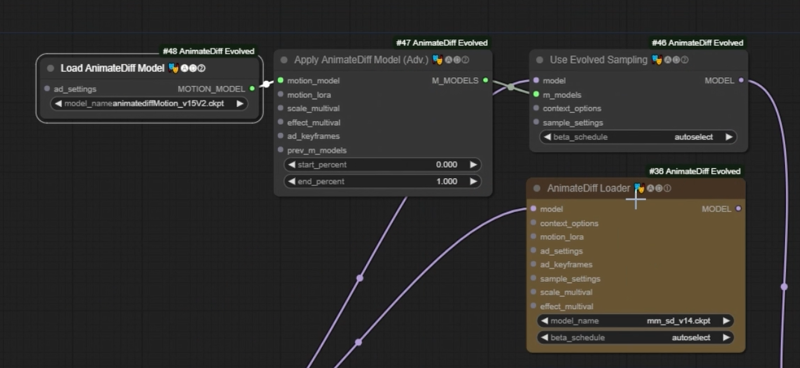
The loader contains the AnimateDiff motion module, which is a model which converts a checkpoint into an animation generator. This is the core of AnimateDiff. AD Evolved has recently developed Generation 2 models (more on that later)
The empty latent defines the resolution and the number of frames to be generated. As usual, standard resolution for SD is 512x512 (but can also be changed if prompted/conditioned properly). The number of frames is the latent batch number.
The rest of the nodes, in this basic setup, work in the same way as for image generation. So you can change checkpoints, prompts, seeds, samplers, etc.
Generation 2 AnimateDiff
Generation 2 allow some additional flexibility than Generation 1, so in the video tutorial I immediately 'transform' the AnimateDiff Loader Gen 1 to the equivalent construction with Gen 2 nodes: Load AnimateDiff model, Apply AnimateDiff Model (advanced) and Use Evolved Sampling.

Motion Models
There are many different motion models available, which work differently and can be applied to different checkpoint versions (SD1.5, SDXL, etc.).
This video does not discuss in detail the different models and their differences (I will do in future videos), but shows that different models can be used showing different results.
For the rest of the video, we use mm_sd_v15_v2, as it can use the standard motion loras and it is widely used.
Beta schedule
The transformation of checkpoints into animation generator models is sensitive to the beta schedule. I am not familiar with the exact application and implications, but each AnimateDiff motion module has a recommended beta schedule (linear, square root, cos, etc). If not used properly, the animation will have a bad render
Fortunately, there is the possibility to choose 'autoselect'. Unless you are experimenting or there is a specific recommendation for a specific AnimateDiff model, do not change it.
Motion Loras
Motion LoRAs influence the movement of v2-based motion models like mm_sd_v15_v2. In the video we just show a demonstration of how they work and what can be done (e.g. Zooming Out), and how to handle the watermark effect issue.

I have personally not played much with them, as the watermark effect did not allow for much flexibility and the Motion Loras could not be applied to other motion models. However, I plan to work more on this due to new developments and that now it seems it is easier to make your own motion loras (with the use of Motion Director). This will be in future videos/guides.
Scale multival
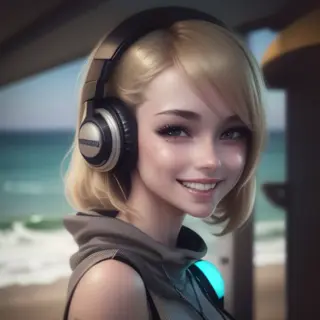
The scale defines the amount of movement that you want to generate. By default, it is one.
When the scale is increased, the total amount of movement increases (example: scale = 1.2)

But if the value is too high, it can lead to strange renders (example scale 1.4)

Reducing the value, will lead to less dynamic images (example: 0.9)
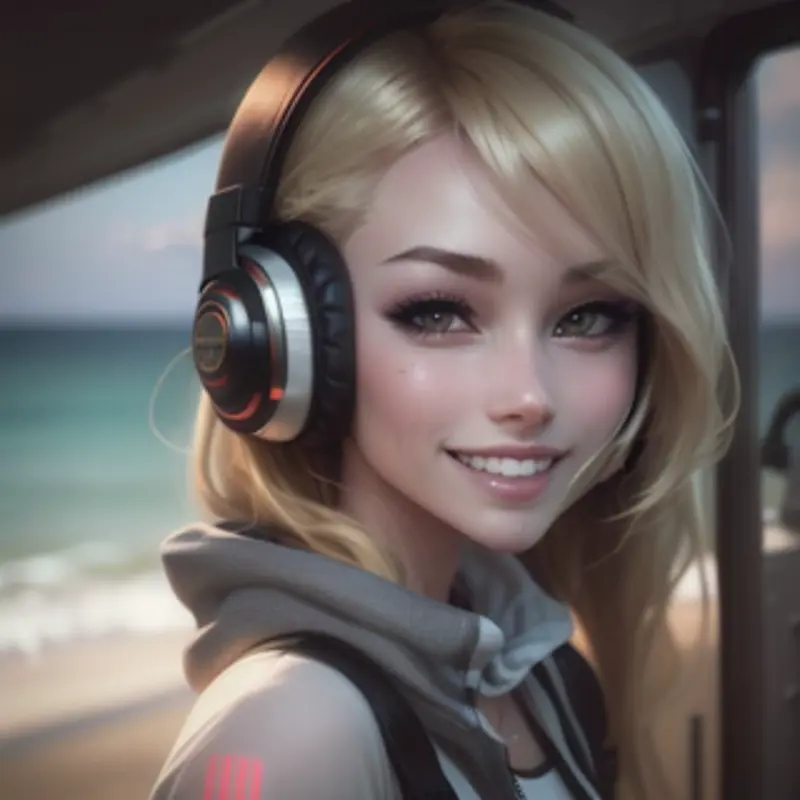
Masks can be applied to scale multival. With empty latents, only the masked part will be rendered. You can use images as a latent to have an image over the non-masked area:

Effect multival
The effect is the degree at which the AnimateDiff motion module is applied to the checkpoint. Therefore, with an effect value of zero, there is no animation generation and the result of the render is the same as no applying AnimateDiff.

If there is no effect multival applied, the default value of zero is obtained. Values above 1 can be used, increasing the consistency of the animation. However, more consistency will imply decreased freedom to move.
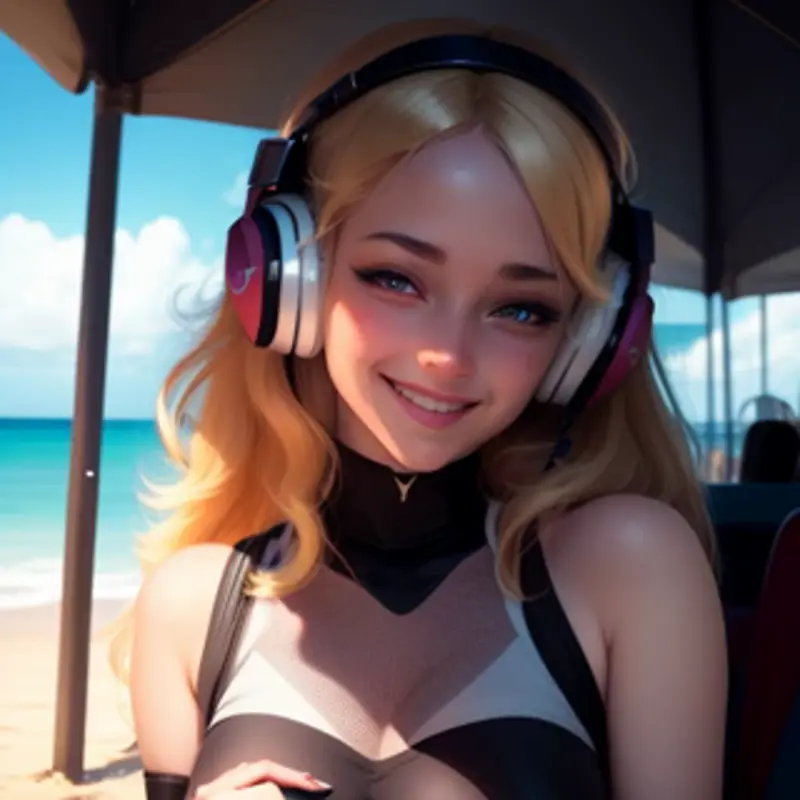
Like in the case of scale multival, masks can also be applied. However, in the case of effect multival the non-masked area it will be rendered with a value of zero (unless another AnimateDiff apply node is applied via another mask). See below that the mask is applied to the lady, but not to the background.
AnimateDiff Keyframes
With AnimateDiff Keyframes we can apply different scale and/or effect multival at different steps of the sampling process. This advance feature give additional flexibility during the rendering process, but it is not directly intuitive because of the nature of the samplers.
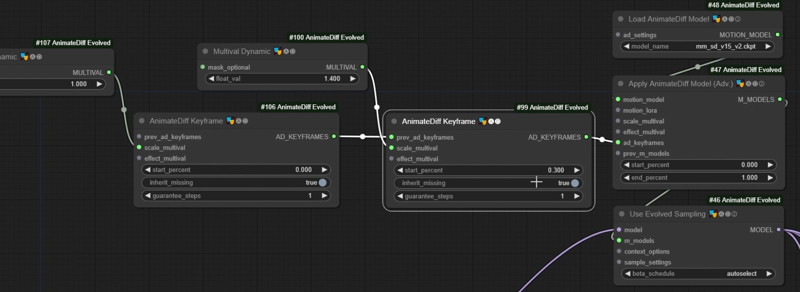
In the video tutorial, a walkthrough with an extreme example (with one of the AD Keyframes at zero) is shown. However, it shows the potential of using keyframes to control the animation.
Context Options
Context options allow to break down the total number of latents in portions, for a determined length. This is a context window. The AnimateDiff motion module only processes a context window. This way, we can divide a long animation (let's say of 64 frames) in chunks of 16 frames.
In order to improve the coherence between context windows, we also define the overlap. This can range from 0 to the context length (minus 1 frame). The larger the overlap, the more coherent that will be the resulting animation. However, more context windows are created, so the render time will be higher.
View Options are similar to Context Options. The main difference is that, when using Context Option nodes, the latents are divided and the complete UNET (controlnets, IP Adapater, etc), will process the latents of the context windows. When using View Options, only the motion module applies the context windows. The rest processes all the frames. While this provided more stability, it typically requires of more VRAM (specially for long animations).
In the second video we also explore the different nodes and algorithms used for the context/view options (standard static, standard uniform and looped uniform), the significance of the stride, the use off different fuse methods, concatenation of nodes and combinations of context/view options, when the start percent is different than zero.
Combination with other methods for better control
Prompt travelling
Prompt travelling is the use of different prompts at different keyframes of an animation. The prompt scheduling node from Fizz Nodes is used for that.
At a defined keyframe, the prompt tries to influence the influence. If the prompt is changed at a different keyframe, the prompt at this new keyframe will change.
The animation will morph or pivot from one prompt to the other. This can be used to add some interesting twists, or to direct, to a certain extent, what we want the animation to look like.
See the second video of the series for an example of how to set it up.
Control Nets
As with image prompting, Controlnet can be used to use a preprocess reference image to guide the image towards certain output. In this case, the preprocessed image is a sequence of images (video). So, if for example, we extract the DWPose of a person walking, our AnimateDiff animation will provide the same type of movement.
Using controlnets with AnimateDiff is a powerful method for the animation to behave as we desired. However, it requires that such videos or frames exist beforehand.
Typical controlnets when animating people are OpenPose/DWPose and depth maps (all variants). Nevertheless, any other controlnet can be used (lineart, tile, soft edge, QR code...), with different result, depending on what you want to do.
See the second video of the series for an example of how to set it up.
Video to video - low denoise
Like image to image, we can use a reference video and the final image be a variation of the the original video. To do that, we need to encode the original video into latents using a VAE encode node, and using the resulting latent as input to the K Sampler.
As in img2img, lower denoise will be more adherent to the original frames.
When using controlnet, higher denoise values will provide an animation with a partly different style, guided by the prompt, while keeping quite a lot of consistency.
However, if we want to change a big change in the style of the image, vid2vid is not enough.
IP Adapter
Adherence to motion and shapes is done with Controlnets, but we can define the style of the animation we are going to generate using IP Adapter. The way to do it is the same as with image generation.
In combination with controlnet (and masks) is a powerful tool to control the results of the final animation.
What's next?
In next videos I will work in the additional options of AnimateDiff (probably sampling) and work on the motion models and its options. Probably we will also explore using other models (SDXL, LCM, Turbo, Lightining), as well as any other technique that can be interesting, to complete this detailed AD guide.
Part 2 tutorial is already available in youtube. I will further complete the guide after my holidays :)
