Minimum vram needed, If your lucky 8gb will do but to be safe 12gb is recommended.
I'm a beginner myself and this is just to learn how to make Textual Inversion / Embeddings like I do them.
Once you've learned the basics, you can continue to learn more from other places.
tldr: You should be able to skip all the text and just look at the pictures. jump to step 3.

Step 1:
You need about 15-20 different images. In as good quality you can find, Don't use too low a resolution minimum 512x512.
Here is an example of the types of images I use.
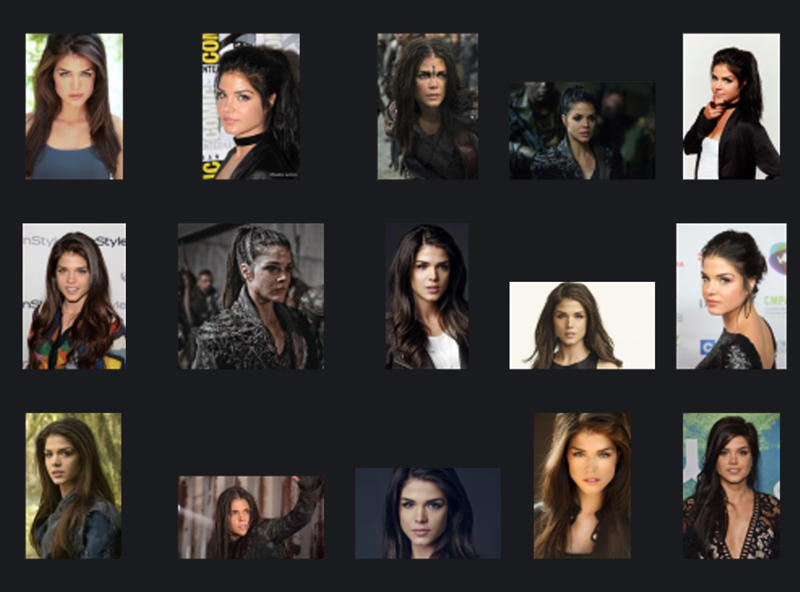
image source for: Marie Avgeropoulos (Octavia)
I focus on the face. AI can already make bodies well so unnecessary to look for pictures of just the butt or the breasts etc.

Step 1.1:
If you want to practice a style, you can use more pictures but that they have the same theme.
Here is an example of the types of images I use.
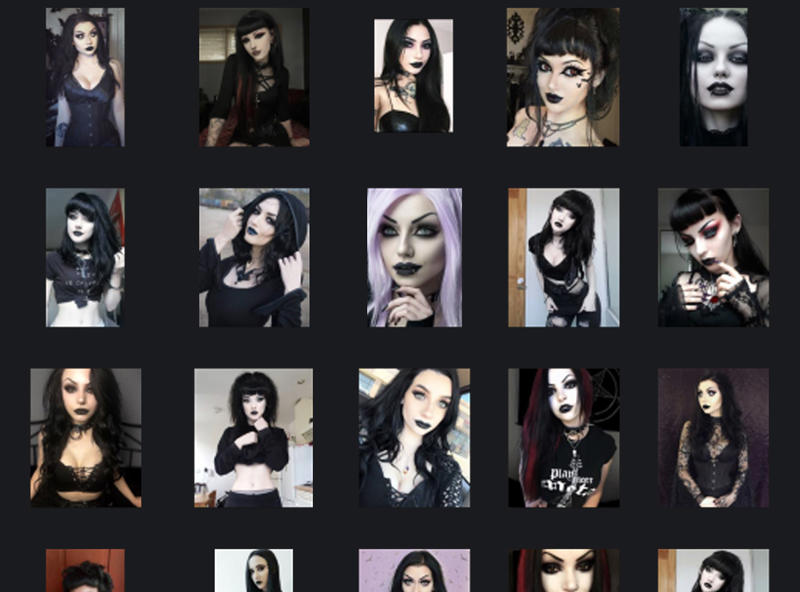
image source for: Mix goths [No name]
As you can see, everyone has something in common but everyone is different. Black lipstick and very dark makeup etc.

Step 2:
Fix all photos. What should you consider when fixing the pictures?
| Remove watermarks/logo.
| If it's a group photo remove other people.
| As an example, if it's a singer who has a mic around in every shot, that would be learned as well. So remove things that are repeated in multiple images.
| The same if you use an image that has the same background, they will be taught in as well.
So good training on someone standing in front of a green screen is bad and should be avoided. You can have a plain background but make sure it's different colors and variation.

Step 2.1:
How to fix the pictures easily and quickly!
Open up Photoshop, Don´t have it?
Am sure there is a captain jack sparrow version that are floating around online. If not skip this or try Gimp which is free.
Watermarks/logo use spot healing brush tool
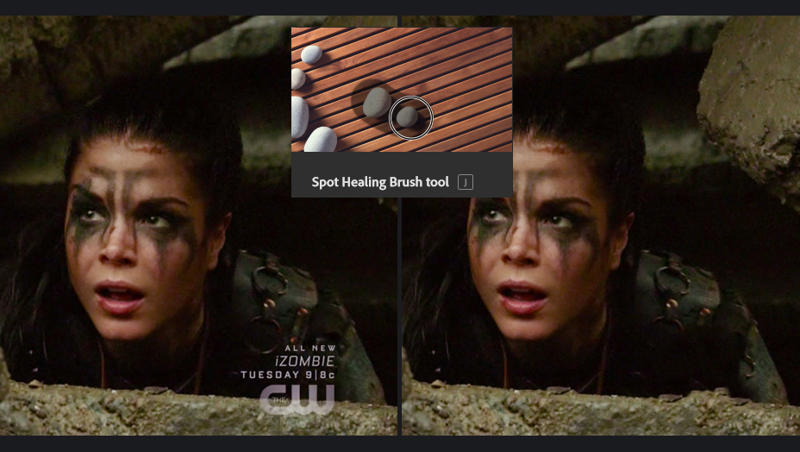
just one click and gone!
Remove other people use crop tool
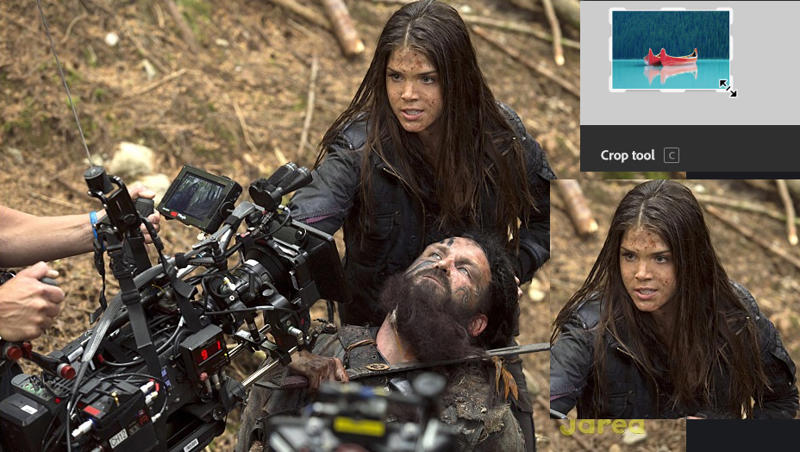
Just make sure the image is not to small after crop.

Step 3:
We are now ready to train. If you don't have: v1-5-pruned-emaonly,
Download it here > v1.5-pruned-emaonly
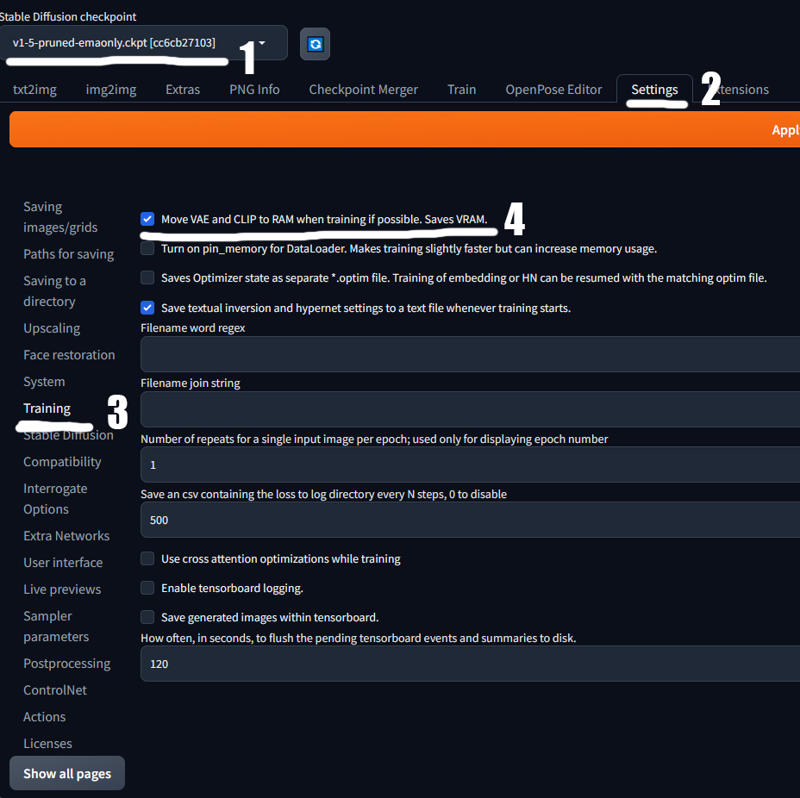
Select checkpoint: v1-5-pruned-emaonly
If you got a bad pc follow 2,3,4... Click Settings.
Click Training
Fill check box: Move VAE and CLIP to RAM when training if possible. Saves VRAM.
Now we go to Train tab
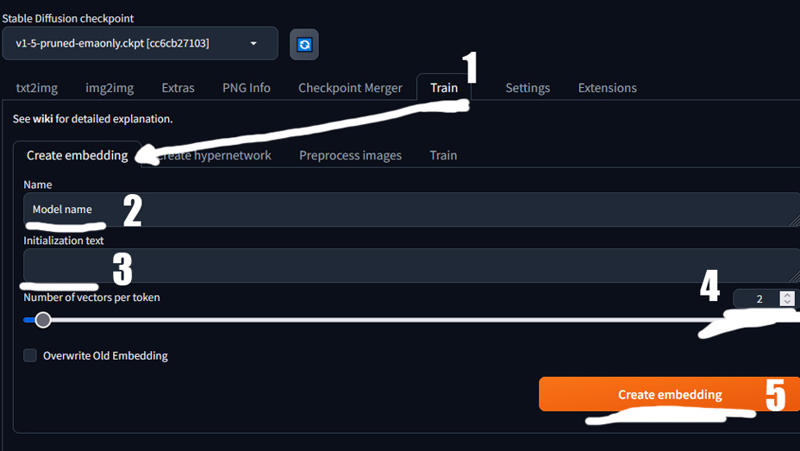
Now we go to Train tab and click Create embedding
Name your model
(This will be the keyword to use in prompt to show your model)
If you see a ( * ) there remove it.
Set it to 2
Click: Create embedding
This step is for older automatic1111 pre 1.7.0. If you have v1.7.0 or newer scroll down to next step.
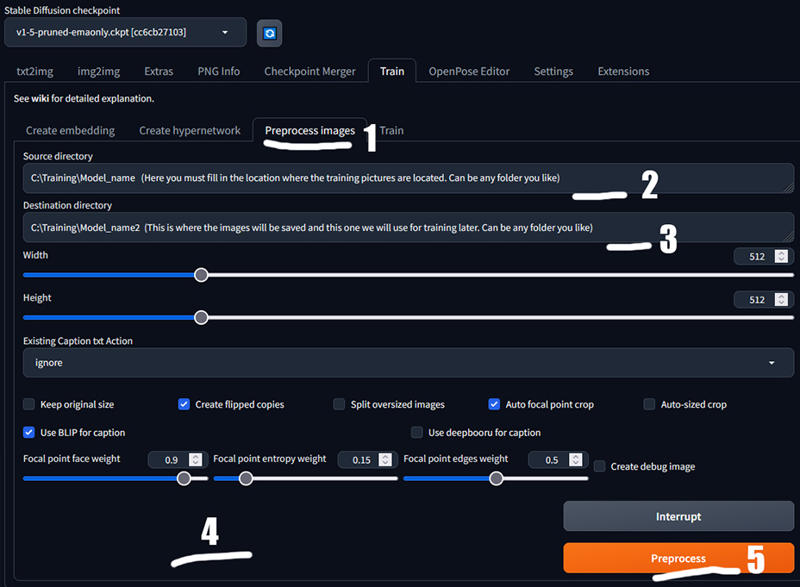
Click: Preprocess images
Folder for your input img the ones you just made.
Folder for output img that will be used for traning.
Click: Create flipped copies, Auto focal point crop, Use BLIP for caption.
Click: Preprocess
If you use automatic1111 1.7.0 or newer Preprocess images are moved and now look like this.
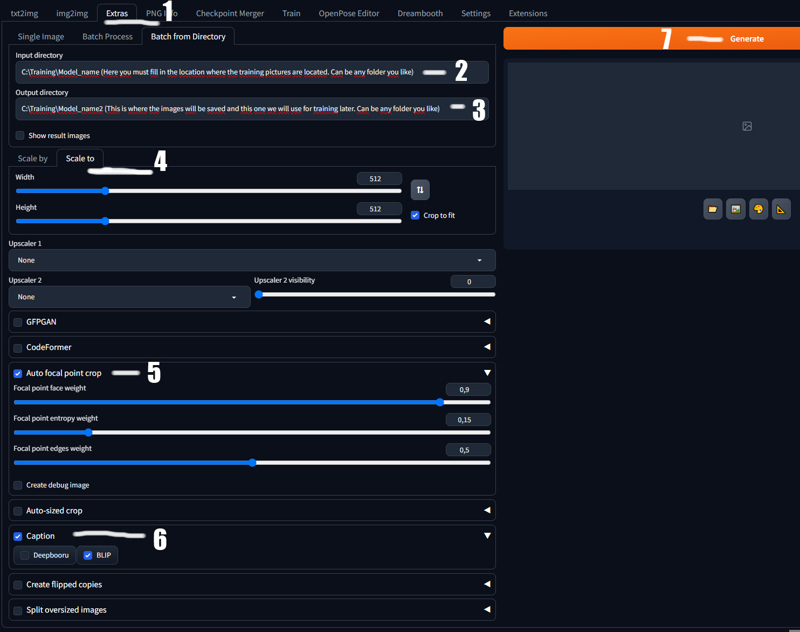
You now find it in the tab Extras then Batch from Directory.
Folder for your input img the ones you just made.
Folder for output img that will be used for traning.
Select scale to.
Use Auto focal point crop.
Use Caption and BLIP. (Bug atm if you get AttributeError: 'str' object has no attribute 'to')
Fix the bug go to stable-diffusion-webui\scripts\postprocessing_caption. py open it in notepad. Now replace all text with this:
from modules import scripts_postprocessing, ui_components, deepbooru, shared
import gradio as gr


class ScriptPostprocessingCeption(scripts_postprocessing.ScriptPostprocessing):
    name = "Caption"
    order = 4000

    def ui(self):
        with ui_components.InputAccordion(False, label="Caption") as enable:
            option = gr.CheckboxGroup(value=["Deepbooru"], choices=["Deepbooru", "BLIP"], show_label=False)

        return {
            "enable": enable,
            "option": option,
        }

    def process(self, pp: scripts_postprocessing.PostprocessedImage, enable, option):
        if not enable:
            return

        captions = [pp.caption]

        if "Deepbooru" in option:
            captions.append(deepbooru.model.tag(pp.image))

        if "BLIP" in option:
            captions.append(shared.interrogator.interrogate(pp.image.convert("RGB")))

        pp.caption = ", ".join([x for x in captions if x])
Click: Generate
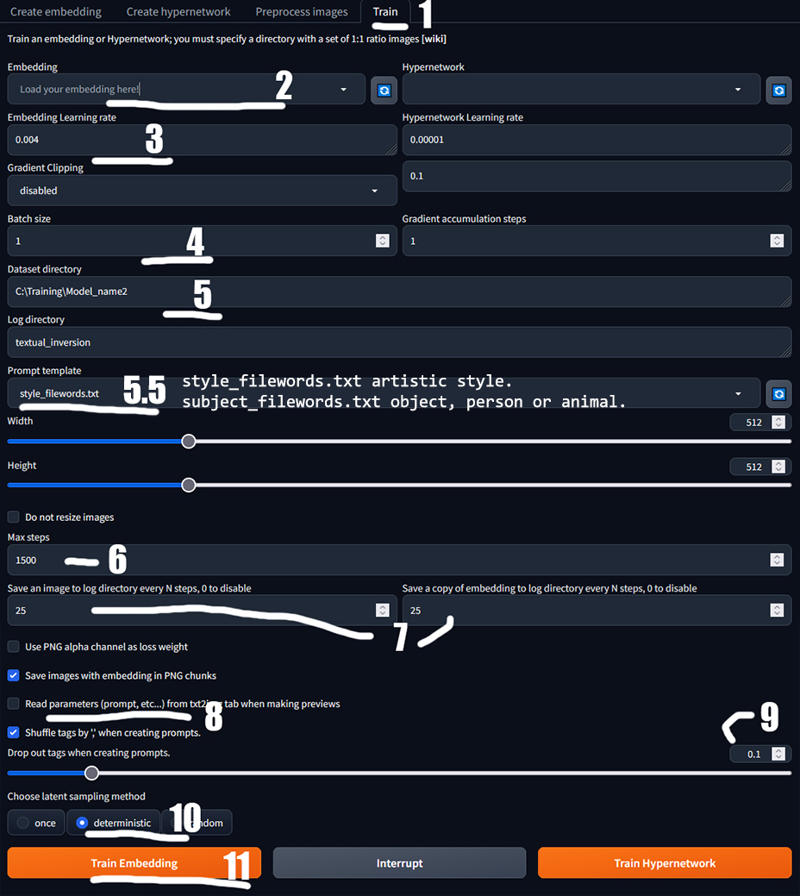
Click: Train
Name your model, the one we just made.
Changes from 0.005 to 0.004
1-3 depending on how good card you have i got 3060 12Gb and i only run 1
“C:\Training\Model_name2” The folder you pick before.
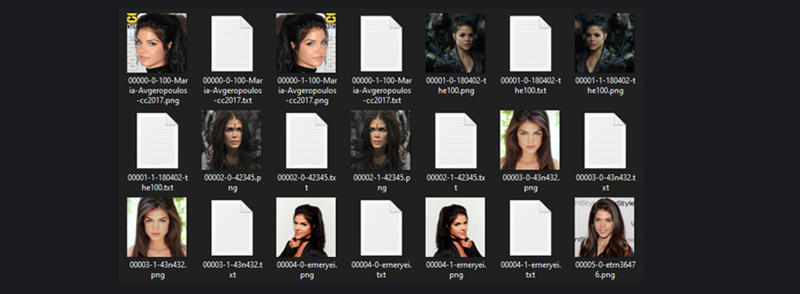
the one that has text files.
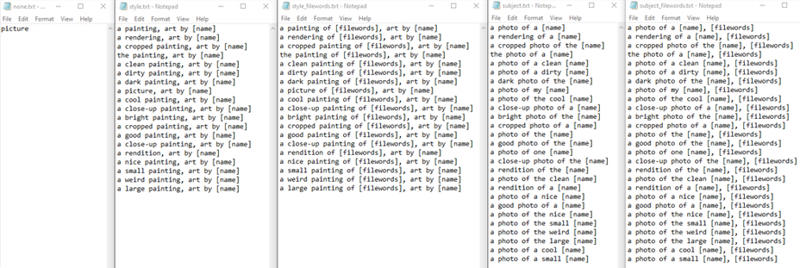
5.5 select style_filewords.txt if you are training an artistic style or
select subject_filewords.txt if you are training an object, person or animal.
6. 1500 steps, very rare but some times 1500 is to much so you can find lower steps after your done training.
stable-diffusion-webui\textual_inversion\2222-02-02\octavia\embeddings
7. 25 25
8. Check mark:
Save images with embedding in PNG chunks
and
Shuffle tags by ',' when creating prompts.
9. 0.1
10. Deterministic
11. Click Train Embedding and wait. DONE! :D


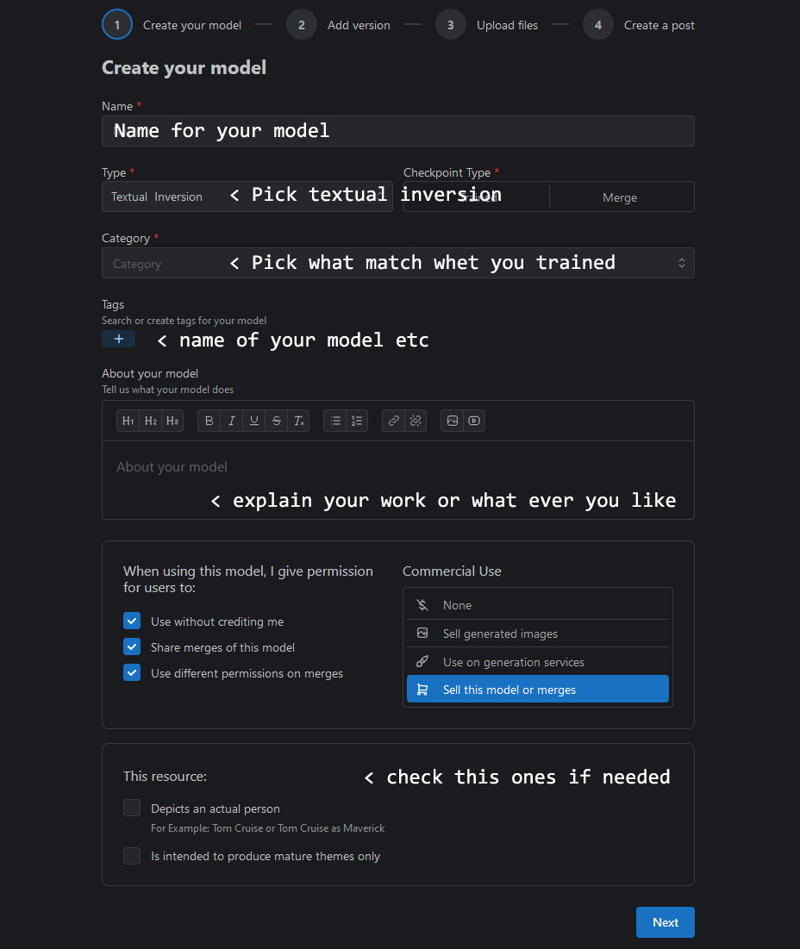
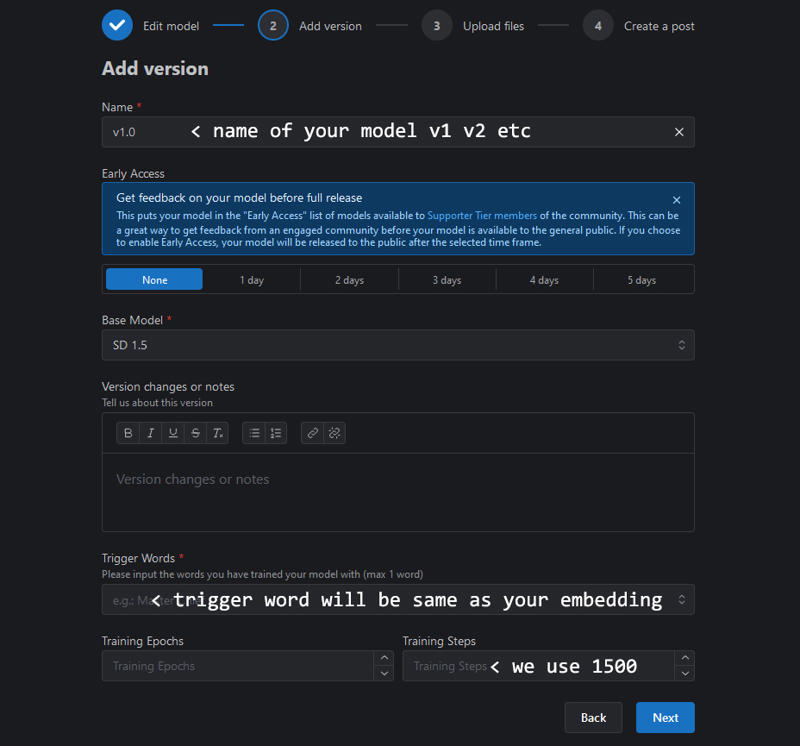
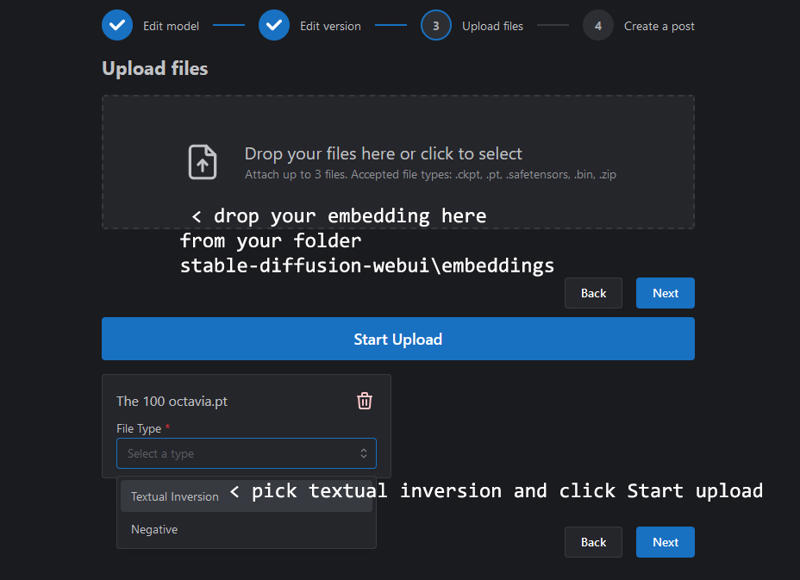

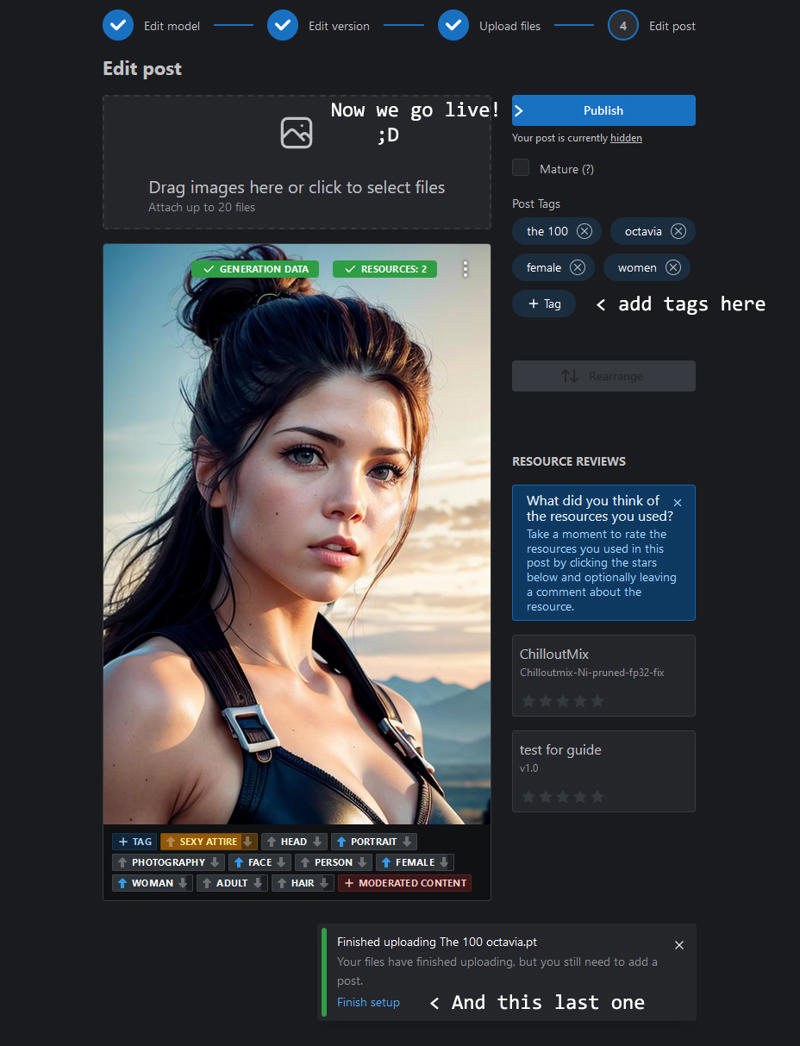

Need more help? Ask a pro not a beginner like me.
But i´am happy to give all help i can.
Thanks for reading! Have fun creating all the new Textual Inversion!
Love to see your work so please share.
Sincerely Alyila


