Welcome! In this guide, we will walkthrough the steps to collect and enhance images from the internet, and use them to create a lower model using the Koya SS GUI and Auto 1111 solutions. This process can be broken down into multiple sections, with this guide focusing on the first part - collecting and preparing images.
Step 1: Image Collection
Let's say we want to create a Jennifer Aniston model from the 1990s. First, we need to collect images:
Search "Jennifer Aniston" online to find a variety of images.
Aim to find high resolution images with, at least, a 512x512 pixel resolution.
Don't worry about the aspect ratio of the images. They can be landscape, portrait, or square - we'll take care of the aspect ratio later using Bucketing .
Select and save the images into a new folder. For this guide, let's name it 'Jennifer'. Create a subfolder within it named 'LoRA' (the intended name of our model). In 'LoRA', create a subfolder named 'image'. Within this folder, create a subfolder with a name starting with the corresponding number of repeats you intend to run (for 16 images, you would usually do 100 repeats).
jennifer aniston/lora/img/100 jennifer aniston
You can use a mix of images with different resolutions during the training process, as long as the minimum resolution is 512x512, which is how the Stable Diffusion model was trained initially. Using images with lower resolutions might introduce problems. 🔗
Selection Criteria
It's a pivotal step in the creation of your model to decide on the right images for your dataset. I'd love to guide you through a few pointers that can steer your choice effectively:
High-Quality Images: It's ideal to opt for images with fine resolution and clearly visible details. Be cautious of low-resolution or fuzzy images, as they may impair your model's capacity to learn effectively and generalise.
Relevant and Representative Images: You should be on the lookout for images that depict the theme you are focusing your model on, in an accurate way. The images should portray the essential aspects, features, or properties that you want your model to understand and identify.
Desired Model Output: Bear in mind your expectations for the output your model should generate. Go for images that harmonise with your anticipated output or visual aesthetic. This will act as a beacon for the learning process of the model and influence the results it produces.
By sticking to these recommendations, you can compile a dataset that amplifies the effectiveness of your model, enabling it to learn from top-notch, representative images and deliver the results you expect in a more efficient manner.
Suppose you're focusing your model on Jennifer Aniston. In this case, it's critical to prioritise top-notch images. Selecting images with a resolution of 720p or above is a prudent choice as this ensures that your model will pick up on the finer details effectively. Though you can include images of lower quality, it's crucial to realise that these might pose a challenge to the model, particularly with intricate elements such as facial features, patterns, or tattoos that play a big role in Jennifer Aniston's appearance. Prioritising higher quality images will boost the model's learning capability and the precision of its generated renditions of the character.
Step 2: Image Cropping
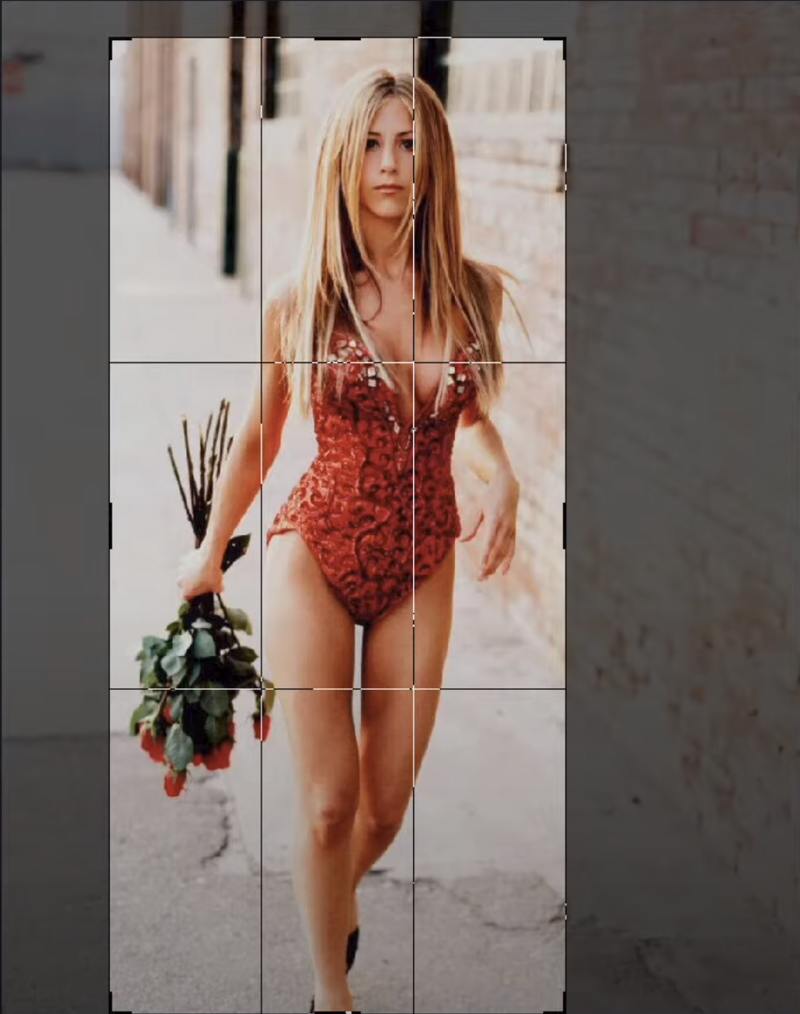
Crop the images in order to focus all of the attention of the trainer on the subject you are want to train. The surroundings are unimportant, what matters is the subject.
Crop the image to remove any unnecessary surroundings, keeping the subject in the center.

Step 3: Image Enhancement
With our cropped images collected, let's enhance them:
Open your preferred image enhancement software, we use Topaz Gigapixel AI.
Upscale the images 2x checking that the upscale brings an actual improvement.
Remember to save the final images in JPG.
Once you've gathered and processed all the images, review them in their folder. Remove any image that wasn't cropped/enhanced or not in JPG format. Aim to have 16 good-quality images. Look for duplications or images that seem out of place, and rectify if needed.
Step 4: Use Stable Diffusion to Further Enhance the Images
Certain images may need further improvement. For instance, they might appear too soft or grainy.
Open your Stable Diffusion instance.
Select the img2img tab.
Drop a copy of the image you want to enhance into the tool.
Adjust the output resolution and dimensions to fit your needs.
Run a Interrogate CLIP to get a prompt for the image.
Recommended Parameters:
Lower the denoising strength to around 30% (0.3 value) to 25% (0.25 value).
Sampling Steps: 20
Sampler: Euler
CFG Scale: 7
Enhanced image versions emerge as a result of this approach. Maintaining the subject's facial resemblance to the original photo is critical. Major deviations? Toss those aside—they won't do.
Step 5: Caption the Images
Captions are essential for training models about the subject of an image. Generating captions is instrumental to teach the LoRA do discern the subject from the rest of the picture.
Navigate to your captioning tool. In our case, we're using the Koya SS GUI.
Open the "Utilities" tab and select the "BLIP Captioning" tab
In Image folder to caption insert the directory path of the folder containing the images to be captioned. In our case jennifer aniston/lora/img/100 jennifer aniston. Alternatively you can use the folder button to the right to navigate to the desired folder.
In Prefix to add to BLIP caption, add a prefix to your captions. This will add a prefix to each of the images to be captioned. In our case we'll insertjennifer aniston
Adjust the settings to fit your needs. For instance:
In Batch size select 8.
Number of beams select 10.
Top p insert 0.9.
Max length insert 75 tokens.
Min length insert 22 tokens.
Start the captioning process by pressing on Caption Images.
If you now navigate back into the folder, you'll see text files (with the extension .txt) appearing aside the images, containing one for each image. These files contain the generated captions.
Once the captions are generated, review them for accuracy. Compare them with the corresponding image to look for inaccuracies.
Make any necessary edits to the captions, focusing on the important details in each image.
Some captions edit criteria:
Ensure that the captions clearly differentiate between elements in the background and those in the foreground by incorporating these specific terms.
Remove any reference to facial expressions.
Enhance the details of apparel whenever you encounter insufficient descriptions.
Save your final captions.
I genuinely hope that this guide has offered a comprehensible and enlightening glimpse into the process of assembling images for a dataset. If there are any queries you'd like to raise, or if you have any additional tips that could enrich this guide even further, I encourage you to post them in the comments. Your contributions are valuable and can help in refining and expanding this guide, as well as benefiting others who discover it. I appreciate your engagement and support — thank you!


