Hi! This is a no-nonsense introductory tutorial on how to generate your first image with Stable Diffusion. We will take a top-down approach and dive into finer details later once you have got the hang of the process. Are you ready?
Pre-requisites
You will need a Computer/Tablet/Phone that can comfortably run a browser. I recommend using a Computer because it just offers a lot more ease of navigating and managing tabs and files.
Another important thing that you will require is GPU compute. If you have a decent graphics card, you can run Stable Diffusion locally (we will cover that in a different tutorial). If you don't, you can access GPUs on the cloud using various services like Google Colab (Pro and Pro+), Lambda and Paperspace. Today we will be focussing on generating our images with Google Colab Pro. It is the first choice of most people who do not have access to powerful GPUs locally and provides 100 compute units/month for around $10, which should last you roughly 50 hours using their lowest-end configuration. (If you don't want to commit to a subscription and still want to be able to follow along, Lamda has provided a free demo that you can access from here: Lambda Stable Diffusion Demo. In this case, skip to Generating your first image section below)
Patience.
Setting up your Google Colab Pro/Pro+
It's a personal preference, but I recommend setting up a new Google account as a safety practice, given we will essentially be executing code online and using our Google Drive to save code, diffusion models and images. Most of the notebooks (files containing codes with the extension ipynb) are publicly vetted by the developers in the community, so they can mostly be trusted. However, if you are not careful, you might end up executing some sketchy files from bad actors. So to be safer, set up a new account and subscribe to Colab Pro there.
We will be using the Automatic 1111 WebUI implemented by TheLastBen. This GitHub repository is actively maintained and comes with most of the latest features. It can sometimes be buggy, but things get patched pretty fast, per my experience.
Scroll to the bottom of the linked page, and you will see this:
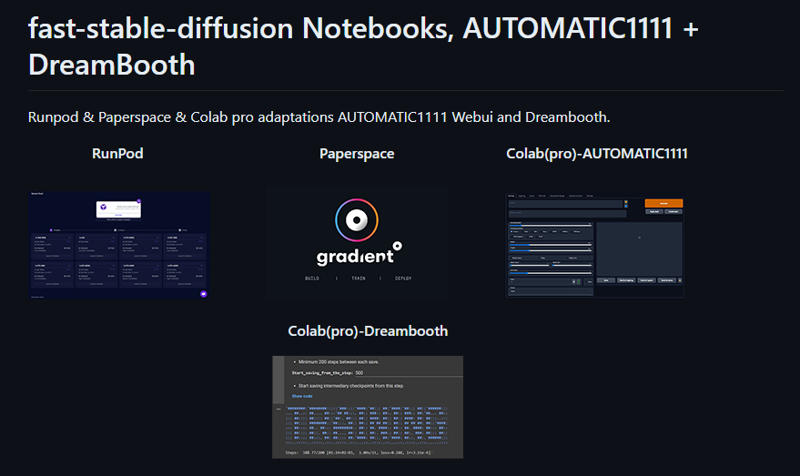
Click on Colab(pro)-AUTOMATIC1111; the notebook will launch in Google Colab as shown.
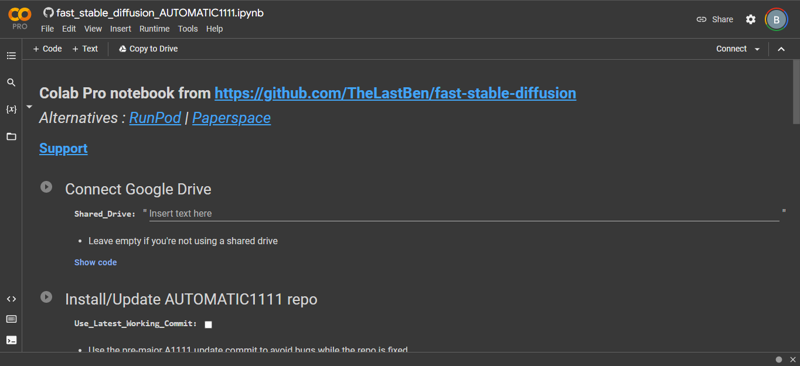
Go to Runtime--> Change runtime type, and the Notebook settings will pop up. Set Hardware accelerator to GPU (must), GPU type to T4 and Runtime shape to Standard. This lowest-end GPU configuration burns compute units at approximately 1.96 units/hour. You can choose faster GPU types and higher RAM Runtime shapes as per your needs later, and they will burn your units faster accordingly, but for our needs today, we are okay with the lower specced configuration.
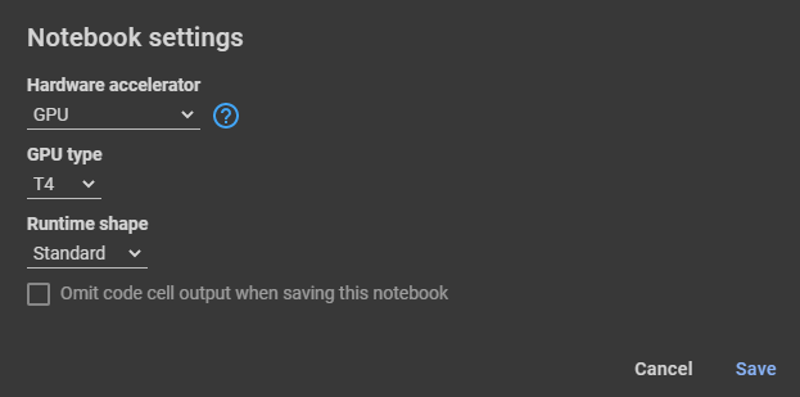
You are now ready to launch your WebUI!
Launching your Stable Diffusion WebUI
With the setup complete, you only have to run each code cell in the notebook one by one by clicking the play button next to them. Let's execute some code cells and see what they do.
Connect your Google Drive
On running this code cell, you will be shown a warning: "Warning: This notebook was not authored by Google". Click on Run Anyway. (This is why I advised you to create a fresh account!).
Then you will get another popup "Permit this notebook to access your Google Drive files?". Click on Connect to Drive. A new window will pop up asking you to choose your Google account whose Drive you would like to connect; choose the new account you have created and allow access to Drive.
Once your drive is connected, you will see DONE below the code cell and a green check beside the play button indicating that the code has been executed. Also, in the top right, you will see a green check against the RAM and Disk monitor, indicating that your virtual machine is up and running (If you click it, you can see the usage monitors, your remaining compute units and your usage rate).
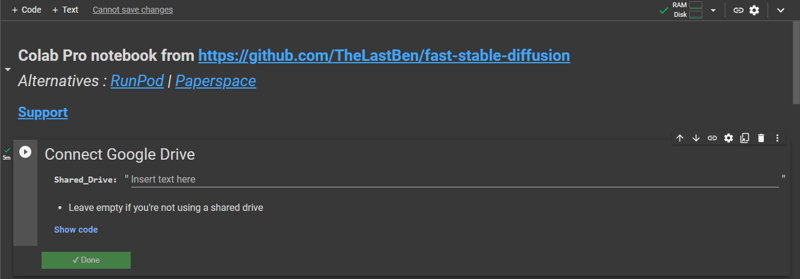
Install/Update AUTOMATIC1111 repo
Running this cell will copy/update the code repository to your drive and create all necessary folders. Additionally, it provides an option to "Use_Latest_Working_Commit", which is helpful at times your webUI doesn't launch due to bugs caused by new updates. Checking it allows you to use an older working version. We will keep it unchecked for now.
Requirements
Running this code cell will install all the necessary Python packages for the WebUI.
Model Download/Load
Choose Model_Version 1.5 (This is the most widely used base model in the Stable Diffusion community, thanks to its flexibility and the range in the outputs it provides, making it a good candidate for further fine-tuning). Leave other things unchecked and blank for now, and then run the cell. This will download and save Stable Diffusion 1.5 model in your Drive to generate the images based on your instructions.
ControlNet
Don't run this cell for now, but for the sake of understanding, ControlNet is a potent tool that can be used to mimic the composition, character poses, and other details from a reference image. We will cover it in a separate tutorial.
Start Stable-Diffusion
This is the last cell of the notebook, which will launch your WebUI on a public web address generated by it. Before running it, check Use_Cloudflare_Tunnel, and if you want, you can password-protect your instance of webUI but providing a username and password (optional).
When this code is executed successfully, you will see a web link to click on, launching your WebUI directly or opening a login page (if you entered the required username and password before).
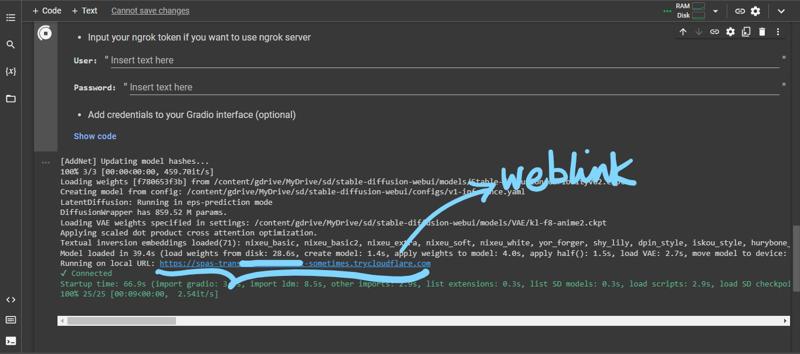
The link will work as long as this cell is running. If, for some reason, you encounter an error and the link is not generated, go to Install/Update AUTOMATIC1111 repo cell above, check the Use_Latest_Working_Commit, run it and then rerun the Start Stable Diffusion cell.

Don't fret if your WebUI doesn't exactly look like this.
Generating your first image
Make sure you are on txt2img tab. If not, then click on it (top left).
Also, make sure that a Stable Diffusion checkpoint is loaded. In your case, it would be Stable Diffusion 1.5 (I am using a different custom model curiosityV02 as seen in the screenshot. Again, don't fret if your WebUI doesn't exactly look like this).
Click on the first box that says Prompt and type/paste "a cute oil painting of a cat wearing a crown made of diamonds".
In the box below that says Negative Prompt, type/paste "blur, hazy, cartoon, picture, cropped, bad quality".
Use the following settings:
Sampling method: Euler a
Sampling Steps: 25
Batch Count, Batch Size: 1
Width, Height: 512
CFG Scale: 7
Seed: -1
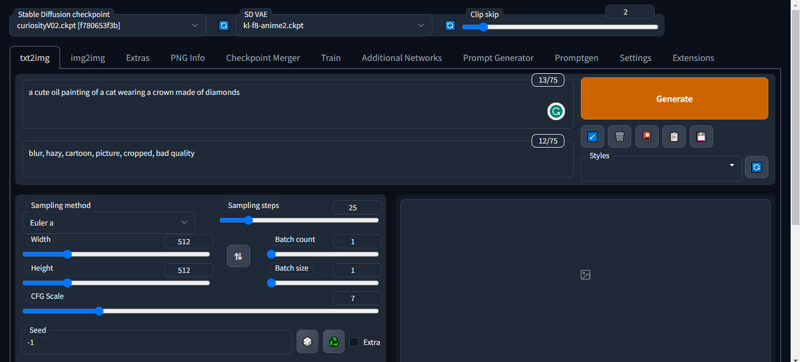
Click Generate, give it a few seconds, and congratulations, you have generated your first image using Stable Diffusion! (you can track the progress of the image generation under the Run Stable Diffusion cell at the bottom of the collab notebook as well!)
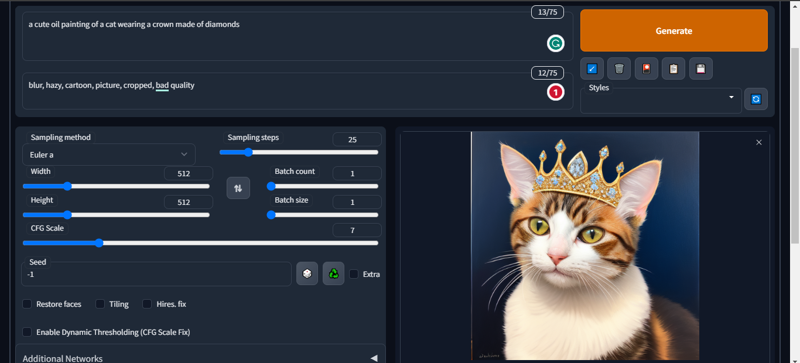
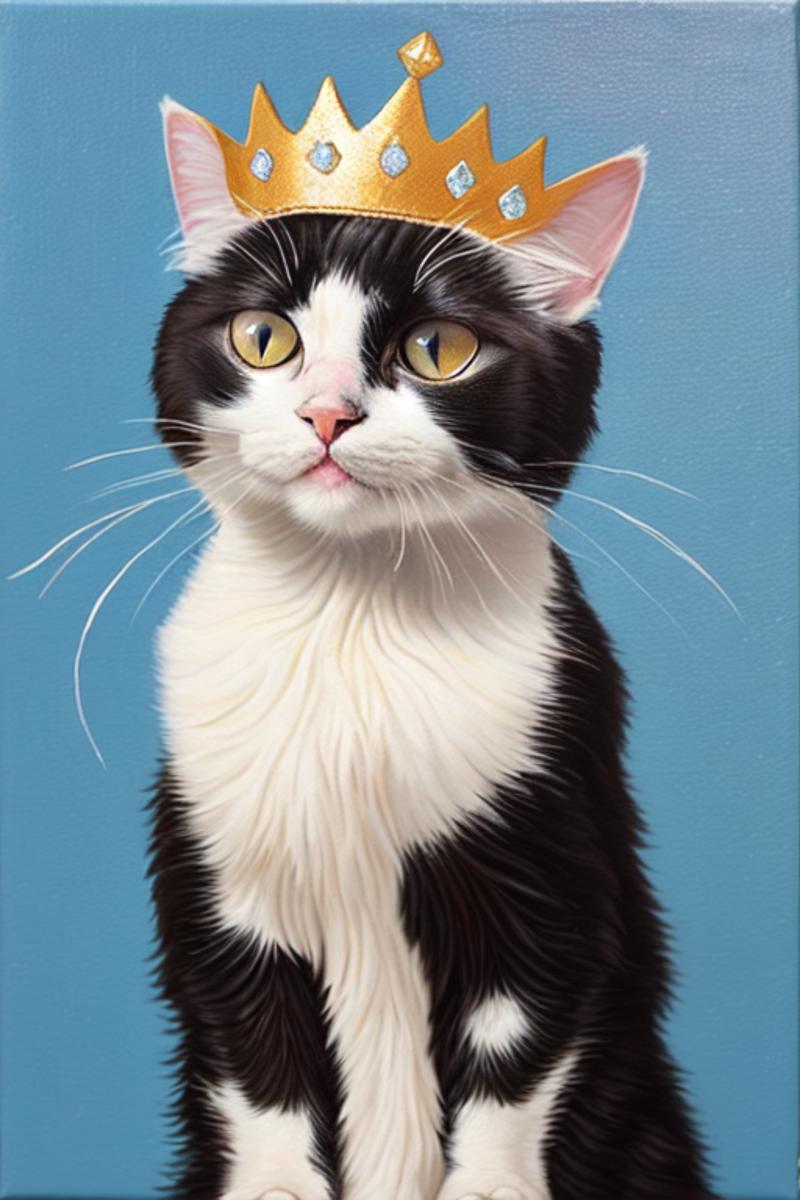
Click on the image, and you can right-click save it. The image also gets saved on your drive so don't worry about manually saving everything.
Now read the below section, play with prompts and settings on your own and after you are done, do not forget to terminate your Google Colab session; otherwise, it will keep eating your compute quota. To terminate your session, click the arrow next to the RAM and Disk monitor icon, select Disconnect and delete runtime and then confirm yes.
Overview of the settings
Prompt: A prompt is a textual description of whatever you want to make. Type what you want to see in the created image! It is better to be as descriptive as possible. There's a community consensus on the way to construct a prompt, but I wouldn't be too bothered about it right now. Just experiment and have fun. I will cover prompt writing in another tutorial.
Negative Prompt: It is everything you don't want to see in your image. It tells the model what to stay away from. For e.g., if you make a photorealistic image, keywords like cartoon, anime, painting, sketch, and 2D will go in the negative prompt.
Sampling method: SD generates an image by denoising a noisy sample/image. This denoising is accomplished using a sampler, each having a different approach to denoising the image/sample. The choice of sampler affects the look of the final image/sample, so choosing a sampler is generally a matter of opinion. Experiment with different samplers and see what works for you. Euler and DPM ++2M Karras are some popular choices.
Sampling Steps: It determines the number of steps/iterations taken to denoise the image, which in turn affects the quality and the time to generate the final output. A good recommended setting is around 20-30, but it depends on your choice of the sampler and the output you are looking for. Experiment with different numbers and see what sticks. The change in quality is dramatic for lower values but not so much when you crank it way up. So for fast and good generations, you should not increase it too much.
Batch Count and Batch Size: Pretty self-explanatory. If you want more than one image in one go, change the batch size, and if you want to create multiple batches, then change the batch count. I like to set them to 1 and 3, respectively, so I can quickly see if the prompt and settings are good. This is also the maximum you can go on the low-specced GPU config.
Width, Height: Most older models have been trained on 512x512 or 512x768 image sizes, so setting the image sizes in multiple of these typically yields good results. You can, however, set them to whatever size you want as long as your GPU is powerful and has enough memory to render at that size.
CFG Scale: This parameter tells the model how strongly to follow your prompt. A high CFG tells the model to strictly follow your prompt, while a lower one gives it more freedom. People typically like to use a CFG of 7-10. If you go overboard with the CFG, your image starts to get plagued with saturation issues.
Seed: Seed is like an Image ID for the given configuration of your model and the settings. Every image has a unique seed that can be used to replicate it, given the model and other environment settings are the same as when the image was created. It is usually a large number but typically set to -1, instructing the model to use a random seed.
Note: You will also notice that when you create multiple images in batch sizes > 1, each image has a seed incremented by 1.
Next Steps
Launching Stable Diffusion for the second time
All the steps remain the same as above, except you don't need to rerun the Model Download/Load cell, given that you have already downloaded it.
New tutorials
I will try to write new tutorials on techniques and topics I skipped or skimmed over, so you can keep an eye out for that.
Check out the Stable Diffusion community
The stable diffusion community is very supportive, and you will find many people willing to help you learn more things. You can lurk in the Discord servers, dedicated subreddits and social media sites where you can ask questions, enjoy the art made by others, and get inspired.
Drop Feedback
If you liked this tutorial, let me know; if you didn't, let me know where I can improve. If you have specific tutorial requests or questions for this particular tutorial, drop them in the comments.
I hope you enjoyed this tutorial! I would love to see all the beautiful art you end up creating, so tag me on my socials, and I will share the best ones!
Keep Dreaming!

