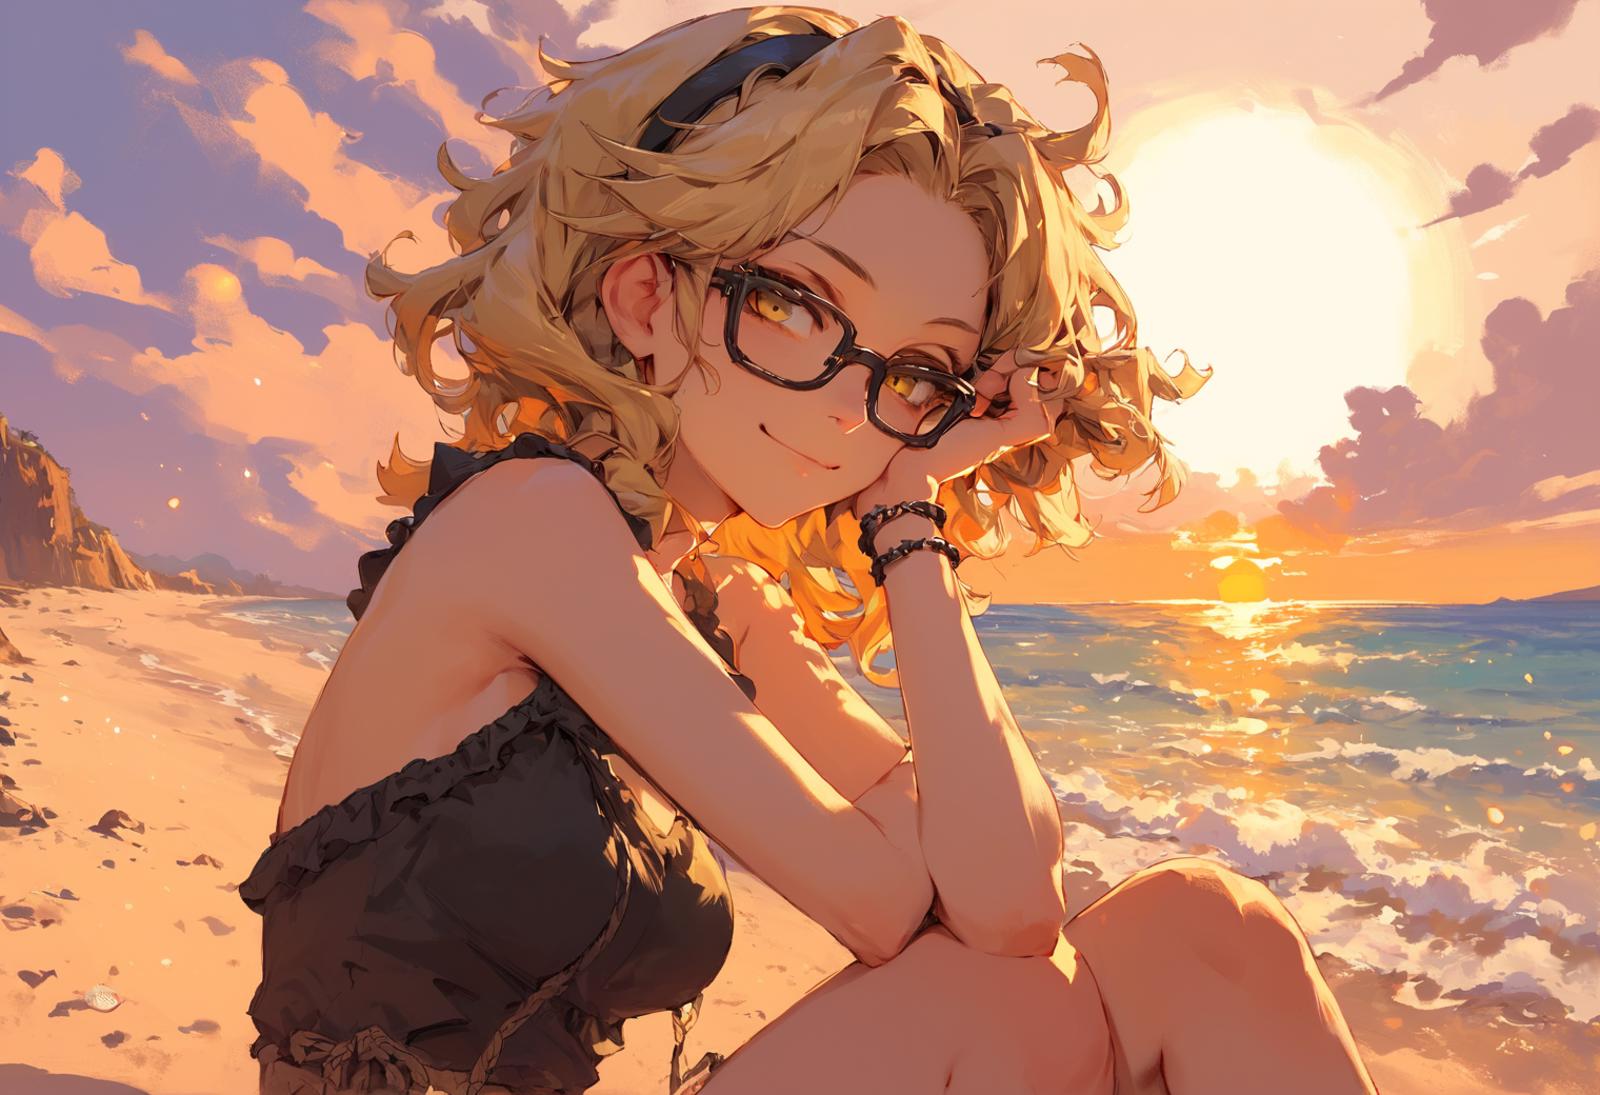
Disclaimer: this article was originally wrote to present the ComfyUI Compact workflow. I moved it as a model, since it's easier to update versions.
Introduction
In this article, I will demonstrate how I typically setup my environment and use my ComfyUI Compact workflow to generate images. For this study case, I will use DucHaiten-Pony-XL with no LoRAs.
Environment
I don't have a very powerful computer. For people in the same situation, here's what I do.
I first rent a computer on vast.ai. There is Docker images (i.e. templates) that already include ComfyUI environment. Then, I chose an instance, usually something like a RTX 3060 with ~800 Mbps Download Speed. That should be around $0.15/hr.
I open the instance and start ComfyUI. I import my workflow and install my missing nodes. Meanwhile, I open a Jupyter Notebook on the instance and download my ressources via the terminal (checkpoints, LoRAs, etc.)
curl -L -H 'Authorization: Bearer <API_KEY>' -o ./models/checkpoints/checkpoint.safetensors https://civitai.com/api/download/models/<MODEL_ID>Note: go to your CivitAI account to add your <API_KEY>. Then, find the MODEL_ID directly on the CivitAI model's page, on the download section.
Settings
I don't tweak so much the settings. I just strongly recommend to pythongosssss nodes to Manage custom words and load Danbooru's tags.
Define style
I like to generate successions of images that look the same to create a coherent story. For that, I use IPAdapter to inject a style taken from a photo. I couldI take an existing one, but I like to just generate a bunch to see what mood speaks to me the most.
Hakkun nodes are useful to create some randomness on that matter. I typically use a simple prompt, without too many details on the subject, but with different styles. I also try different LoRAs styles, but I'll just use the checkpoint here.
I don't use any high-res fix or any upscaling. The goal here is to output stuff quickly.
score_9, score_8_up, score_7_up, score_6_up,
[lineart,sketch|realistic|photorealistic]
[cyberpunk|steampunk|]
[beach|city|forest|jungle|lake|snow|rain]
[sun,sunlight|moon,moonlight|]
[light particles|light rays|]
[[warm|cold] tones|]
[pastel colors|10:monochrome|multiple monochrome|]
1girl
The first one looks nice. I'll save it and go to the next phase
IP Adapter
Now, I take my image and put it in IP Adapter. I usually try different type of settings to see what outputs are the best. Don't hesitate to play with the weight, the start and end values, IP Adapter's model/strength, etc.
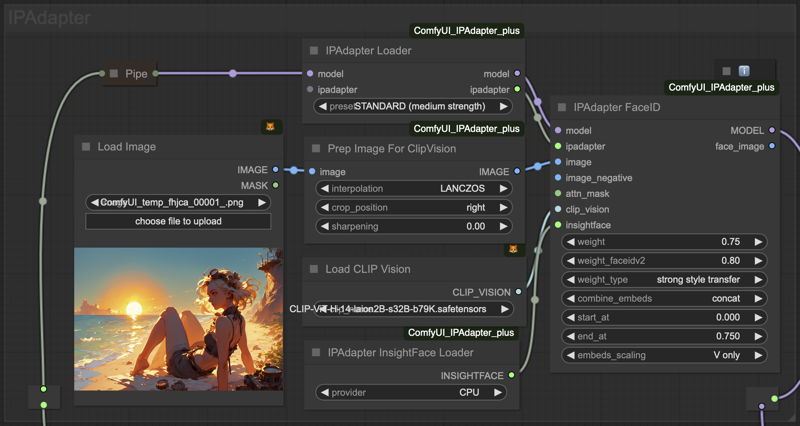
I try to setup some scenes with different subjects and environment, just to see what works well. I keep the styling keywords to a minimum, since it's normally handled by the IP Adapter. Something like that:
score_9, score_8_up, score_7_up, score_6_up,
portrait, [from above|from below|straight-on], [light particles|]
1girl,
[ginger|brown|blue|red|green] hair
[short|long|medium] hair
[blue|green|yellow] eyes, [glasses|]
[white|black|gray] [tank top|shirt|dress|swimsuit]
The last ones start to take this sunny-overexposed style. I like the "short-hair with glasses" character, so I'll keep that in mind.
Base image
I'll keep my IP Adapter settings and write a less random prompt. I will start by generating few images like that and refine my keywords if necessary.
score_9, score_8_up, score_7_up, score_6_up,
portrait, straight-on, light particles
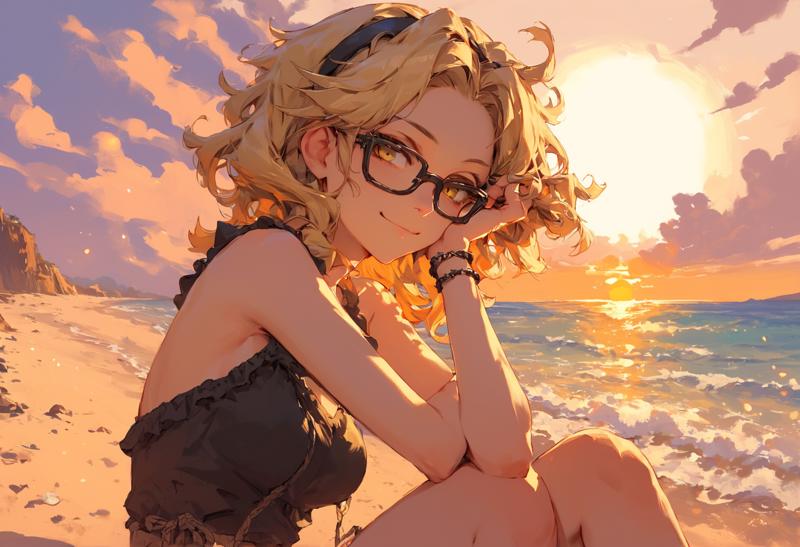
1girl, sitting, adjusting hair
short hair, blonde hair, wavy hair, black hairband
yellow eyes, black glasses
black shirt, off-shoulder shirt
light smile, half-closed eyes, smirk
beach, sun, cloudy sky
Last one seems nice. I'll use it as a base. Thanks to the Canvas Tab node, I can even do some adjustment. I'll start by inpaint unnecessary elements on the image.
Rework final image
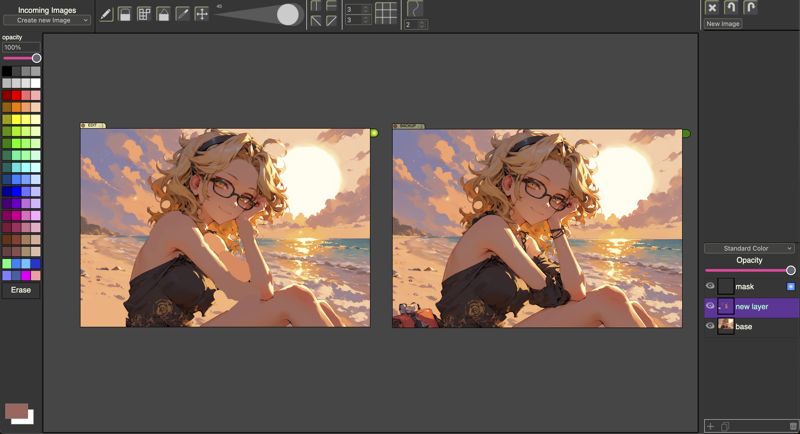
Then, I run a img2img generation and play a bit with the denoise value to see how it turns out. Unless I put a mask, it will rebuild the whole image, but I'm ok with it. Depending on the first result, I run a XY plot to see a denoise + steps comparisons.
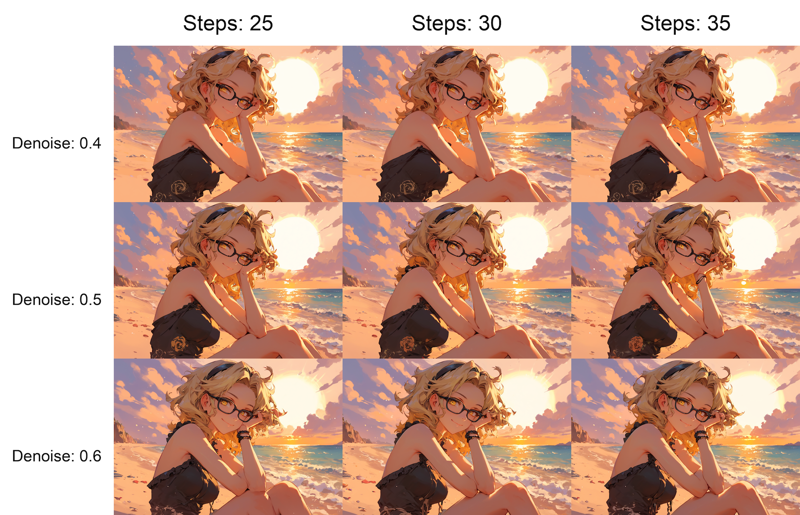
Details are subtle, but 25 steps at 0.6 denoise seem the most stable. I can pass a highres fix, upscale and output the final image with metadatas.
Conclusion
This is just an example of how I work on my images. Sometime I tweak the sampler, try to do some rework with more inpainting or using multiple LoRAs. I hope it gave you an overview of what's possible to do and inspire you! Let me know if you have questions or comments!


