TLDR
In this article, I'll describe the process I used to generate the title image. The purpose is to showcase a variety of techniques and how they can be combined to create something much more complicated and detailed than you can get through pure prompting.
(Warning: long read ahead!)
Forward
This started as a tutorial on how to combine Draw Things and Photoshop, but as the process grew more involved I realized that this was way too complicated for a tutorial. So instead, think of it more like a director’s commentary where I simple describe what I did and why, and hopefully it will give you some ideas you can use in your own projects.
Thanks in advance for reading, and I hope you find this helpful!
Prerequisites
I’m going to assume you have a basic understanding of Stable Diffusion in general, as well as prompting, models, and LoRAs. I’ll briefly describe some more advanced topics like ControlNets and Inpainting, but many of these have entire tutorials dedicated them, so I’ll leave it to you to do your own research if you’re interested.
For my Stable Diffusion front-end, I’ll be using the macOS app Draw Things. If you’re brand new to Stable Diffusion, imagine that Stable Diffusion is the engine that powers the vehicle, and Draw Things is the car that is driven by the user. Other “cars” you may be more familiar with include Automatic1111, Fooocus, InvokeAI, or ComfyUI.
For my image editor I’ll be using Photoshop. There are other options that will work just as well, but since I am most familiar with this one, it’s the one I’ll be using.
The Workflow
Initial Test
I’ll start by just trying to render the scene I want to end up with. This almost always fails, but every once in a while it works out. And even when it does fail, knowing how it fails is useful for figuring out where to go next.
I like fantasy art, so I’ll be drawing an image of:
a wizard battling a dragonFor my starting settings, I’ll use:
Model: Asgard
Image Size: 1152 x 896
Text Guidance (CFG): 7.5
CLIP Skip: 1
Steps: 35
Result (best of 5):
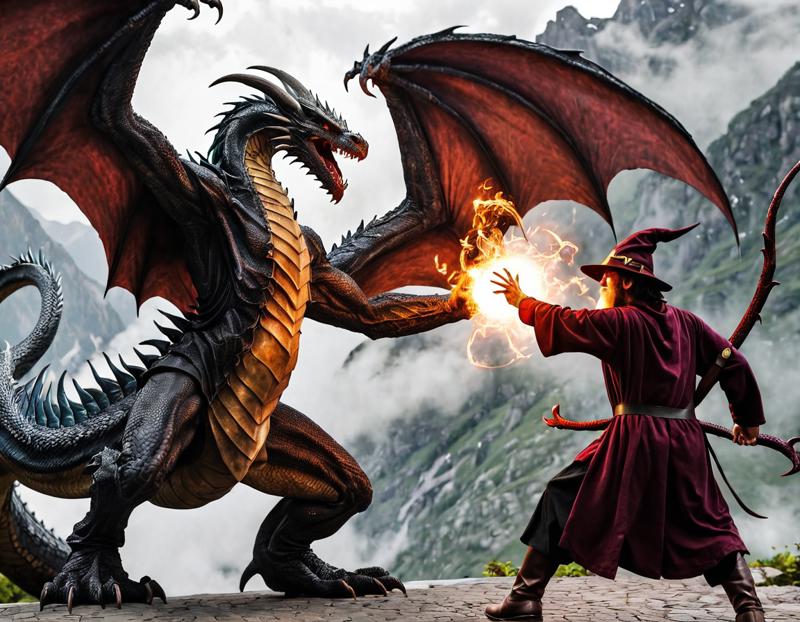
I'm actually a bit shocked at how well this turned out. I’m not happy with the dragon, but I like the composition, especially the wizard’s pose. I’m pretty sure I’ll end up using this one, but first I’ll try rendering a few more just to see if anything better comes along. This time I’ll try Juggernaut XL 10.
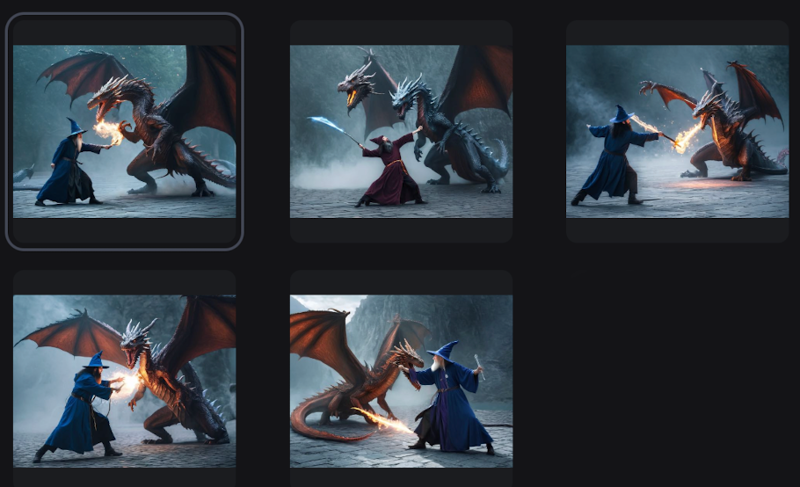
It may not be obvious from these thumbnails, but the overall quality is comparable-to-slightly worse. So I’ll be sticking with the first image.
I want a bit more room to work with, so the next step will be to Outpaint. Outpainting is where we draw outside the bounds of the original image to expand the scene. The process is basically the same as the more commonly used Inpainting, just applied to the outside instead of the inside. If you’re not familiar with Inpainting yet, don’t worry, I’ll go over it more later.
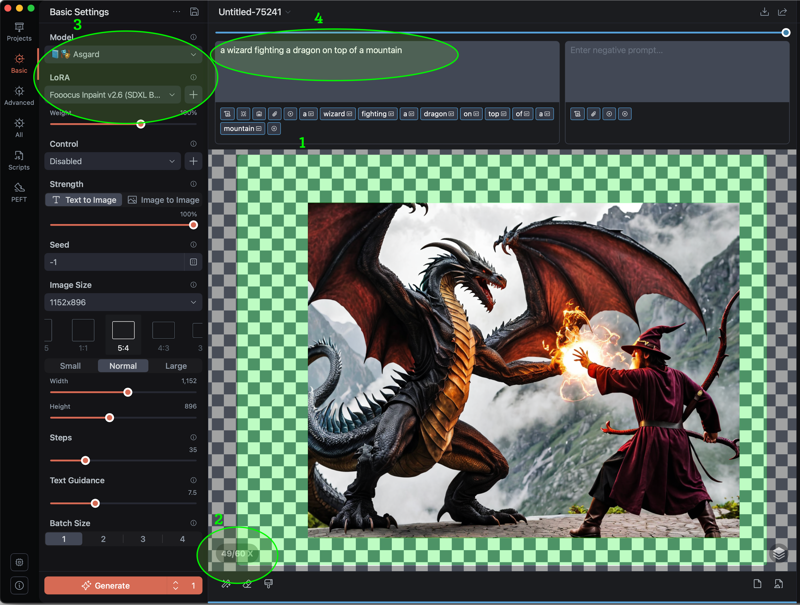
The first thing is to zoom out using either the scroll wheel or reverse pinch. Then pan up and left to put most of the empty space in that area, since I want to get the dragon’s full wing.
You can see the zoom level here
When it comes to Inpainting/Outpainting in SDXL, there’s basically two options in Draw Things (other UIs have more). You can use a dedicated Inpainting model, or you can download the Fooocus Inpainting LoRA and use it alongside your regular model. You can find it in the LoRA dropdown menu.
When Inpainting/Outpainting, it’s important to make sure the prompt describes what needs to be drawn. For the original image, I didn’t specify a setting. But since I’m trying to expand the background, I need to make sure I’m describing one now.
Result:
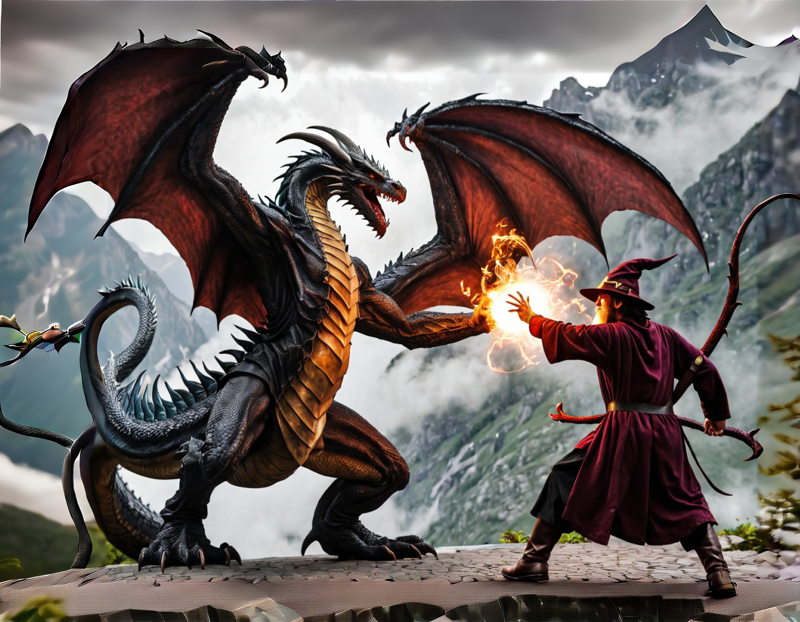
You can see the dragon is now fully in view and there’s more mountains in the background. It’s not perfect though - the bottom of the image is kinda weird, and there’s a seam along the right side where the new imagery didn’t blend quite right. I could fix this, but I’m not going to.
I mentioned before that I was unsatisfied with the dragon. The more I look at this scene, the more I feel like editing it is going to be very, very difficult. Plus I was never really planning to use a realistic style anyway - I just started out not specifying the style because I wanted to see how well Stable Diffusion could handle the composition.
So I’m going to start over. Sort of. I’m going to save this image to use later, but for now I need to take a step back and think about exactly what I want to be going on in this scene.
(To save an image in Draw Things, look for the down arrow above the negative prompt. Click it, and you’ll be presented with an option to choose where you want to save the current image).

So what now? As I said before, I like the wizard and the overall composition. I dislike the dragon, but its pose and location aren’t terrible. So what I’m going to do is look at the scene in terms of its individual components, and then work on them separately:
The setting
The dragon
The wizard
I’ll start with the setting, since it’s easier to place characters into a setting than it is to try to build a setting around characters. A mountainous region works, but what I have now feels a bit boring. So I’m going to add a lair for the dragon, and try to make the background more detailed.
To find the style I want, I run several test prompts with a few different style tags across several different models. Ultimately, I really liked this one using SDVN8-ArtXL:
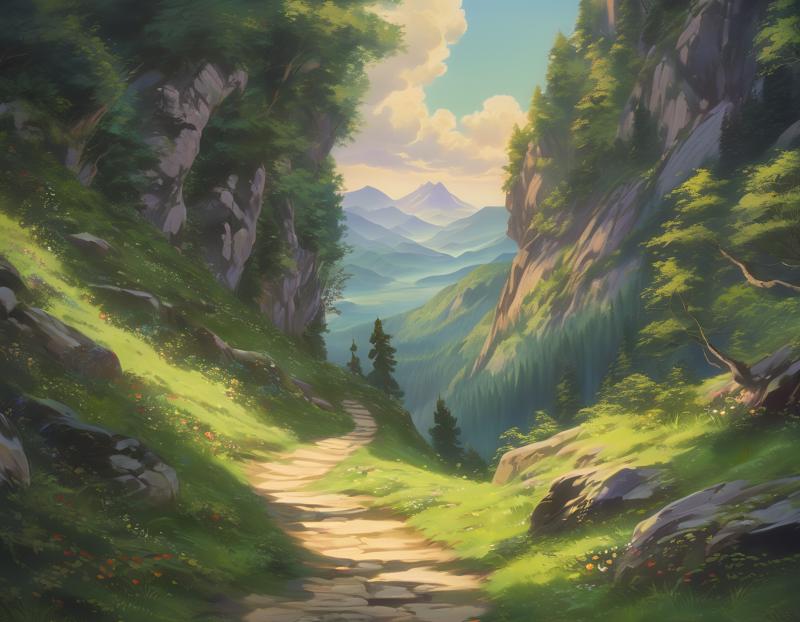
a mountain path, forest, detailed background
baroque anime screencap oil painting by disney animation, by makoto shinkai, by michelangelo
(In Draw Things, you can press SHIFT+RETURN to do a new line. This is the equivalent of Automatic1111’s BREAK statement.)
I’m a bit of a sucker for fusing different art styles. In this case, classical + anime. I have no idea if I’ll be able to pull it off, but this is what I’ll be aiming for.
Starting Over with a Sketch
I’m going to be switching to a 1.5 model at this point for one simple reason: ControlNet Scribble. ControlNet is a suite of tools that give you much more granular control over what you’re trying to draw. In this case, I’ll be using Scribble to turn a simple, messy drawing into something more workable.
(If you're wondering why this requires a 1.5 model, the answer is that Draw Things doesn't have great support for SDXL ControlNets).
I’ll be using the Paint tool to create a sketch of what I want the setting to look like. Below the main canvas on the left are three icons. The right-most of these opens the Paint menu.
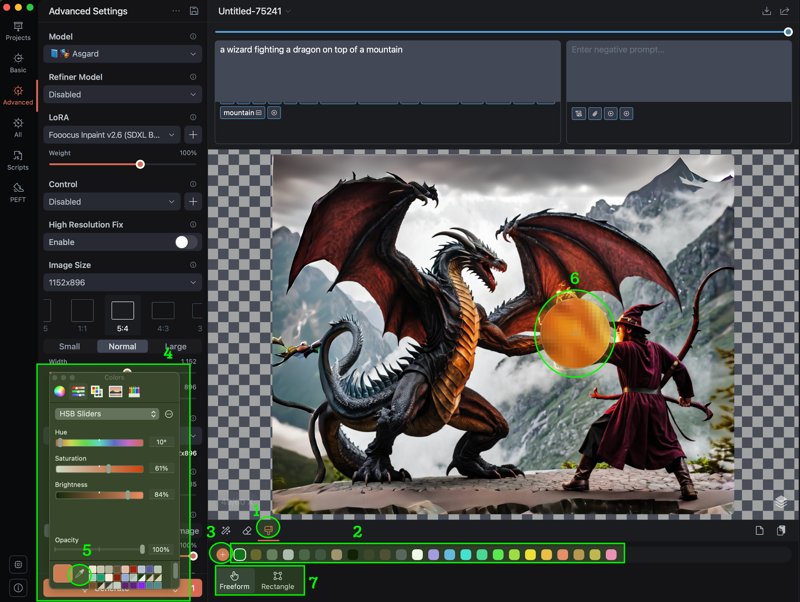
Tapping the paint brush opens and closes the paint menu.
Your color pallete
Tapping the plus button opens the color picker, for choosing a new color not in the palette.
The color picker
The eyedrop tool can be used to select a color from an existing image.
Magnifier
By default you’ll use a paintbrush tool to paint, but for large areas you can switch to a rectangle.
I want to put the dragon in front of its cave, so I’ll start by drawing the cave on the left side. After that, I'll paint over the mountains and the wizard, and then finally add some trees to liven things up.
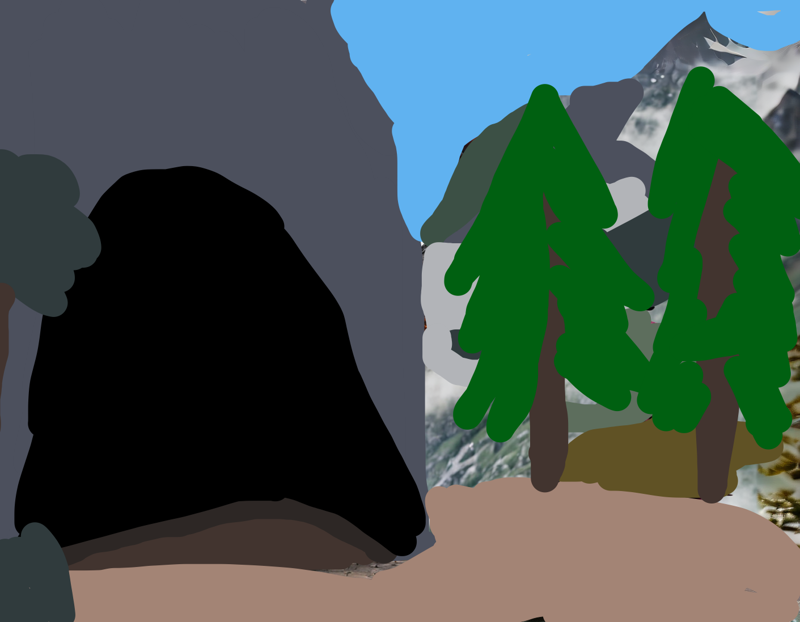
Clearly it's time to start applying to art schools, right?
Now it’s time to create a render based on the sketch.
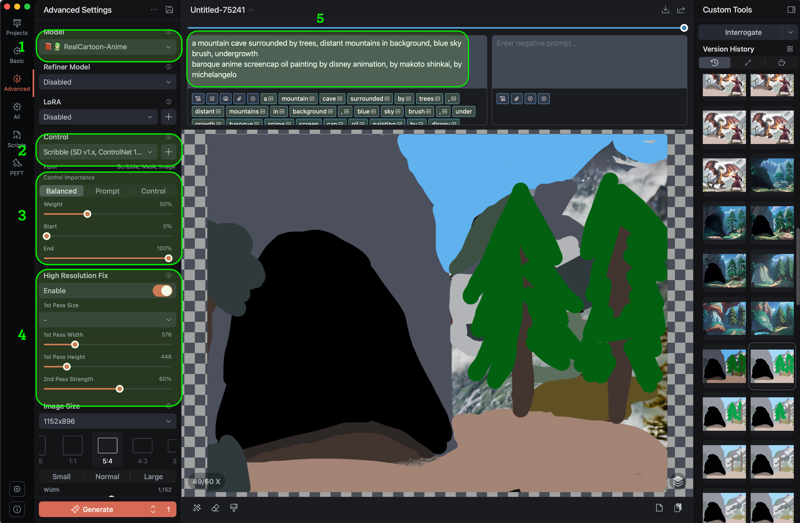
For this next step, I’ll use the RealCartoon-Anime model. It’s an anime model with a lightly airbrushed, faux-3D look.
ControlNets can be activated from the Control dropdown menu. I’ll be using Scribble (SD v1.x, ControlNet 1.1).
ControlNet options. Most of the time, you’ll want to set Start and End to 100%. This will start the ControlNet right away, and keep it running all the way to the end of the render. I only want to use my sketch to set the basic overall composition, so I’m going to set End to 50% so ControlNet’s influence will stop once the image is halfway done. I’m also going to tone down that influence by reducing the Weight to 40%.
Since this is a 1.5 model, it defaults to half the resolution as SDXL. If I simply increase the resolution, I’ll get a bunch of artifacts. So I’ll use High Resolution Fix (AKA Hires Fix), which first draws a low resolution image and then redraws it at a higher resolution. The 2nd Pass Strength determines how much creative freedom Stable Diffusion has during this process. 60% means that the upscaled image will mostly look like the original, but the details will be different. This is useful for making the higher resolution version more detailed and intricate.
Once gain, the prompt gets updated to specifically describe what I’m drawing
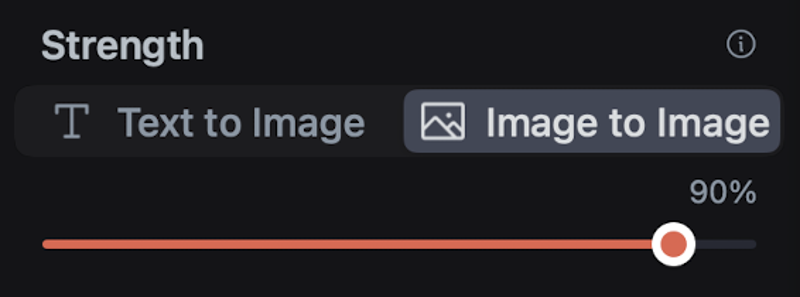
I also set the Strength to 90%, which automatically switches from Text to Image (the image is driven by the prompt) to Image to Image mode (the image is driven by both the prompt and a source image). By setting the Strength to such a high value, I’m telling Stable Diffusion to focus heavily on the prompt and only lightly reference the underlying image.
Result:
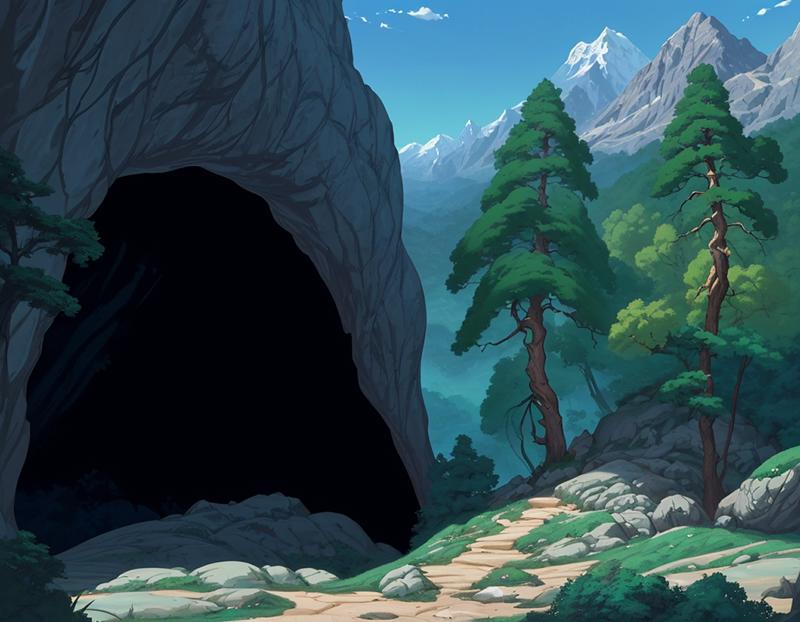
You can see I’ve got the greenerey going offscreen on the left, the two trees on the right, and the distant mountains. This looks promising, so I’ll save the image for now.
Staging the Characters
Now to work on fixing the dragon. Originally, I planned out a number of Photoshop edits with the intent of using a combination of Open Pose ControlNet and Image to Image, but after several hours of failed renderings I gave up and did what I should have done in the first place - rendered a new dragon from scratch using the FurryBlend model.
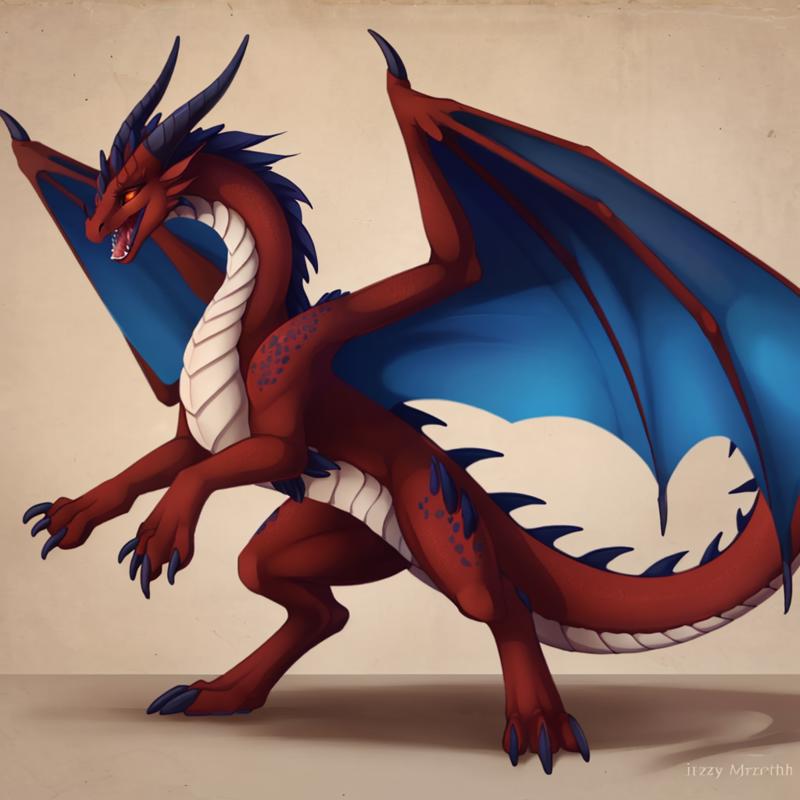
This turned out much better. So I’ll bring it into Photoshop, flip it, and place it in front of the cave. I'll also bring in the wizard. I open the image I saved earlier in Photoshop and select the wizard using the Object Selection Tool (think of it like a smarter version of the Lasso). Once he’s been copied, I paste him into the new image.
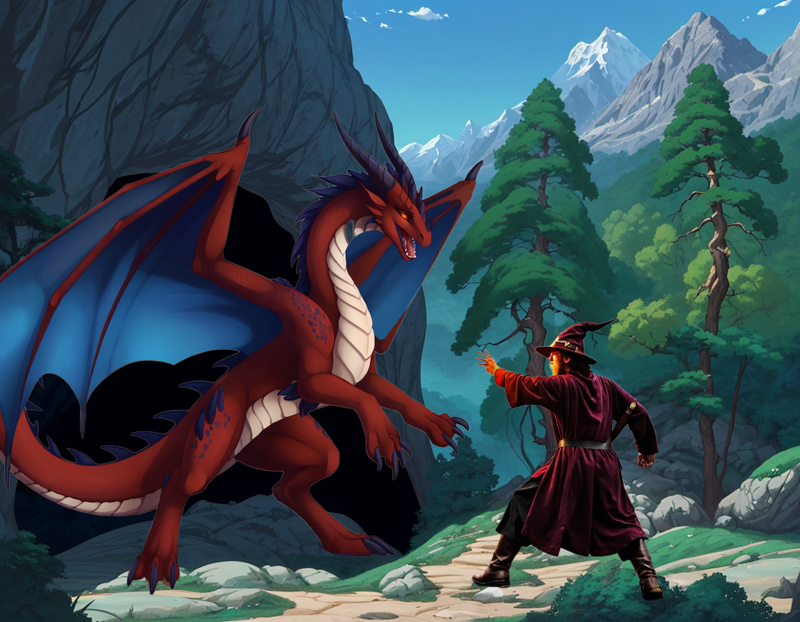
The characters have been placed, but they're not really in the scene, just on top of it. So I'll copy the bush and the cave and move them to the top.
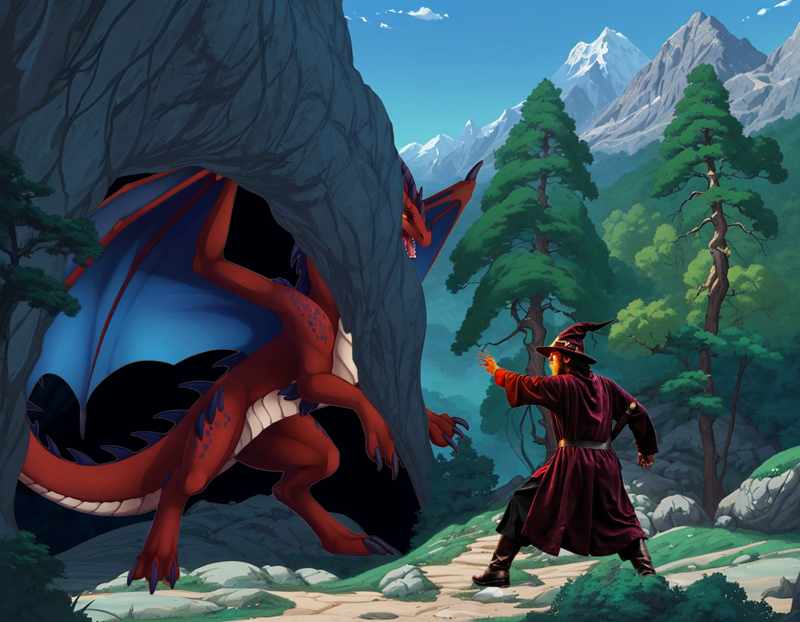
The wizard is fine, but obviously I only want part of the cave to overlap the dragon. I'll add a Layer Mask to the cave layer, and then start painting it black except for where I want it to show on top (the tail). The reason for using this method instead of the eraser tool is it makes it much, much easier to modify or undo later. A good rule of thumb when working in Photoshop is to always make sure you can go back to a previous state if needed.
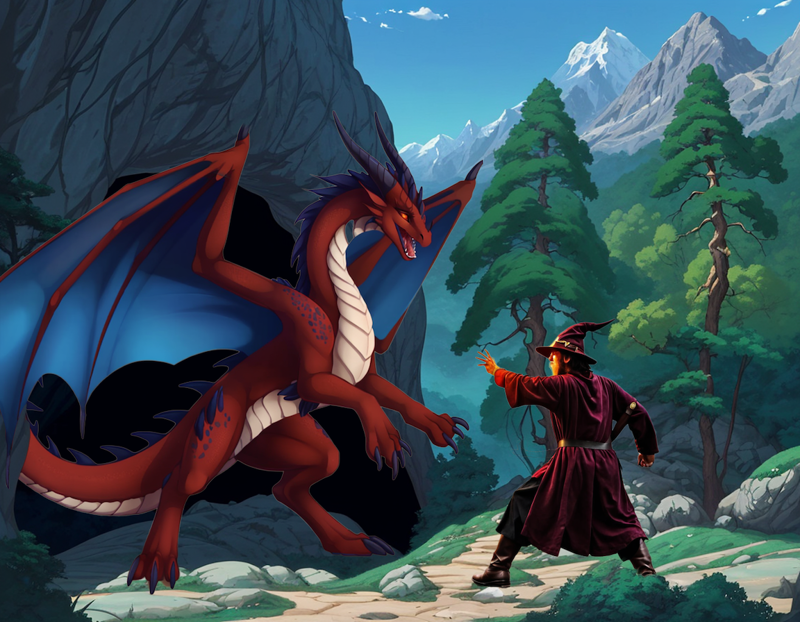
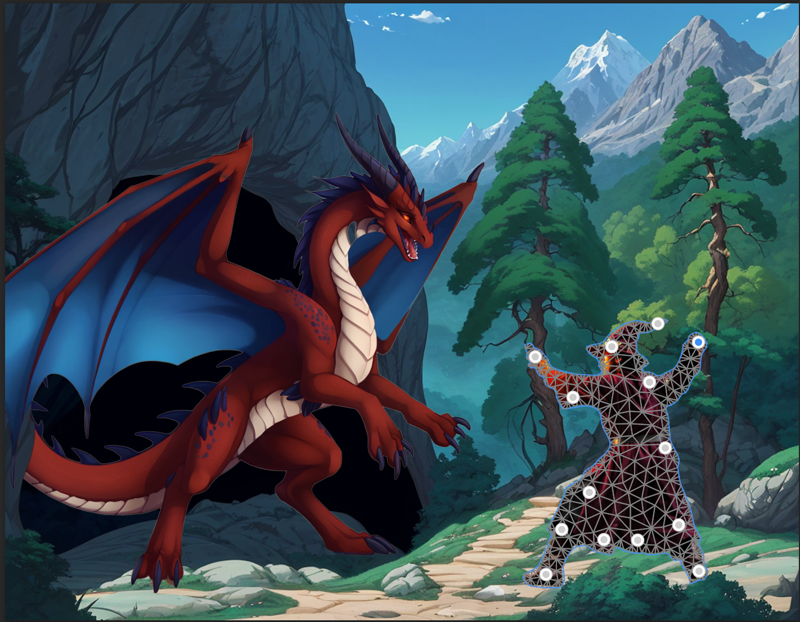
This is much better, but I have a few more changes before bringing it back into Draw Things. First, I’ll move the wizard back a bit. I’m going to be doing some Inpainting on him later, and I’d rather not have the dragon’s leg getting in the way. The second thing I’m going to do is reposition his right arm. His left arm is going to be casting one spell, and I want his right to be preparing another.
After moving him back, I’ll go into the Edit menu and choose the Puppet Warp tool. This covers the wizard in a grid of triangles. Next, I want to make sure the only thing that moves is his arm, so I’ll drop a bunch of pins along the other edges. This will prevent those sections from moving. Then I drag the arm into position and click the checkmark at the top to finish.
Refinement 1
I want to redraw the image to make sure all the pieces share a uniform style. So the first thing I'll do is get a sample that's closer to the style I actually want. I'll import the image into Draw Things, switch the model to SDVN8-ArtXL, set the Strength to 70% (so the overall composition will be the same but the app has lots of freedom to change the details), and update the prompt:
an epic battle between a dragon and a wizard at the top of a mountain, the dragon is guarding a cave, there are trees and mountains in the background
baroque anime screencap oil painting by disney animation, by makoto shinkai, by michelangelo
Result:
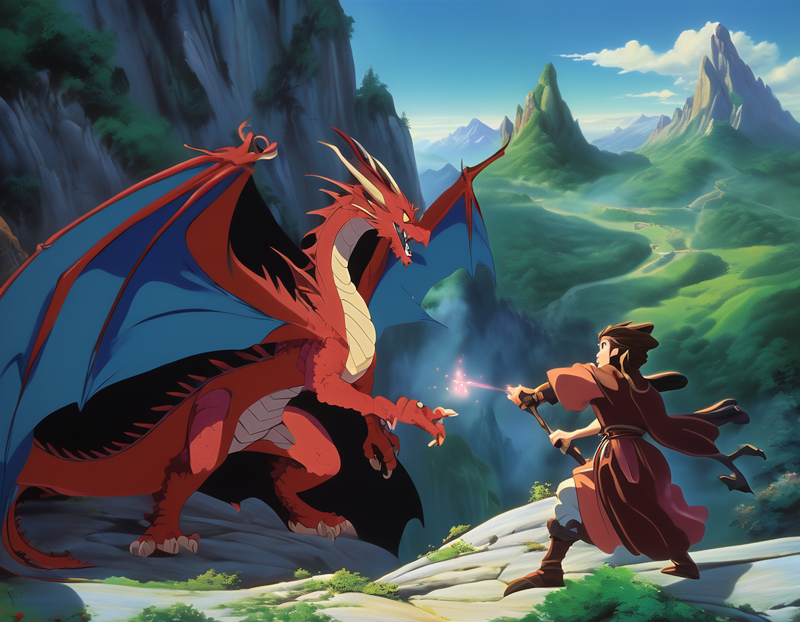
It's not quite the same as before, and there's a part of me that was getting attached to the style of the mountains and trees I already had. But this is only a sample, and for what I have planned I don't need to use it at 100%.
I'll go back to the last imported version of the image and switch the model to LusterMix. Then I’ll activate three ControlNets:
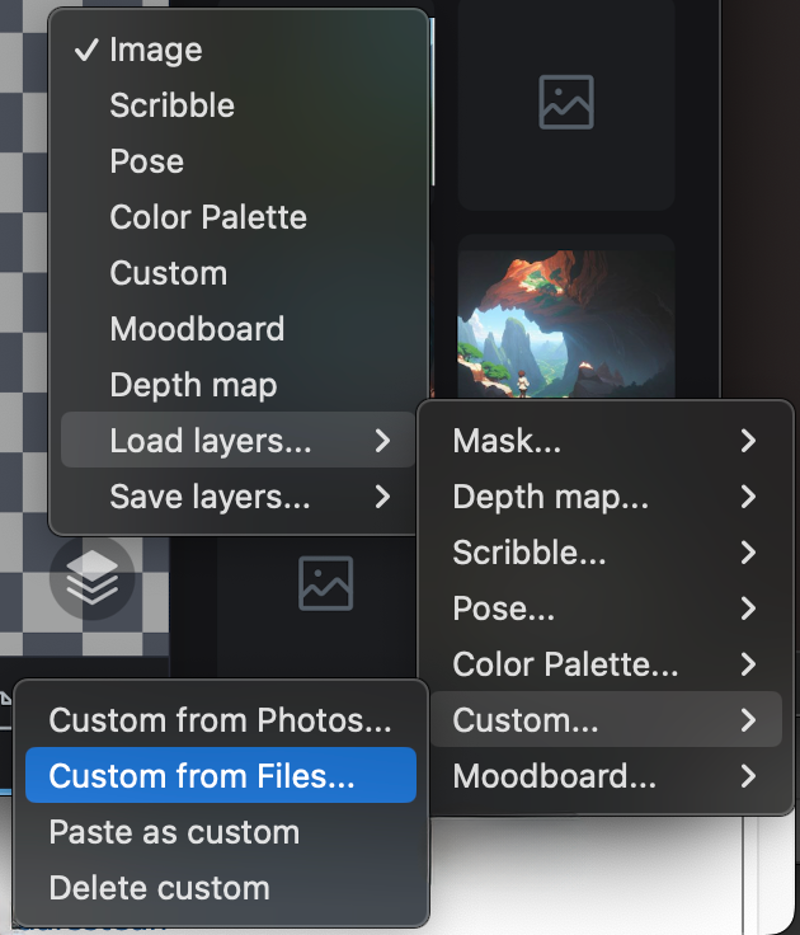
IP Adapter Plus (SD v1.x, ControlNet 1.1). This is a ControlNet that lets you use the style, composition, or both from one image as you draw another. It’s like a more granular version of Image to image. I only care about the style, so I set the InstantStyle Blocks to Style Only. Then I set the Weight to 70%, and the End to 90%. The last step is to provide the reference image. If you look just below the dropdown, you should see “Input” followed by “Moodboard, Custom”. These are the layers that will influence the ControlNet. So I open the Layers menu and choose Load Layers > Custom > Custom from files, and choose the style sample I just created.
Soft Edge (SD v1.x, ControlNet 1.1) and Canny Edge Map (SD v1.x, ControlNet 1.1). Soft Edge and Canny both detect edges within the source image and guide the new image to match them. The main difference between the two is that Soft Edge, as the name implies, is a bit fuzzier, keeping the shapes and outlines mostly consistent while giving the new image freedom in the details. Canny is much stricter. I'll set Soft Edge to Weight 65%, Start 0%, End 85%, and Canny to Weight 30%, Start 70%, End 100%. Originally I only used Soft Edge, but the dragon's left wing and horn kept getting lost, so I added a little bit of Canny at the end to bring them back.
I'll set the Strength to 80% - I'm relying on Soft Edge and Canny to preserve to composition of the original image, so I can give Stable Diffusion as much freedom as possible to change the style and details. I'll also use the same prompt as the last step.
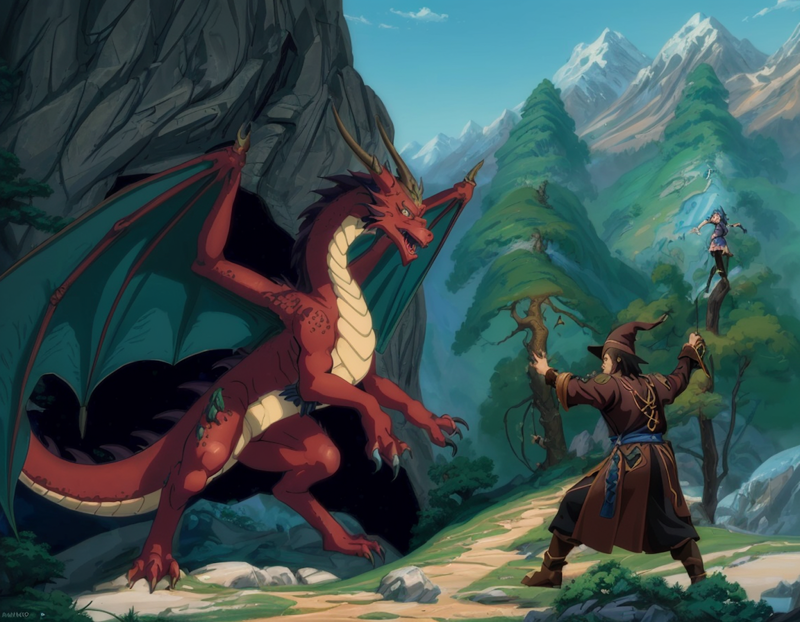
There's some weirdness here (like the girl in the tree). But overall it's shaping up - there's now a single, coherent style for all parts of the image.
To clean up this image, I'll be using Inpainting. Inpainting means masking out only a piece of an image, and then telling Stable Diffusion to redraw only that piece, and to make it blend with the rest of the scene. It's great for adding new objects, removing existing ones, or simply redrawing a different version of the same object. However, Inpainting works best when it doesn't need to make drastic changes. So I've found that the best way to use it is to manually make the edits I want and then Inpaint on top of the edits.
The tree needs work - not just because it turns into a girl in the middle, but because it's fused into the hillside behind it. So I'll bring the image into Photoshop, then use the Remove tool to get rid of the entire top of the tree. I'll continue using it, almost like a smart paintbrush, to bring the more mountainous areas down and get rid of a lot of the grassy areas.
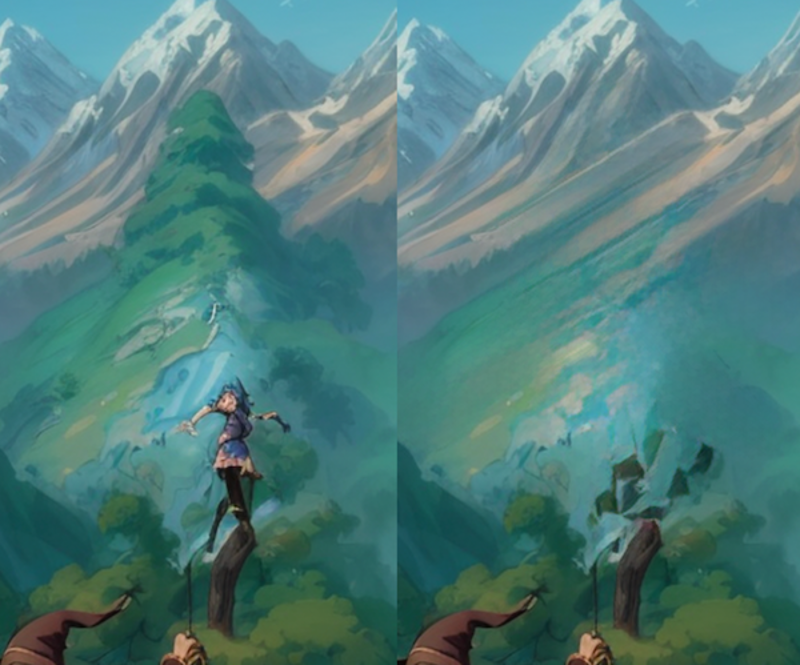
To bring the tree back, I'll start by using the Object Selection tool to grab the top bit of trunk remaining, and then copy it into a new layer. Then I'll use Puppet Warp to stretch and bend it into the area the old tree covered. Once that's in place, I'll just copy-paste a few leafy sections from other parts of the image.
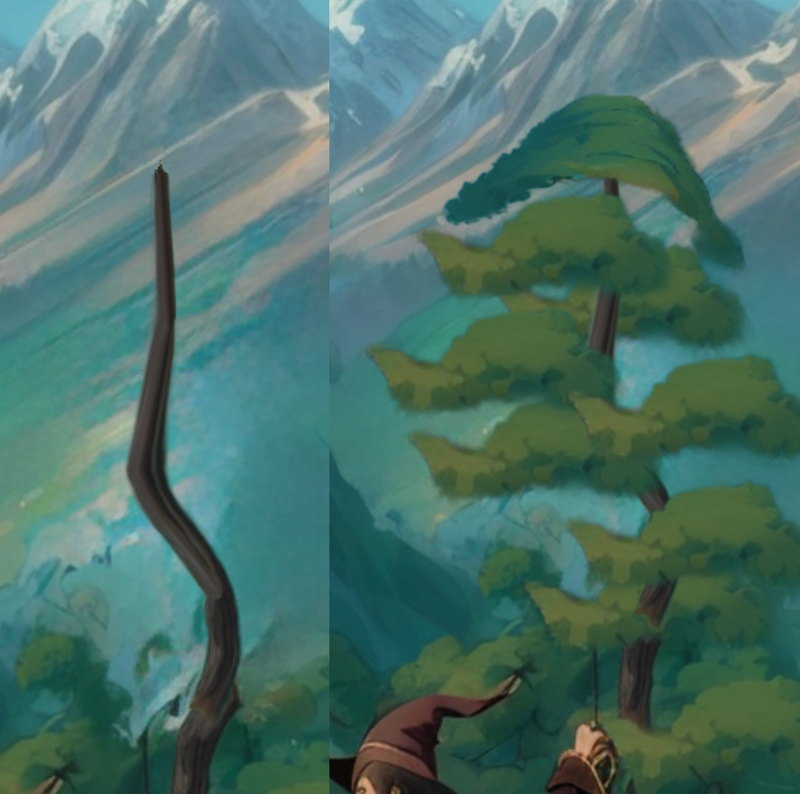
This looks pretty terrible, but the goal is just to create a foundation that will help Inpaint with the real edits.
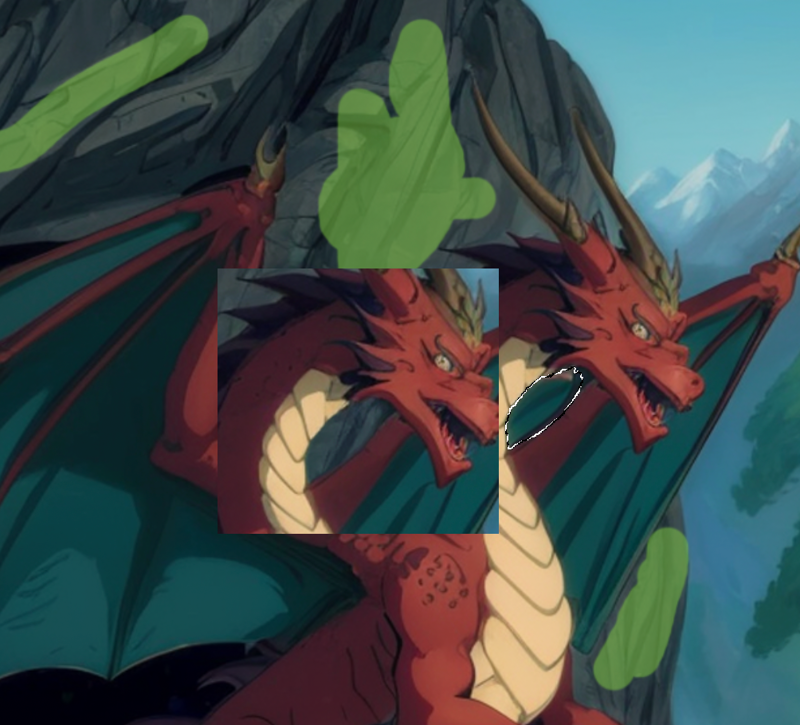
Before I go back to Draw Things, there's a few edits I want to make while I'm still in Photoshop. The dragon’s wing is a little messed up near its neck. So I’ll use Object Selection again to select it, and then Content Aware Fill to replace it with something more fitting. Normally, I’d use the area immediately around the object I’m replacing, but in this case I want to pull from other parts of the cliff.
The ground at the dragon’s feet also looks a bit off. I'll start with Object Selection + Content Aware Fill then I’ll create a new layer above it and then apply a Clipping Mask. This will ensure that the new layer will be invisible, except where it overlaps the top of the boulder. Then I'll use a soft Brush at 15% opacity to paint across the top of the boulder to fade it into the darkness of the cave. Then use the Remove tool to clean up a few artifacts.
One final change, the color of the leftmost section of the boulder doesn’t quite match the rest. So I'll copy it onto a new layer, and apply some Color Overlays (Color Dodge and Soft Light) to get the colors to match.
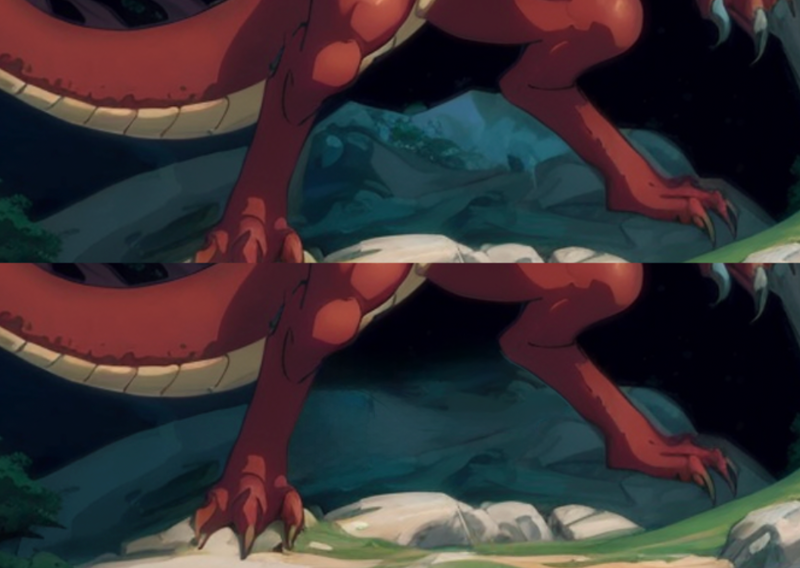
I'll export the image and bring it into Draw Things.
The first step to Inpainting is to mask out what you want to change. In Draw Things, this is done with the Erase Tool below the main canvas. Since I want to redraw the trees (both of them), I'll erase them, and a little bit of the surrounding area to give the Inpainting a little more room to work with. However, I'm also going to leave a few tiny holes in the mask where I want the original image to stay. This is a trick I'll sometimes use when Stable Diffusion tries to draw something smaller than what I want (my first attempts at Inpainting resulted in trees that were half the size I wanted).
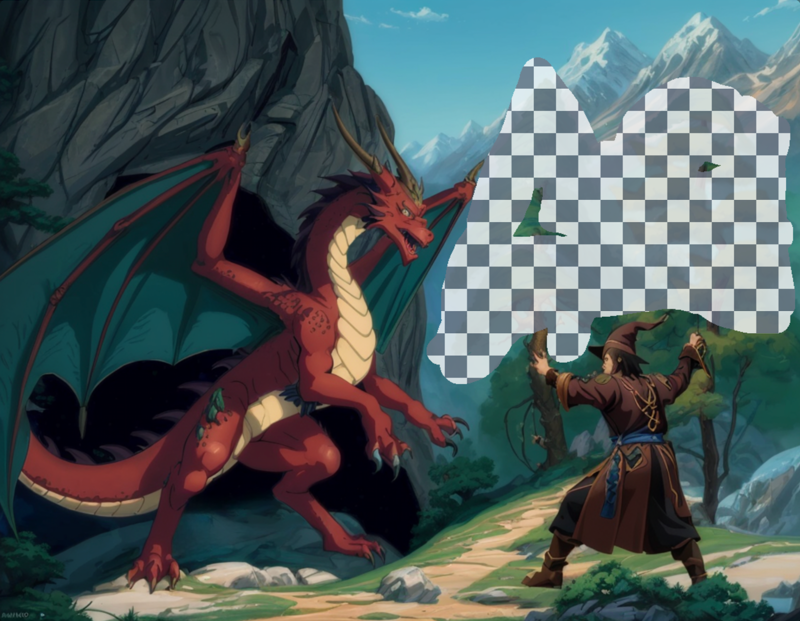
Then I'll set 2 ControlNets:
Soft Edge - I’m using this for the same reason as the gaps, to try to force Draw Things to make the trees bigger than it is naturally inclined to. But I don’t want it to simply match the current trees (they’re pretty bad), so I’ll use a very low influence: Weight 30%, Start 30%, end 60%.
Inpainting (SD v1.x, ControlNet 1.1) - Since I’ll be using 1.5 models, I can’t use the Fooocus Inpainting LoRA. Instead, I’ll use the Inpainting ControlNet to do the same thing. I'll set it to Weight 100%, Start 0%, End 100%, and switch the Control Importance from “Balanced” to “Control” (the Inpainting ControlNet sometimes doesn’t quite match to surrounding area perfectly, leaving a bit of haze along the borders. By giving the Control more importance than the prompt, I allow it to do more to try to blend).
I'll set the Strength to 80%, so I’ll get a little influence from the current image, and the High Resolution Fix 2nd Pass Strength to 70%, so it has the freedom to add more details. Once again, I’ll be using RealCartoon-Anime.
When Inpainting, you want your prompt to describe what you're about to draw, not necessarily the image as a whole. So I'll use:
two tall lush ((trees)) in front of distant mountains, leafy branches, detailed background, no humans
baroque anime screencap oil painting by disney animation, by makoto shinkai, by michelangelo
Note the “no humans” tag. Ordinarily, you should never put something in the positive prompt that you don’t want. However, since I’m using an anime model, it almost certainly has at least some knowledge of Booru Tags. “No humans” is actually a specific tag used to indicate the absence of anything human, which means I can use it in this situation.
Result:
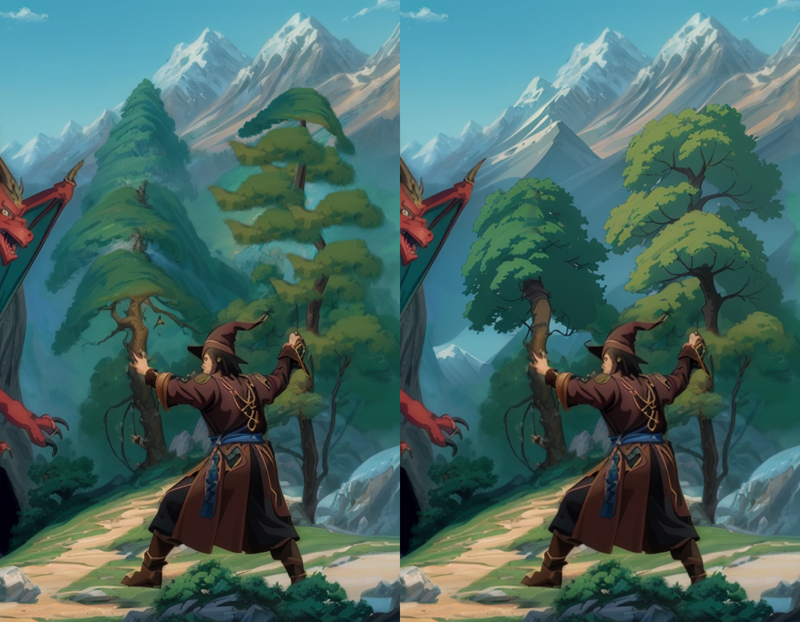
Much better! The left tree has a bit of weirdness with an inconsistent background, but otherwise this is pretty good. I'll worry about that background bit later if I need to, since this next part might just cover it up anyway.
Adding Magic and Fire
For this next part, I want the wizard to be casting a magical barrier. At first, I tried to do this with pure Inpainting, but it proved to be too much for Stable Diffusion to handle. So once again it's back into Photoshop for some manual edits.
I'll start by drawing a simple white ellipse over the wizard. Then, I'll add a Layer Mask, and using a large, soft brush with low opacity, I'll paint out the inside of the mask to make the center area (except for one small piece in the middle) more transparent, leaving the edges a bit more intact. The bottom gets masked out completely, since I want it to look like a dome that stops at the ground. Once the shading is where I want it, I'll lower the total opacity until I can clearly see the barrier, but I can also clearly see through it.
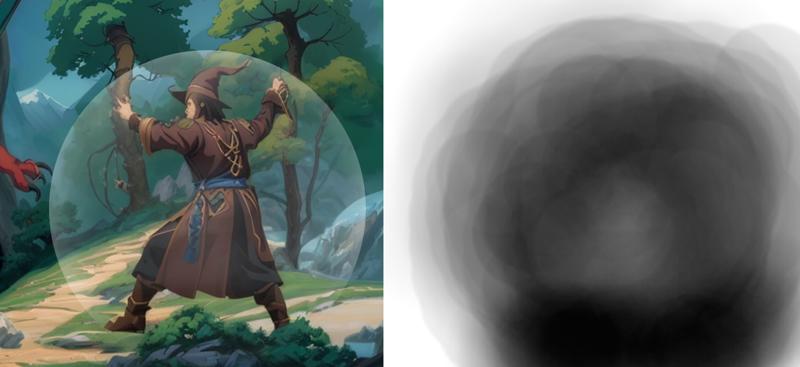
To give it some color, I'll duplicate the ellipse, remove the layer mask on the new one, set the Fill Opacity to 0, and add a blue inner glow. Then once again adjust the transparency as needed.
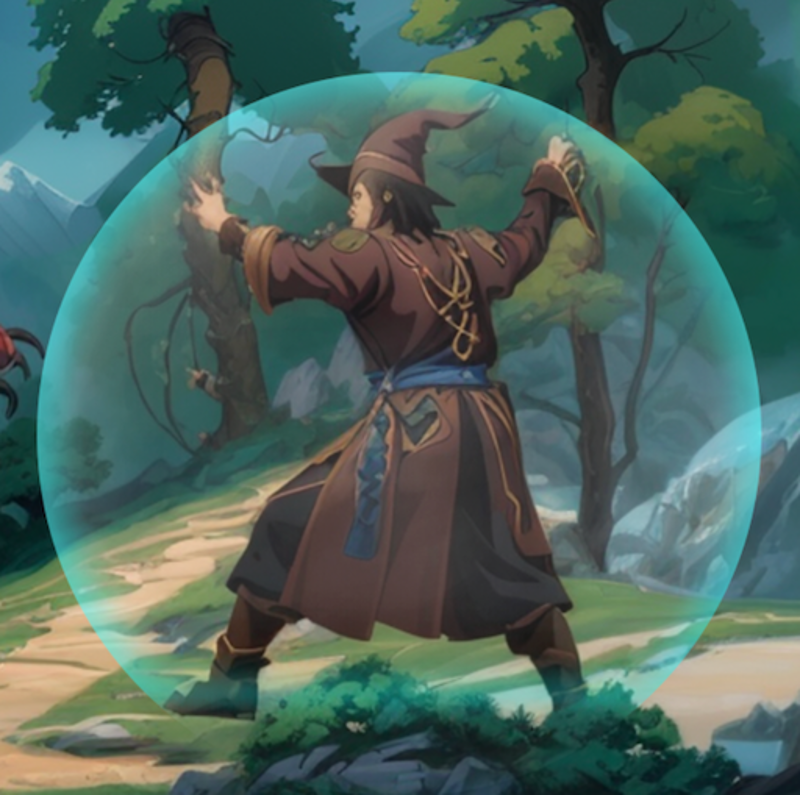
I export as PNG, and bring back into Draw Things.
I’ll be focusing on the wizard for this next part, so I switch the Image Size from 1152 x 896 to 1024 x 1024. (IMPORTANT: When changing resolutions in Draw Things, High Resolution Fix will often reset to 0 x 0. Make sure you double-check before rendering, or you may end up with low-quality images).
After adjusting the resolution/ratio, I'll zoom in on the wizard. I want to give him a shield, but at the same time I also want to improve the level of detail, especially around the face.
I'm really happy with the wizard's stance, so I want to make sure I don't lose that during the next step. So I’ll be using the Open Pose ControlNet. This is a ControlNet that looks for a multicolor stick-figure skeleton, and then tries to match a character's pose to that skeleton.
To get the Open Pose skeleton, open the Layers menu and choose Pose. Draw Things should automatically look for a character in the scene and use it to generate the skeleton, but sometimes this fails. If this happens, you’ll need to generate a new image - something as simple as possible like “knight, standing, t pose, white background”. Then open the Pose layer on that image, open the Layers menu again and go to Save Layers > Pose > Copy. Then return to the main image, open the Layers menu, and go to Load Layers > Pose > Paste as pose.
The skeleton for this image required a bit of adjusting to match the wizard, but not too much.
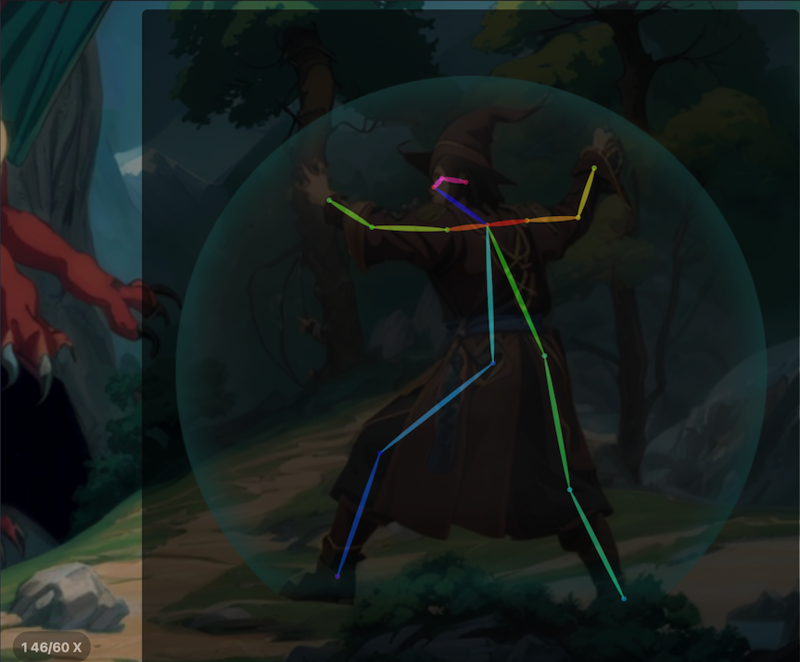
I'll be using 3 ControlNets for this next step:
Soft Edge - Weight 50%, Start 20%, End 80%
Open Pose - Weight 70%, Start 0%, End 80% - I want the pose to have a strong influence, but I've also found that making it too rigid can sometimes lead to weird-looking proportions, so I try to give it a little flexibility if possible.
Inpainting - Weight 100%, Start 0%, End 100%, Control Importance: Control.
I'll also be using a LoRA for this step: Forcefield. I enable it from the LoRA dropdown menu to the left of the canvas. Unlike Automatic1111 or Forge, Draw Things does not use <lora:filename:weight> in your prompt. All of that is handled by the menus. You will need to include trigger words, though. I'll give it a weight of 60% - originally I had it much higher, but now that I've drawn a placeholder shield, I can tone it down.
For the prompt, I'll be using:
a wizard in a dome, forcefield, magic circle, swirling lights, energy, flames, from rear view, forest, beard, pointy hat, ruggedly handsome, masterpiece, absurd res, trending on pixiv
baroque anime screencap oil painting by disney animation, by makoto shinkai, by michelangelo
Normally, I really, really dislike quality modifiers like "masterpiece" or "trending on pixiv", but sometimes they do seem to help. I'll also be adding the following negative prompt:
buildings, shrine, monochromeThis is to correct for certain artifacts that kept appearing in earlier attempts. Finally, I can mask out the wizard and his shield, and hit generate.
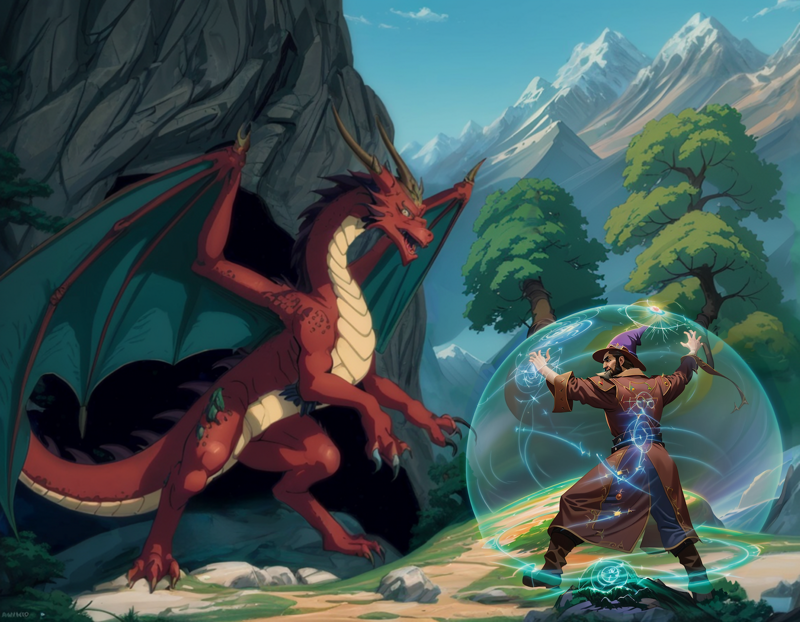
Wizard's looking good! (Well, aside from where his sleeve morphs into a tree, but that's easy to fix). He's looking so good, in fact, the dragon's starting to look a bit scruffy and low-definition by comparison. I think fixing that should be the next step.
I'll zoom in on the dragon and mask it out, and then set the following settings
ControlNets:
Soft Edge - Weight 70%, Start 0%, End 80%
Canny - Weight 50%, Start 40%, End 100%
Inpainting - Weight 100%, Start 0%, End 100%, Control Importance: Control
Strength: 40% - I really like the dragon's overall design, I so I don't want the render to have a lot of freedom to change much.
LoRAs:
Furthermore - a LoRA that increases the level of detail. I don’t want to go overboard though, so I only set its weight to 40%.
Prompt:
a dragon guarding in front of a cave, western dragon, feral, quadruped, upright, on hind legs, roaring, masterpiece, absurd res, trending on pixiv, detailed scales
baroque anime screencap oil painting by disney animation, by makoto shinkai, by michelangelo
Model: For the model, I'm going with something a bit more..."refined" this time (yes that was bad, no I won't apologize). Yep, I'll be using a Refiner Model. This means that Draw Things will start out using one model, and then at a given percentage switch to another. Since the dragon was originally made with FurryBlend, that's the model I'll use for the main. For the refiner, I'll use RealCartoon-Anime, since that's been the main model for the rest of the image.
Result:
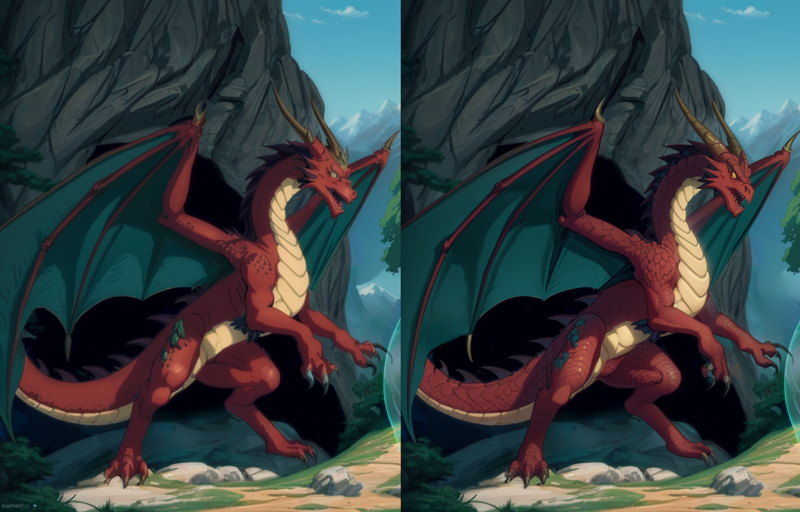
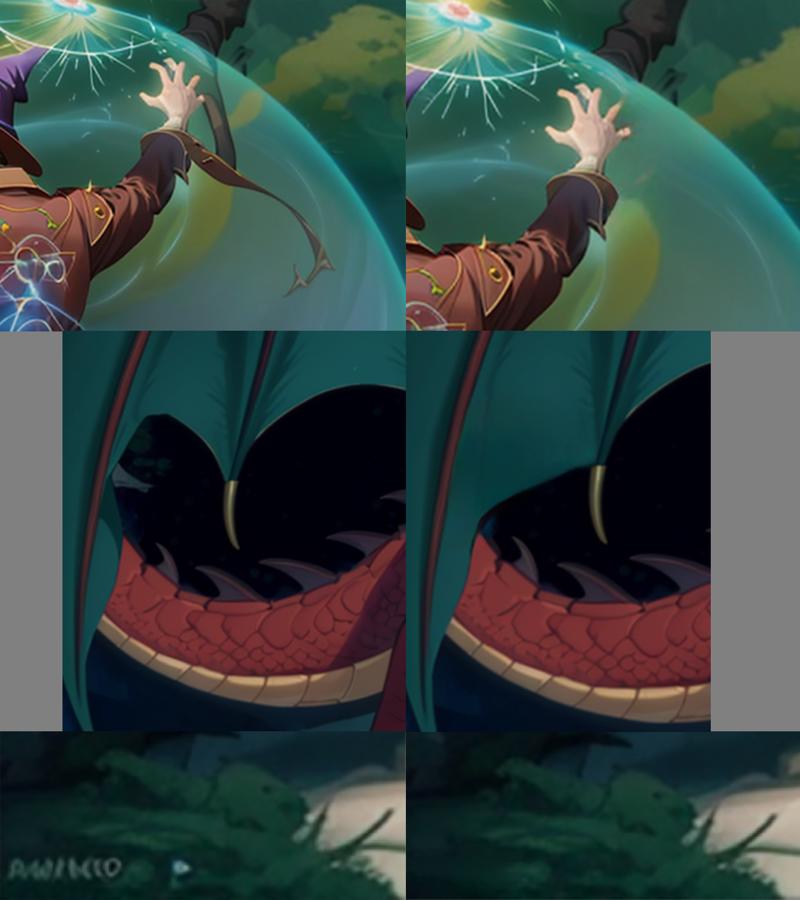
Much better - the right paw and left leg need a bit of work, but I can get to that later. For now it's back to Photoshop.
First, some quick and easy fixes using the Remove tool: The wizard's sleeve, the gap in the dragon's right wing, and the "signature" in the lower left corner.
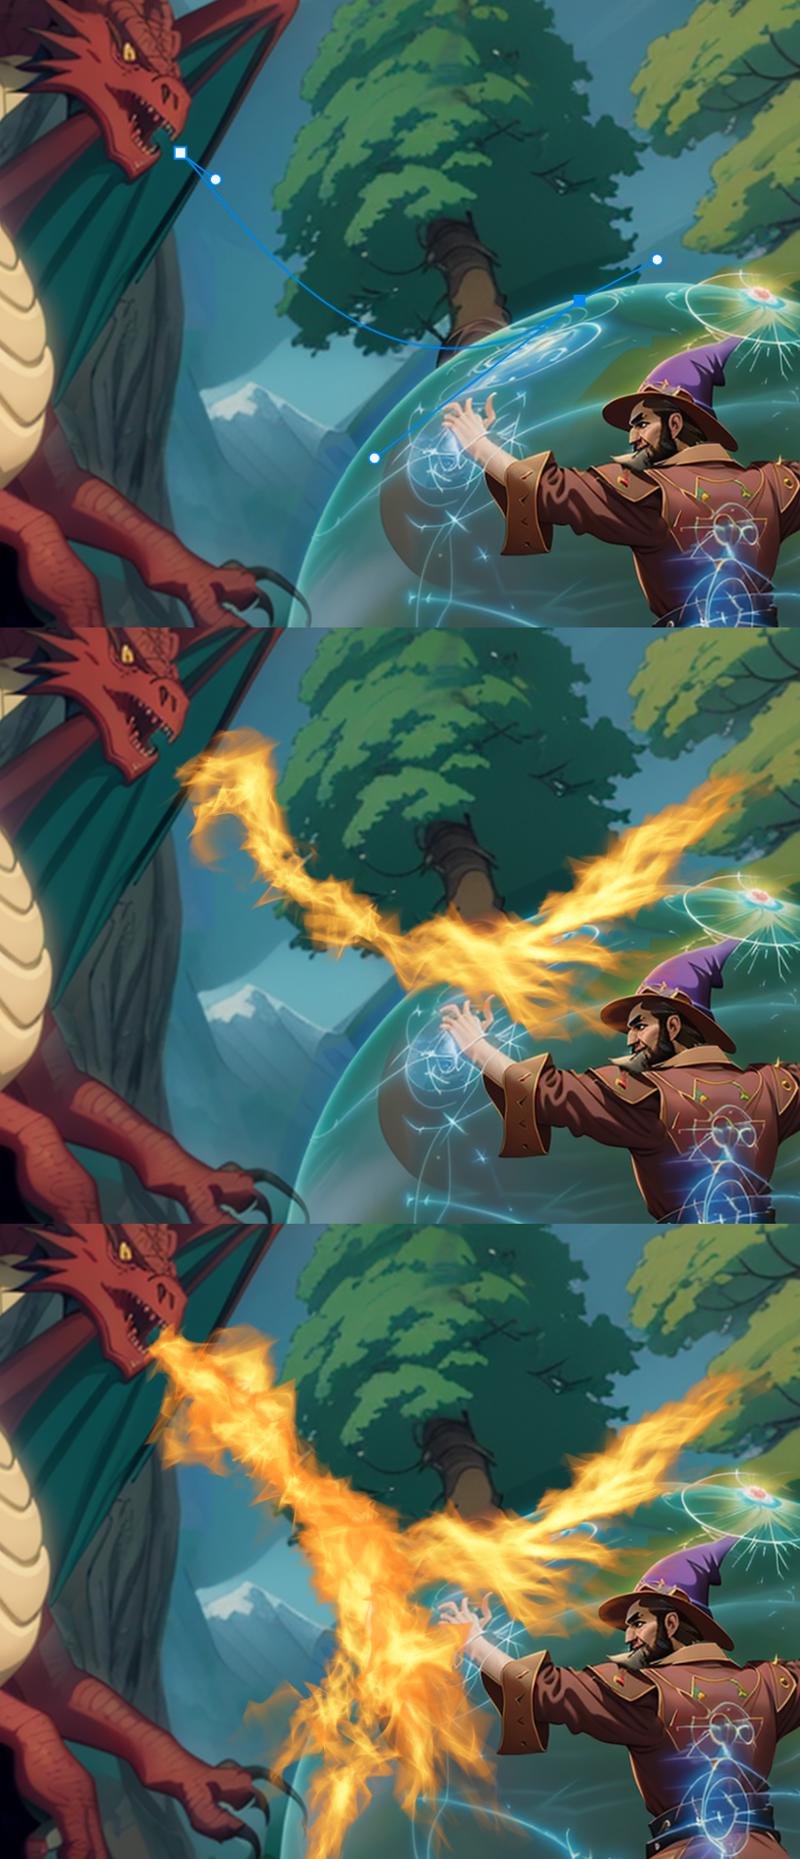
Now for something a little more fun. What does every epic dragon battle need? FIRE! And fortunately, Photoshop comes with a built-in Fire tool.
First I’ll create a new layer. Then I’ll use the Pen tool to draw a curved Path from the dragon’s mouth to the wizard’s shield. Then I'll go to Filter > Render > Flame. I could do a whole tutorial on the Flame tool, but the key settings here are: Flame Type —> Multiple Flames Path Directed, Angle —> 90˚, Flame Style —> Violent. Beyond that, it’s just a matter of playing around with the other settings to adjust the flame’s density, size, and complexity. Repeat a few more times, and I've got a nice stream of fire splashing against the wizard's shield.
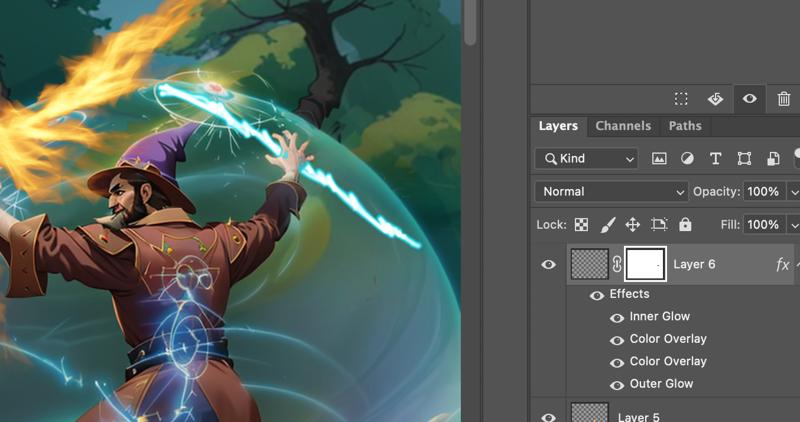
Remember waaay back when I was first positioning the wizard, and I used Puppet Warp to raise his right arm? Well I figured he should be doing more than shielding himself - he should be charging a spell to fight back. I’ll give him a lightning bolt.
First I'll use the Brush tool to draw a jagged, light blue line running through his hand. Then I'll mask out the area where the hand covers the line so the bolt will appear "behind" it. Then I'll add some Layer Effects - a couple Color Overlays to adjust the color, and an Inner and Outer Glow to give it an electric look.
I commented earlier that I would be ignoring the area between the cave and the tree where the background was messed up, because future changes might just cover it up. I was referring to the fire. Unfortunately, as you can see in the above images, this turned out not to be the case. So I'll hide the fire layers, use Object Select to select the glitched area, then Content Aware Fill to blend it into its surroundings, and finally Remove to clean up any artifacts or seams. Then I'll turn the fire layers back on and export as PNG to bring the image back over to Draw Things.
I have the fire and lightning now, but they don't match the style of the rest of the image. So I'll be Inpainting both. I won't go into too many details, since you should be getting familiar with the process by now - basically mask out the designated areas, set ControlNet Inpainting, adjust the Strength (40% in both these cases), and the prompts, and then render (note: these were two separate Inpainting jobs, not one).
One interesting tidbit I would like to note: when I originally Inpainted the fire, the wizard's shield kept disintegrating. It was a cool effect, but it didn't work with the image. So I added the Forcefield LoRA back in. That stabilized it, but something was lost - the collapsing shield made the scene feel much more dramatic - like it was a real life-or-death struggle where both sides were in danger. So I took the best seed from the batch and started slowly lowering the LoRA's strength, until I eventually shut it off completely. I'd basically stumbled onto a seed that produced exactly the effect I wanted - a shield that was still intact, but clearly buckling.
There's still some parts of the scene to clean up. Most will require Photoshop, but the dragon's claws and legs can be done now with more Inpainting. Once again, I'll use the FurryBlend/RealCartoon-Anime combo for that part.
Refinement 2
Now it's back to Photoshop for another round of cleanup (really that's basically all I'm doing here - hopping back and forth and back and forth between Stable Diffusion and Photoshop, making iterative changes to keep improving the image until I finally have something I'm satisfied with).
There’s a small light patch between the dragon’s front legs. I’ll fix that by using Content Aware Fill followed by Remove to clean up the seams.
The dragon’s left upper foreleg is slightly discolored. I can fix that by creating a copy of that section of the leg, and then using Color Overlays.
The fire looks a bit odd where it meets the wizard’s hand. By creating a new layer, and then using the Remove tool to remove the hand on the new layer, I can create a layer of flame on top of the hand. Then I can lower the transparency so that the original hand is still visible through the flames. That makes it look more like the hand is behind the shield, with the flames spilling across the surface.
I’m still not completely sold on the fire, plus, it needs to be coming out of the dragon’s mouth. So I'll copy a small piece of it and use Puppet Warp to stretch it over the dragon’s mouth. Then I'll add a Layer Mask and paint the edges of the flame with a soft brush to blend them into the mouth. Finally, I’ll copy a larger section of fire into a new layer, and use the smudge tool to make it look like it’s “flowing” a bit. I’ll obviously need to do another round of Inpainting to clean this edit up.
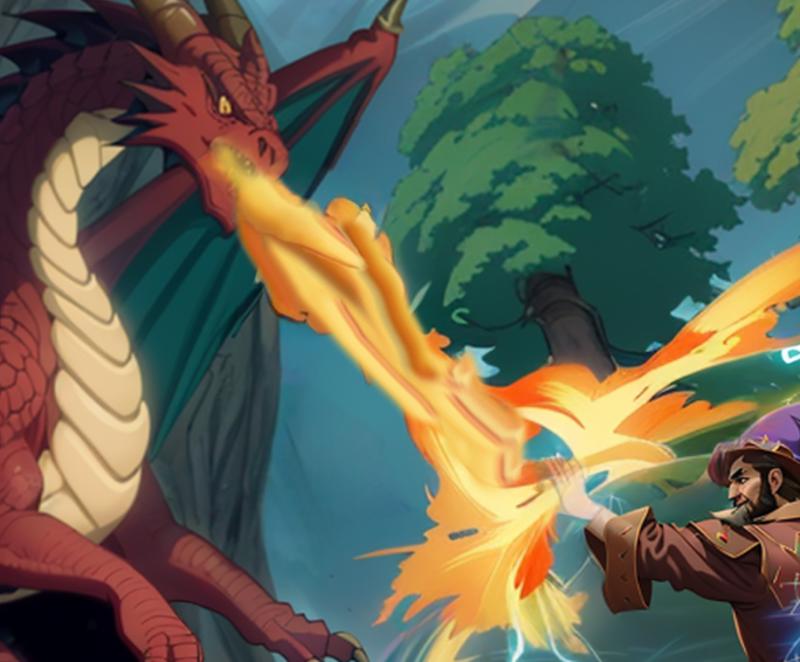
Overall I'm pretty happy, but there is one more semi-significant change to the scene I want to make. I like scenes that have some sort of story to them, and while a fight between a dragon and wizard is fine on its own, I'd like add something to the narrative. Something to explain what brought them into conflict in the first place.
Tucked away in the corner of the cave, I'll add this:
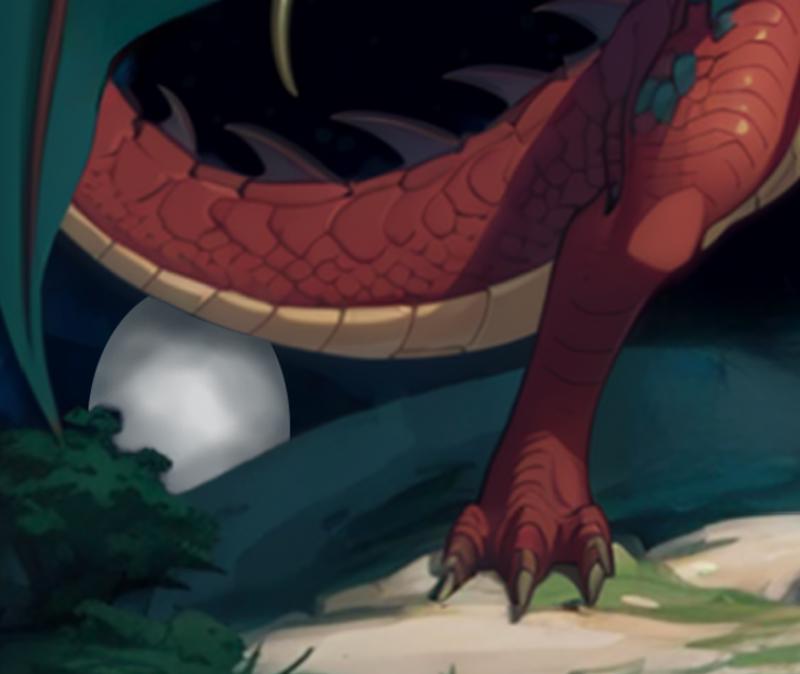
First I drew a white ellipse. Then I used the Object Selection Tool to select everything that should be obscuring it and applied the selection to a Layer Mask on the ellipse's layer. Then I created a new layer and applied a Clipping Mask (so anything I drew would only be visible when it overlapped with the underlying layer, AKA the egg). The I used a large, soft brush with low opacity, and just kept applying layers of blue-gray around the sides to give it depth and put it into shadow.
I like it, but the egg’s a little plain. So I'd like to create a bit of texture and color to layer on top of it. I'll select an area of the image, and use Photoshop’s Generative Fill with the following prompt:
Oily iridescent silver rainbow scalesIt takes a number of iterations, but eventually I get a couple objects I can use.
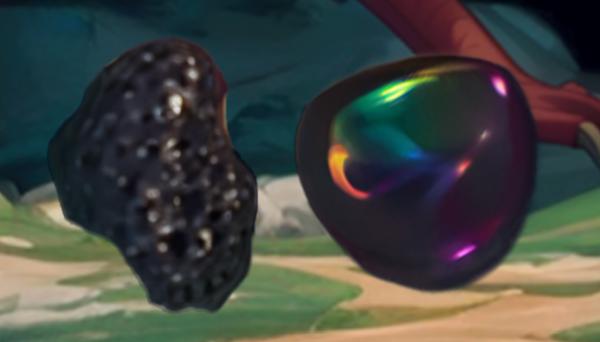
I'll position each one over the egg, then use Create Clipping Mask on both their layers. I'll set the first layer's Blend Mode to Color Dodge to give the egg some texture, and the second one to Hard Light to give it some color. I'll also adjust the transparencies so they don't overwhelm the original image.
Result:
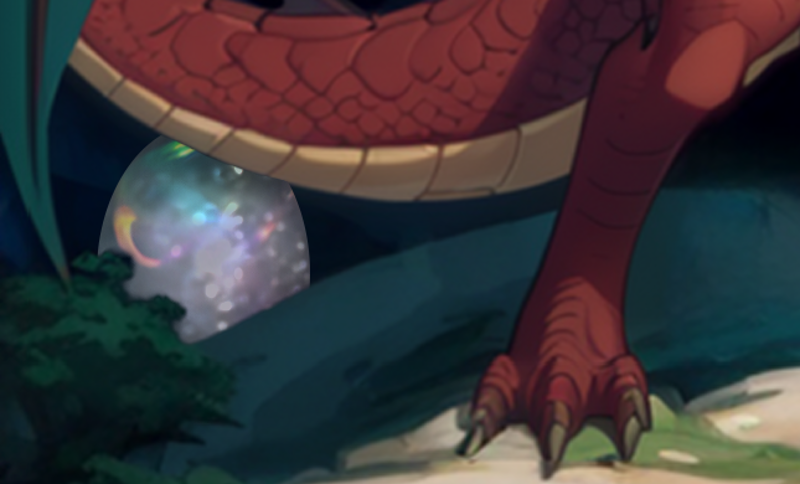
I actually kinda want to keep the egg as-is, but unfortunately it just doesn't match the rest of the style. Too bad. Anyway, it's back to Draw Things now (these will be the final Inpainting edits/fixes).
I won't go into any detail on the fire, since that was pretty straightforward. The egg actually proved to be a bit of a pain, because Stable Diffusion kept trying to draw brightly-colored, highly decorated eggs. I eventually realized what was going on, and added "Easter" to the negative prompt, but I still kept ending up with eggs covered in cracks or a honeycomb pattern.
Eventually I succeeded with the following settings:
Soft Edge ControlNet: Weight 90%, Start 0%, End 50%
Inpainting ControlNet: Weight 100%, Start 0%, End 100%, Control Importance: Control
Strength: 35%
positive prompt:
a dragon guarding a speckled iridescent silver scaled white egg
Negative:
nsfw, anthro, cracked, painted
Final result of both edits:
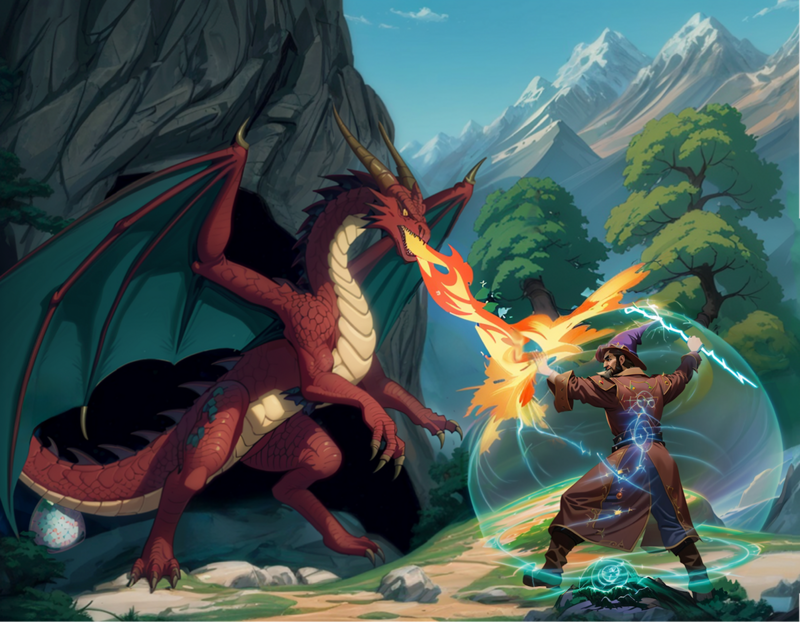
I've got one final Draw Things step, but before I get there, I want to do another round of cleanup in Photoshop. I won't go into any details (these are all fairly minor changes), I'll just show the final result and you can compare it with the one above (easiest way is to open both in new tabs and just switch back and forth between them).
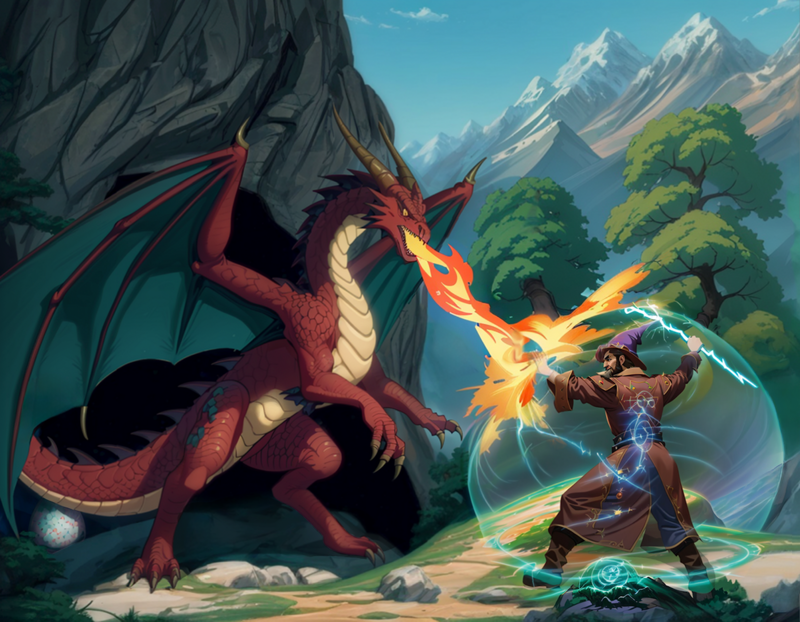
Upscaling
Now to upscale the image. Draw Things has 2 different methods of upscaling besides High Resolution Fix. The first is to simply choose one of the 2x or 4x upscalers from the Upscaler menu, and Draw Things will automatically scale up the image once it has finished rendering.
The second method is to use tiling. It basically breaks the image down into pieces, renders each piece individually, and stitches them together. This version is much slower, but it lets you make the image more detailed.
If you want to let Draw Things do all the work, first turn off all LoRAs and ControlNets, then open the Scripts menu and look under Community Scripts. Draw Things comes with 2 upscaler scripts you can download - Creative Upscale and SD Ultimate Upscale. Both of these use tiling to upscale the current image.
However, I’m going to do things manually this time. First, I’m going to make sure Tiled Decoding and Tiled Diffusion are both enabled. Despite the similar names, they have different purposes. Tiled Diffusion is what actually enables tiling to upscale the image. Tiled Decoding also uses tiling, but it does so behind the scenes as an intermediate step to reduce memory overhead. It won’t have any impact on the final image, but Draw Things crashes on my machine at high resolutions without it. For both of them, I’ll use a tile size of 1152 x 896, and an overlap of 128.
Before setting the Image Size, I need to set the models. Each model has a default resolution, and if the new model has a different default than the previous one, the Image Size will be automatically updated. So it’s generally a good idea to set the model first. Since I’m basically stuck with a 1.5 model (more on that later), and since the dragon is likely the most difficult part for Stable Diffusion to undersstand, I’ll once again go with FurryBlend as the main model. For the Refiner, I’ll switch to A-Zovya RPG Artist Tools at 70%.
I’ll set the Image Size to 1152 x 896, and then import the most recent version of my image. Then, I’ll increase the resolution. You may notice when Tiled Diffusion is enabled that the Image Size can go much higher than normal. I’ll set it to 4608 x 3584 (4x the starting size), and then set the zoom level to 4x - it should now look the same as when I first imported the image.
I’ll be using the following settings:
ControlNets:
Canny Edge: Weight 70%, Start 0%, End 60% - I’m pretty happy with the image’s overall composition, so I would really prefer to only give the app enough freedom to change some of the details
Tile (SD v1.x, ControlNet 1.1): Weight 60%, Start 0%, End 100%, Down Sampling Rate 1.0 - This is the last of the “tiling” components I need to activate - it’s separate from Tiled Diffusion, but the two compliment each other, especially at high resolutions.
LoRAs:
Furthermore (Weight 80%)
Furtastic Detailer (Weight 20%) - another detailer, this one specifically meant for furry models
SDXLrender (Weight 50%) - general enhancer.
High Resolution Fix:
1st Pass Image Size 576 x 448
2nd Pass Strength 35%
Strength 45%
Prompt:
epic battle between wizard and dragon on mountaintop, dragon is breathing fire, sorcerer is holding lightning bolt and protected by forcefield, large egg hidden in cave, trees and snowy peaks, blue sky, dramatic, intense, amazing background
masterpiece baroque anime screencap oil painting by disney animation, by makoto shinkai, by michelangelo, by bob ross, by studio ghibli, absurd res, zrpgstyle, post impressionism, classical
I’ve made a few changes to the style portion to try to push it a little more towards painting than anime. One of these changes is the “zrpgstyle” trigger word, which tells A-Zovya to use a heavy oil-painting(ish) style.
Each upscaling render took ~20 minutes or so, so it was actually about a day’s worth of experimenting until I settled on the above settings. Once I did, I rendered a batch of 10, and the results…were mixed. It seemed like everything I wanted was there, just not all at once in the same picture. If I were doing a realistic image, I would have had to resort to more Inpainting to fix everything. However, because this is a painting style, and because I had used Canny Edge to make sure the outlines of everything mostly matched, I was actually able to combine several of these images in Photoshop. I imported the images, masked them out completely, and then unmasked the parts I wanted to come through on top of the base image.
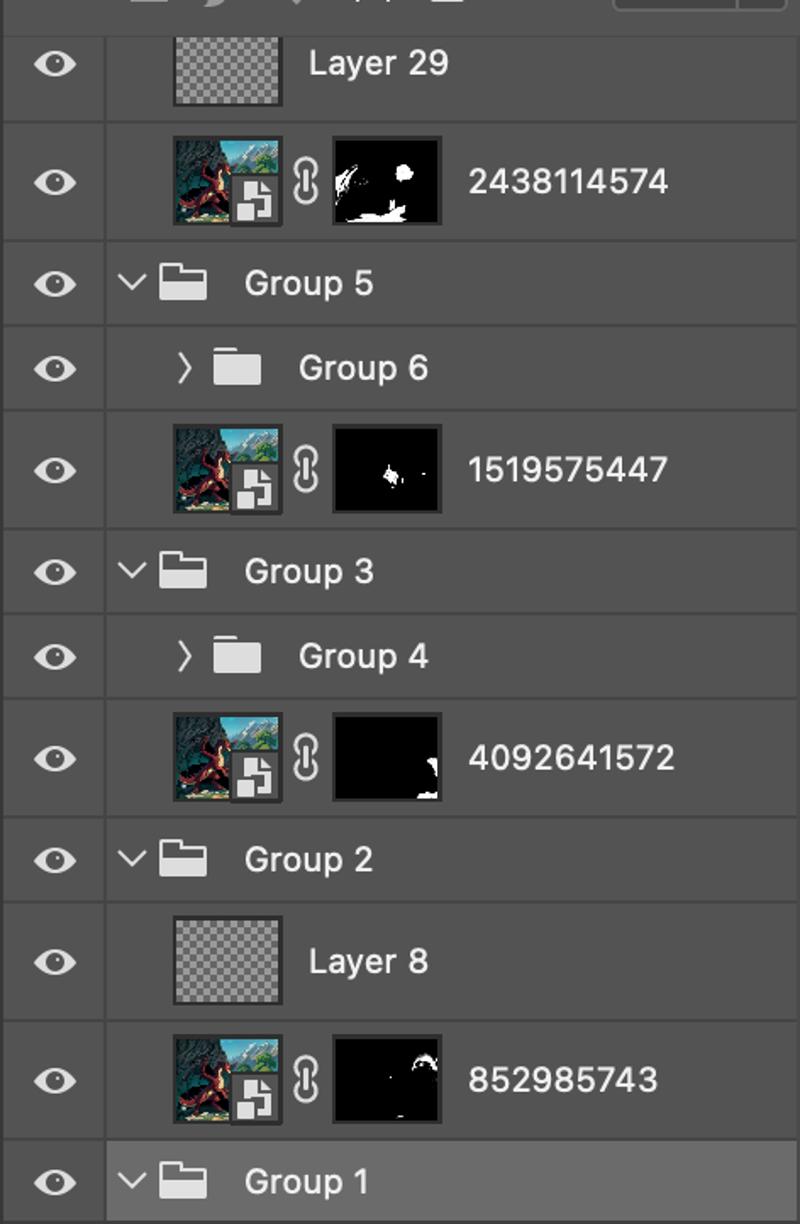
(You can see the Layer Masks in the above image - note how they are mostly black, just with a few specific areas painted white to allow that part of the layer to come through).
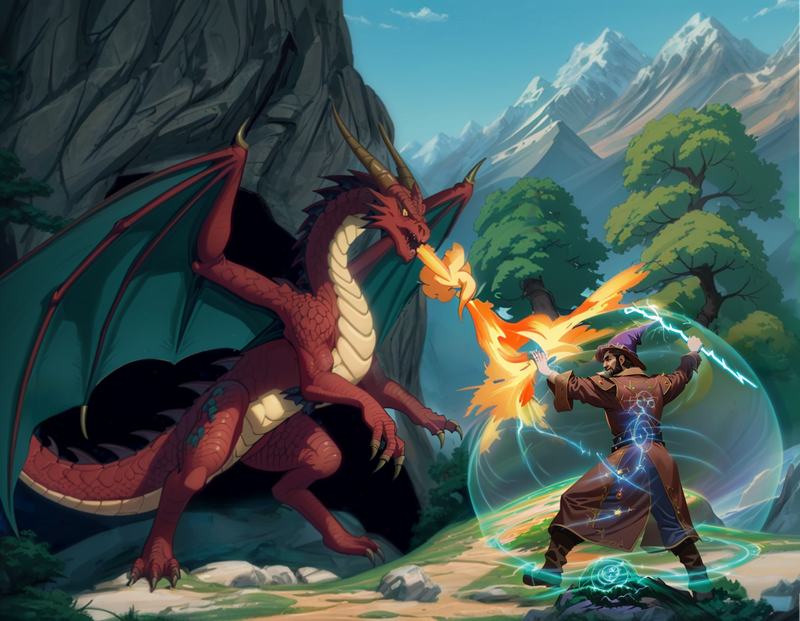
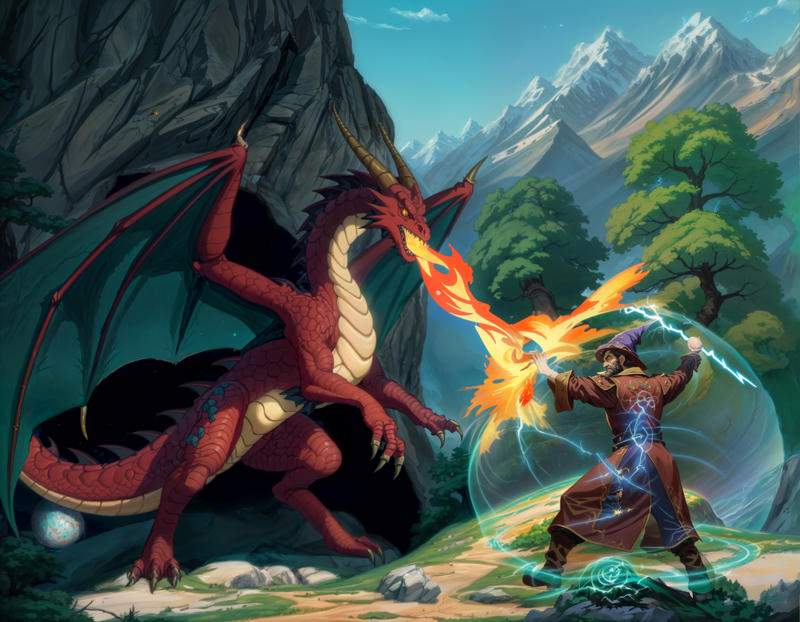
I also used the Remove tool, copy-paste in a few places (such as the dragon’s wing-spike), Content Aware Fill, and Brush to make a bunch of other small edits. I won’t go into them all, but here’s the before-and-after.
Before (full-size link):
After (full-size link):
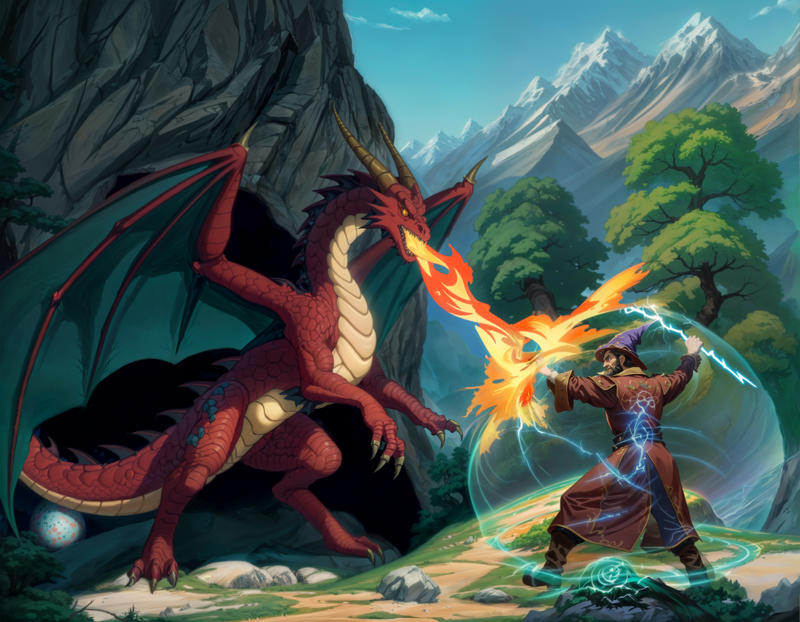
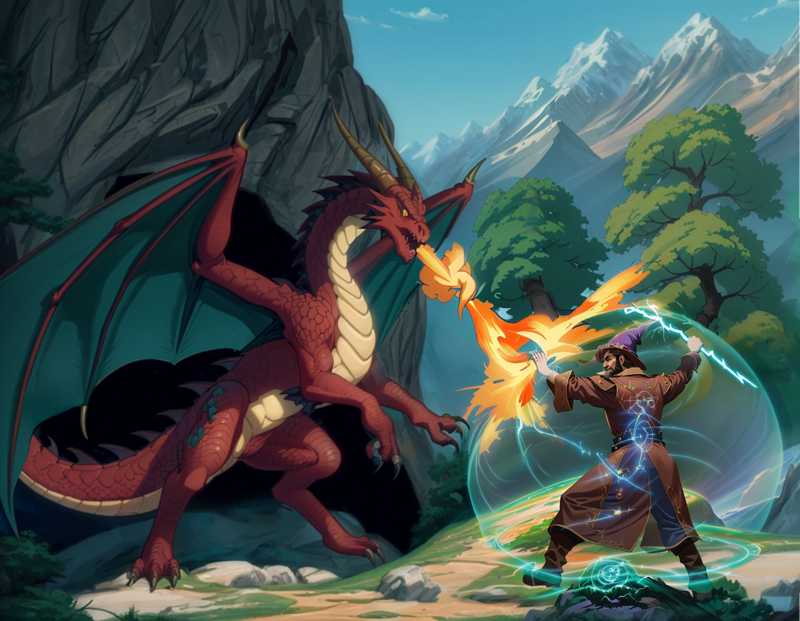
And there it is! It's been a long journey, but IMO the results were worth it.
If you’ve made it this far, thanks for reading, and I hope you’ll have found something useful to help your own workflows!
(Apologies for the low-quality animation - CivitAI is pretty strict about image sizes. The full-size final PNG and an MP4 movie of the above animation are in the attachments for anyone interested.)
