Inpainting and Masking of characters and addition of textures in Animations with AnimateDiff can be done seamlessly combining Grounding DINO and IP Adapter.
📽️ Click to watch the complete tutorial
👩 Improved workflow with 4 masks and FaceID for face refining
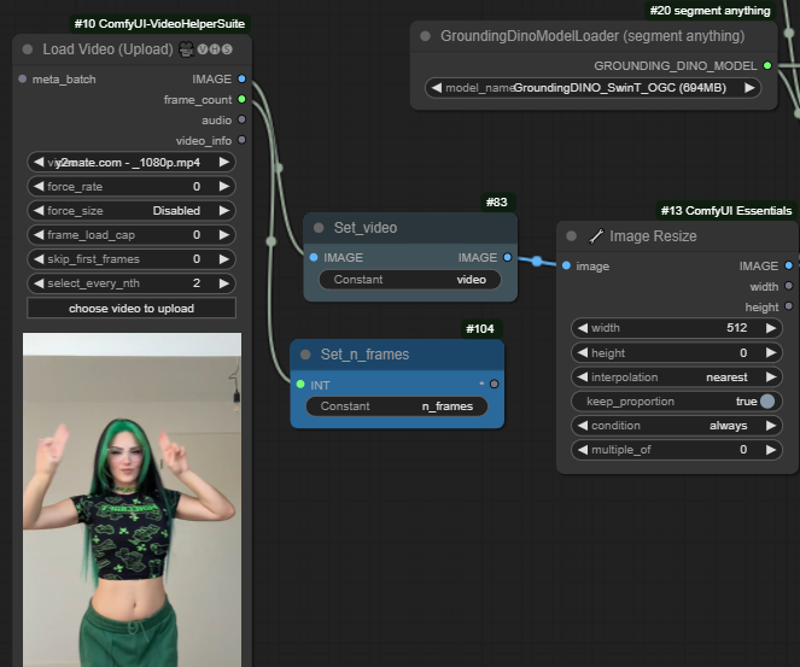
Step 1 - Adding your video
Add your video and cap it to a reasonable number of frames (e.g. 16). Resize to a reasonable size not to run out of VRAM
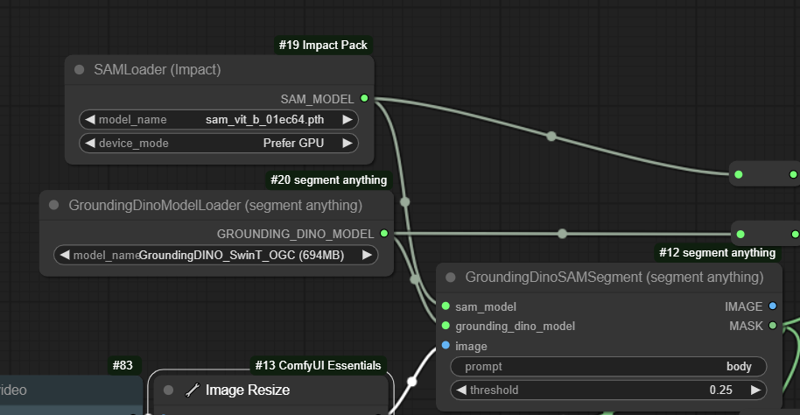
Step 2 - Masking with Grounding DINO
For each mask, add a GroundingDinoSAMSegment (segment anything node). Describe the prompt of what you want to inpaint/mask (e.g. body, ground, floor, cup...) and set the threshold of the detection.
Do it as many times as per per objects you want to mask
The node needs a SAM Loader and a Grounding Dino Loader. The models can be installed from the ComfyUI Manager.
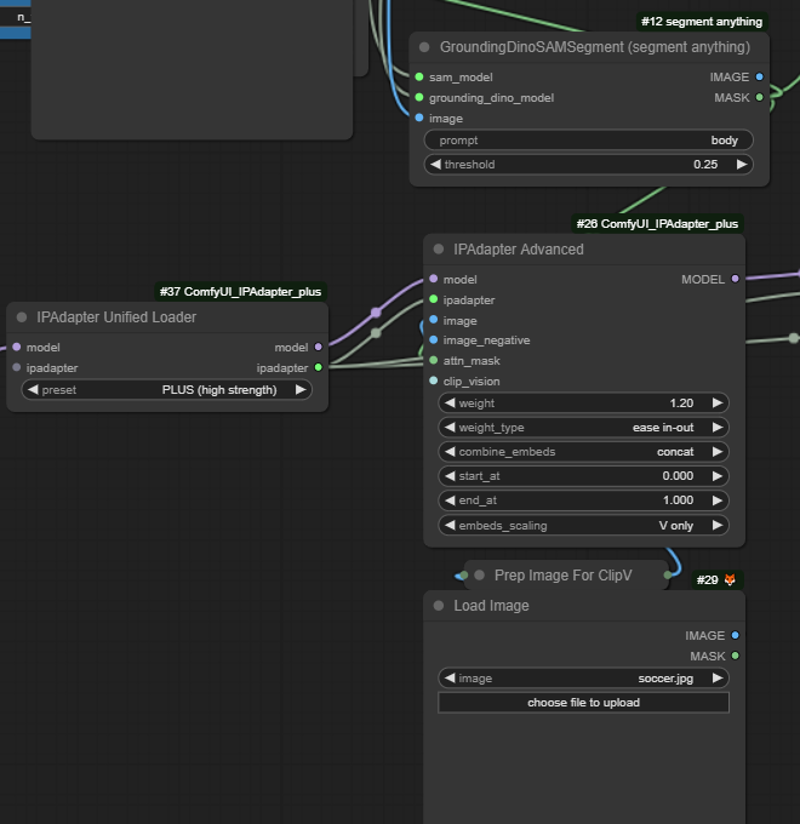
Step 3 - IP Adapter
Connect the mask of the Grounding Dino SAM Segment node to the mask input of an IP Adapter Advanced.
The IP Adapter needs a reference image, the model and the corresponding IP Adapter. You can use a IP Adapter Unified Loader for the last two.
When you have more than one mask, connect the IP Adapter to each IP Adapter Advanced Node, and connect the models in series.
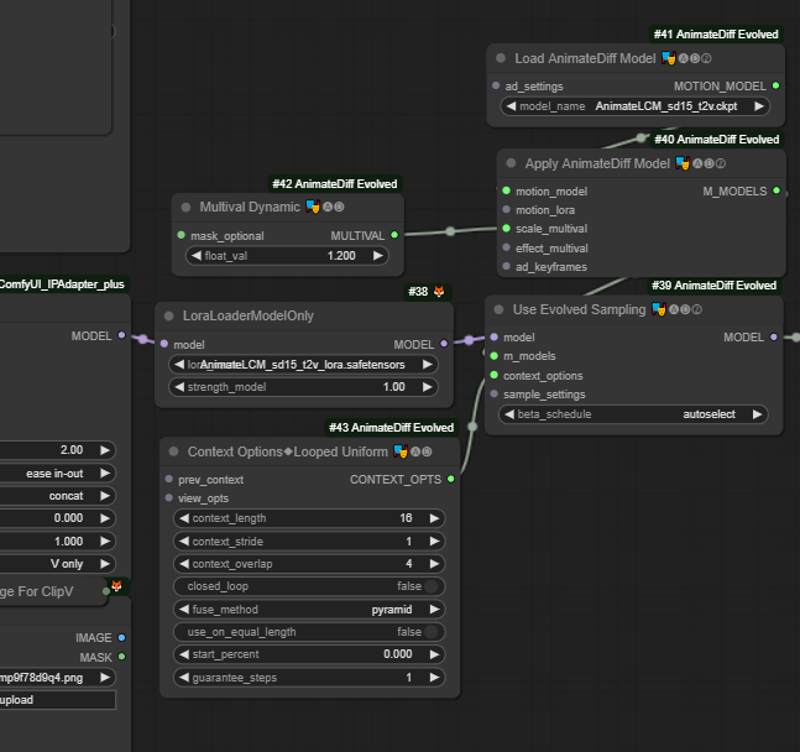
Step 4 - Setting AnimateDiff
Connect the model output of the last IP to a Load Loader Model (if you want to use AnimateLCM or AnimateDiff version 3. Then, set up the AnimateDiff configuration as in the picture. Connect the model output to the K Sampler.
Step 5 - Model and ControlNet Pipeline
Use a standard pipeline for AnimateDiff using a Checkpoint Loader, Prompts and Controlnets.
OpenPose, Lineart, Scribble and Depth work pretty nicely with this workflow.
In the prompt, try to describe the scene you want to result. Sometimes it helps describing the details in the prompt (e.g. red jacket if the result gives a white jacket), despite the influence of the IP Adapter.

Step 6 - Sampling
From the Load Video Node, connect the frame count to the Latent Batch Image. Define also there the size of the frames.
The K Sampler should have all its connections (Model, Conditioning, Latent).
For AnimateLCM, set 8-10 steps and a CFG between 1 and 2.
The sampler should be LCM, and I recommend to use the sgm_unfirm scheduler. Keep the denoise at 1.
Step 7 - Testing and refining
With a limited amount of frames, test the workflow and determine any change that it is required: weights and weight types in IP Adapter, position of the Prepare for Clipvision node, strength of controlnets, K Sampler settings, sensitivity of the mask detection of Grounding Dino...
When you think the settings are all good, you can then come back to the Load Video node and set the frame cap load to zero, to run all the frames (or whatever amount of frames you want to use).
Step 8 - Upscaling and Refining
In general, you want to keep the resolution of the images relatively small to minimize the rendering time. Eventually, though, you may want to scale the resolution and details. You can do that with any method available (Latent upscale, Image upscale, etc.). The faces can be restored using Facedetailer, but I personally like to use Face ID. Other methods are also good.
Finally, frame interpolation will help in smoothing the final video.