Good day to everybody. In this article I am going to show my workflow to generate anime images (or hentai, if you want to be lewd) in case that you guys have curiosity. I am not an expert so approach this guide more like a beginner tutorial. Let's go!
First we need the right tools to generate images. I use AUTOMATIC1111 to generate images using the Web UI, using my own PC, with an AMD Ryzen 7 3700X 8-core and NVIDIA Geforce RTX 2060. If you don't have a powerful PC I would recommend to use Google Colab, but for me I prefer to have it on my own personal computer to have more control of models, LoRAs, and the generated outputs.
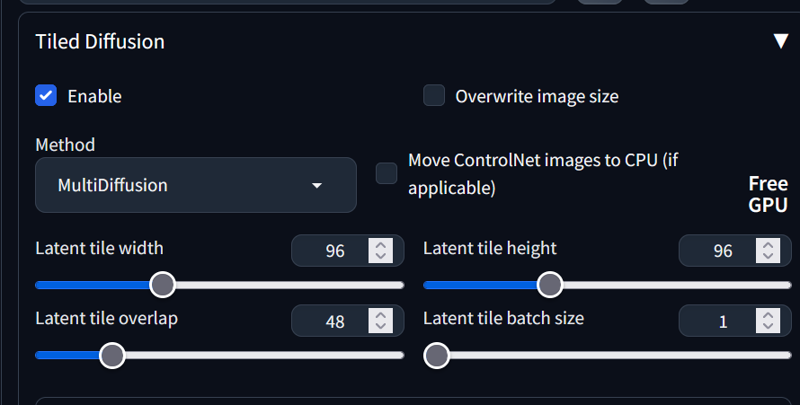
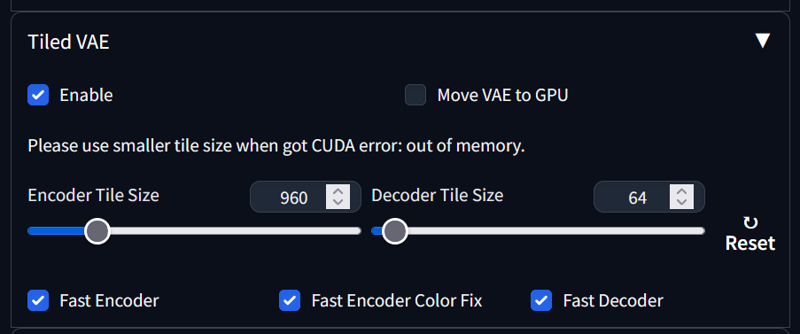
The other tools that I use are TiledDiffussion and TiledVAE. With these tools the generated images have more detailed and with bigger size images that you could generate without using them.
Once you have configured AUTOMATIC1111, we have to choose a model! In Civitai there are a lot of options that can get you lost. Don't worry, I'm going to tell you my favourite models! Without order of preference but telling what are easy and complex to use.
MeinaMix: This one is the first model that I've used ever! Perfect to generate images with a miHoyo vibe and very easy to use, you don't have to write long prompts to generate excelent results.
GhostMix: If you want extreme detailed images and the possiblity to create realistic anime images but also classic anime you have to try this one. The prompts are more complex and you need to use a external VAE.
BreakDomain/BreakDomainRealistic: One is for drawing style, the other is for realistic images. I use this model when I want to experiment with artistic movements like cubism and impressionism but from an anime starting point, and to be more expressive. It's the hardest one to use but it's very powerful and expressive.
Hassaku: The first lewd model and the one that I use to generate hentai images, but it's great to generate SFW images too. Like MeinaMix it's simple to use.
To use a model download it from its page and move it to where you have downloaded AUTOMATIC1111 and from the models folder to Stable-diffusion folder

Then execute AUTOMATIC1111. If everything is OK it will show you this.

Before entering any prompt I like to choose a model and configure the options to generate images. In this example I am going to use MeniaMixV10 model.
The sampling method is the method that we are going to use to denoise the generated images (if you want to know more about this go to this tutorial) Usually the model pages tells you what sampling method is the best, but if they don't tell you anything you can check the Generation Data from the samples images. The worst case is that samples don't have the data, so in that case the only thing you can do is try and see what methods get the results that you wanted.
MeinaMix recommends Euler A sampling method and 55 sampling steps, so that's what we are going to use.
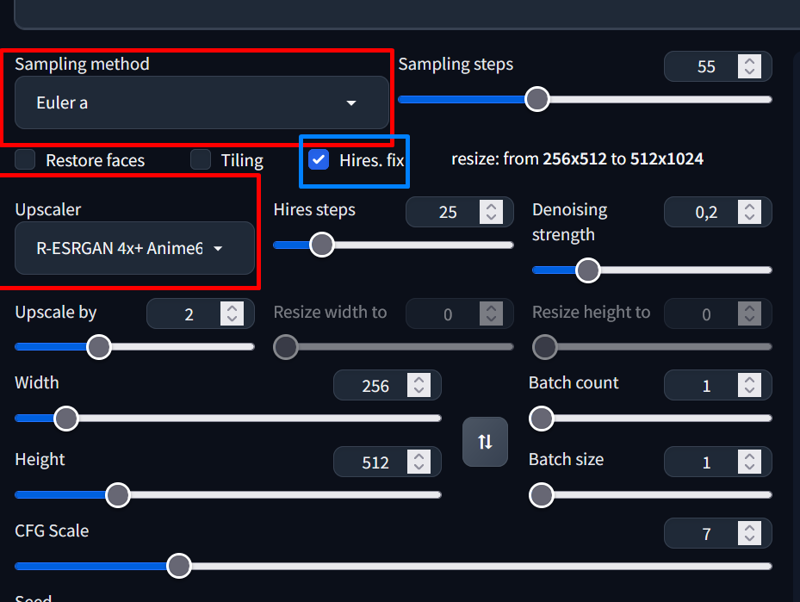
In the image you can see that I have checked the Hires. fix. With this check you can use an upscaler to generate better quality images from lower sizes. I usually upscale by 2 using a R-ESRGAN upscaler (I use the Anime version too), but some models work better with other upscalers.
These upscalers are AI upscalers, so you have to configure how many steps are going to be applied and also how much denoising apply. With R-ESRGAN upscalers I use low Denoising strength and 20-30 steps.
Images sizes are important. If you want to generate portraits the height must be higher that the width. If you want to generate landscapes or images from many angles width must be higher that the height.
To end the configuration I enable Tiled Diffussion and Tiled VAE to generate more detailed images faster. Depending on the model and the PC specs you can play with these parameters whatever you like.
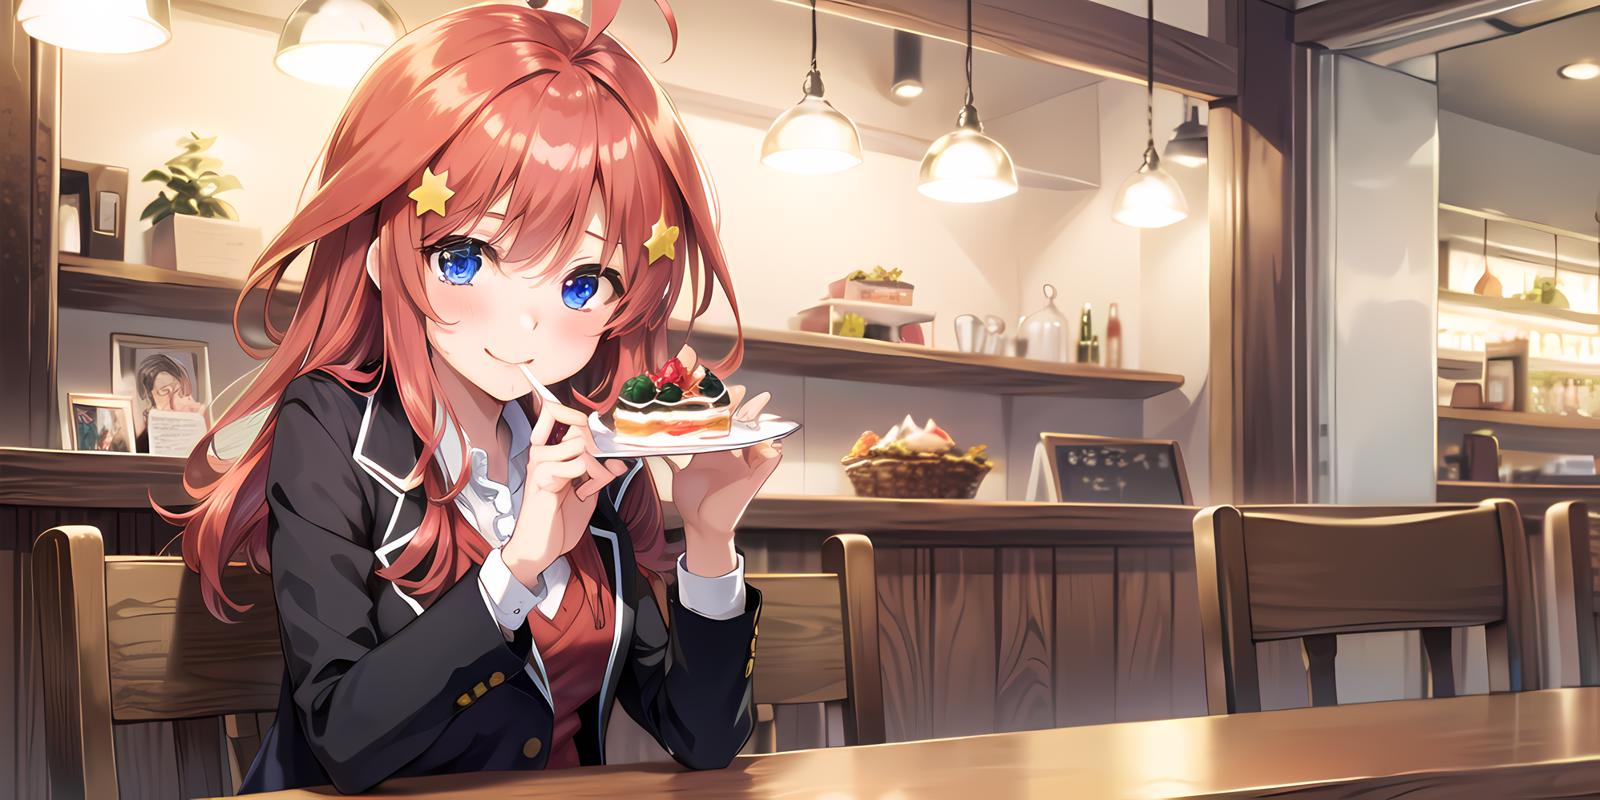
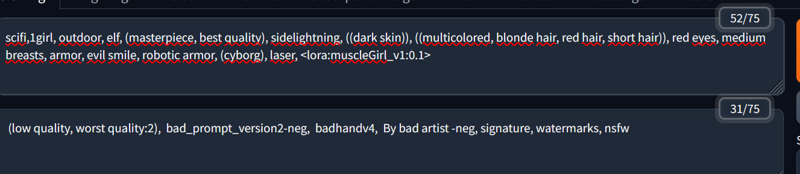
Finally, we are going to generate some images! For this example I am going to generate a dark elf in a sci-fi context. The first thing that you have to understand is that you have to be specific with your prompt: generic prompts can give you good results but maybe not the result that you really want. Prompting is a skill that makes the difference between a good image and a bad image. Be specific and you will have the best results.
Knowing this we are going to write our prompt! I am going to write a short hair cyborg dark elf with some evil in her face. I play with the weights and I use a LoRA, but you don't have to use the LoRA if you don't want to. For the negative prompts I use negative embeddings to make my life easier and not have a big negative prompting. Links to the negative embeddings
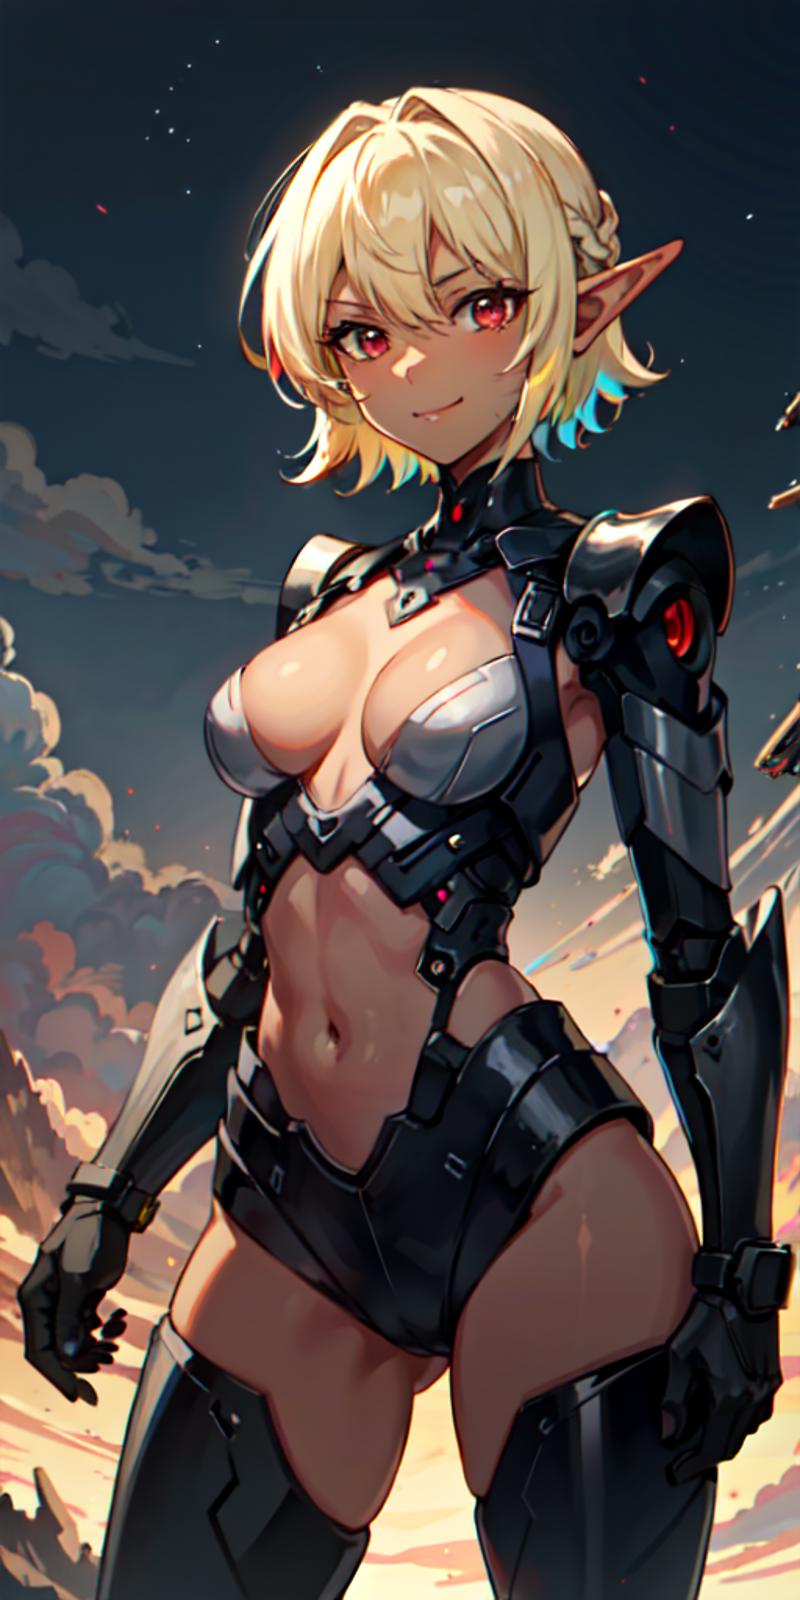
Then I click on the big orange Generate Button! You can create batches if you want. After some clicks I have generated a image that I quite like. To get the images go to Stable-diffusion folder -> outputs -> tx2imag-images -> Date
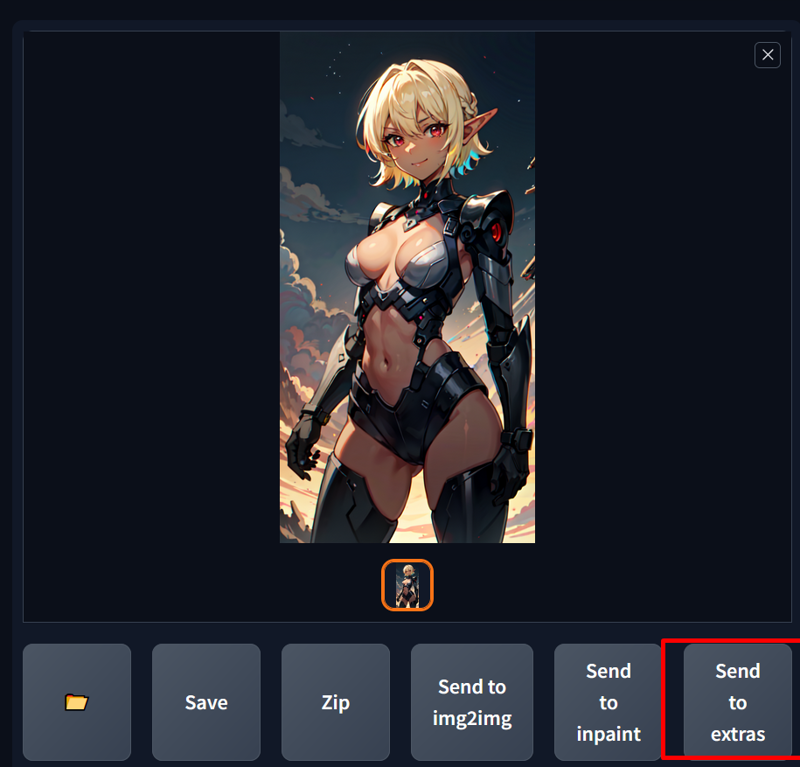
Even with the upscaler when it's zoomed it gets blurry. Don't worry, we can upscale it again! Under the image there are some buttons, but in this case we are going to go to Send to extras
This extras tab have the option to upscale any image with some upscalers provided on the Hires. fix check. In this case we can use R-ESRGAN 4x+ Anime6B upscaler and upscale the image by two.
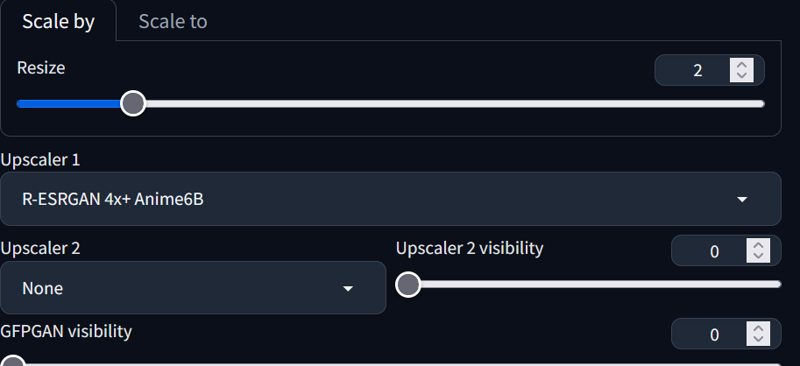
The best thing is that you can upscale to the max if you want. Usually 2-3 is ok.
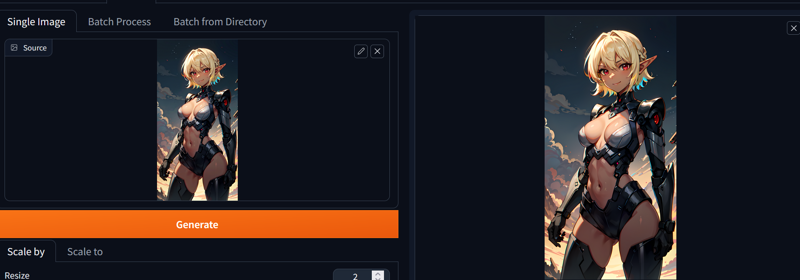
The generated image is bigger and have more details. The images are stored in outputs -> extras-images. You can compare the results and see how big the improvement is.
With this I finish this article. I hope that it helps to start generating images or even to improve workflows. If you have any doubts don't be afraid to ask (and if you have insults don't be afraid neither) Stay safe!