I'm happy to announce the release of HW Tagger that I was collaborating with Hecatonchireart. HW Tagger is a multi-purpose application that provides autotag creation, tag management, and many more features helpful in streamlining the dataset for loras and checkpoints.
This tutorial video was made after writing this article so it covers more features:
HW Tagger: https://github.com/HaW-Tagger/HWtagger
Hecatonchireart's release note: https://civitai.com/articles/5751/hw-tagger-release
This is going to be a tutorial guide covering the basic features. I'll make a video recording of this cause there's soooo many features and it would be easier to record. video recording link: [making video, will have link once I record it]
Here we will show the UI and how to use it:
This is a mock example by me (Wasabi), here’s my PC spec: Windows 11, RTX3090 GPU, AMD Ryzen 9 5900X CPU, and my C drive is a SSD (NVM Express, PCIe 3.0 x4)
I assume the reader has installed the HW tagger and the application is working.
Dataset:
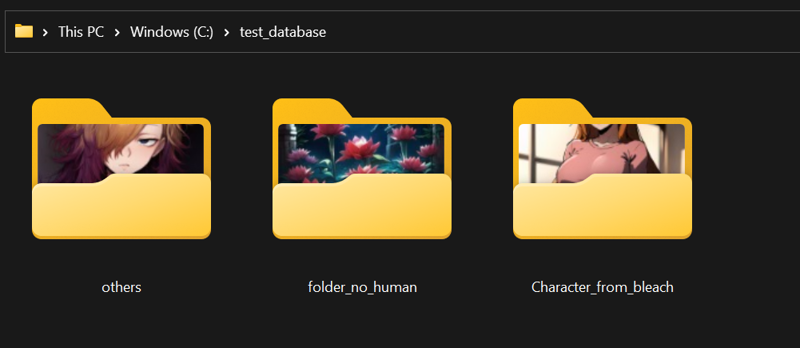
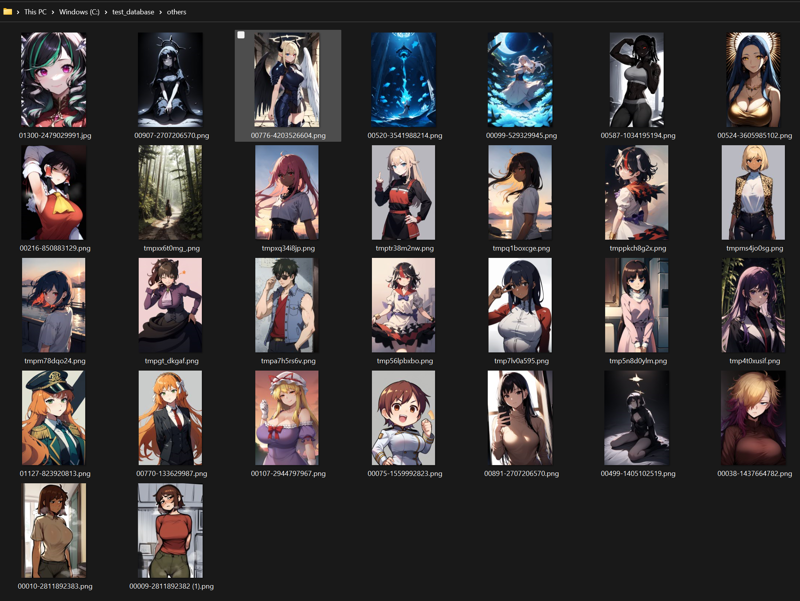
Here’s the folder we will be using for this tutorial + the content of the 3 folder


Using the HW tagger app:
Database creation:
The HW tagger can create a database with one or multiple folders, and it will make a database that stores the tags. You can then edit the tags and choose to export them for training a Lora.
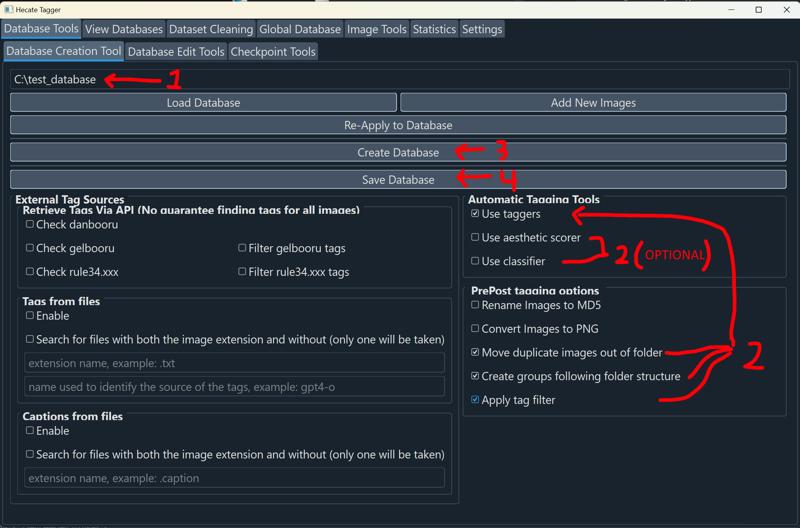
I’ll demonstrate the steps for tagging this dataset, you basically need to enter the location, check the settings to create the database, create the database, and save the database. I also enabled the move duplicates, create groups, and filter options for step 2.
Once you click the create button, things will start in the terminal and you’ll see the autotagger working its magic. If the CUDA and cudnn are properly set up, this is extremely fast. There’s a bit of fixed time setting up the data loader for the tagger and the actual tagging will show a progress bar. I had many tabs and apps open, but I list the time it took for running my basic tagging setting (Both Swin and Caformer) on different dataset size:
43 imgs (example dataset) took 36 sec

1033 imgs, 3 min 32 sec

27986 imgs, ~44 min

*If you enable other options it’ll add more time, but the other model’s are more lightweight than the autotagger.
* The tagging is +10x faster than the wd-14-tagger extension because we allow batching. Just looking at the Caformer tagger, Wd-14-tagger extension (batch 1) took 150 seconds to tag 100 images, while the HW tagger app (batch 8) took 16 seconds.
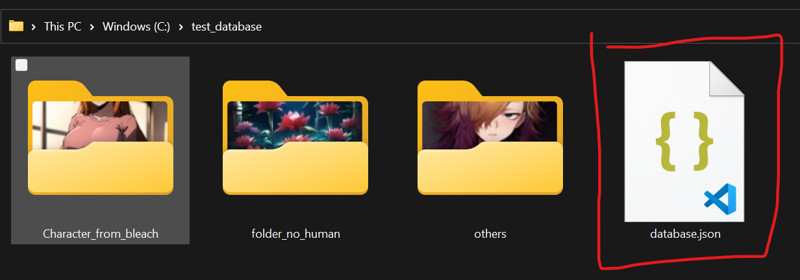
Once the tagging is complete and you save the database, you’ll see a new database.json file added in the folder you were working on. The database file basically stores all the tags and other relevant information, if you make changes and save your database, it updates this file and you can come back to this project and continue where you left off:
Viewing database:
Lets move to the next tab and load up the database:

Image loading is also optimized so you can load a database and it’ll thumbnail, cache, and load the database really fast (I have thumbnail size set to 192px, the thumbnail size will affect speed and the memory used). Loading a 1000 img database takes only ~3 seconds.

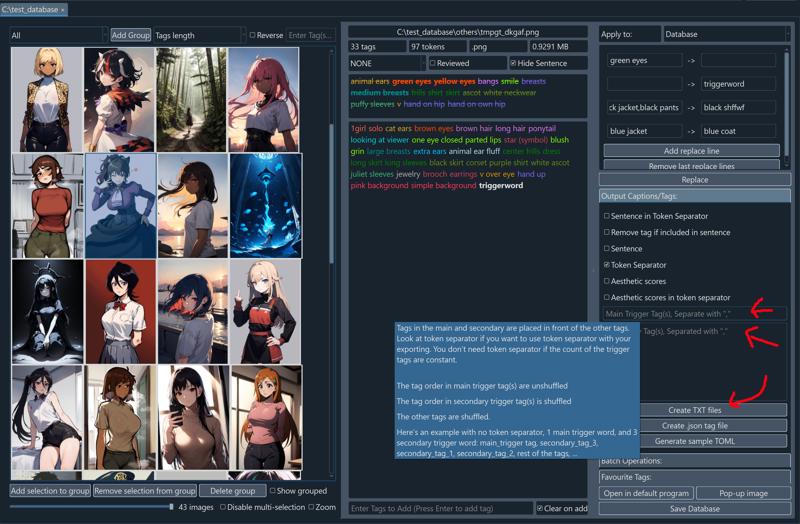
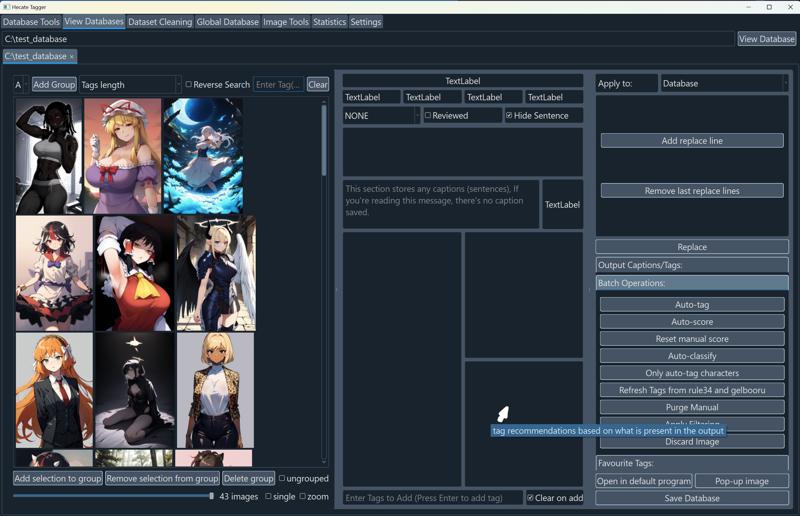
This is what you’ll see when you load a database. There’s a lot of buttons and dropdowns, but I’ll only explain the ones that I’ll be using (the full list of descriptions is in this Civitai article:). You can also hover over the area or over the interactable objects and a tooltip message will show up (I couldn’t screenshot where my cursor was so I drew the cursor).
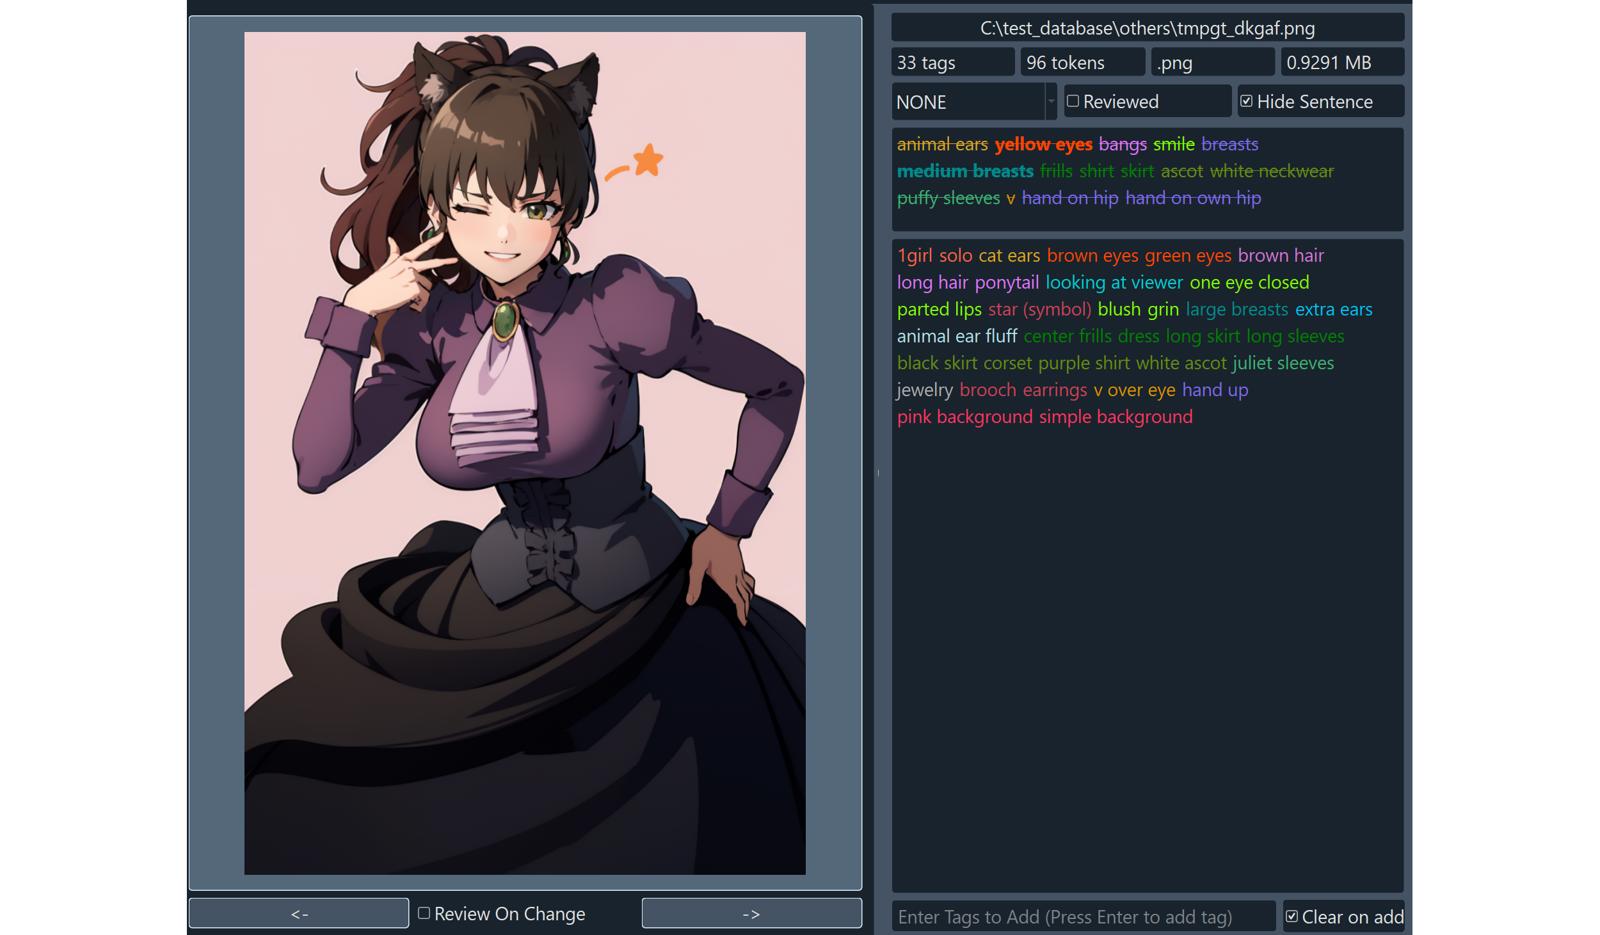
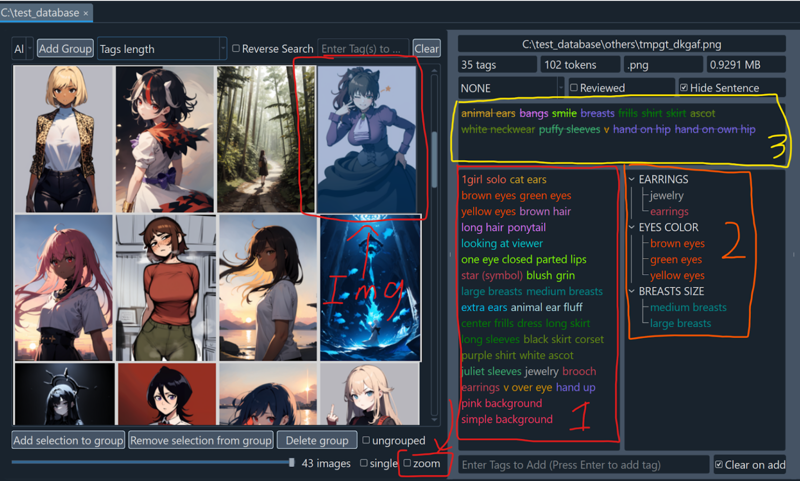
You can click on an image, and the tags will be loaded in the middle section. Known tags are color-coded based on their category. The red box (1) is the list of tags associated with the images. The orange box (2) lists the potential conflicts. The yellow box (3) is the rejected tags. The rejected and conflict sections are filled because we applied the filter when we made the dataset.
I clicked on the zoom checkbox and clicked on the image, then the image fills the entire left area. You can click on the image again to go back to the gallery or you can click on the <- and -> arrows to move to the previous or next image in the view.
Tags before manually cleaning:
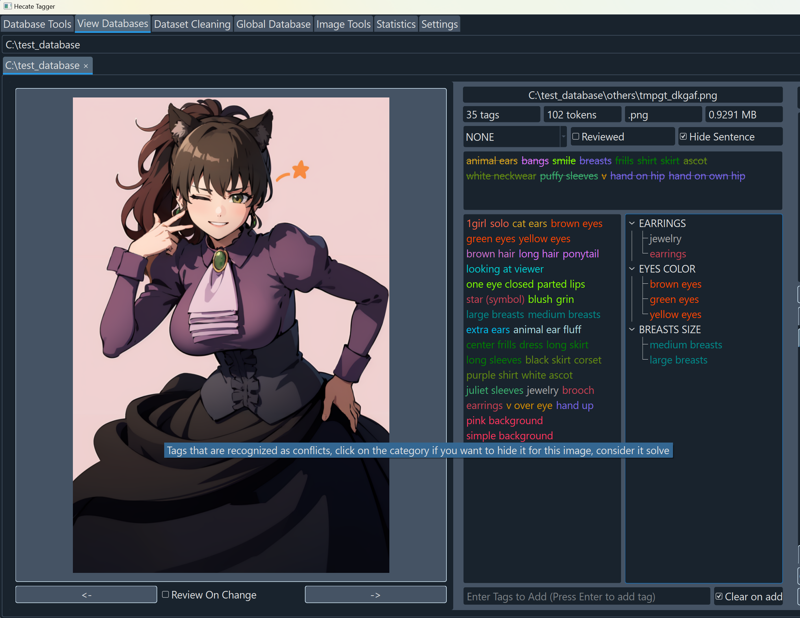
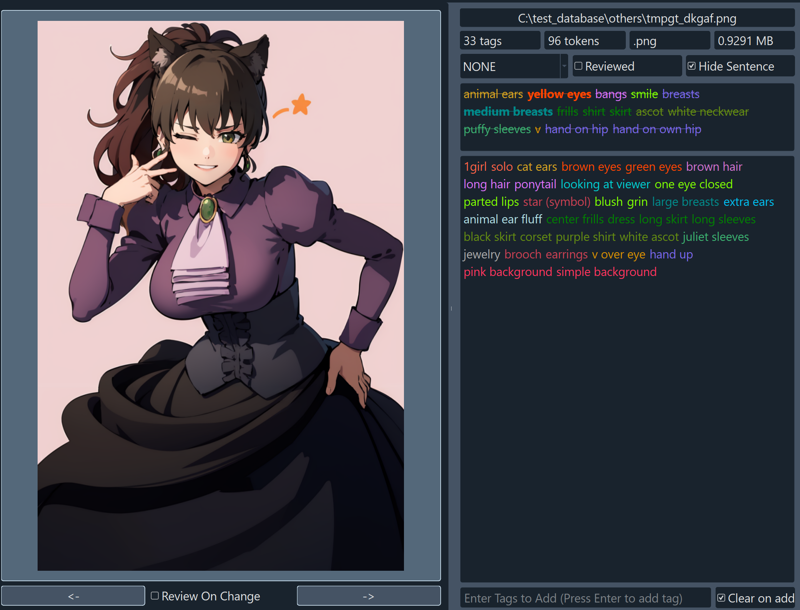
The conflict section is useful to look for errors with the autotagger. You can left-click the tag to keep and discard the rest or you can right-click a tag to move it into the rejected section. Resolved conflicts are automatically removed from the list. In this scenario, her eyes were brown with a tint of green so I right-clicked on the “yellow eyes” tag to move it to the rejected, then right-clicked the “EYE COLOR” category so that conflict is removed from the list. Then I left-clicked on the “large breasts” to keep that tag and automatically “medium breasts” was moved to the rejected section. The “EARRINGS” section was fine to keep so I right-clicked on the category and we resolved all the known potential conflicts.
Tags after resolving the conflict:
Useful filters and view management:
I’ll also describe the useful dropdowns in the image gallery view.
Groups:
The far left dropdown has “All” by default and it shows all images in the database. If you have any groups in your dataset, additional dropdown options will show up and you can filter your views. The group mechanism is a nice optional organization feature and images can be assigned to one or many groups and helps with filtering the view. In this example, we already organized the images into 3 subfolders and we imported them as the groups.

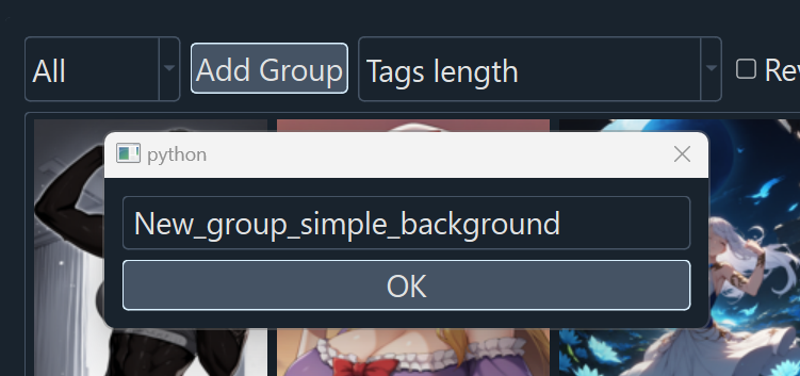
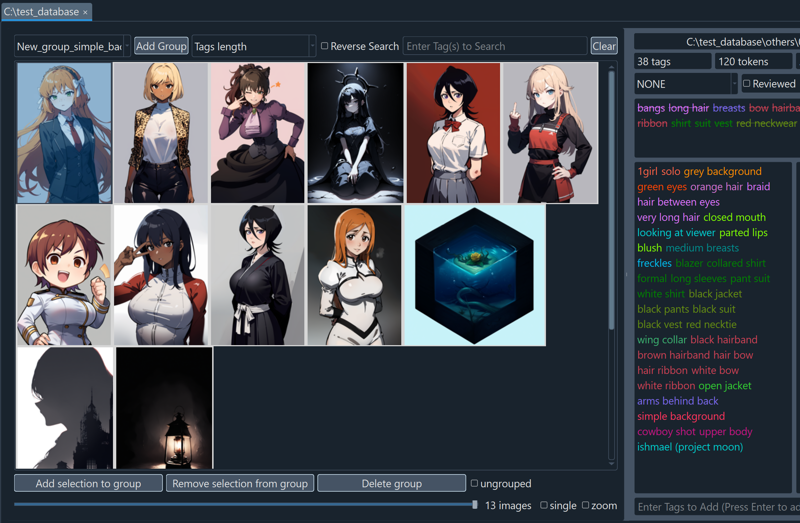
You can also make new groups with the “Add Group” button. A pop up will show up and you can create a new group, let’s make a new group of images with simple backgrounds. Adding or deleting groups doesn’t affect your images, it’s just an organizational filter.
The new group will be empty at first:
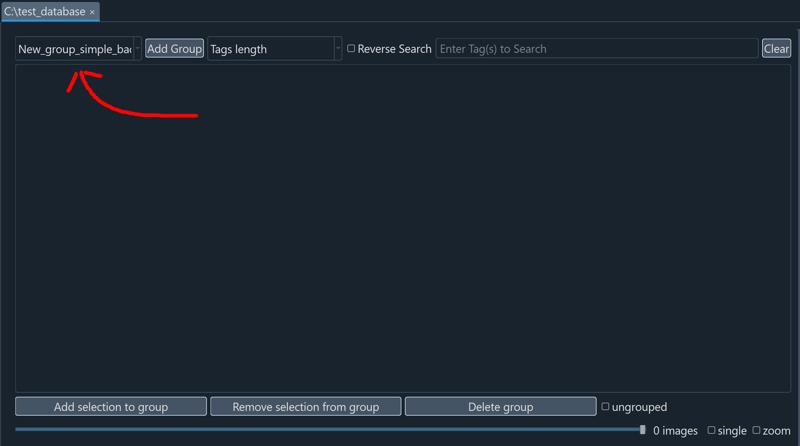
All the images are currently in a group so nothing else shows up, but you can show grouped images by enabling the “ungrouped” checkbox on the bottom menu.
Now we see all the images, and we can ctrl + click to select multiple images, then click the add button to add the selection to the group
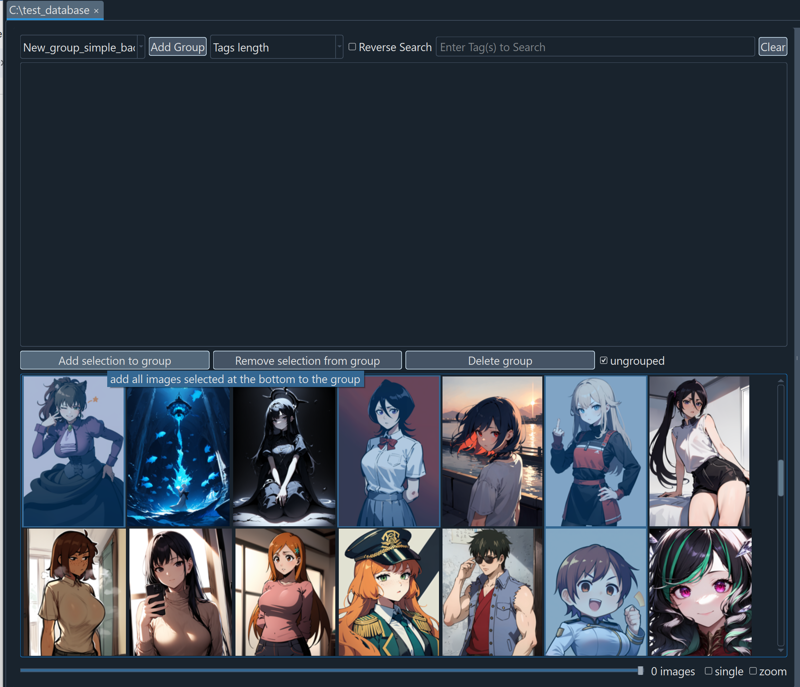
We made a new group and assigned images to it. If we save the database, this grouping is saved and we can access it anytime.
Sorting:
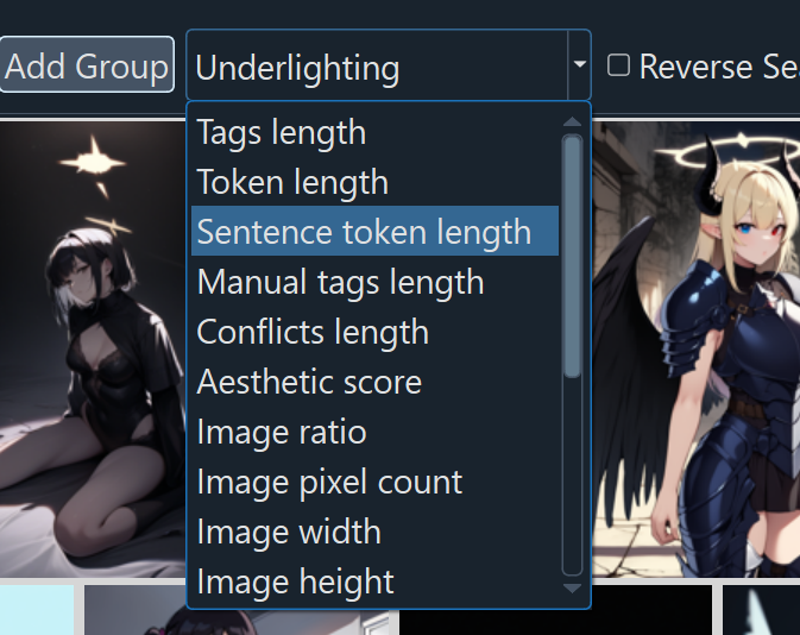
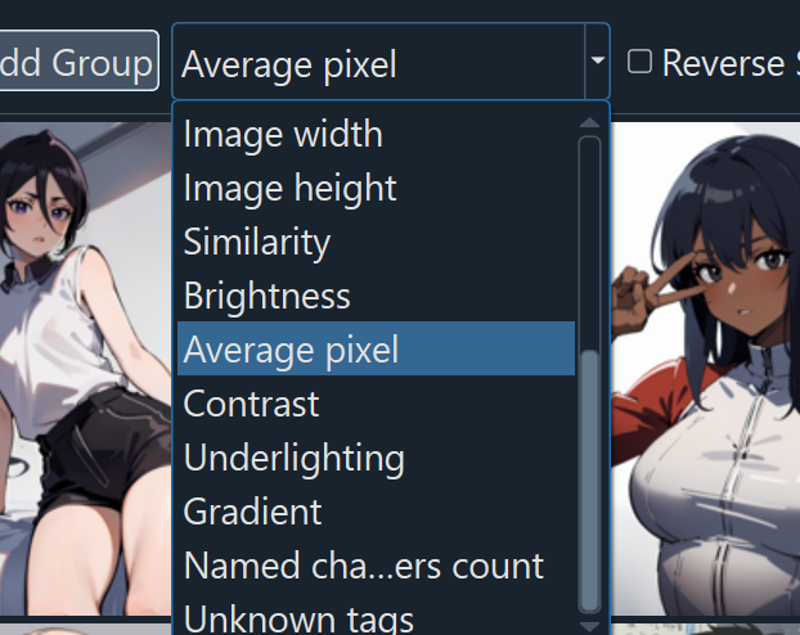
We also have a lot of sort options and a checkbox for reversing them. The sort can be based on tag statistics, image attributes, and we have additional sorting methods that require a one time calculation (ex: average pixel value, brightness, contrast, underlighting, etc). We plan on adding more sorts.
Searching tags:
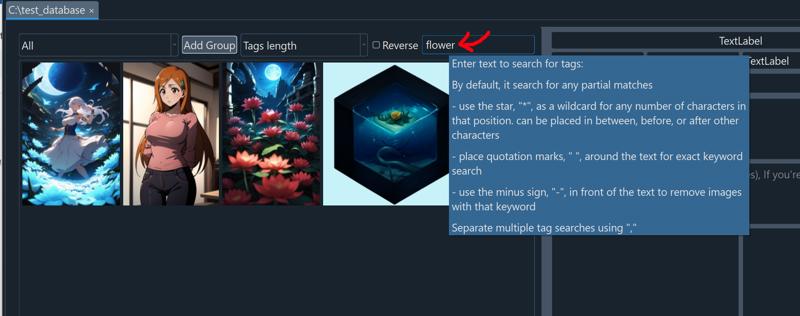
You can also search tag(s) and it will filter the view.
Replacing tags:
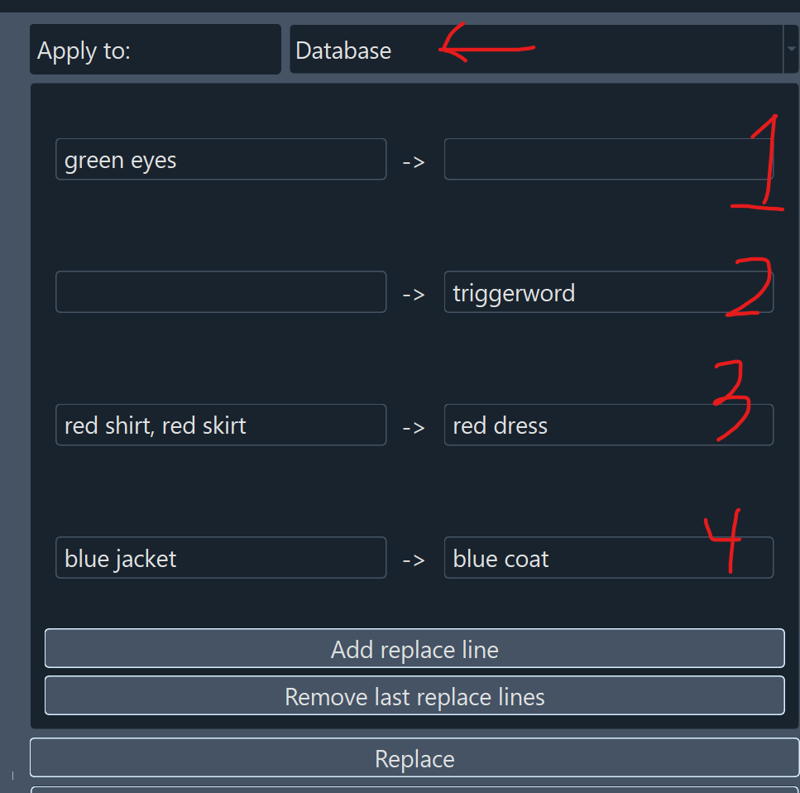
You can use the replace tag section to do several things. Here we show 4 different common use cases that’s being applied to the entire database (you can change if the rule applies to the entire database, the images in the visible view, or a single image). Blank text means that it gets converted to nothing or from nothing.
Case:
1) “green eyes” are mapped to nothing, meaning green eyes are removed from all images and the tag is moved to the rejected list.
2) Nothing is converted to a tag “triggerword” so this tag is added to all images, useful for batch adding tags
3) Images with both “red shirt” and “red skirt” will replace them with “red dress”, this is useful when you want to merge 2 tags and replace it with a new tag
4) “blue jacket” is converted to “blue coat”, this is useful when you need consistency across your dataset, primarily useful for character Lora creation because outfits may be tagged with similar tags.
Exporting tags as .txt:
Now let's say we have completed cleaning up our tags, added trigger word(s) to the database, then we’re ready to export the tags to a file. If you need specific tags to be at the front of the txt file, you can list them in the main or secondary trigger tags, and export the tags. You should have a .txt file with the tags next to each image.
