Editing your Outputs with Clip Studio (Rough Guide)
Disclaimer
Maturity level is PG-13 due to the inability of me censoring every part of the images below. Some would be classed as R in the tagger, but there is no nudity. Please be aware that some male underwear and "bare skin" (midriff lol) is being shown. I have not shared the clip studio file in which i'm working with, as i'm very poor at naming layers, and keeping things organized. If you'd like an in depth video on this or a timelapse for another piece please let me know in the comments.
Also to the moderators: Feel free if the images are too much, to let me know I am happy to provide censored options. I didn't feel for education that the tagger's R rating was very useful as this is an artistic guide.
For this tutorial I've been using a Wacom CTL 490W, which was likely a 2017 or earlier Bamboo. I've had a long standing relationship using digital tablets since the mid 2000s when they became cheaper to obtain. Please note, you're welcome to use a mouse for this, but you will not have the same pressure sensitivity. Digital devices such as Ipads/Android tablets are welcome for this, however the same layout and tools may not be available.
And yes, this model of tablet has a "optional wireless" option, but it was paid extra - and by the time we got this model on sale as a student deal in early 2018... this model was no longer supported for that specific add-on.
Introduction
Welcome to this rough guide on refining AI-generated characters in Clip Studio! As a designer and artist, I'm excited to share my experience with editing and enhancing characters created with Pony XL and other AI models. This guide is perfect for those who are curious about taking their AI-generated characters to the next level, whether you're using Civitai's onsite AI Art generator or an external GUI system.
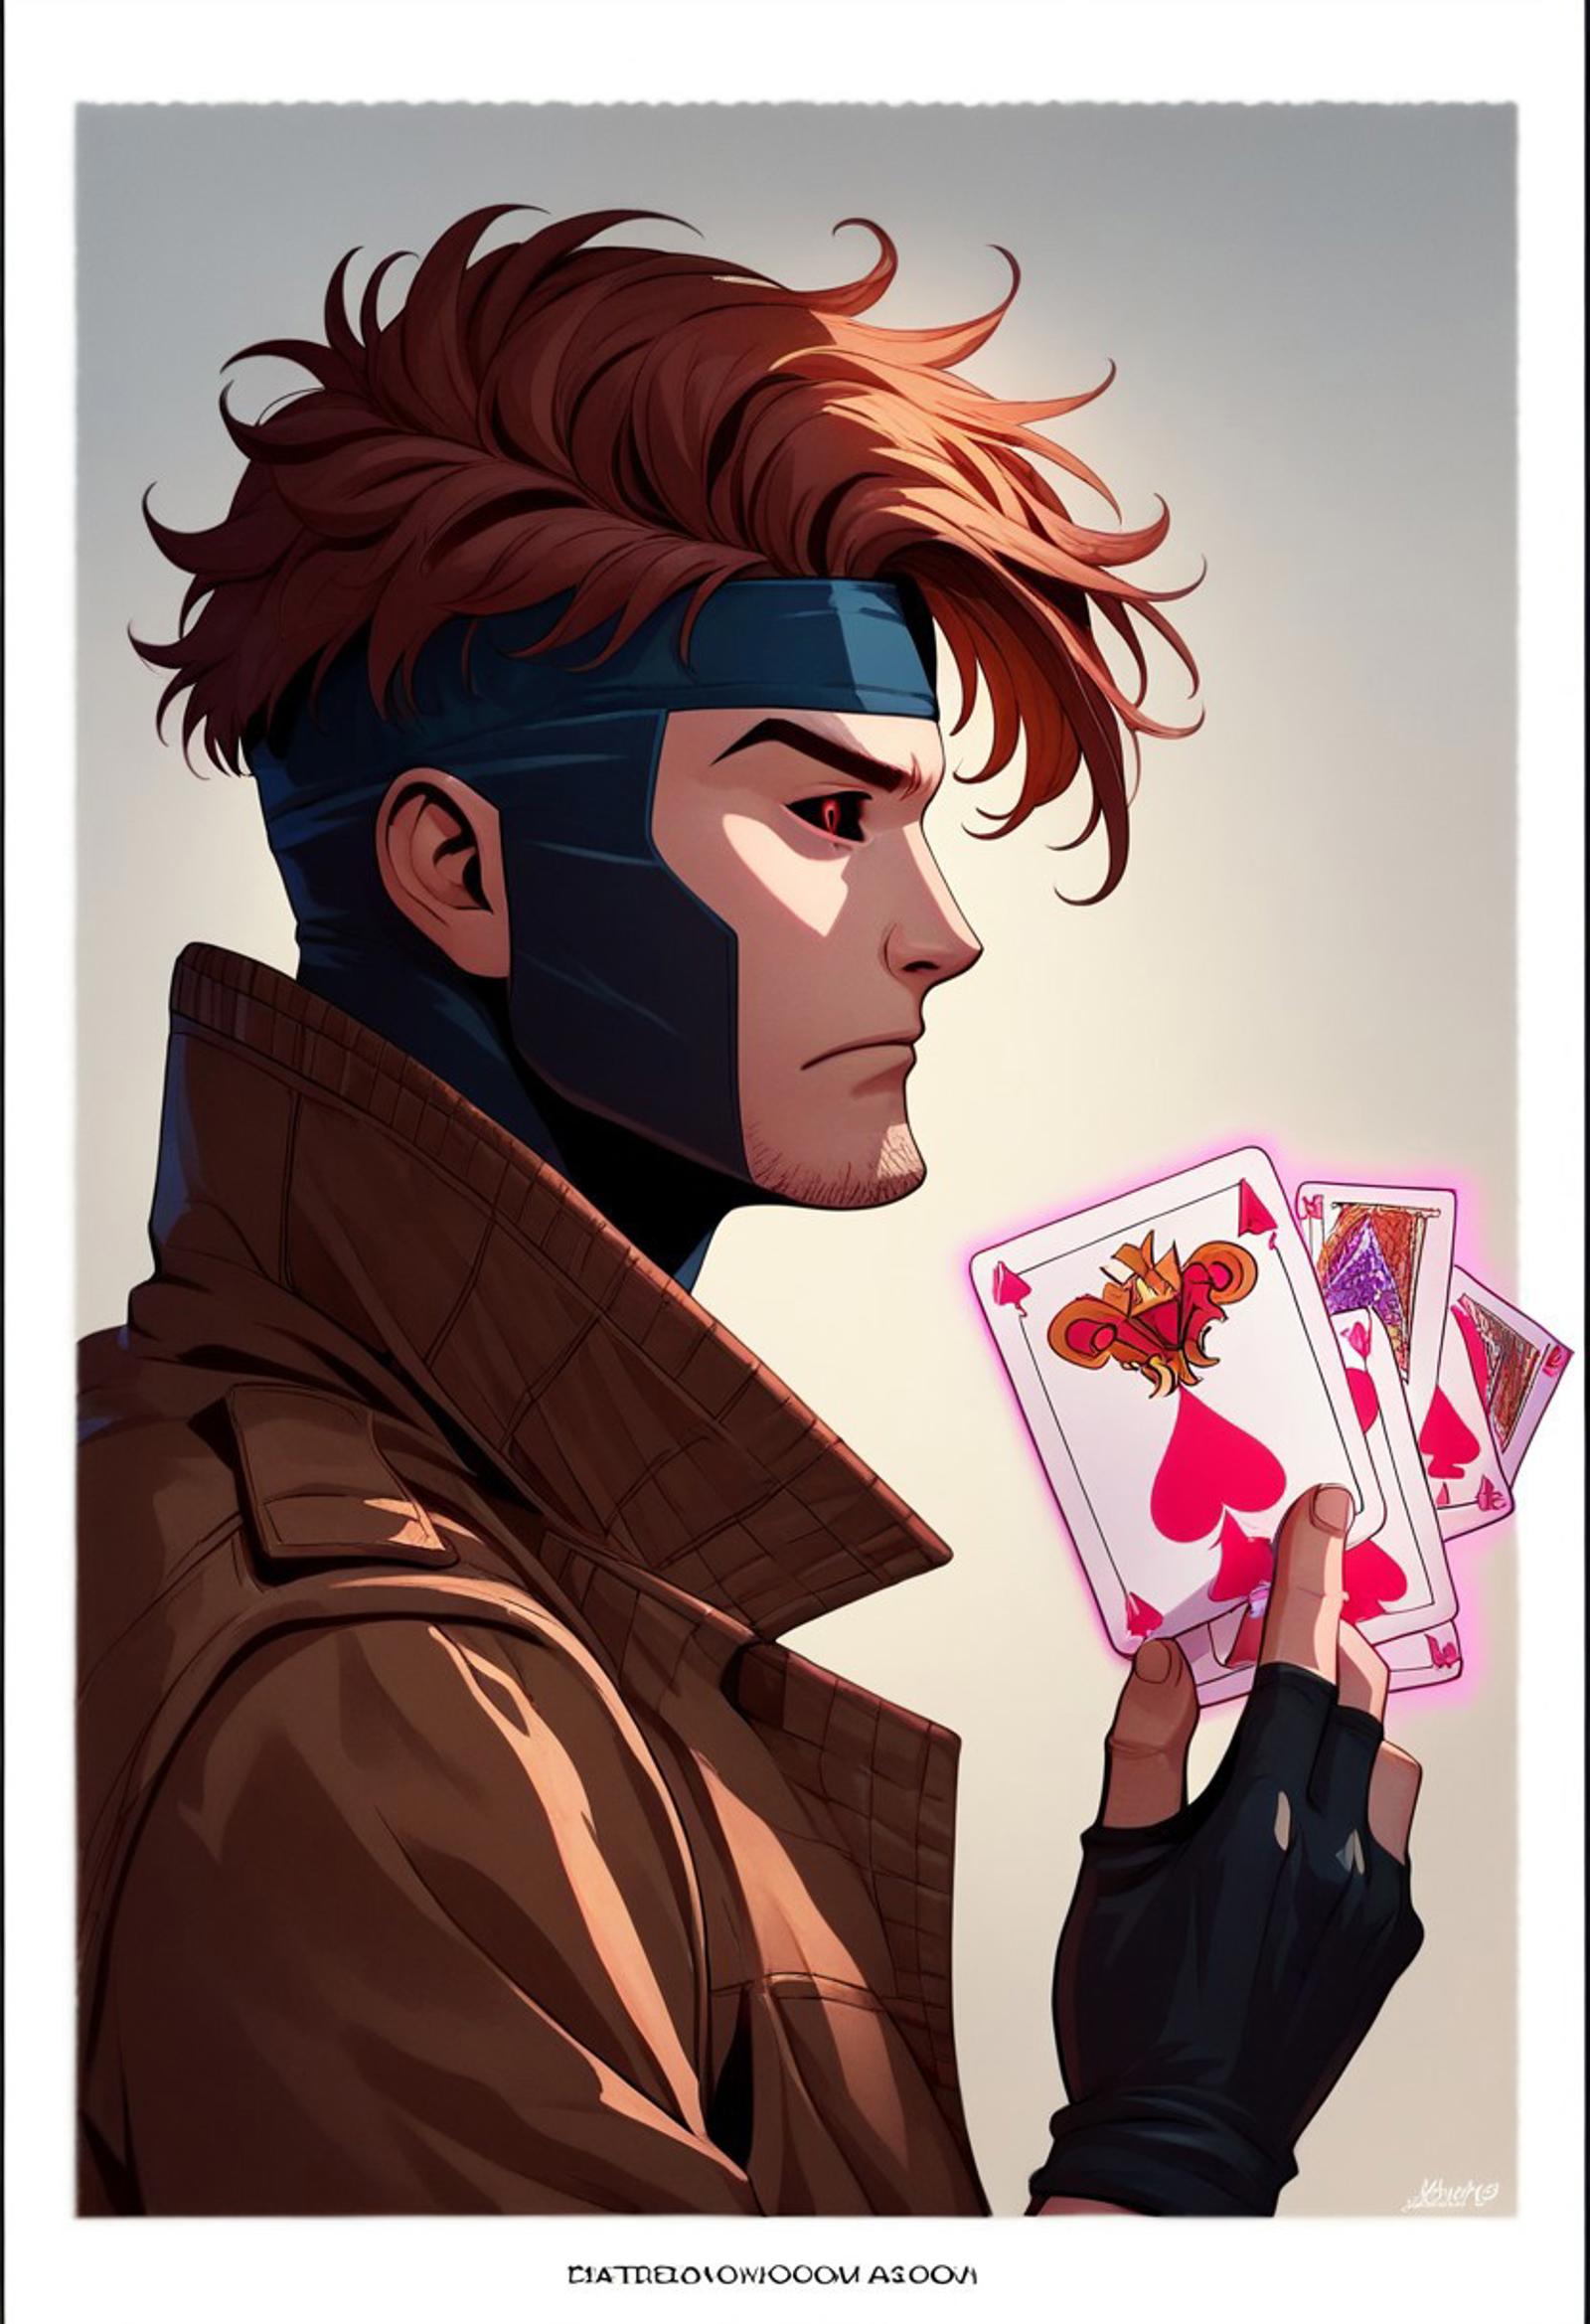
In this guide, we'll focus on animated and illustrated outputs, using the Gambit/Remy Lebeau character Lora as our example. I'll share my personal tips and tricks for refining AI-generated characters, from proportion guides to texture and color. This isn't a replacement for comprehensive tutorials on KRITA or PHOTOSHOP, but rather a specialized guide for those interested in editing AI-generated characters.
As someone who's worked on commissioned pieces, I can attest to the joy of re-drawing elements and learning as you go. In fact, last year, I had the opportunity to work on commissioned pieces for Final Fantasy XIV English voice actors Colin Ryan and Bethan Walker, best known for their roles as Alphinaud and Alisae Leveilleur. These projects involved re-drawing and heavily editing existing characters, which was a great experience in refining my skills. Similarly, refining AI-generated characters can be a fun and creative way to develop your skills and produce unique pieces.
Just remember to always be truthful, don't pass off edited AI-generated characters as entirely your own, and be mindful of the licensing of the original model. With that said, let's dive into the world of refining AI-generated characters in Clip Studio!
Preparing the Image
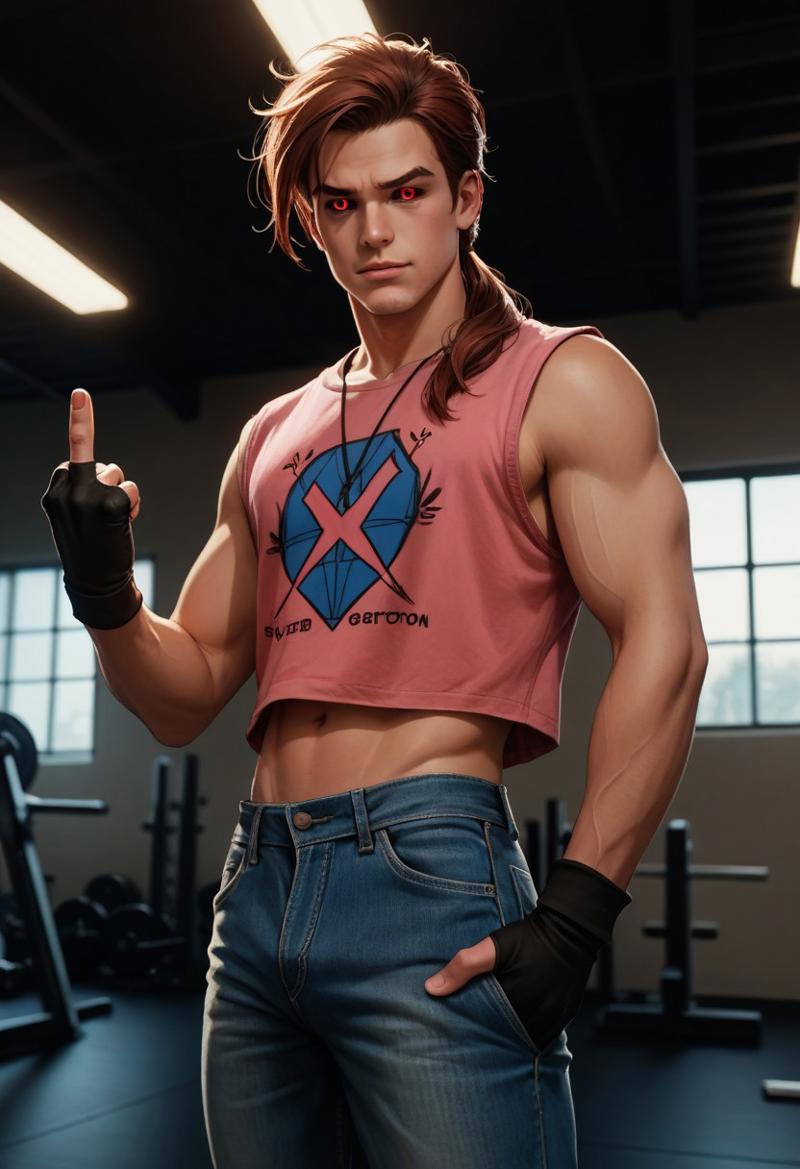
Prepare your images, they say? Well, in this case, we're going to challenge that notion by working with a low-resolution JPEG file straight from the Civitai generator. As you can see from the screenshot below, our starting point is a heavily artifacted image with a file size of less than 500kb.
This image contains mature themes, including sexy attire and male underwear. While our intention is to create an educational piece, we acknowledge that some viewers may find the content offensive. We are happy to create a censored version if required by moderators. Please proceed with discretion.
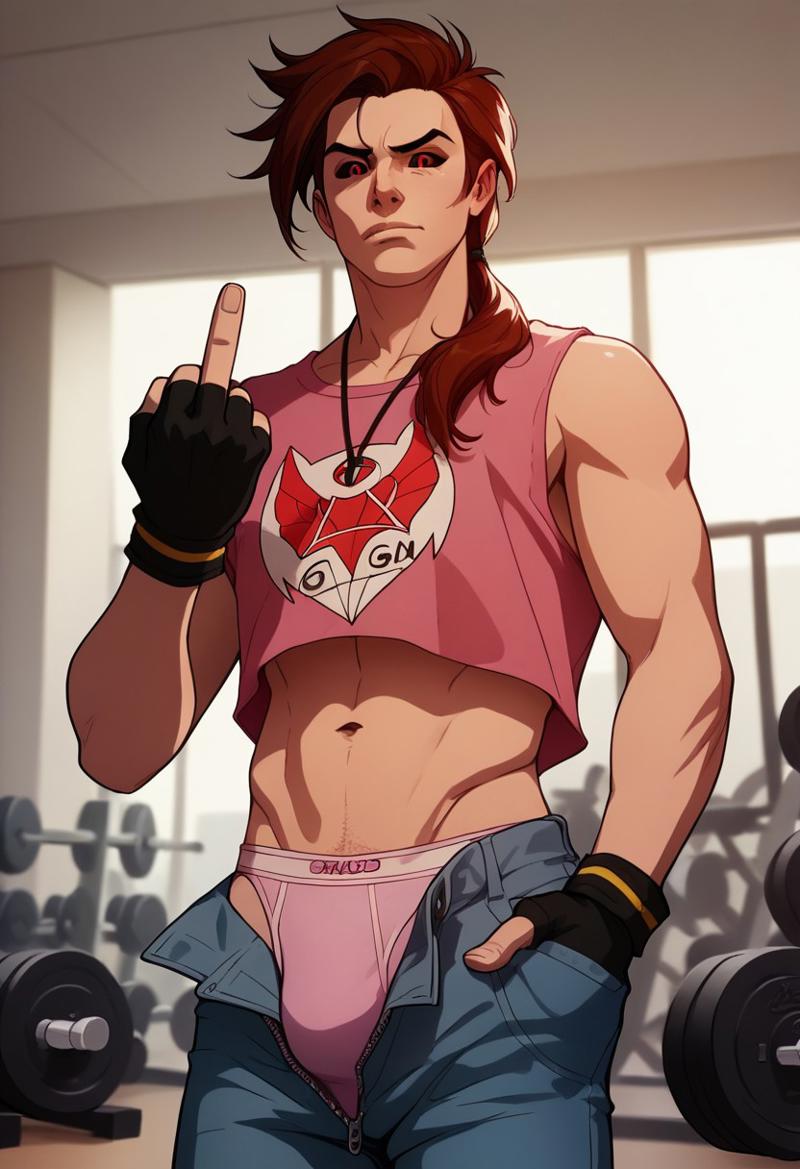
The prompt used to generate this image is a complex one, incorporating Danbooru tags and natural language prompting. The goal was to create a cinematic scene with a focus on Remy Lebeau, featuring auburn hair, red eyes, and a bold outfit. While the image may not be perfect, it's a great starting point for our editing journey.
"Dsk_Remy_Lebeau, 1boy, auburn hair, red eyes, black sclera, colored sclera, pink crop top, denim, fingerless gloves, gloves, hand in pocket, jeans, long hair, male focus, male underwear, middle finger, midriff, pants, Gym scene, indoors, low ponytail, solo, underwear, unzipped, extreme light and shadow, cinematic lighting, cinematic angle, score_9, score_8_up, score_7_up, score_6_up, score_5_up, score_4_up,"Note that the prompt includes elements like extreme light and shadow, cinematic lighting, and a cinematic angle, which will help us create a more dynamic composition. And yes, we're aware that the image is inspired by existing artwork, but our focus is on editing and refining, not arguing about ethics.
So, let's get started on refining this image and turning it into an editable masterpiece!
Introduction to Clip Studio Tools
In this section, we'll cover the essential tools and palettes you'll need to work with in Clip Studio. While most of these tools are also available in other digital art software like Krita and Procreate, it's crucial to get familiar with the Clip Studio interface to avoid anxiety and ensure a smooth workflow. Additionally, I highly recommend using a Wacom or drawing tablet for this tutorial, but you can also use a general mouse if you prefer.
Tool Introductions
Blending Tool: This tool blends pixels together based on the nearest colors around it, similar to a pencil blender or color blender for paint. Note that it's not the same as a "Blur" tool.

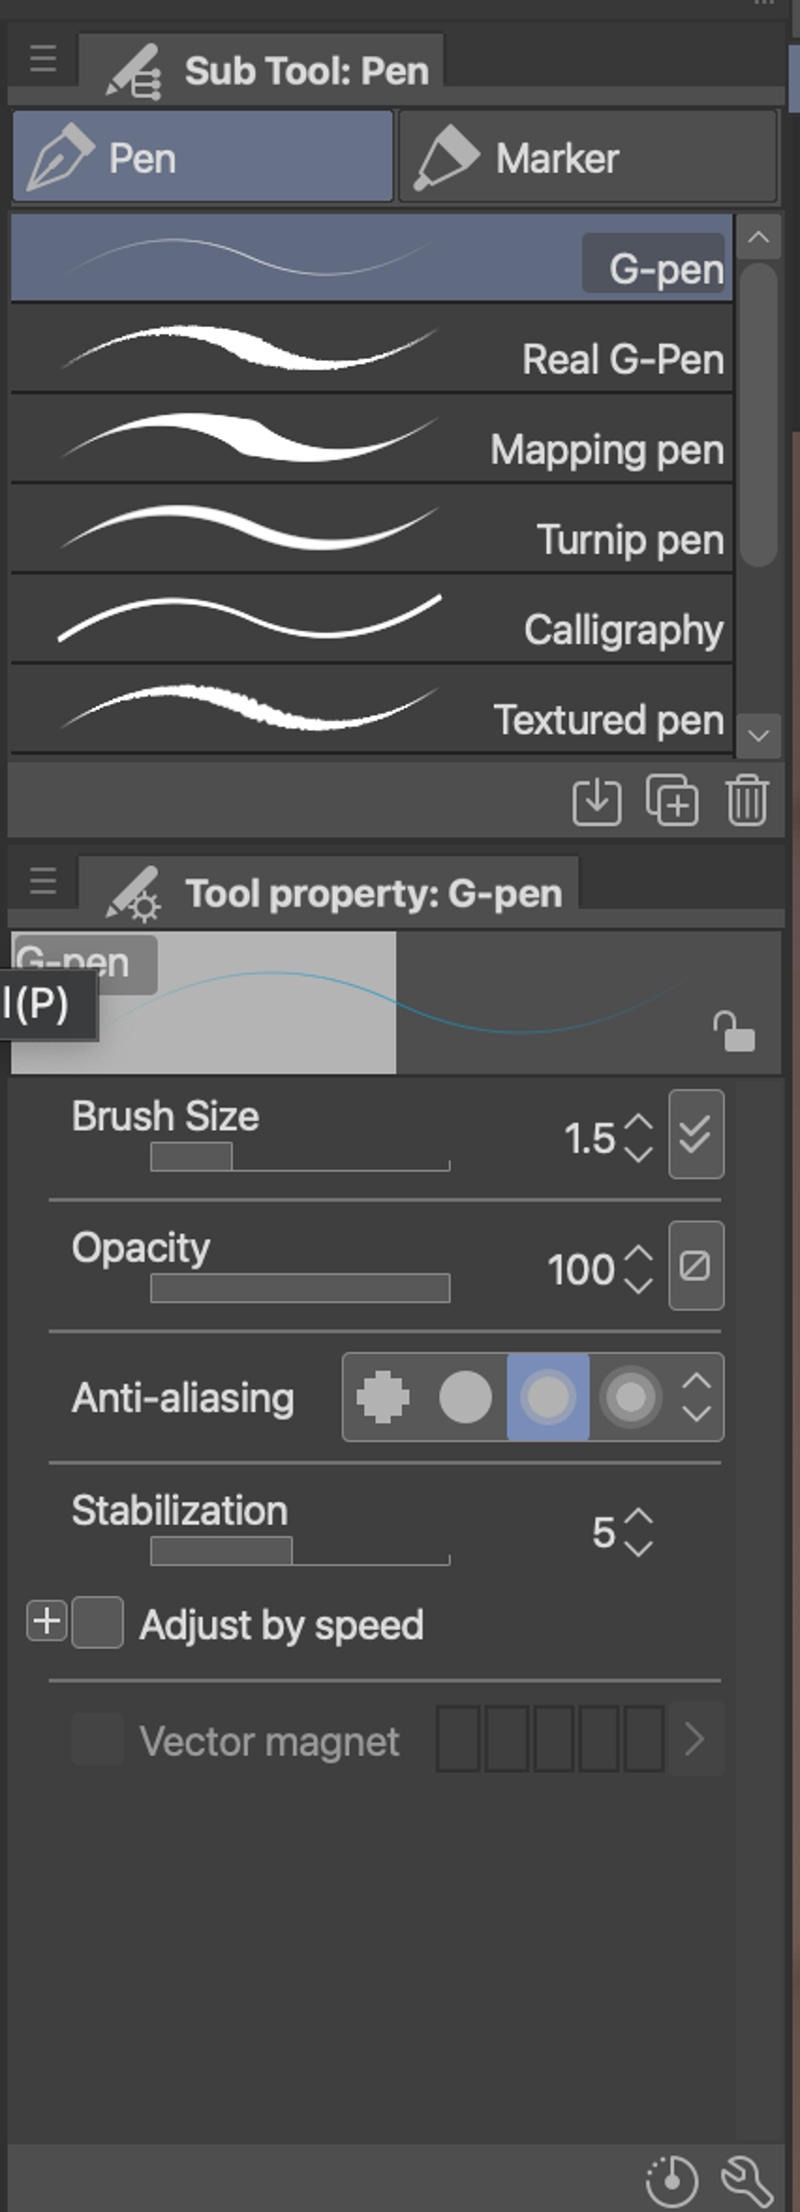
Pen Tool: This tool is commonly used for inking and is designed for illustrations. (Note: it's not a vector pen.)
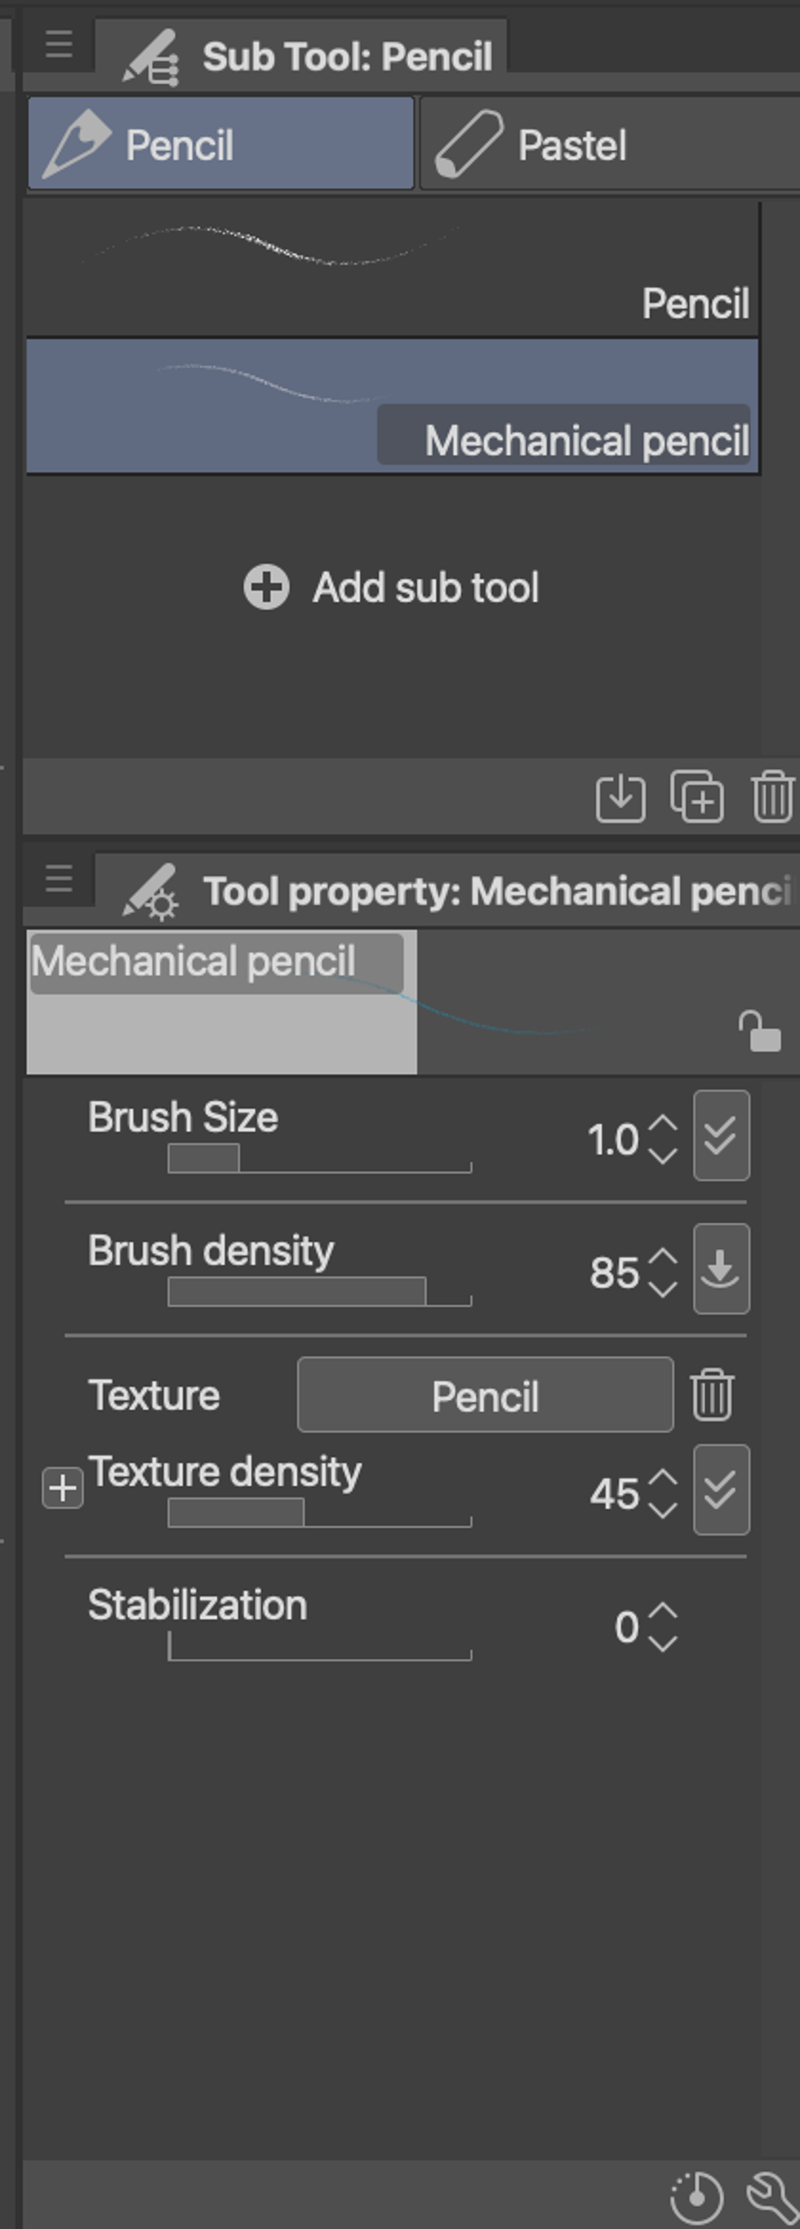
Pencil Tool: A hard/bitmap style pencil that mimics natural pencil marks at different sizes.
Paint Tool: This tool offers various brushes and painting options, including traditional mediums and digital styles.
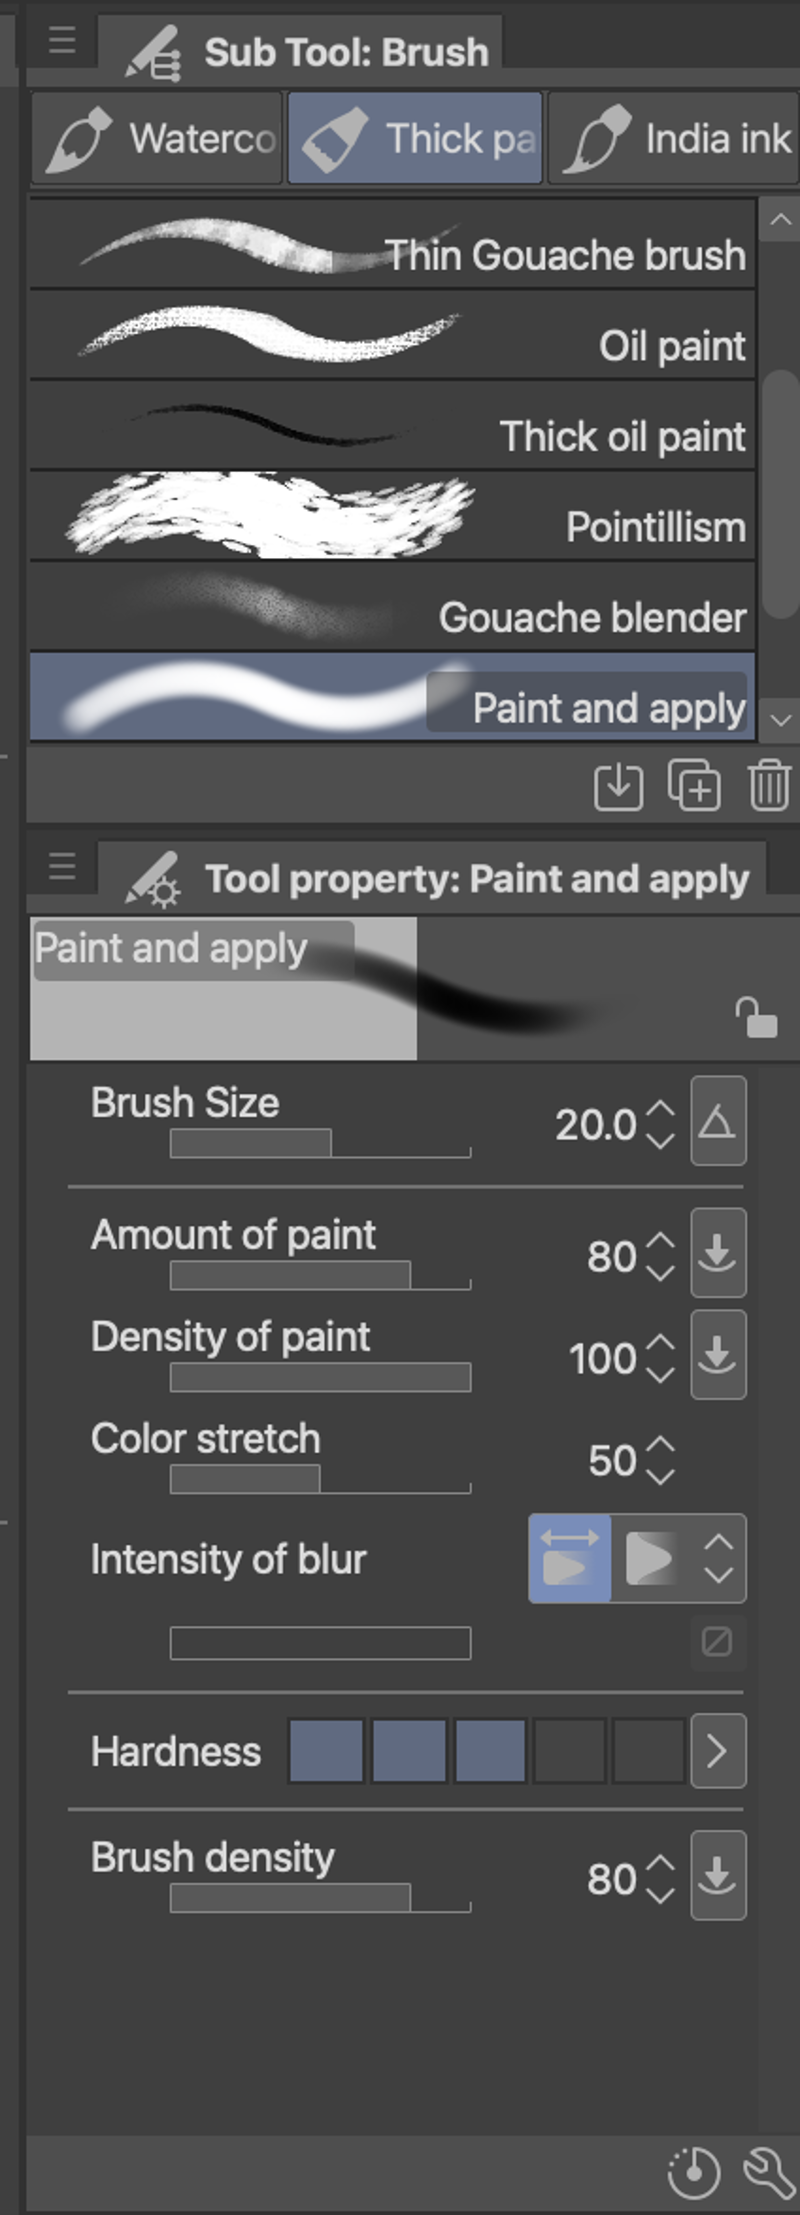
Palette Introductions
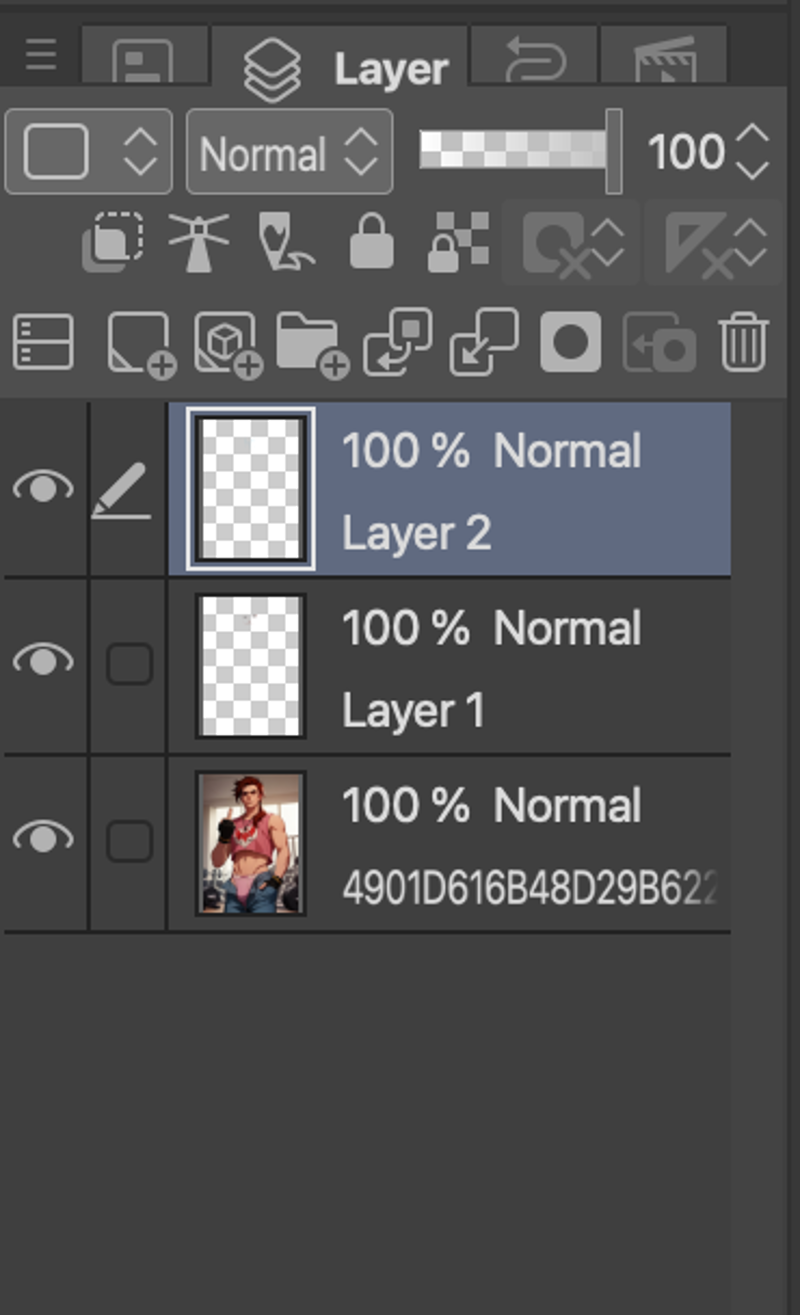
Layer Palette: This is a crucial palette that allows you to organize your work. Always work on a new layer, except when blending. The "NEW LAYER" and "VISIBILITY" (eyeball) options are the most important ones to know.
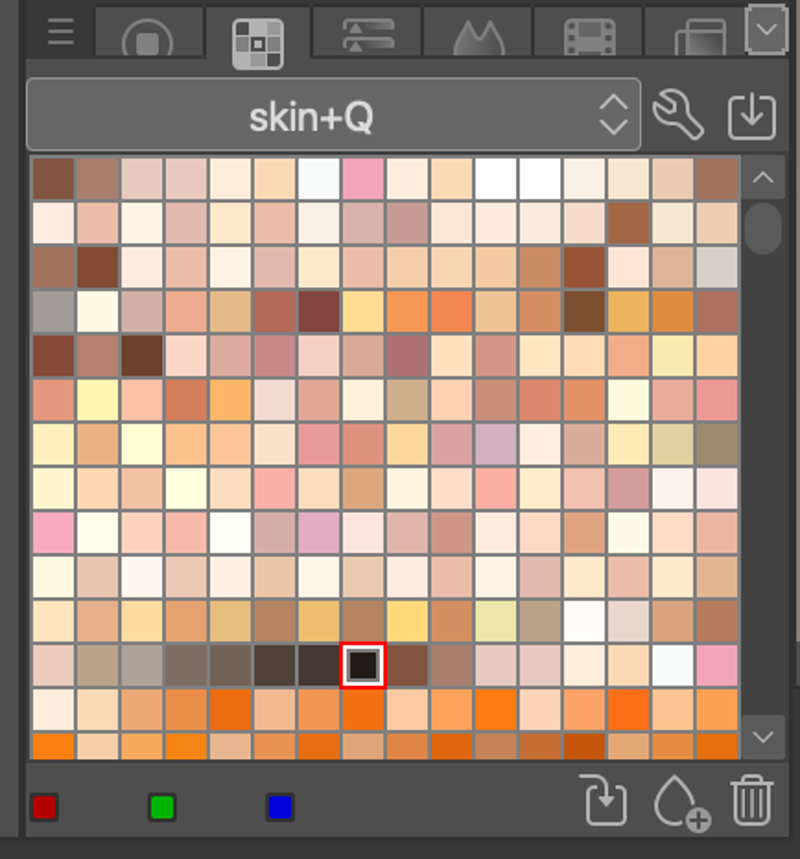
Color Palette: This palette allows you to manage your colors. You can download custom color palettes, like the skin tone example shown here. Feel free to explore the advanced features of this palette on your own.
Zoom Shortcuts
Windows:
Zoom: Ctrl +
Zoom out: Ctrl -
Mac:
Zoom: Cmd +
Zoom out: Cmd -
Proportion Guides and Anatomy
In this section, we'll cover the basics of proportion guides and anatomy for illustration. Please note that this is a cumulative trick I've learned from various sources over the years, and it's not meant to be a definitive guide.
Basic Face Proportions
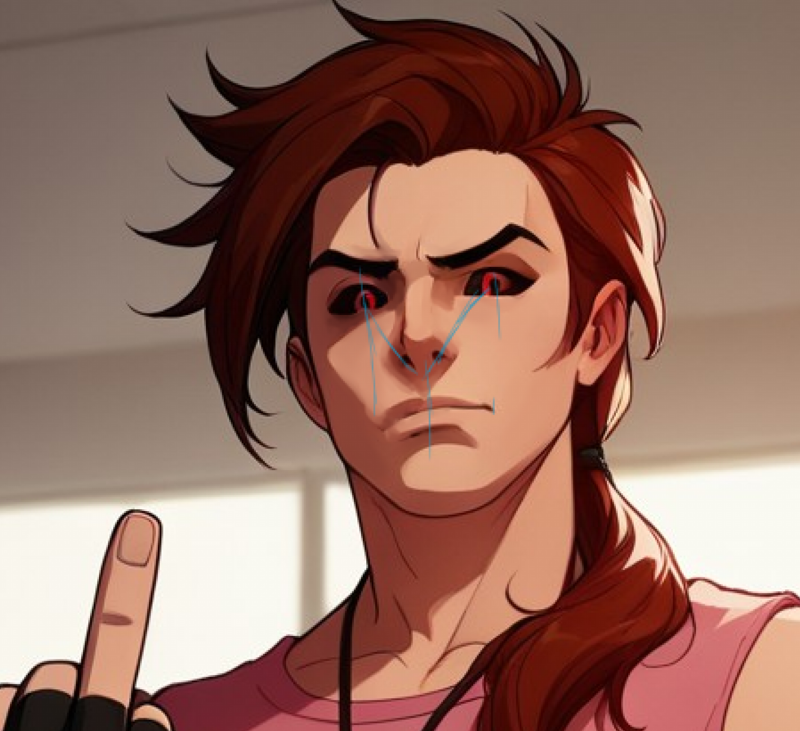
As you can see, I've marked the basic face proportions in a blue hue, similar to the Non Photo Blue pencil used by many illustrators in their drafting stage. This is a digital equivalent, so we'll focus on creating a blank new layer and drawing lines from the rough areas of the pupils down to the corners of the mouth.
Assuming some minor liberties are taken with the facial structure, this guide will help you achieve a more human-like face. We'll dive into clothing and detailed anatomy later on.
Rough Outline
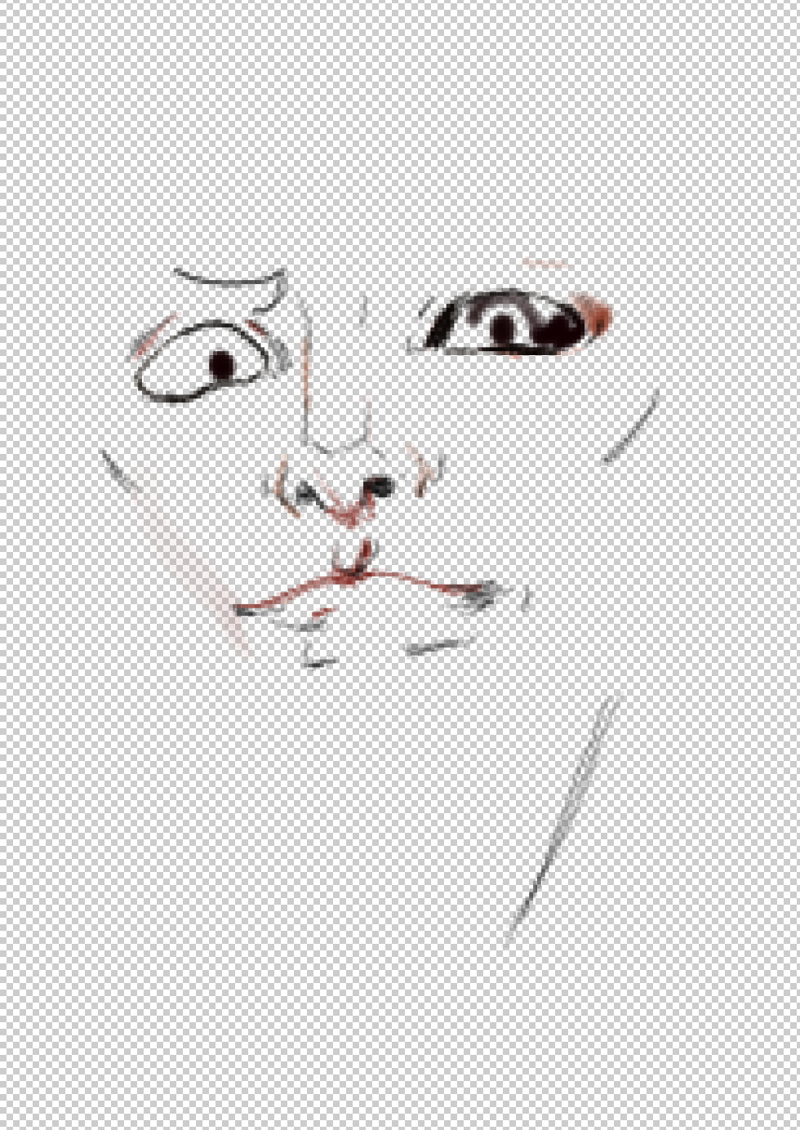
Here, I've created a rough outline based on my knowledge of facial anatomy. This is probably more of a step 6 in the process, but we'll revisit it later.
The goal is to ensure that the face looks fairly human, with the mouth positioned between the eyes, roughly at the edges of each eye for the corners of the mouth.
Additional Resources
For more advanced proportion guides and anatomy tutorials, I recommend exploring other resources online. This tutorial focuses on basic face proportions, and we'll cover more detailed anatomy later on.
Removing JPEG Artifacts and Blending
When working with AI-generated images, it's essential to remove JPEG artifacts to achieve a smoother, more refined look. While using another AI tool can be tempting, it can lead to triple the work and potentially introduce new issues. Instead, we'll focus on using the blending tool within Clip Studio to remove artifacts and blend colors seamlessly.
The Blending Tool
As introduced in the tools section, the blending tool is a powerful feature that helps merge colors and remove harsh lines and artifacts. While it doesn't create new textures, it's excellent for smoothing out the image and removing unwanted details.
Removing Artifacts
In the original image, there were extra lines, shading, and artifacts that didn't conform to human anatomy. These "AI artifacts" can be challenging to remove, even with multiple tools. However, by using the blending tool, we can minimize their impact and create a more cohesive image. I've shared some examples of the differences between the original image and where i'm at now in the progress of this. Be aware that my piece is not finished yet.
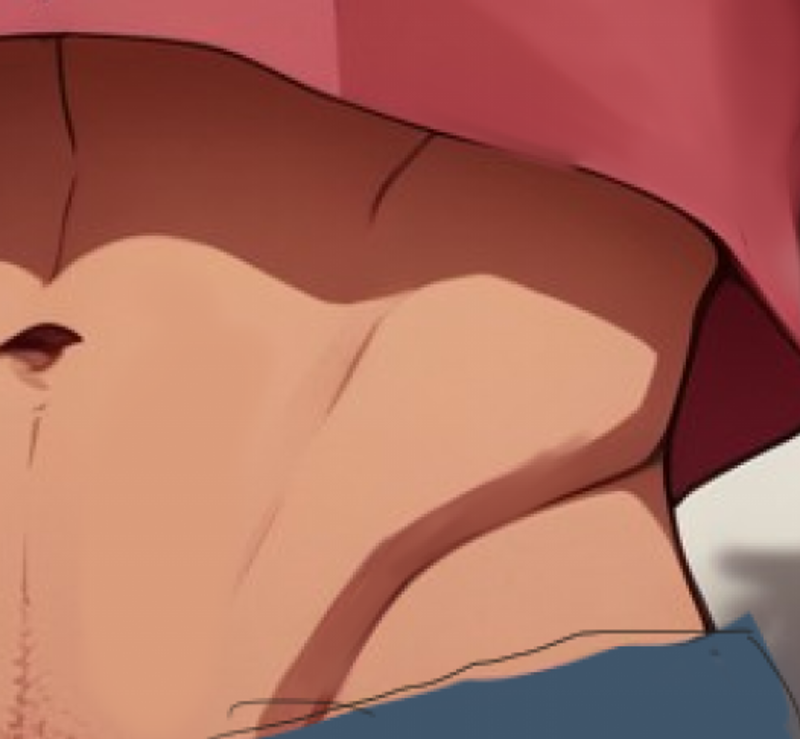
Note you'll learn a tad more later on about my piss-poor clothing skills, but this screenshot was to share where the shading was fixed with the blending just a tad. (I beleive I did use the paint tool by using the eye dropper to get the rough color needed.)
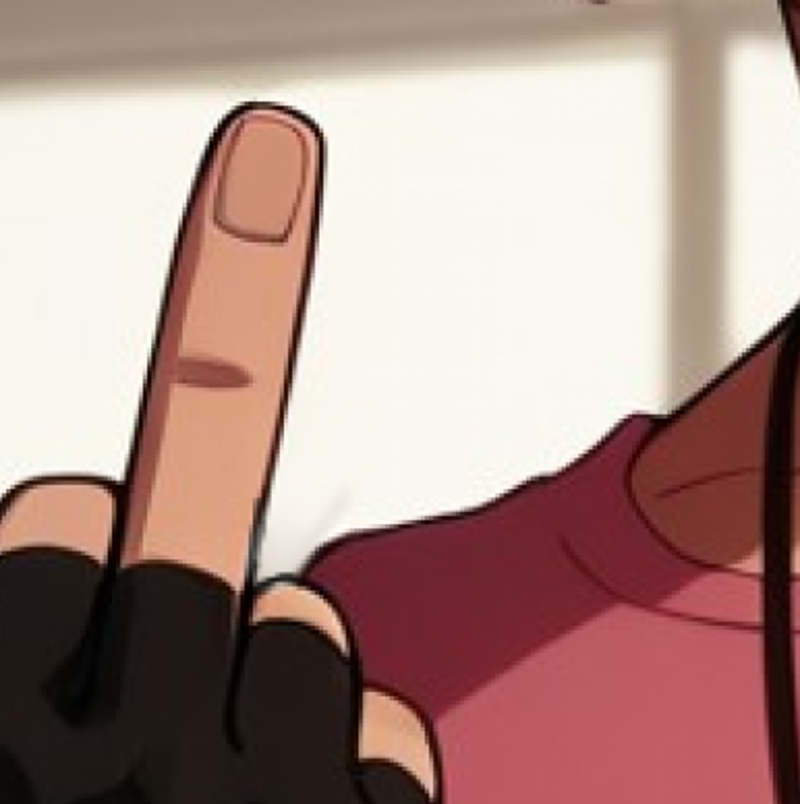
In the original pic, you'll note that there was a "BLOB" between the middle finger and the shoulder. AI has a struggle with natural patterns, something to prove to people that AI can outsmart us on some stuff, but not everything. I used the blend tool lazily, and then had to re-draw parts of the outline because It drove me up a wall.
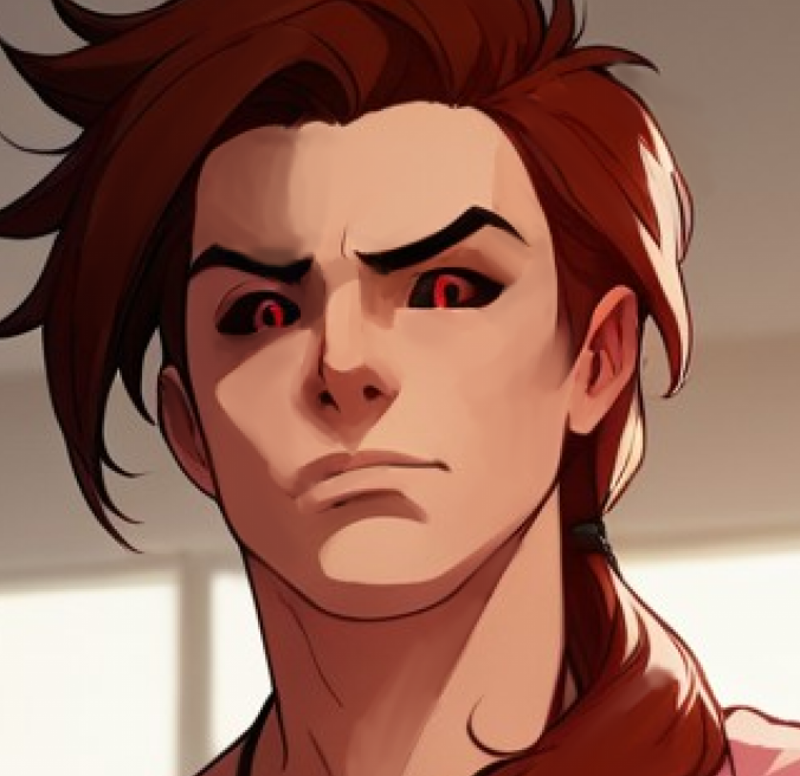
I've previously edited the eyes a little, and have another layer entirely that has new lines and structures. We'll go more into this as we get through the next sections.
Texturing and Semi-Realism
For this piece, we're aiming for a quasi 2.25D digital look with aspects of cel shading and depth. While I'm not a master of realistic art like Stanley Lau (Artgerm) or other comic book artists, I've developed my own tips and tricks for achieving semi-realism. The key is to find a balance and avoid overdoing it, which we'll discuss further in the next section on color and skin tones.
Color and Skin Tones
When it comes to color and skin tones, it's essential to create a cohesive look that enhances the overall image. In this section, we'll explore some tips and tricks for achieving realistic skin tones and harmonious color palettes.
Skin Tone Basics
When working with skin tones, it's crucial to remember that they can vary greatly depending on the individual. However, there are some general guidelines to keep in mind. For example, skin tones tend to have a warm, golden undertone, especially in areas with more blood flow.
Color Palette
To create a harmonious color palette, we'll focus on selecting colors that complement the skin tones. We can use the color wheel to identify analogous colors, which are colors that are next to each other on the wheel. These colors tend to work well together and create a cohesive look.
Clip Studio Color Tools
Clip Studio offers a range of color tools that can help us achieve the desired skin tones and color palette. We can use the Color Palette to select and manage our colors, and the Tone Curve to adjust the brightness and contrast of our image.
Disclaimer
This guide is designed to provide a basic introduction to color and skin tones in Clip Studio. For more advanced tutorials on tools and techniques not covered in this guide, we recommend exploring online resources such as YouTube videos and articles on the internet. There are many excellent tutorials and guides available that can help you take your skills to the next level.
Refining the Image
Now that we've worked on the color and skin tones, it's time to refine the image and add some final touches. In this section, we'll explore some techniques for enhancing the details and textures in our image.
Adding Texture and Detail
To add texture and detail to our image, we can use a combination of brushes and tools in Clip Studio. We can use the Brush Tool to add subtle texture and grain to the image.
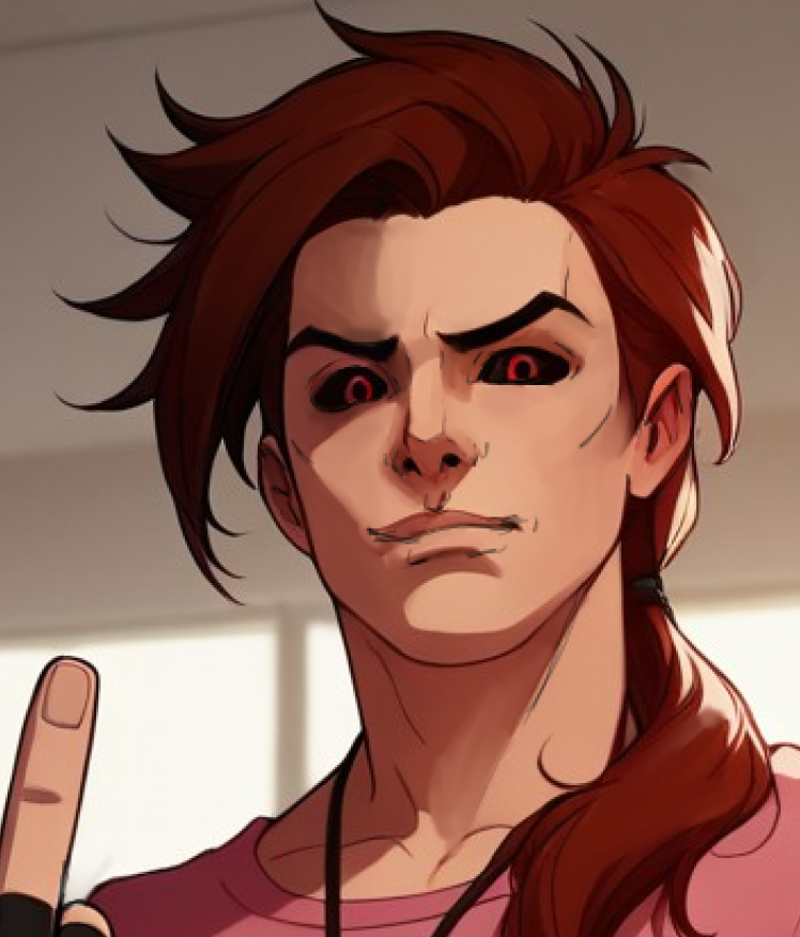
Please remember, I'm not at the "BRUSH TOOL TO ADD TEXTURE" stage, I'm still working on blending and other things. However as the image progresses I'll be updating this, and getting the LLM i've been beating with a squeaky bat to help re-word content over and over.
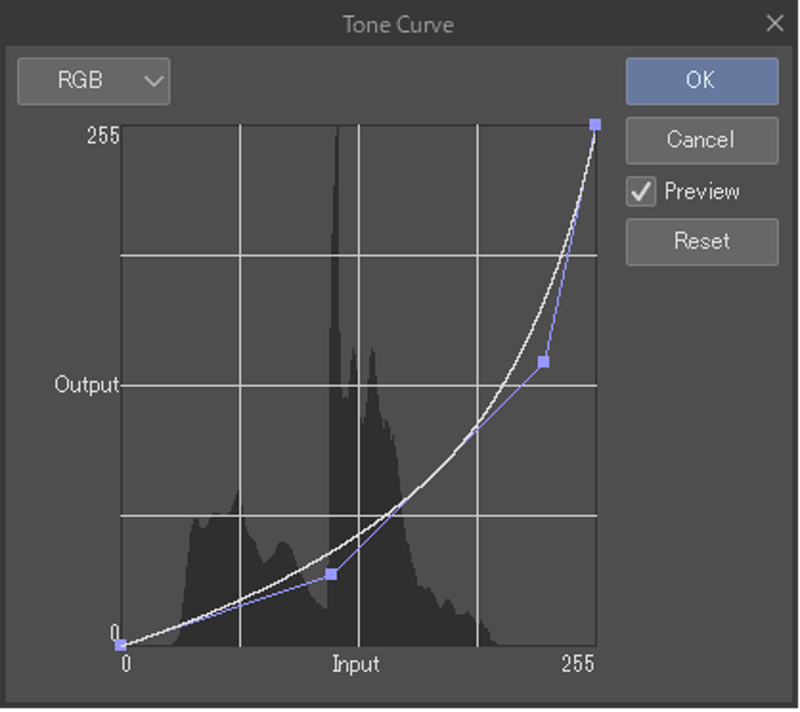
Introducing the Tone Curve Tool
The Tone Curve tool is a powerful feature in Clip Studio that allows us to adjust the brightness and contrast of our image. Located in the Adjustments palette, the Tone Curve tool can be used to fine-tune the tone and mood of our image. By adjusting the curve, we can add depth and dimension to our image, or create a specific atmosphere or mood.
Note more information is found here: https://help.clip-studio.com/en-us/manual_en/390_filters/Tonal_Correction_Effects.htm#1364001
Enhancing Facial Features
The facial features are a crucial part of any portrait, and refining them can make a big difference in the overall image. We can use the Pen Tool to add definition to the eyes, eyebrows, and mouth, and the Blending Tool to smooth out any harsh lines or edges.
Final Touches
Before we finalize the image, let's take a step back and evaluate the overall composition and balance. We can use the Layer Palette to adjust the opacity and blending modes of different layers, and the Color Palette to make any final adjustments to the color scheme.
Disclaimer
As with Section 6, this guide is designed to provide a basic introduction to refining the image in Clip Studio. For more advanced tutorials on tools and techniques not covered in this guide, we recommend exploring online resources such as YouTube videos and articles on the internet.
Adding Reference Images and Tracing
Sometimes, even with the best intentions, our artwork may not turn out as planned. Whether it's a mistake in the clothing or a need to re-censor certain areas, having a reference image can be a lifesaver. In this section, we'll explore how to add reference images to our project and use them to trace over and create new elements.
Why Use Reference Images?
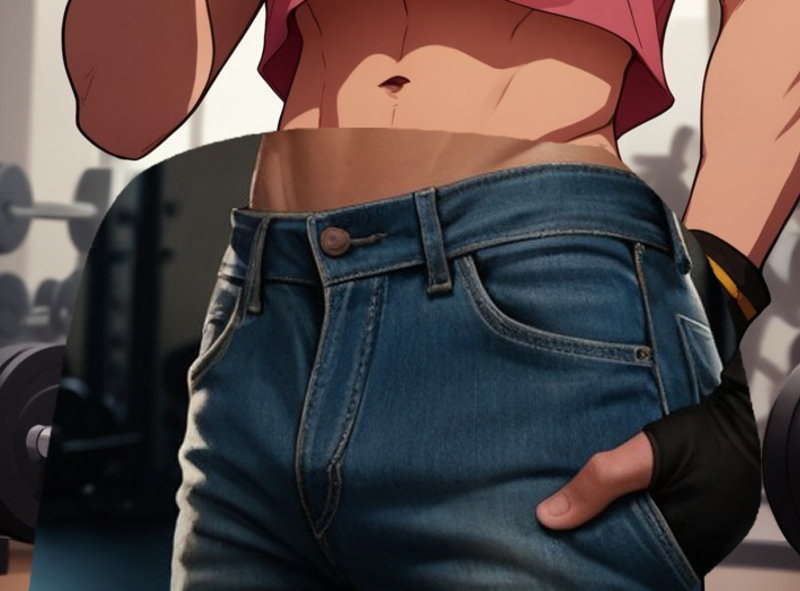
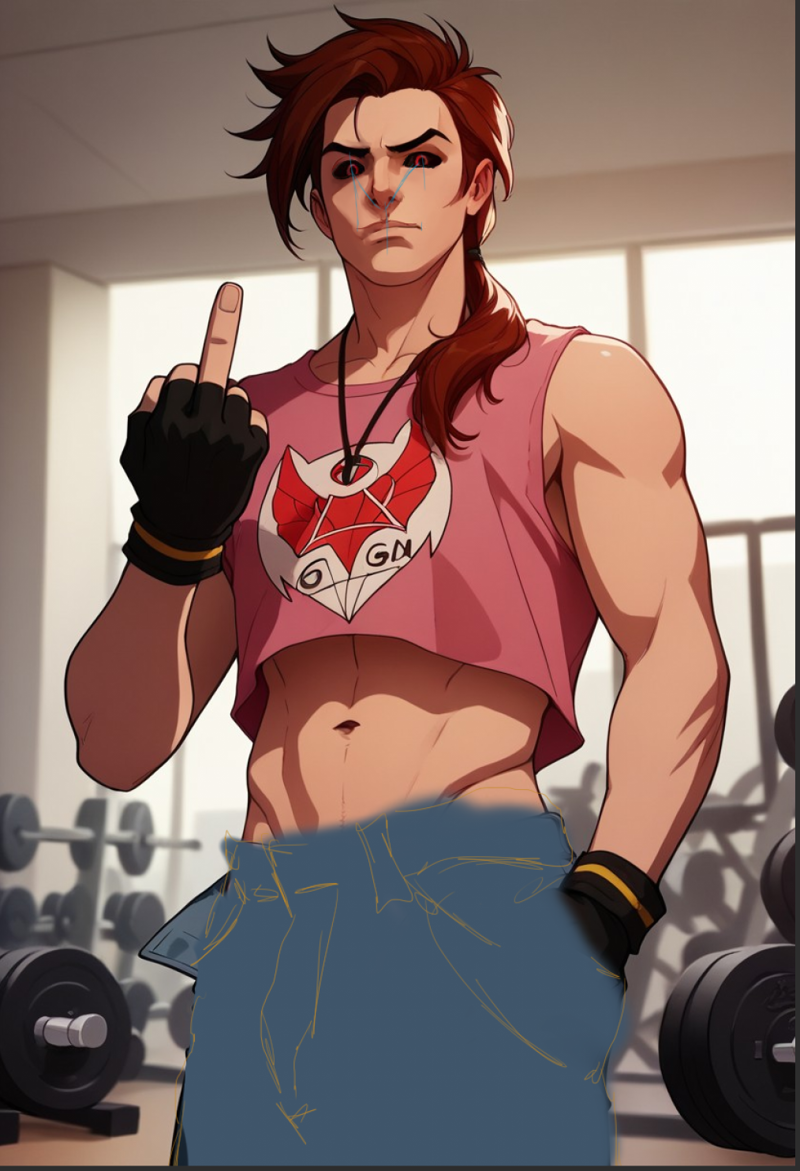
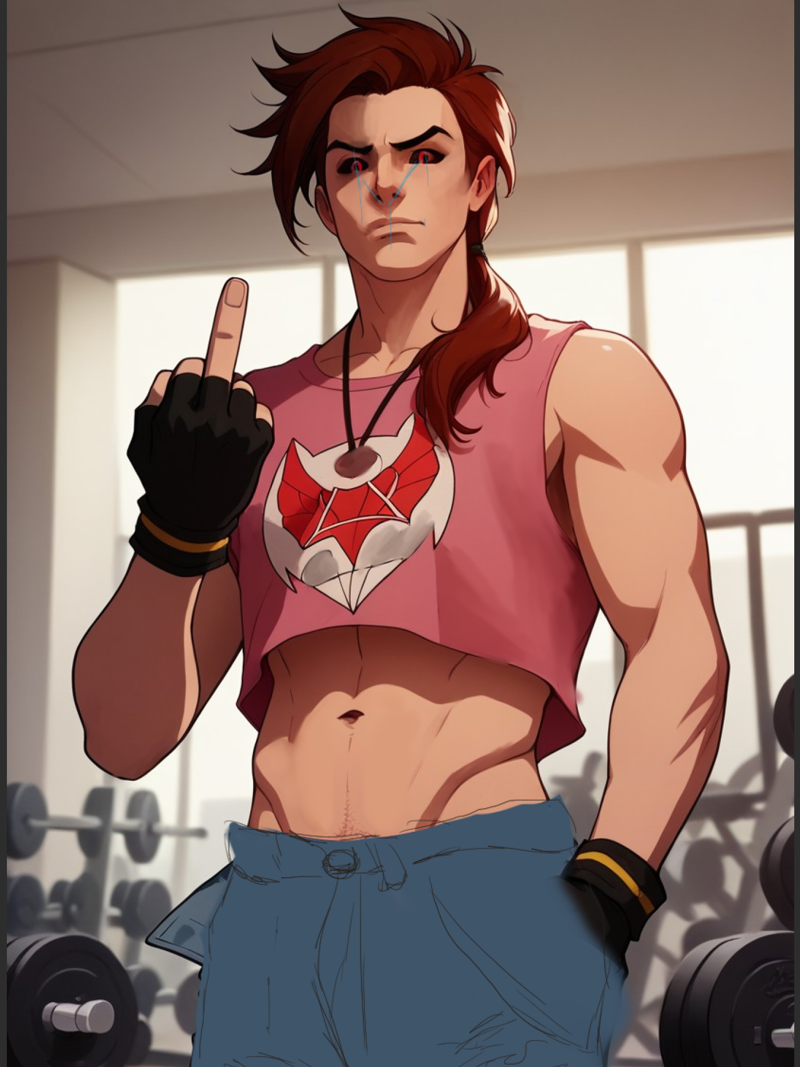
Reference images can be incredibly helpful when trying to recreate specific details or elements in our artwork. In our case, we wanted to re-create the pants in full, but weren't entirely satisfied with the original output. By using another sample output of the same prompt, we can resize and adjust it to fit our needs and use it as a reference to trace over.
Tracing with Reference Images
To add a reference image to our project, we can simply drag and drop it into our Clip Studio file. From there, we can resize and adjust it to fit our needs. In this case, we'll use the reference image to trace over the pants, using two different colors to create a rough outline. We'll then add a base layer of paint to match the denim, creating a solid foundation for our new pants.
Tips and Variations
When using reference images, it's essential to remember that they're just a guide. Feel free to experiment and try new things, even if it means deviating from the original reference. Additionally, you can use multiple reference images to create a composite image, or combine different elements to create something entirely new.
Secondary Project: Beetlejuice for Earthnicity
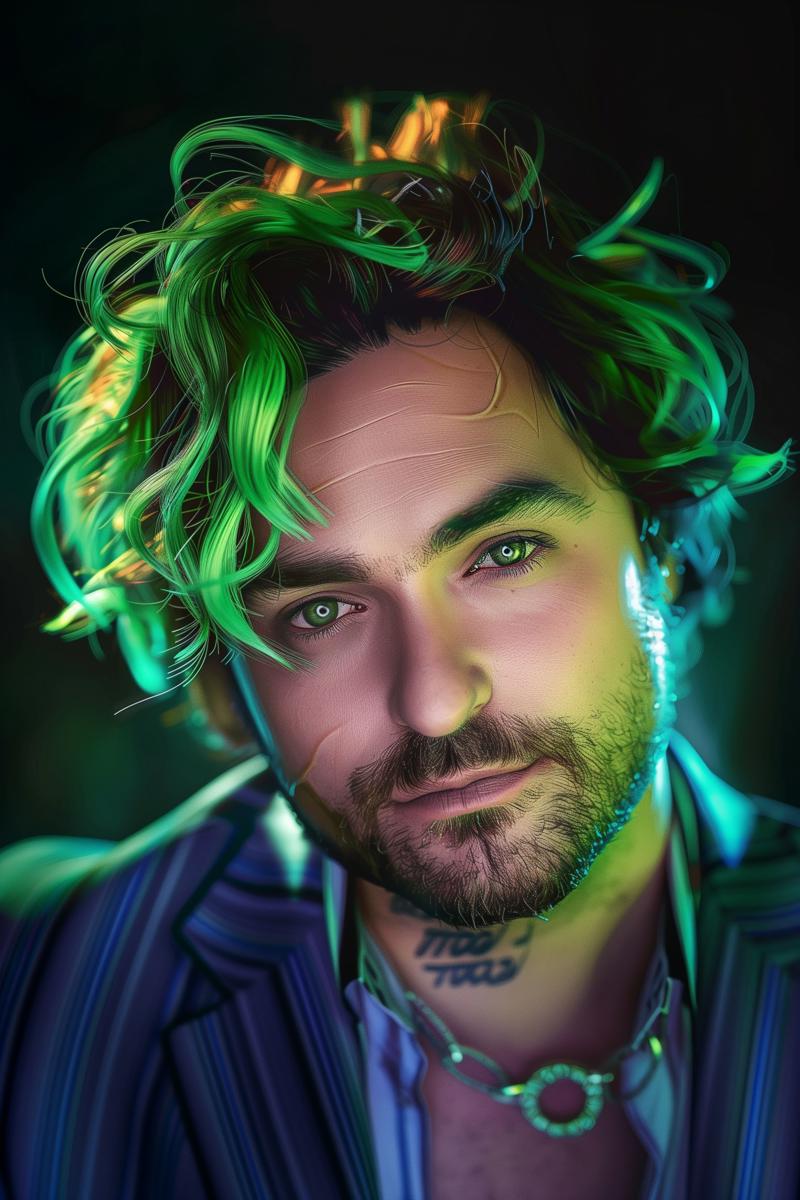
We started work on something after generating this in midjourney:
Here's some progress screenshots:
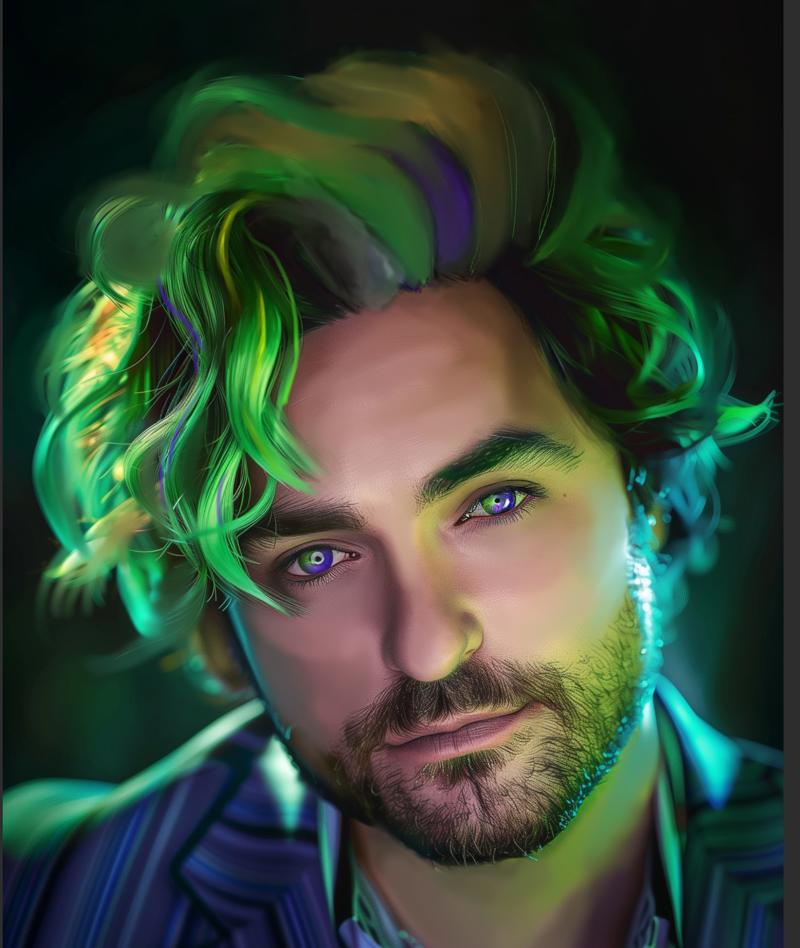
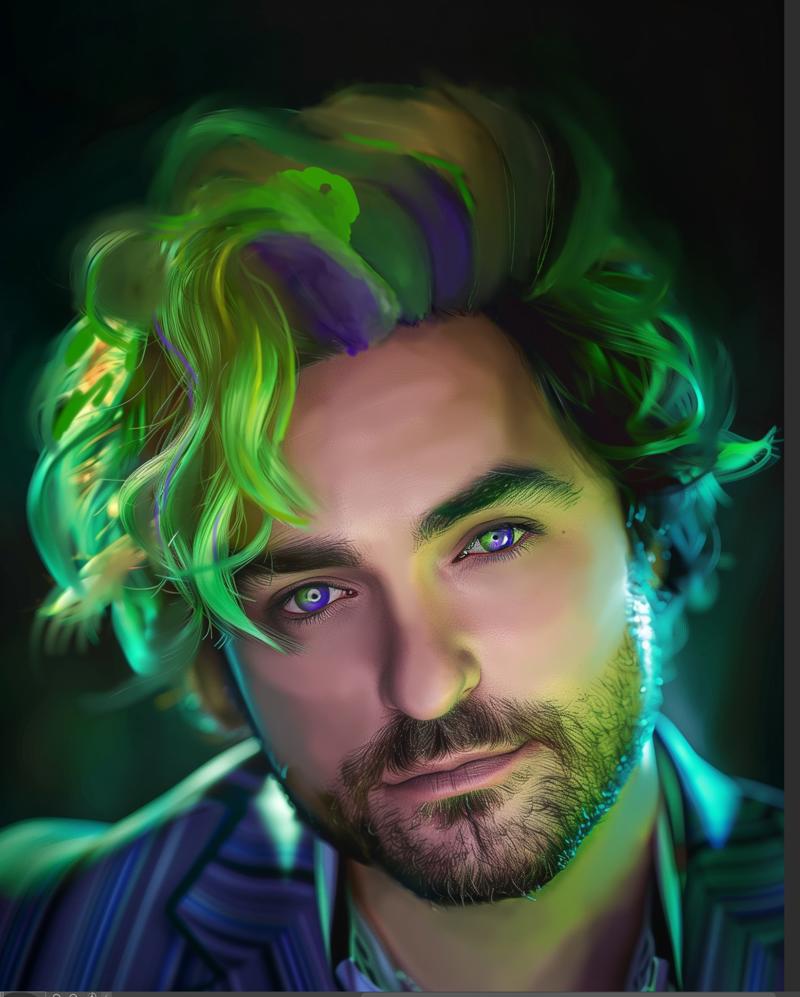
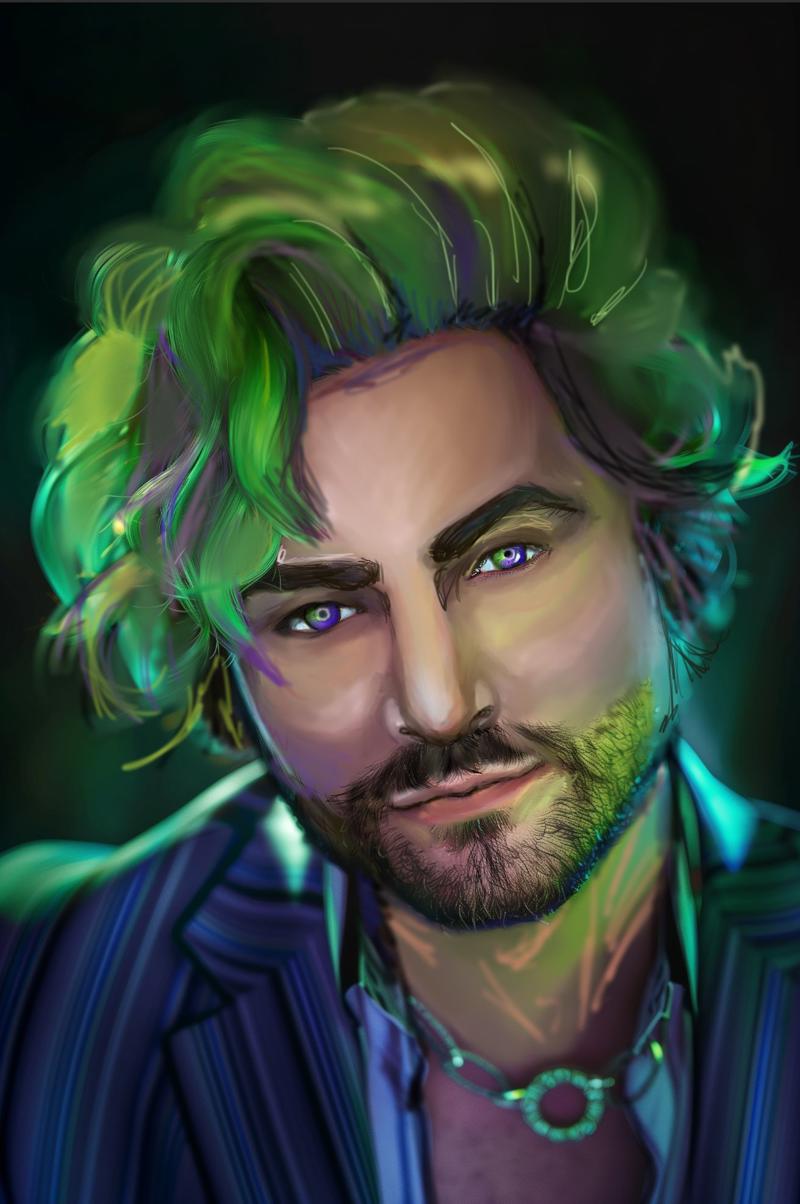
The intention is to make him look more like Alex Brightman than the generation mashup does. Also sadly because I don't have the skills to make sharp/clean images like Artgerm, you're getting the same "ANIME/DIGITAL ART" rendition as the Remy version. SHRUG I wanted to learn painting like Artgerm, but more or less i'm pretty good at rough 2d coloring lol.
Most of this is just using the eyedropper, paint, blend, ink, pencil and airbrush tools.
Summary and Conclusion
And that's a wrap! In this tutorial, we've covered the basics of editing an AI-generated image in Clip Studio Paint. From removing JPEG artifacts to refining facial features and adding texture and detail, we've explored a range of techniques to help you take your AI-generated images to the next level.
Key Takeaways
Removing JPEG artifacts is essential for creating a smooth and refined image
The blending tool can be used to merge colors and remove harsh lines and edges
Adding texture and detail can enhance the overall realism and depth of your image
Reference images can be used to trace over and create new elements, such as clothing and accessories
Experimentation and creativity are key to achieving unique and interesting results
Final Thoughts
Editing an AI-generated image can be a fun and rewarding process, and with the right techniques and tools, you can create stunning artwork that showcases your unique style and vision. Remember to always experiment and try new things, and don't be afraid to make mistakes – they're all part of the learning process!
Resources & Links
About & Links
About Us
We are the Duskfall Portal Crew, a DID system with over 300 alters, navigating life with DID, ADHD, Autism, and CPTSD. We believe in AI’s potential to break down barriers and enhance mental health, despite its challenges. Join us on our creative journey exploring identity and expression.
Join Our Community
Website: End Media
Discord: Join our Discord
Backups: Hugging Face
Support Us: Send a Pizza
Patreon: https://www.patreon.com/earthndusk
Community Groups:
Subreddit: Reddit
Embeddings to Improve Quality
Negative Embeddings: Use scenario-specific embeddings to refine outputs.
Positive Embeddings: Enhance image quality with these embeddings.
Extensions
ADetailer: ADetailer GitHub
Usage: Use this extension to enhance and refine images, but use sparingly to avoid over-processing with SDXL.
Batchlinks: Batchlinks for A1111
Description: Manage multiple links when running A1111 locally or on a server.
Addon: @nocrypt Addon (The link is broken for now i'll find it later OOPS)
Additional Extensions:
Backups for Loras on SDXL & Pony XL:


