

26th July 2024 Update: Released a new version which supports in-painted images, by auto-extracting metadata from the original image which was in-painted
23rd July 2024 Update: Released a new version which can auto-calculate the sha256 hashes from model files on disk
Background
I actually love InvokeAI more than Automatic1111 WebUI, because the interface is much more streamlined, user-friendly and it "just works". But unfortunately Civitai doesn't recognize metadata from images generated with InvokeAI. I've searched high & low online for a workaround, but surprisingly wasn't able to find any.
So in the end, I've written a script to convert InvokeAI metadata format to Automatic1111 format so that Civitai can recognize them.
You can get it here: Invoke-Civitai
How to Use
Prerequisites
Python (ideally v3.10 and above)
InvokeAI (of course!)
Option 1: Setup InvokeAI to calculate model hashes in sha256
Go to the folder where InvokeAI is installed
Open the file
invokeai.yamlin a text editorAdd the line
hashing_algorithm: 'sha256'so theinvokeai.yamlfile will look something like below:
!! IMPORTANT !! Remove all installed models (including LoRAs and VAEs if any), and install them again
InvokeAI by default saves model hashes using BLAKE3 algorithm, while Automatic1111 saves them using sha256. As these hashing algorithms are designed to be unidirectional, it's practically impossible to reverse-engineer a BLAKE3 back to the original form and convert it to a sha256 hash.
Option 2: Setup config file to point to model folders
Open
invokeai_cfg.jsonin a text editorChange the values of
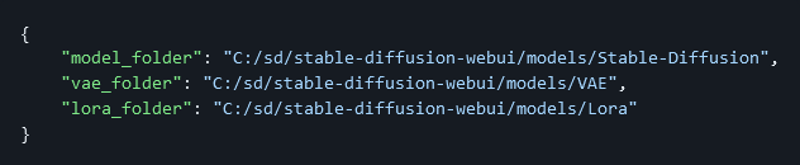
model_folder,vae_folderandlora_folderto the actual locations on your PC where these model files are stored
!! IMPORTANT !! Change any backslashes (\) to forward slashes (/) when entering the model paths
For example, let's say your checkpoint models are stored in C:\sd\stable-diffusion-webui\models\Stable-Diffusion, VAE models in C:\sd\stable-diffusion-webui\models\VAE and LoRA models in C:\sd\stable-diffusion-webui\models\Lora.
Then change the invokeai_cfg.json file like so:
Support for In-painted Images
Similar to the instructions for Option 2, open
invokeai_cfg.jsonin a text editorChange the value of
invokeai_output_folderto the actual location on your PC where InvokeAI stores image outputs. It is typically\outputs\imagesunder the folder where InvokeAI is installed.
For example:

Usage Instructions
Download the latest release of
invoke-civitai, and unzip to a new folderDrag & Drop the images you want to convert to the
converter.batfileThat's it! The converted images will be saved in the same folder as the original, with
_a1111appended to the file name
e.g. if the original filename was1234.png, the converted filename will be1234_a1111.png
Now you can upload the converted images to Civitai, and all parameters and models (including LoRAs) used by the image will automagically be filled in by Civitai upon upload.
Feel free to contact me (either on Civitai or on Github) if you face any issues with the converter, or if you have any suggestions.