1. Introduction
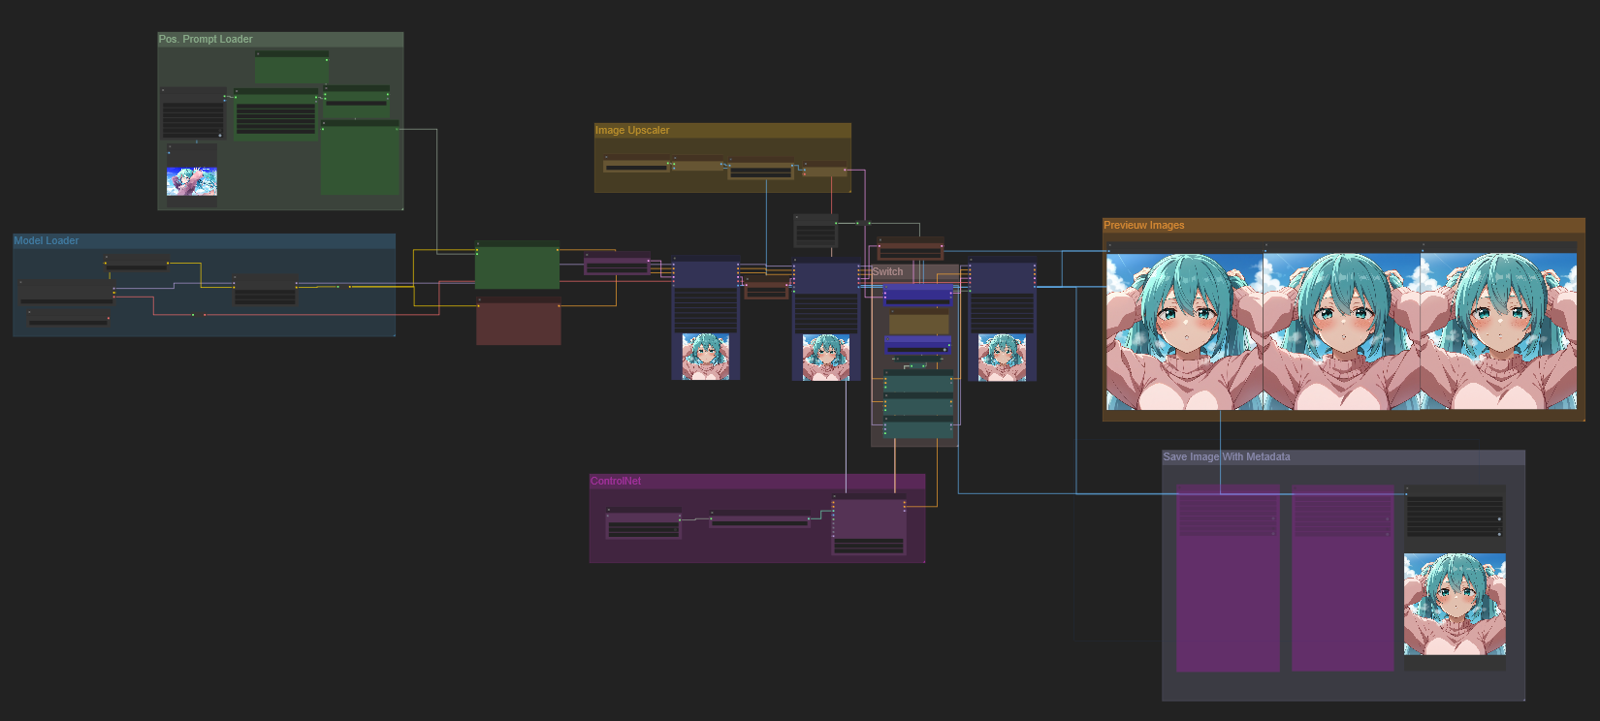
Creating unique prompts for each image can feel like a chore, especially if you're not particularly creative or have limited time. If you're searching for a way to automate this process, upscaling it, saving the image with its metadata for Civitai uploads and loop it to continue the cycle, then look no further! This workflow is the perfect solution and is suitable for both SD 1.5 and SDXL.
2. The Workflow
For those already experienced ComfyUI users, this guide may be useless. But for beginners, I'll briefly cover the main aspects to keep things clear.
2.1 Random Prompt Generator
The section where the prompt gets generated is split into two parts:
1) Fetching a prompt
2) Combining the two texts
1-
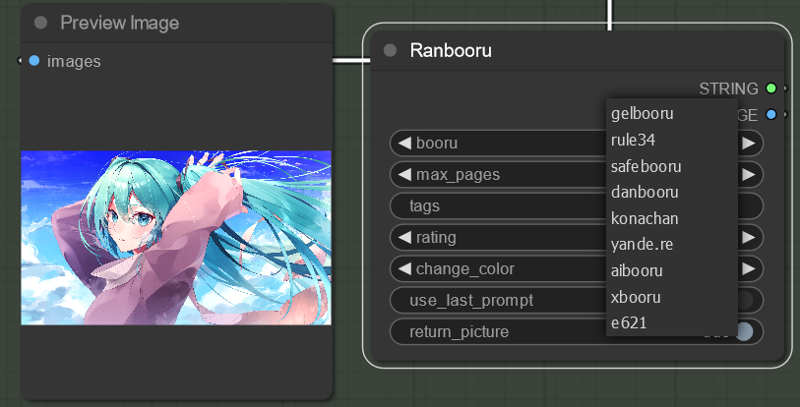
The Ranbooru node is basically a node that fetches an image from a booru API like rule34 and danbooru and returns the tags of that image as a STRING (text). The available URLs are as shown in the screenshot.
2-
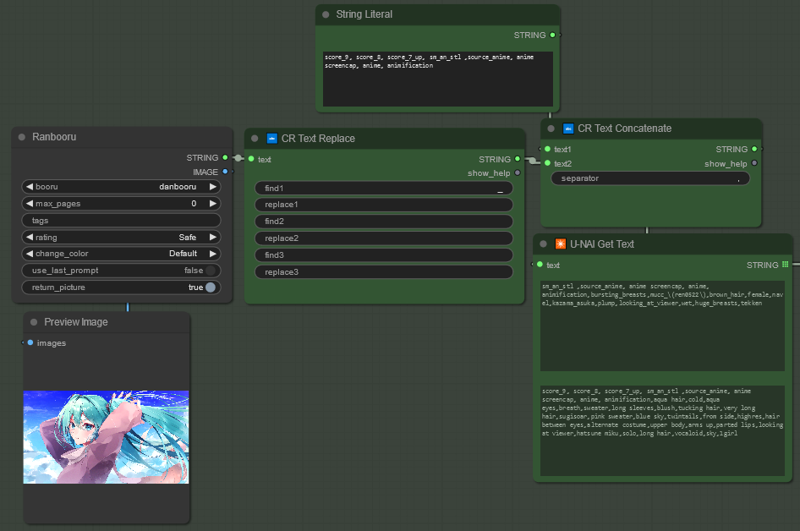
Fetched tags will contain symbols like underscores between the words. If you want to change all the underscores to spaces, you can do so using the Text Replace node. Just enter an underscore for text1 and press the spacebar for replace1.
Furthermore, if you wish to add score tags or specific tags that some models require, you can combine the fetched tags with your personal tags using the Concatenate node, as illustrated in the screenshot.
2.2 Ksamplers + Upscaler (Hi-res fix)
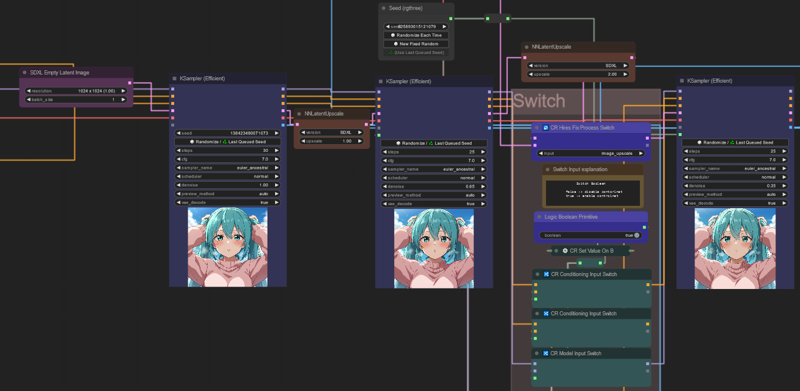
This workflow uses 3 Ksamplers in total. The first is the base, while for the second Ksampler my preference is to pass the latent as is is or occasionally upscale it by 1.3x. And I use a different seed and a lower denoise (0.65-0.7). This usually fixes things like extra fingers, ugly/deformed eyes or artifects. Don't forget to change the version input of the NNLatentUpscale to "SDXL" or "SD 1.x" depending on what you need.
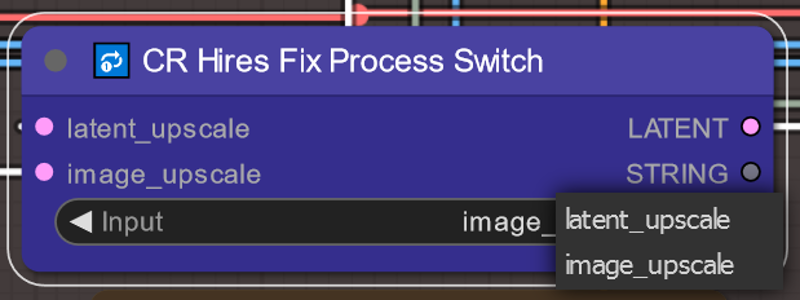
The third Ksampler is where the major upscaler happens. In ComfyUI, there are basically two ways of upscaling: latent and image. Image upscaling preserves the original image more but is less detailed, while latent upscaling is more detailed but sacrifices some original details. It all depends on personal preference. That's why I've provided both options and made it simple to switch between them using the switch node.
2.3 Upscaling with ControlNet Tile

Upscaling with ControlNet is basically an advanced way of having more control over the output. I recommend reading this article, but to keep it short using a tile model helps you retain the original image more while you can crank up the denoise level to irmpove on the details. The SD 1.5 tile model can be downloaded from here https://huggingface.co/lllyasviel/ControlNet-v1-1/blob/main/control_v11f1e_sd15_tile.pth and the SDXL tile models from here https://civitai.com/models/136070/controlnetxl-cnxl.
NOTE: ControlNet does NOT work properly with PonyXL checkpoints due to the way the Pony basemodel was created. This doesn't mean that ControlNet won't have any effect, but it may not always produce the desired results and could screw up the image. If you plan on using ControlNet for PonyXL anyway, I suggest significantly lowering the denoise. I personally use 0.35 and the outcomes appear to be satisfactory, although I haven't conducted thorough testing, so my understanding is limited.
I will quickly go through the settings:
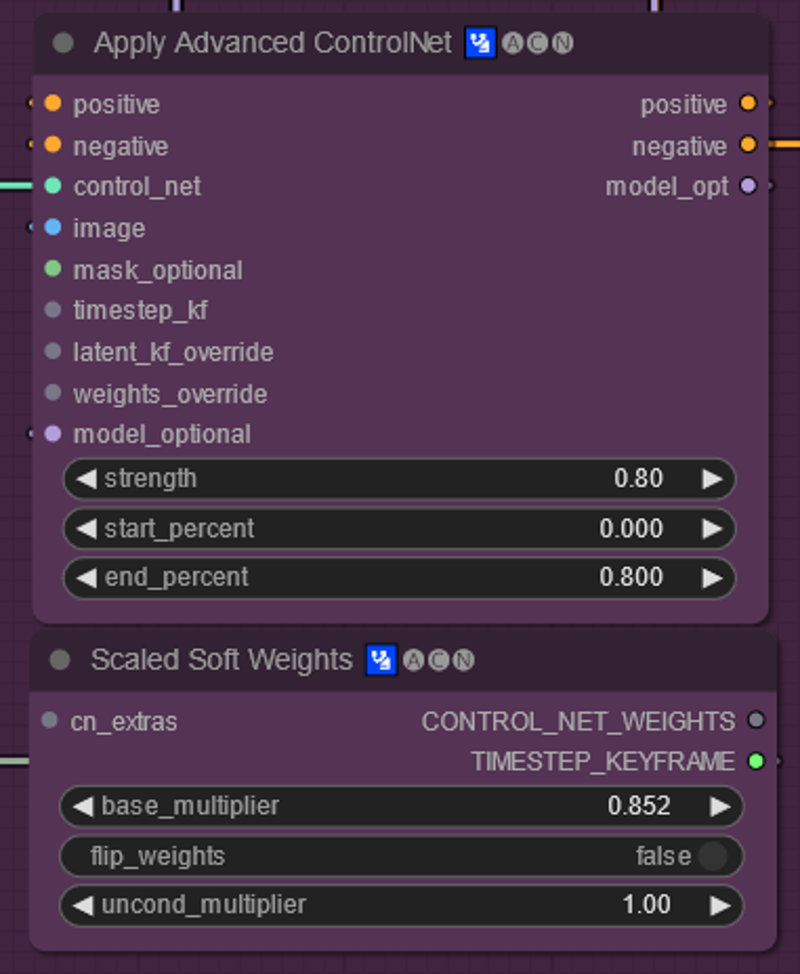
- Scaled Soft Weights node:
->base_multiplier: lets you control the strength of the ControlNet weights, which is the most important part. The higher the value, the more it is faithful to the original image. See examples.
-> Flip weights: inverts the multiplier
-> uncond_multiplier: for when you use unconditional ControlNet.
-Apply Advanced ControlNet node:
-> strength: The strength of the ControlNet model
-> start_percent: When the ControlNet should apply during the generate
-> end_percent: When the ControlNet should end during the generate
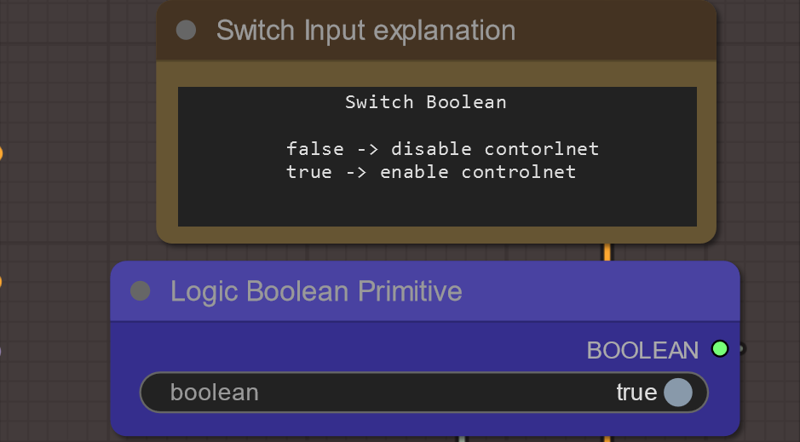
I have provided the option to turn the ControlNet on or off through a toggle.
2.4 Saving image with metadata
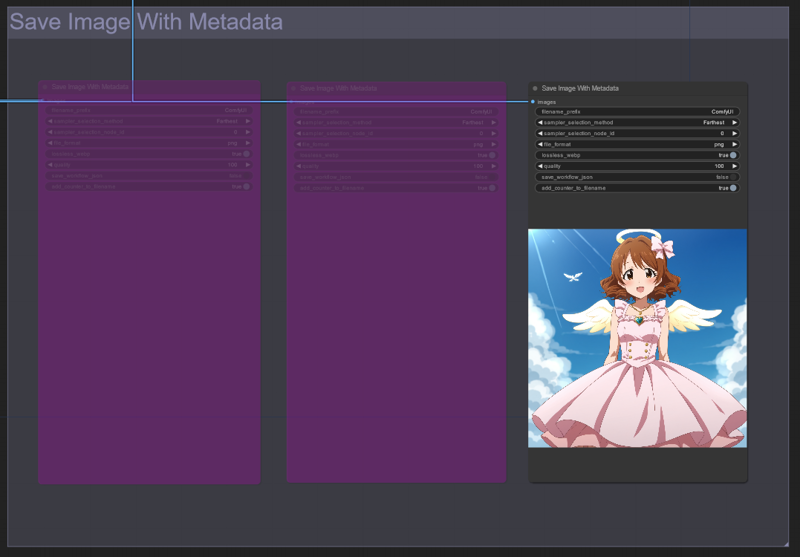
This speaks for itself, it saves the images with their metadata, for example LORAs used and ksampler settings, for Civitai uploads. I have disabled the first two image saver nodes, since the first two images are less interesting to be saved but you can enable them with right-click and selecting "bypass" if you want to.
3. Examples with ControlNet
The image we want to upscale
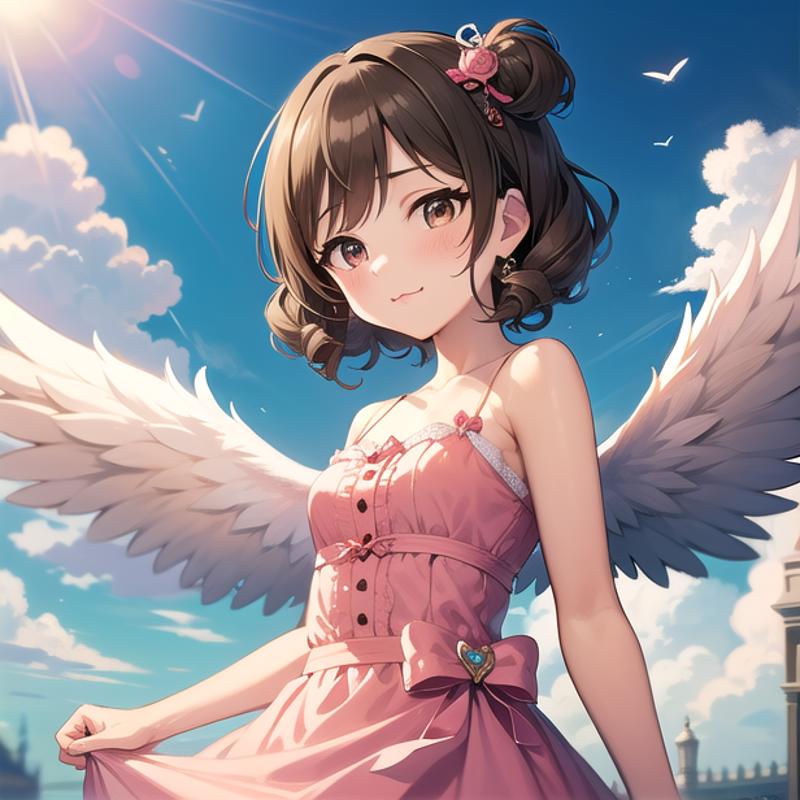
With base_multiplier 1.0
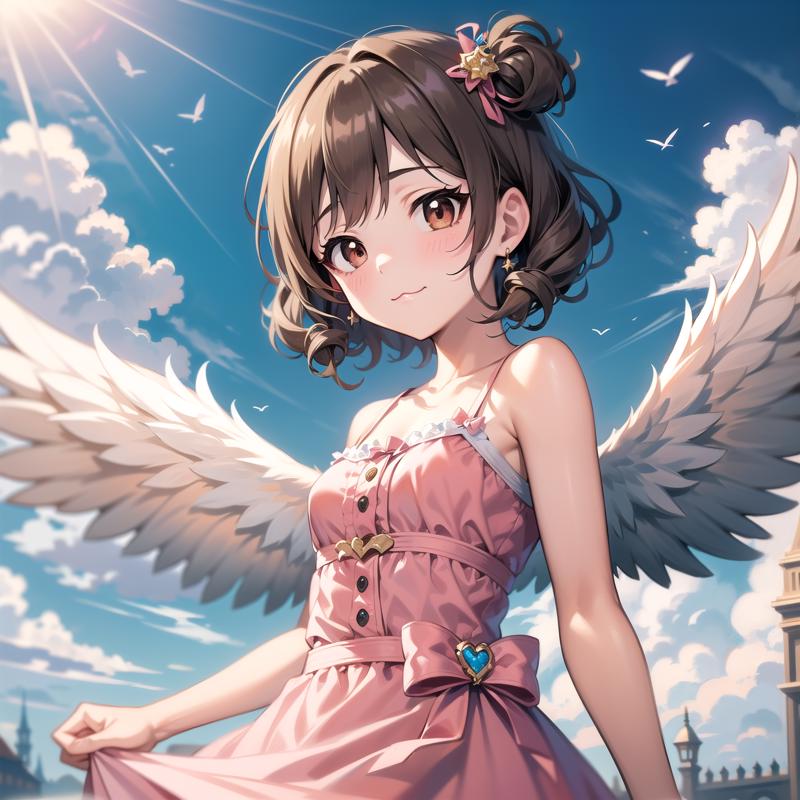
With base_multiplier 0.852
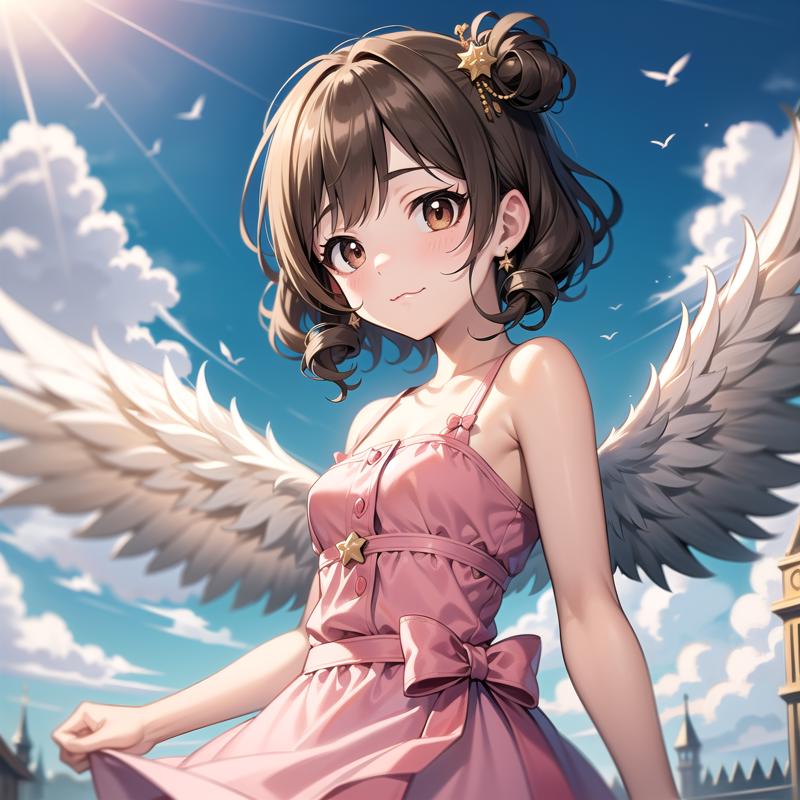
With base_multiplier 0.0
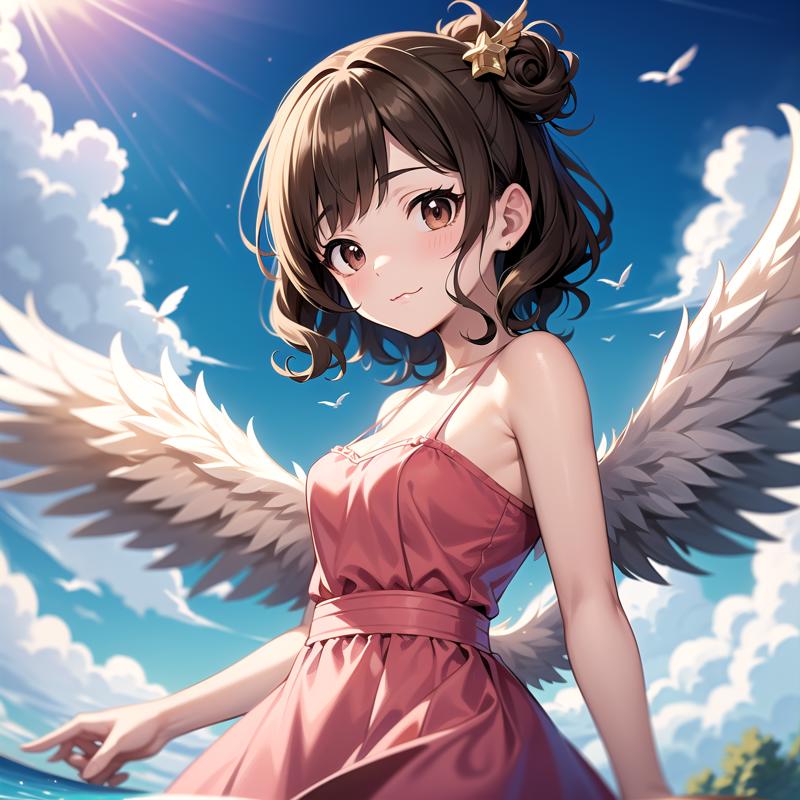
-> So as can be seen, the lower the base_multiplier the less faithful it is to the original image.
4. Conclusion
I have tried to create a workflow that allows you as much freedom as possible to adjust the weights and values according to your specific needs. The intention is to offer a flexible and adaptable workflow that can be tailored to various requirements. Feel free to experiment with different parameters and settings to find what works best for you. Add nodes if needed, as this workflow is just a simple version. Enjoy generating images and let your creativity flow!

