This tutorial is a guide on how I make my LoRAs, namely Pony LoRAs. This will be for people who want to make LoRAs but don’t know how to get started, as well as breaking down how I make my LoRAs. There are a lot of guides out there that tell you the same basic steps and I will be no different. However, the method I use will be tedious at times. If you stay the course, however, you may be rewarded with good looking LoRA.
So, what are these steps? Well, for me, it’s as follows:
Collection
Pruning
Tagging
Generation
Four simple steps, right? Well, as we break them down, you’ll see there’s a lot more of a multi-step process here.
To demonstrate, we’ll go with Ancient Egypt Clothes, by far my most popular LoRA. While I have a Pony LoRA already, for the sake of demonstration, I’ll create one that’s different in how it’s set.
Which begins with Step 1: Collection.
Almost all of my set up begins with this site, a one-stop shop for setting up images and datasets. The only major downside is that it will only download images from Gelbooru, but if you look, you’ll probably find image downloaders for other sites.
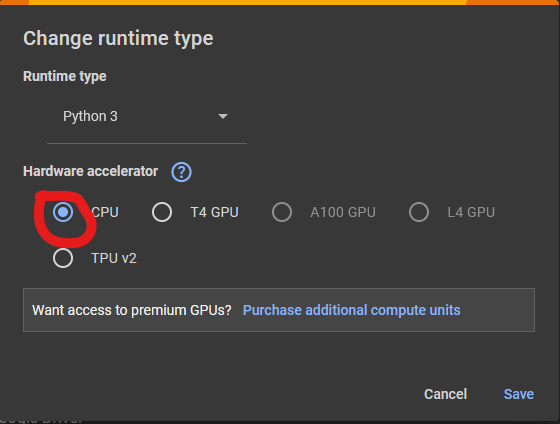
It’s recommended that you change the runtime before you begin, since Google Colab gives you a limited amount of time, but it’s more lenient if you permit it to use a CPU rather than a GPU.
Once you’re done, give your project a fancy name, in this case, we’ll call it…
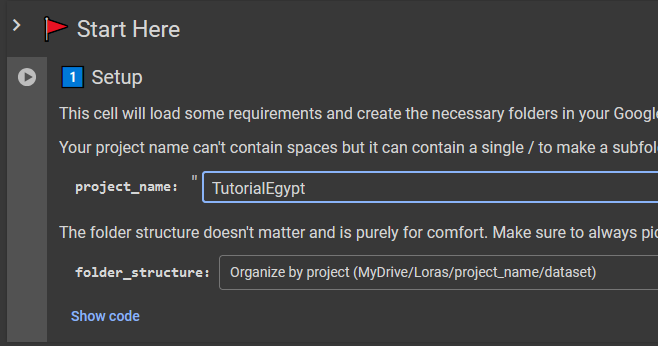
Don’t worry about renaming it just yet, we just want a name to collect our photos in. Colab has a thing where you can set things up, then click the play button. You’ll have to sign in to a Google account, then accept before getting access to the rest of the Colab’s features.
Once you’re in, this is where the magic happens. There’s a search field for where it will grab the Gelbooru items. Here, you can type in what you want/don’t want to find in your images. This is such the case for when I put together the Ancient Egyptian Clothes LoRA:
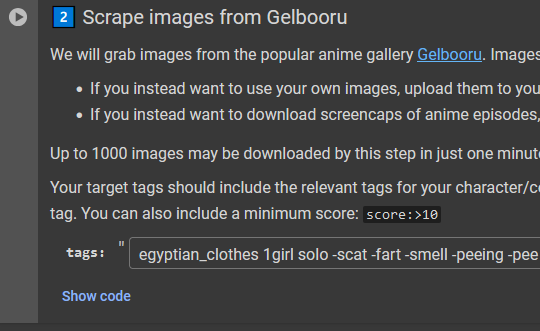
But, we’ll add just one more caveat to this.
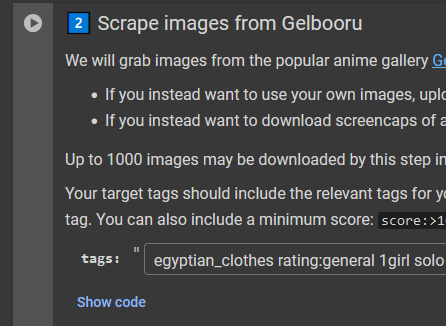
The thing with me making LoRAs is that I want to try different things with them, experiments. And for this example, I want to create a PG version of the Ancient Egyptian Clothes LoRA. Once you figured out what you want to grab, hit play. You’ll be greeted with a number of results like this:

Hmm… Not much, but it’s to be expected. I’ll type in yes and reap the benefits. Now, it’s actually rather good that we don’t have as many results, because if we had more results than we knew what to do with, that could be time consuming down the line. Case in point, if we went with our non-General idea, we’d be seeing this many results:

Also, if you get hit with no field to say yes, just stop and run it again. After this, I run it two times but with a change to the Solo tag: “solo_focus” and “-solo -1boy”. Gelbooru doesn’t get tagged a lot and so often times images slip by without getting the solo tag, hence the latter.
Once we have gotten our images, it’s now time to prune. This is a multistep process and it can get pretty lengthy. The first step is to get rid of duplicate images using a special program built into the Colab program.
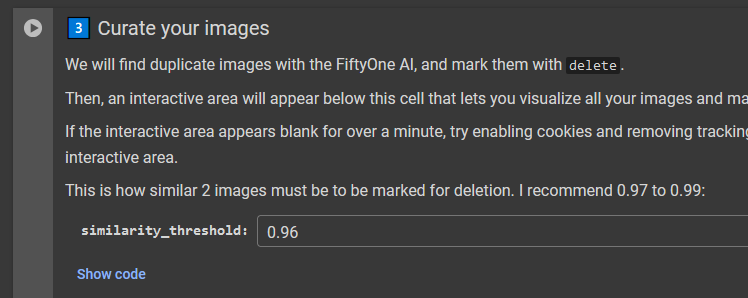
It will sort and find images based off similarity based off a number you program it off of. I set mine to 0.96 because often times, that’s where most of the similar items tend to be found. Hit that play button and grab yourself a coffee because it’s gonna take a bit.
Afterwards, you’ll be greeted with a screen where you’ll have to see which ones are too similar enough that you can afford deleting. Like so:
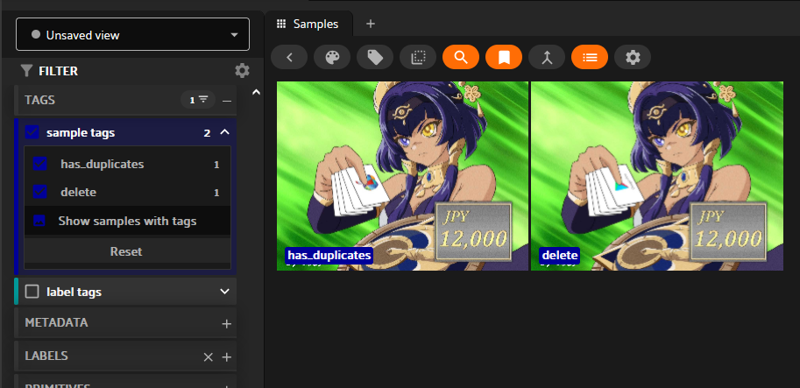
Once you approve, just type anything in the field you see before you and they’ll be deleted. After that, if I am making a Pony LoRA (if I am just making an SD 1.5 LoRA, then I would skip right to the datasetting), I use a series of codes that I will attach to this article. You can either copy and paste them right into the Colab or create a new Colab and copy and paste them in there. The difference is that with the former, you’d have to do it over and over again. The long story short of it is that I use them to:
Separate the images that are the right size for the Pony LoRA from the images that are small.
Resize the small images by a certain percent.
Separate those images by whether they’re the right size but this time the small images go to the trash.
Move the images back to the OG folder.
Change the folder to the folder your dataset is in and hit play for all your codes and hit play on the first Pony Check code. You’ll see this result:
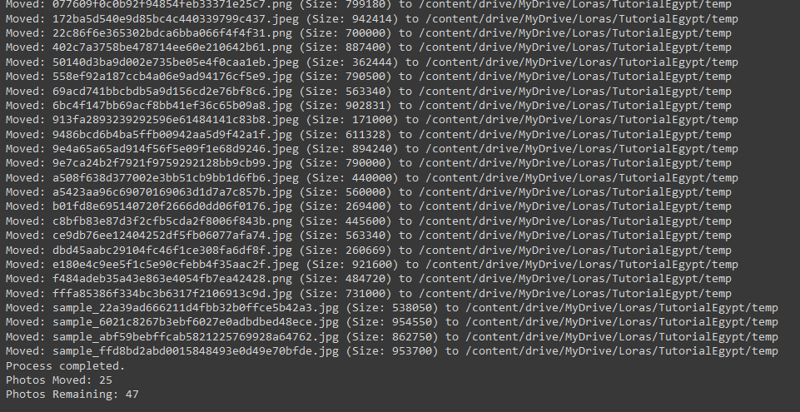
You’ll notice some of those images say “Sample” in front of their file names. That’s because the image grabber decided to download a smaller version of the image rather than its original image. For that, we’re gonna have to manually grab the full version.
So head over to Gelbooru and in the searchbar type “MD5:” followed by the code that comes after “sample_”.
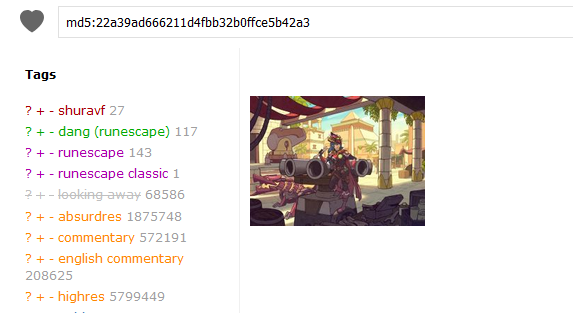
You’ll find that there’s only one image. Click it…
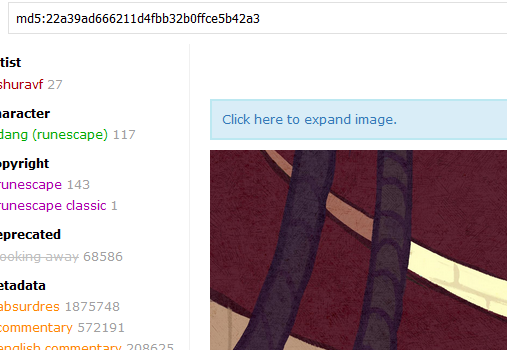
Then click to expand.
Save it. Rinse and repeat for all the samples and then upload them into the folder. Make sure to delete the corresponding sample photos. Next, hit play on the Resize code. Once it tells you the images are resized, hit play on the second Pony Check code.

Only one item was deleted… Pity. I’ll rescue it. This is also something you can do if you want to manually resize and not leave things to automation. Find the image that you want to resize and download it.
Next, open it in your favorite program, I’ll use GIMP.
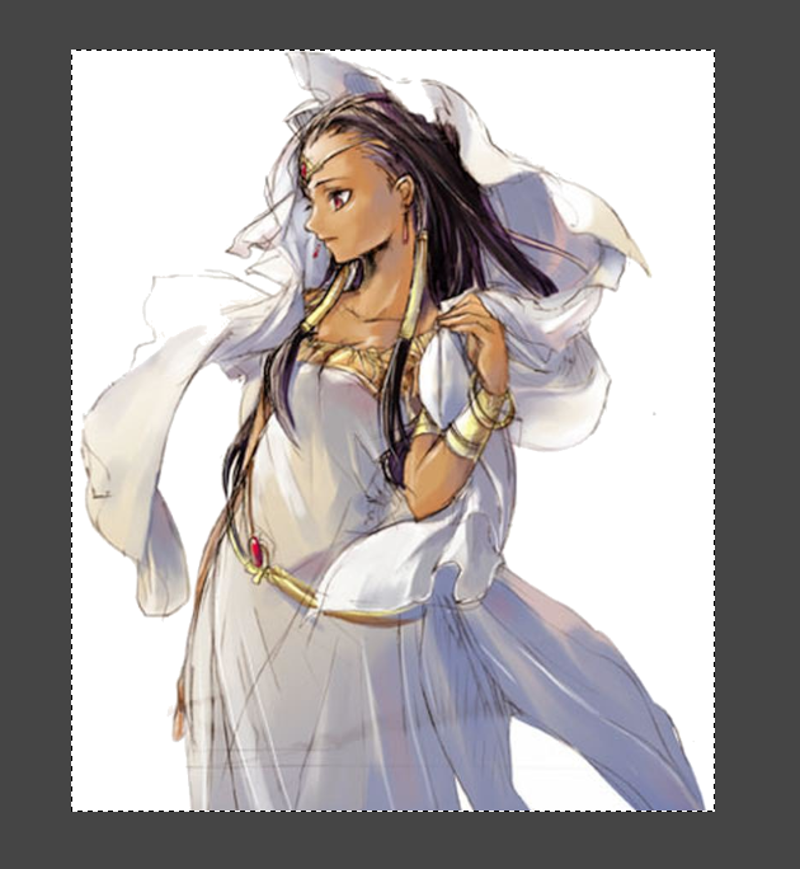
So I see two things with this image, some white space and not being the proper size.
Here, you should do two things:
Autocrop the white space if your program is able to;
Resize the image so that the side with the least amount of pixels has
“1024” instead.
Once you’re done, save it and upload it. After that, hit play on the move Code (only if you have a ton of images and Google Drive would have seizures trying to drag and drop it manually) and done.
Now comes the fun part: Datasetting.
Now, the default settings are good for beginners (it’s set to 0.35 but I moved it to 0.30 because I like even numbers like that), but I found that some tags can often bog down the dataset. The common ones include:
Meta tags: AI don’t really understand how meta tags work for making images unless you train it specifically.
Parody/Memes: Likewise, comedy doesn’t really feel like its strong suit and it thinks every closeup is a meme.
Alternates: Unless you’re really honing in on a character, the AI won’t know what makes short/long hair alternate.
Backgrounds: While Pony’s biggest flaw is making Backgrounds, a lot of the time I find it preferable not to have the background tags (or at least the simple background tags) be used.
Censors: When was the last time you deliberately generated a censored image?
Ultimately, it’s up to you what to include and not include in your filter. Hit play and let it run, but I’d recommend that if you have more than 200 images to switch the runtime to GPU because it will go over the images much more swiftly.
Once it’s finished, look at the tags its mustered.
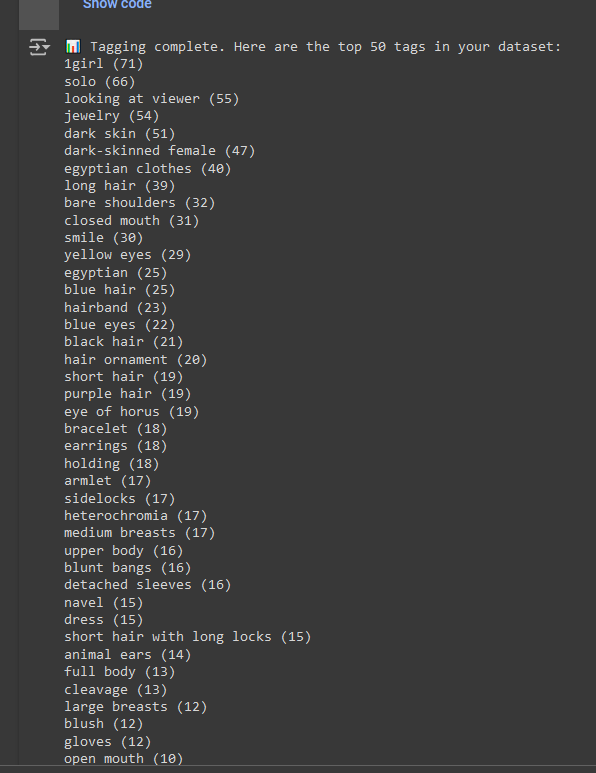
Now, disconnect and delete the runtime, then head into the Drive and search through the tags to see if any of the undesired tags from when you first searched for the images managed to worm their way back. Chances are likely they didn’t, but remember that Gelbooru doesn’t tag their images well and the AI can spot false positives. It’s better to double check.

But I also noticed that not all the images are tagged as Egyptian Clothes, which means they don’t truly qualify for the LoRA… So, it’s off to prune again!
So what I do here is search for the tag that the images lack, usually by typing “-[tag]”. If I need to do -“[tag with more than one space]”, I would need to download the dataset and do it that way. Once you search, make sure you’re searching in the dataset.
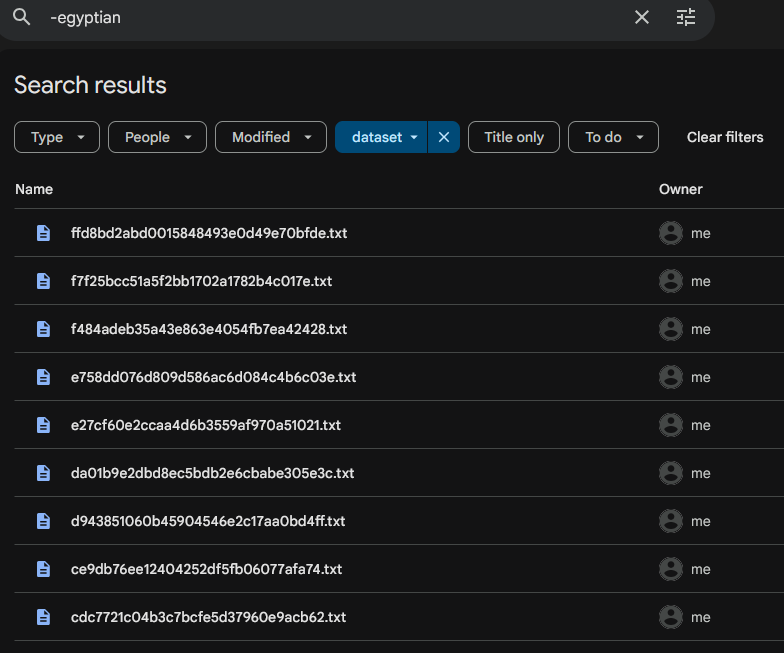
Then… DELETE!
Now, let’s see if there’s any other errant images…
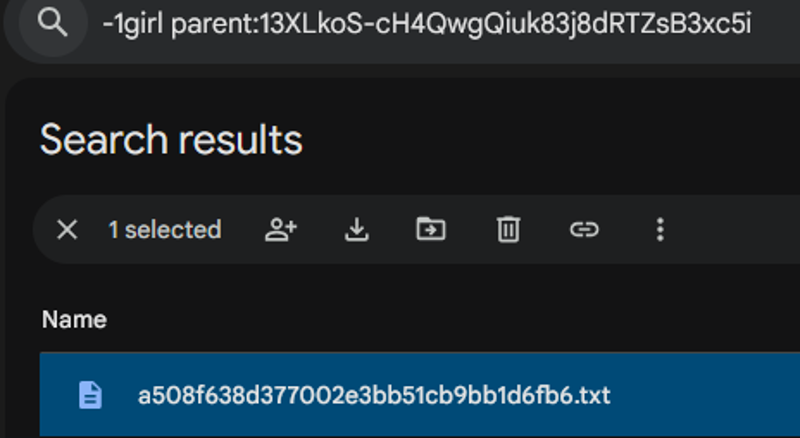
Only this one lacks one girl. Let’s investigate. Copy the file name and search for it. It will show you the text and image. Click on the image and see…
[Whoops, I meant to include the image here... But it got deleted...]
As I suspected, it’s the only image with multiple girls. We want to focus on one individual so… Delete them both. Again, rinse and repeat until you’re happy with the results.
Now, what if the images without the text files? Well, fire off that Photo Balancer code and watch those files be thrown out!
Alternatively, you can just confer when we get to the Generate step, which I will explain later.
Now, what’s the next step? Well, we need to coral these tags into one trigger tag, then clean up some other tags. How do we do that? Well, if this were a character LoRA, it’d be as easy as finding all the hair and eye tags in the first 50 tags and tying them to the character’s name (usually in one word) but here, it’s a whole costume.
Now, we noticed that there’s two very appropriate tags to round up. So, we’ll copy those…
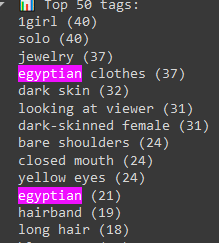
And paste them here.
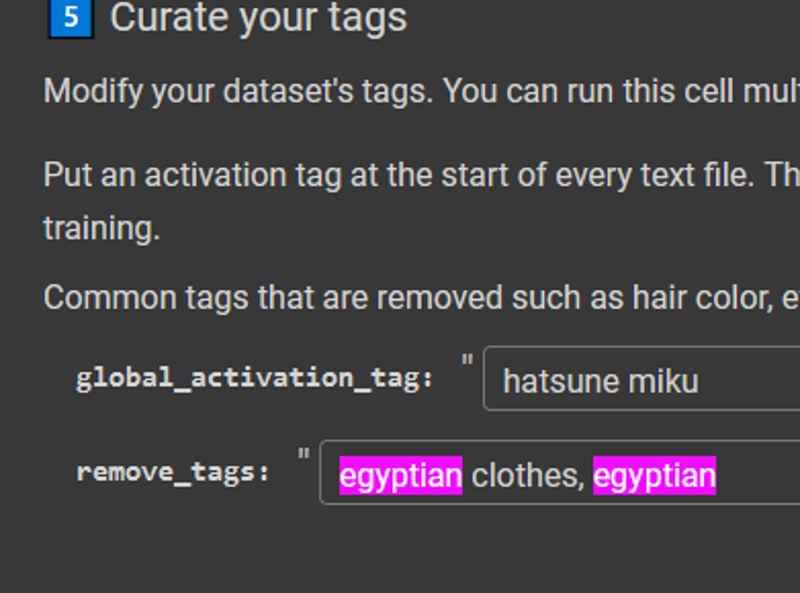
Of course, we’ll change Hatsune Miku’s name to something more appropriate, like Ancient Egyptian Clothes.

We’ll also round up tags suggested by Danbooru, such as eye of horus and ankh. It’s recommended you find tags that are in your top 25 that best fit the description of what sort of LoRA you want.
Then, hit play. Our new tag list would look like this now.
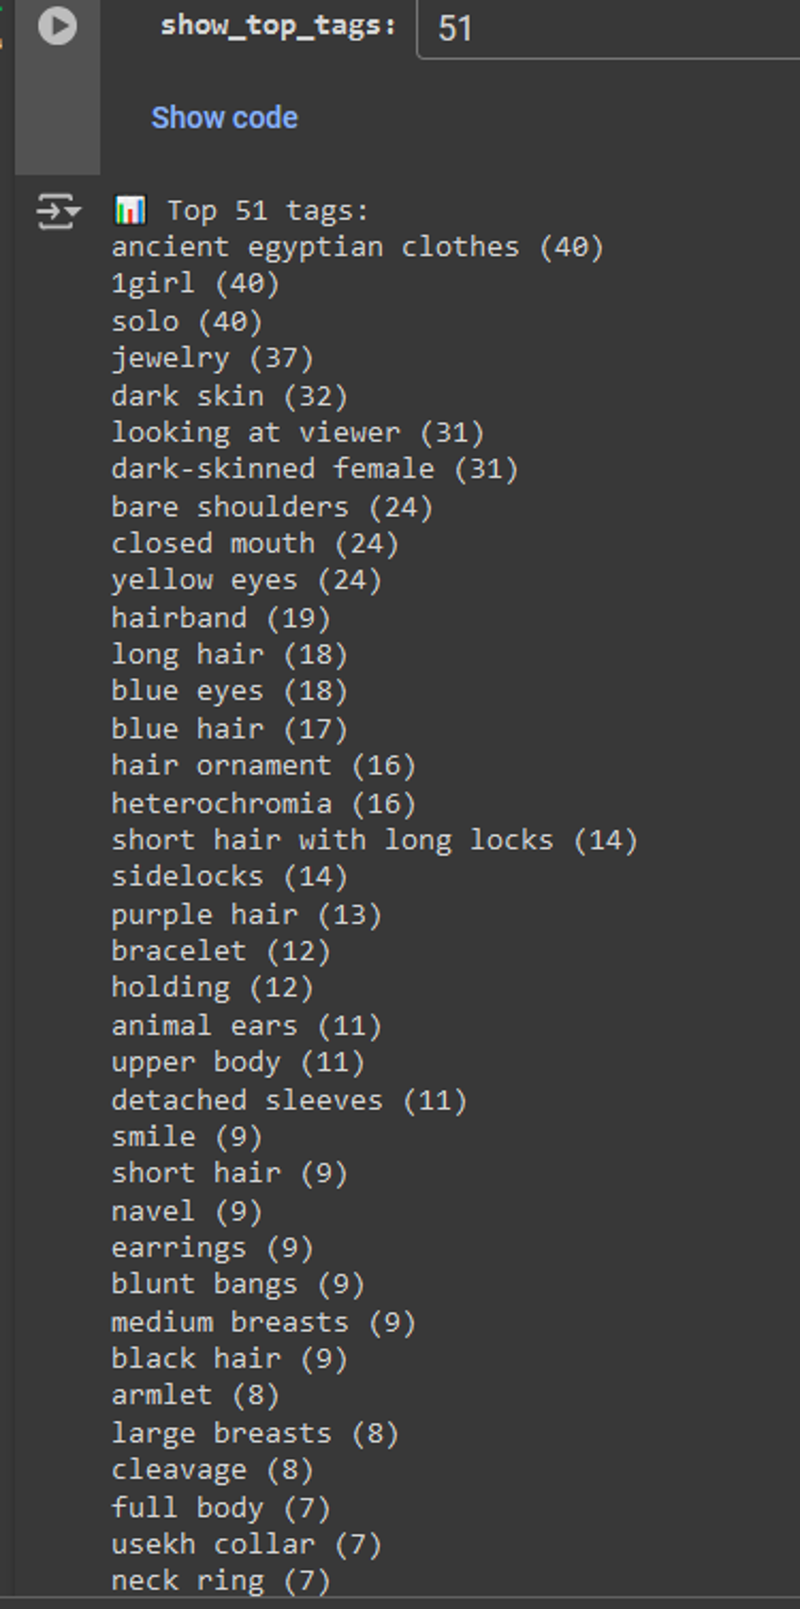
After this, feel free to toy with the tags to your heart’s content until you feel satisfied with your selection. For me, I like to create Aqua Eye tags if Green and Blue eye tags are found in the same files and just round all ear/tail tags into the same animal girl tags (so Dog Ear/Tail tags = Dog Girl).
Once you are satisfied, disconnect the runtime and download the dataset. It’s time to head to Civitai.
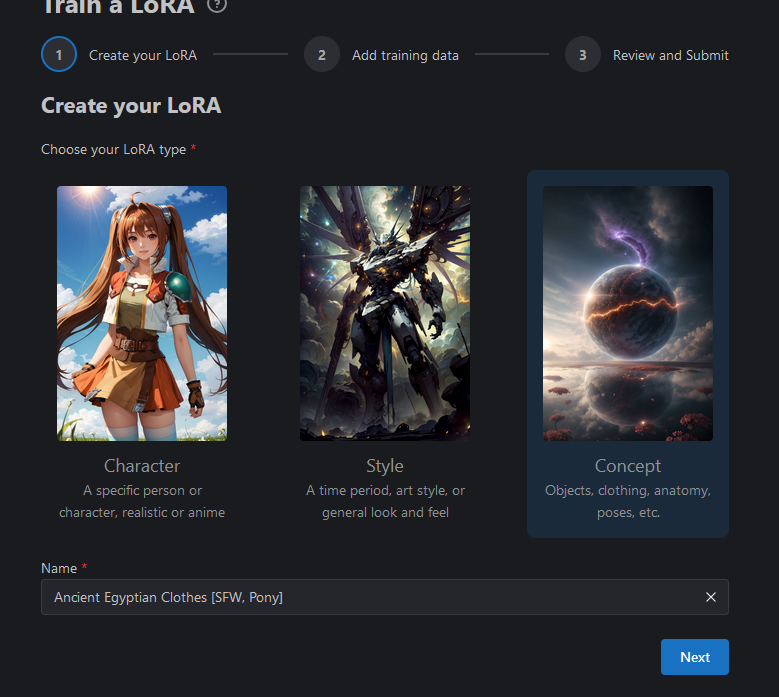
By here. It should be straight forward because the UI here is more user friendly. In fact, you can even use this to tag your images instead. I prefer the other method though due to the uncapped tags. Think of this as one last chance to curate before you pass this off for its final generation.
Finally, we get to the final part of the training before we hand it off to the fire and forget part. We can do this one of two ways:
The so-cheap-it’s-free method where you can make SD 1.5 LoRAs…
Continue and make a Pony LoRA.
The so-cheap-it’s-free method is to take the files and import them back into Drive to run the LoRA Trainer. However, this uses up GPU resources and if you’re not careful, you can be locked out of using it.
The second method is easier, but costs Buzz. Fortunately, even with the nerfs, making 500 Buzz isn’t entirely Herculean. Reacting to 100 images every day for five can seem difficult, but if you were to give feedback to images you generated, collect Buzz when you sign in, follow three people, and post an image, all every day for about three days, you can get enough Buzz to get the training and then some.
Now, you can generate with the default settings, but I’m going to use the following settings here:
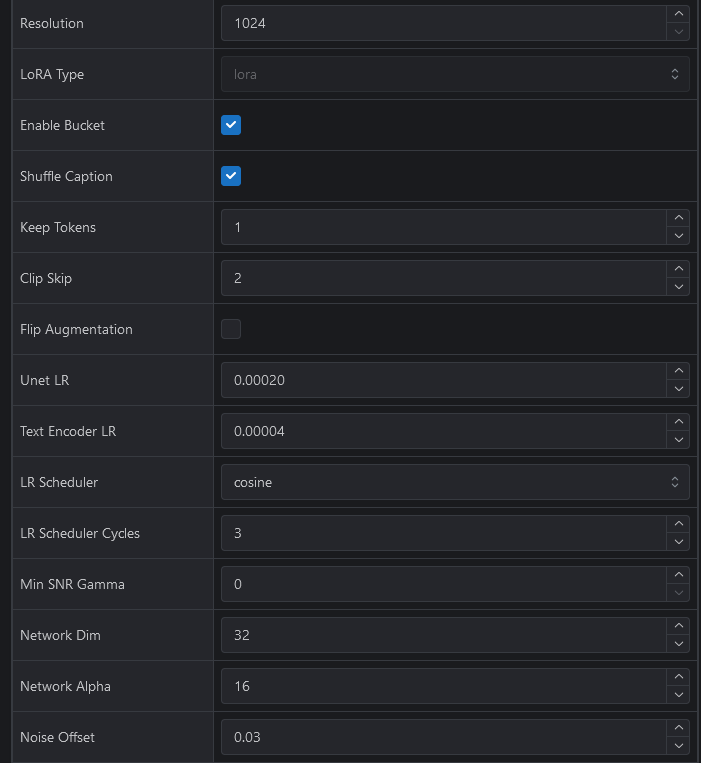
Now, the one thing I didn’t show you is the number of Epochs and Repeats. Unless you have less than 20 images, the number of Epochs should remain at 10. I’ve seen people go to 12 or 14, and I’ve on occasion used 15, but 10 is often the number used.
And then for repeats, my advice is to either leave it alone or bump it as high as you can before either it too reaches 10 or the number of steps reaches up to or close to 800 steps. The reason for this is because going over 800 steps will cause the price to go up. Now, you can go over and it may have good results, but it may also overcook the LoRA. It really depends on how many images you have vs. how many steps you want to train.
Compare that to if you’re doing SD 1.5, where it’s so easy, I created a spreadsheet program telling you what numbers to put in.
We hit submit and wait for the magic to happen.
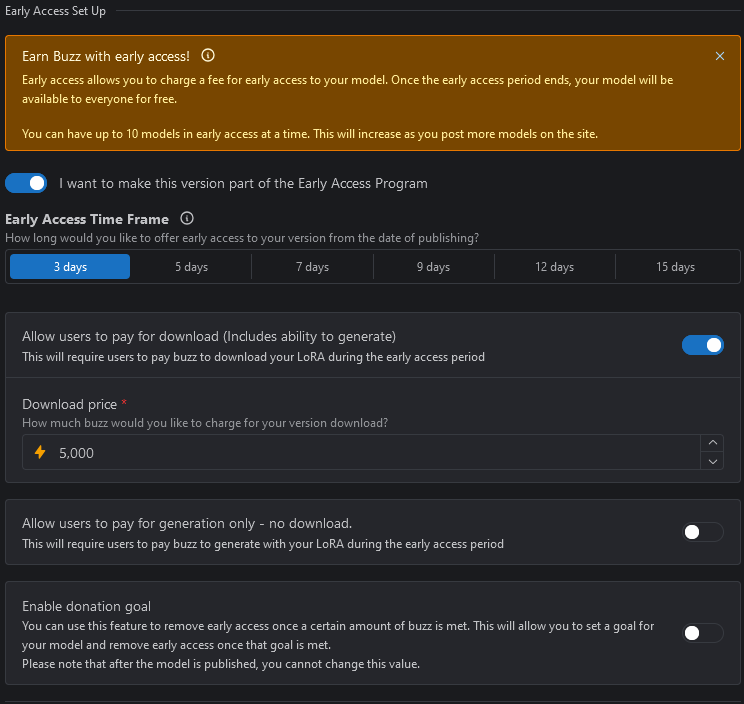
Once you are ready to go, just go ahead and set up your LoRA. Now, to get Buzz with your LoRA, I highly encourage you enable the use of the on-site Generator with your LoRA. Now, this will be a bit risky, but you can optionally enable this too:
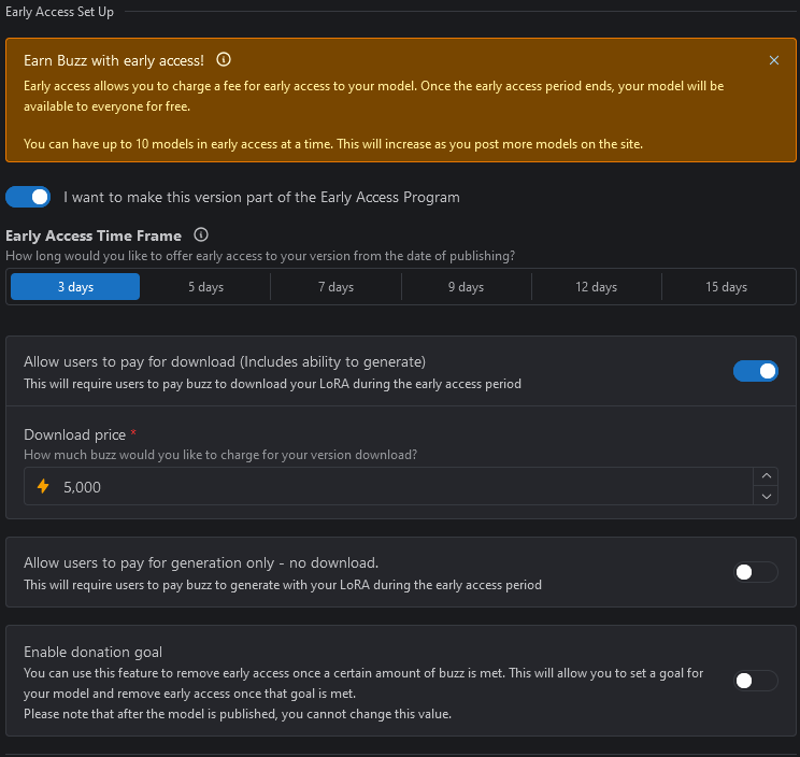
This will charge people to have access to your file and will lock it away for a few days before being available to the public. If you want to just have it be accessible from the word go or you don’t care about this feature, you can ignore it.
I would however, consider what people are willing to pay for early access and how long you’ll lock it off. Set the price too high or the time frame wrong, it will likely backfire. I don’t know if there’s an exact science to this, but obviously don’t abuse it and lock all your LoRAs behind Early Access.
In fact, CivitAI gives you some means to give people a chance, such as adjusting the price, setting a different price to give people generations instead, or even a cap that will unlock the LoRA early. Set these options however you want, but for me, I set them to be rather cheap because to me a hundred Buzz is a lot. Because I am demonstrating how Early Access works, I’m going to set these prices to be pretty cheap:
Next, publish and just relax for the next little while. Congratulations! You published your first LoRA! Give yourself a pat on the back!
Wait…
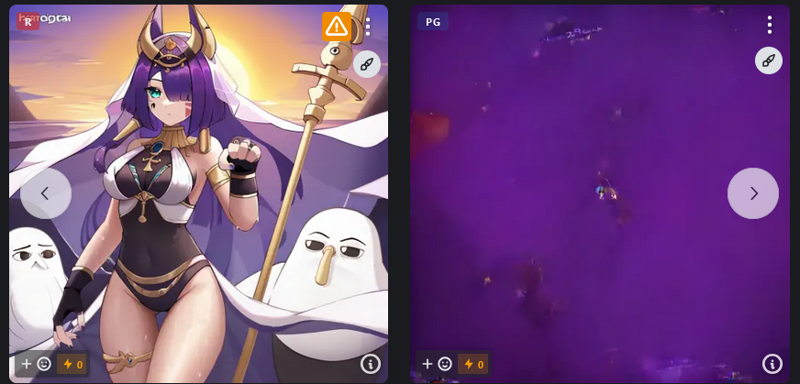
OH NO! This is terrible! The images aren’t presentable! What are we gonna do!
Don’t worry! We have a plan!
Download that dataset in your LoRA page:
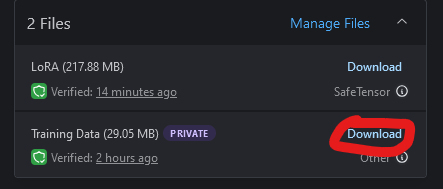
Delete the dataset on your Google Drive and then make a new Dataset folder, uploading only the text files. Once you’re done, go to your dataset maker, open up that folder again, and then scroll down to here:
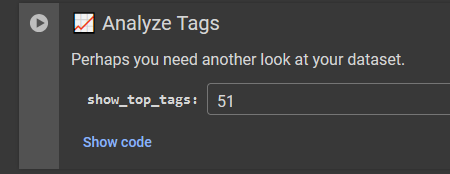
When you’ve imported the Google Drive into your Colab, hit play and copy the list. That, my friend, will be your cheat sheet to making your showcase images. I already made my list:
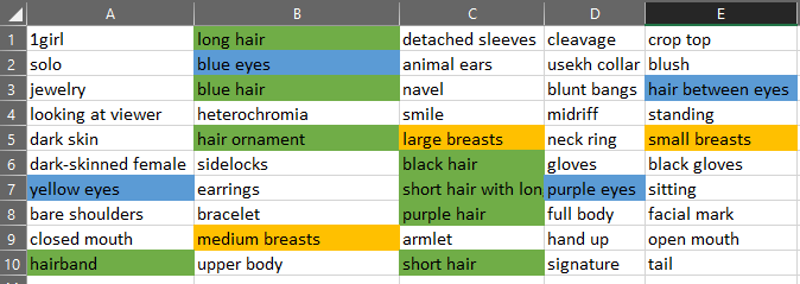
I didn't really change much, but if I find that if the [color] hair tags share a column I swap it to another column. Same for [color] eyes, [length] hair, [size] breasts, etc.
You can do with it however you wish, but keep in mind that these are the most used tags in your LoRA. I say create up to five showcase images. Or even create your own image scenarios if you have gotten the gist of it.
With that, you’ve finally finished creating your LoRA. Now you can bask and relax…


