⚠️ Updated to v2.2 | Archived v2.1 article can be found in the attachments
📚 Tips & Tricks Guide
Welcome to this guide, where you'll find tips and tricks, resource recommendations, comparisons, and contributions aimed at enhancing generation details. This list will be expanded as more information is discovered or contributed by the community. Feel free to share your tips and tricks in the comments, and they'll be added here.
⚙️ General Settings
Let's start by revisiting the recommended settings:
Samplers (Personal Preference)
🏠 For local generation:
DPM++ SDE Karras
DPM++ 3M SDE Karras
DPM++ 2M SDE Karras
DPM++ 2S a Karras
DPM2 a
Euler a
🌎 For site-based generation, you currently have two options:
DPM2 a (more expensive and slower, but generates better details)
Euler a (cheaper and faster, but at the cost of certain details, producing a softer style)
🛟 Basic Prompt & Settings
This is the most basic prompt and settings I use for outputs:
Positive:
score_9, score_8_up, score_7_up, (SUBJECT), depth of field, highly detailed, high contrast, film grain, Rim LightingNegative:
score_6, score_5, score_4, text, censored, deformed, bad handSettings:
DPM++ SDE Karras
30 Steps
832x1216
CFG 6
Seed -1
Clip Skip 2
Adetailer mediapipe_face_full
🎨 Suggestions for Output Improvement
🕯Lighting
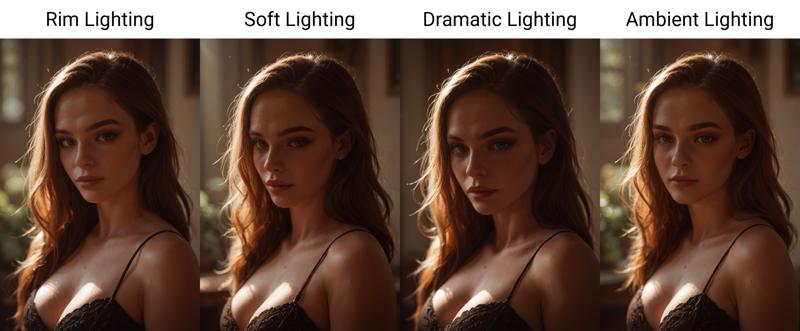
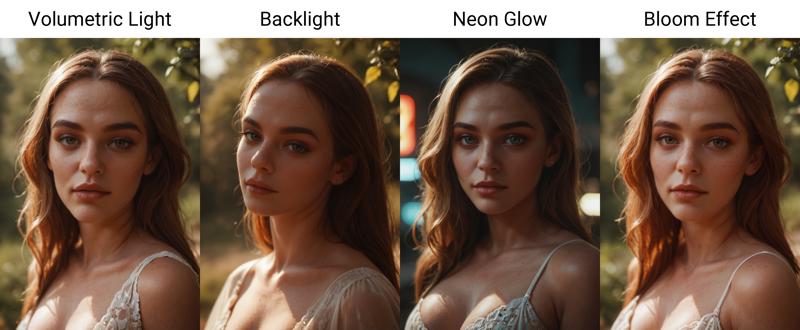
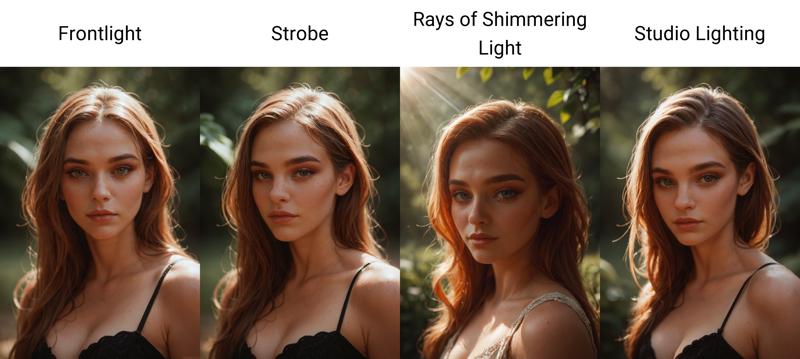
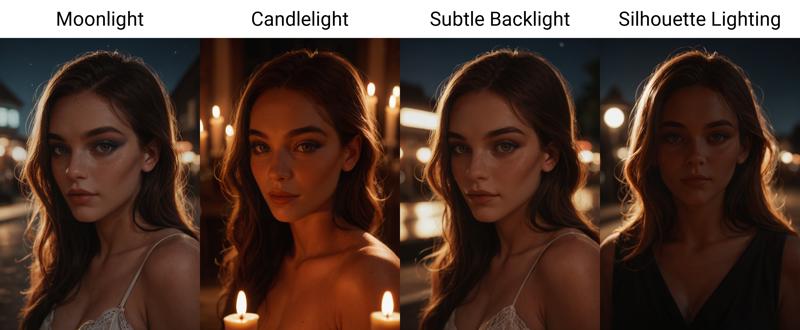
Since the improvements in lighting in v2.2, you can now get more control over the lighting in a scene. This can be achieved by using lighting-related tags and prompts (I prefer to add them at the end of the prompt). Here are some examples:
🌠 Night or Dark Scenes
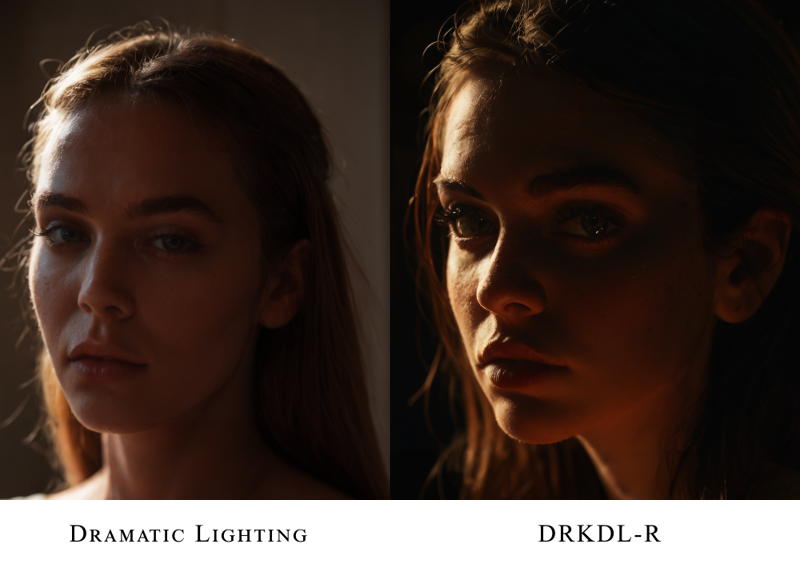
If the base model does not output what you have in mind, you can use one of these great LoRAs like DRKDL-R by @blacksnowskill and Dramatic Lighting by @freckledvixon, you can achieve outstanding dark scenes:
🎥 Professional Image Style
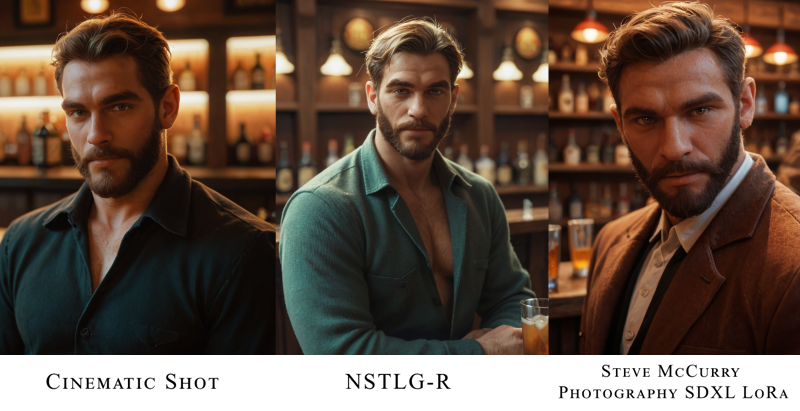
If you can't get the professional look from the base model's lighting, I recommend using LoRAs such as my Cinematic Shot, NSTLG-R/NEOST-R by @blacksnowskill, and Steve McCurry - Photography SDXL LoRa by @FrenzyX to achieve a professional touch:
😠 Facial Expressions
Various facial expressions tested with the model include:


🔍 Skin Detail
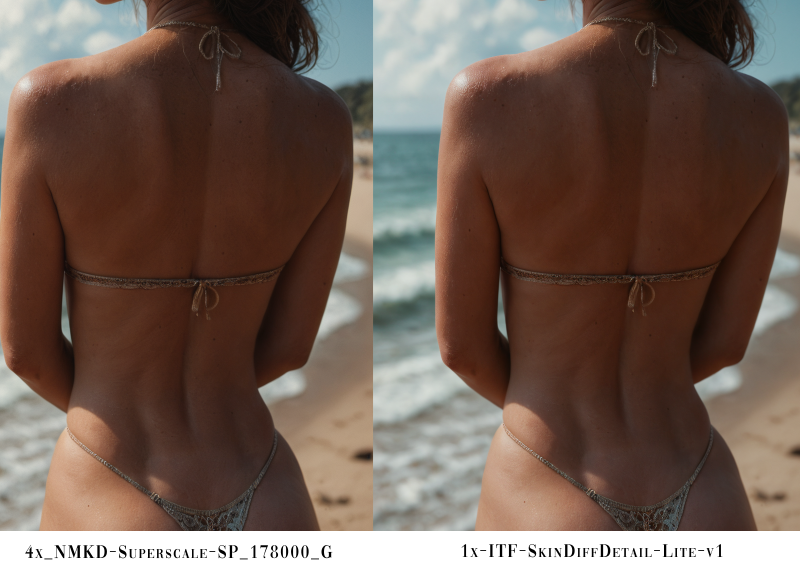
Skin detail quality varies depending on the sampler. Generally, all samplers except Euler a provide great quality. Since the new version's slight skin improvements, 1x-ITF-SkinDiffDetail-Lite-v1 can be a bit too much. If that's the case, I recommend using 4x_NMKD-Superscale-SP_178000_G.
✨ High Realism with Negative Prompt
❗️Less noticeable since v2.2
The following negative prompt provides incredible realism (thanks to @Socash):
deformed, deformed face, low quality, bad quality, worst quality, (drawn, furry, illustration, cartoon, anime, comic:1.5), 3d, cgi, extra fingers, (source_anime, source_cartoon, source_furry, source_western, source_comic, source_pony), deformed teeth
Note: This can sometimes lead to similar facial structures and a tendency to generate female figures.
🤳 Amateur Style
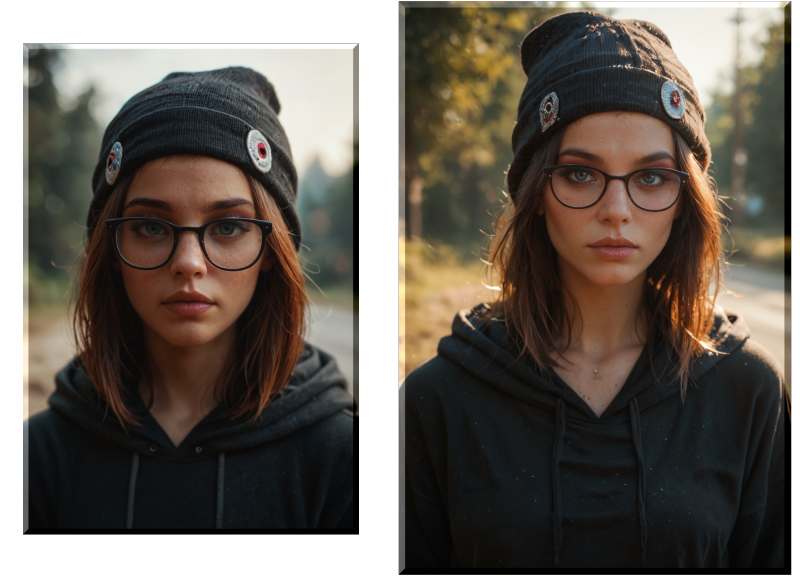
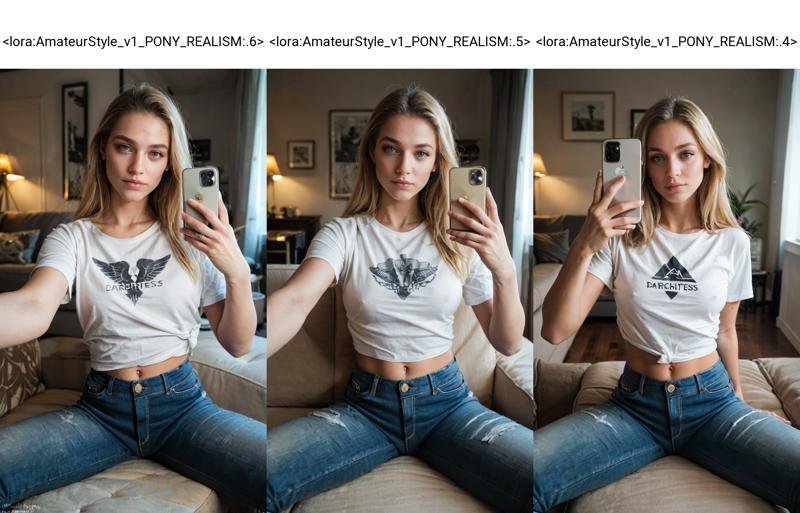
I recommend my LoRA Pony Amateur for an incredible amateur style. It can be tricky to work with, but once you master its settings, the outputs are excellent.
🫱🏼🫲🏿 Skin Color / Ethnicity
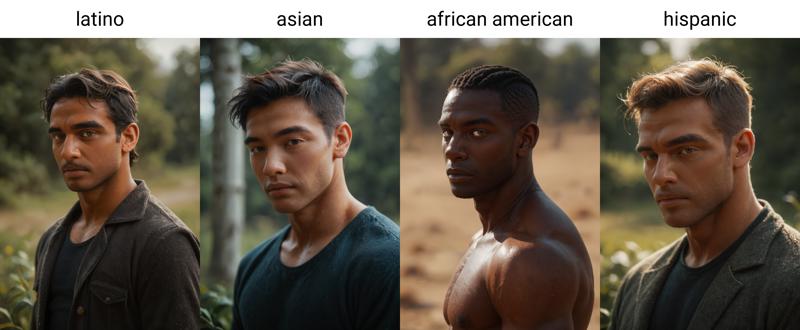
For easier generation of people with different skin tones, it is recommended to describe the origin or ethnicity (e.g., African American) rather than the skin color.
🚫 Removing People from the Image
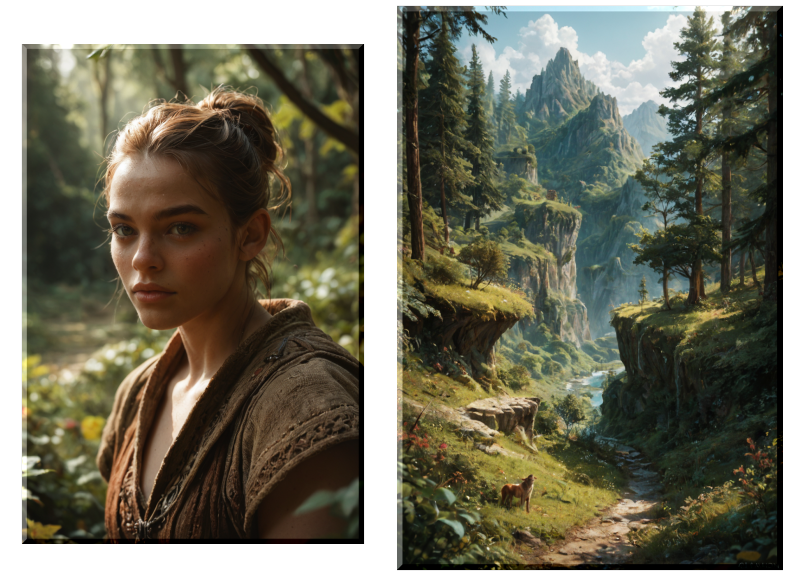
The word scenery effectively removes any person from the scene, helping to eliminate unwanted intruders in your images.
Original Prompts:
Positive:
score_9, score_8_up, score_7_up, score_6_up, photorealistic, fantasy, detailed, natureNegative:
score_5, score_4, score_3
After Adding "scenery" to Positive:
👥 Multiple People with Different Characteristics
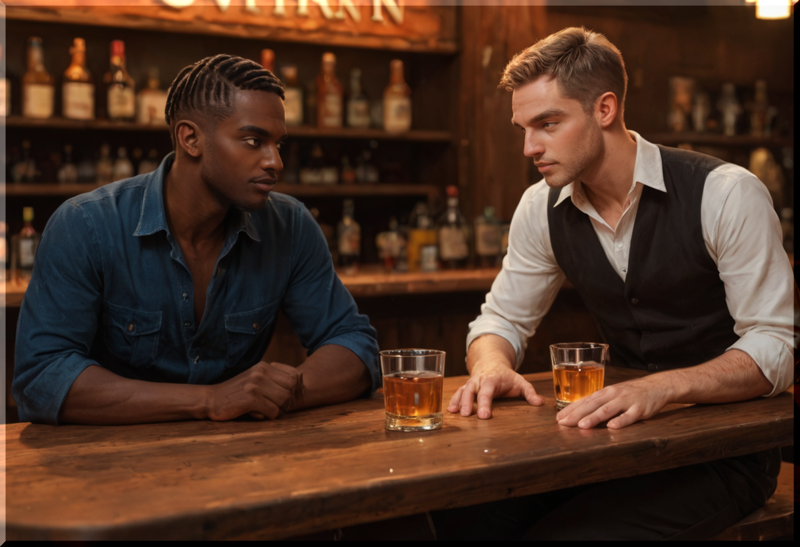
Including more than one subject in an image with different characteristics can be challenging. To make this easier, I recommend using the following prompt structure (note that using character LoRAs may make this more complicated or even impossible):
[number of people (e.g., 2boys)] [description of the first person] BREAK [description of the other person] BREAK [situation, styles, etc.]Example:
To generate an image with two distinct individuals, you could use the following prompt:
Positive:
score_9, score_8_up, score_7_up, score_6_up, 2boys, male, african american BREAK male hispanic BREAK both sitting on a table, barNegative:
score_5, score_4, score_3
🔥Model Horniness
Personally, I haven't noticed the model ignoring prompts and being overly "horny," but if you're having trouble controlling this aspect, try adding the following prompts:
Positive prompt:
"rating_safe"Negative prompt:
"rating_explicit"
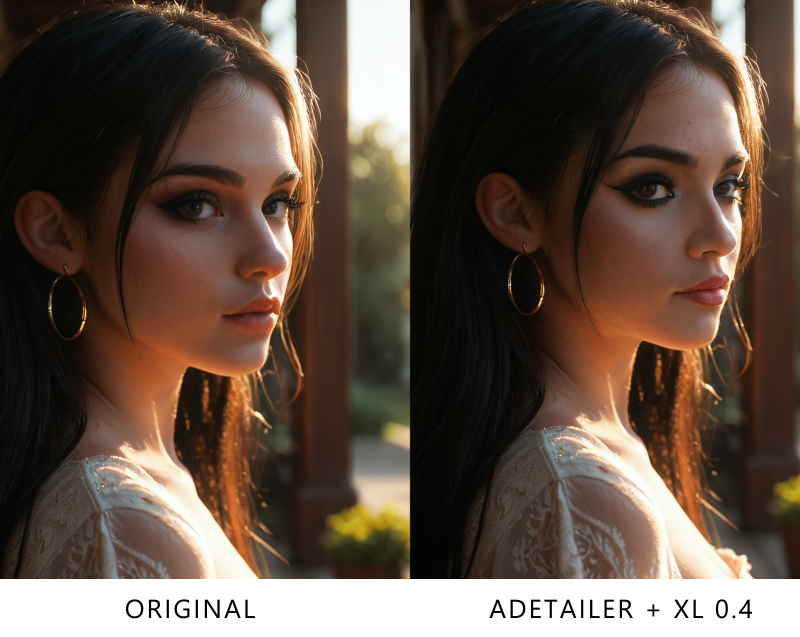
🧼 Adetailer: Tips and Usage
Most of you are likely familiar with Adetailer, but for those who aren’t or who are looking for some guidance, this will explain what Adetailer is and how to get the most out of it.
·What is ADetailer?
"ADetailer is an extension for the Stable Diffusion WebUI that enables automatic masking and inpainting. It functions similarly to the Detection Detailer."
In essence, Adetailer is used to repair or enhance specific masked areas of an image after the initial generation is complete. This is particularly useful for refining details in faces, eyes, hands, bodies, or other features.
In this guide, we'll focus on two specific models: "mediapipe_face_full" (for realistic enhancements) and "face_yolov8s" (a general-purpose model).
·How does it work?
The simplest approach is to activate the extension, choose a model, and let it run automatically. However, there are some settings and tips that can help you fine-tune the process to get better results.
Key Settings and Tips
Detection Settings:
Detection Model Confidence Threshold: This setting determines how sensitive the model is to detecting faces or other target areas. A higher threshold makes it harder to detect unintended faces or details, so you’ll want to adjust it based on your needs.
Inpainting Settings:
Inpaint Denoising Strength: This adjusts the degree to which the inpainted area varies from the original content. A higher value creates a more distinct result, making it especially useful if you want a more noticeable enhancement or alteration.
The following settings let you load a different model specifically for inpainting the masked area. This is helpful for cases like using Pony, which lacks complex facial features. By loading a secondary model, you gain more variety in facial features.
Use Separate Checkpoint ✅
Use Separate Checkpoint: Choose the desired checkpoint model.
Use Separate VAE: Needed only if the selected model requires a different VAE.
Use Separate Sampler: Choose the sampler you want for painting the masked area.
Use Separate CLIP Skip: ✅ Set this to 1 if you're using a model other than Pony.
With these settings, when a face is detected, Adetailer will load the chosen model and apply enhancements. If you want to refine what specific elements get inpainted, Adetailer has positive and negative prompts. Leaving these blank defaults to the general prompts
Multi-Character Painting
If you’ve used ADetailer with multiple characters, you may have encountered issues where the same adjustments are applied to all characters, regardless of their individual traits. For instance, the same settings may not work well if one character is male and the other is female, potentially resulting in odd appearances for one of them.
To fix this, go to Settings -> ADetailer and adjust "Sort bounding boxes by" to "Position (left to right)". This way, ADetailer will process characters in order from left to right, allowing you to use the [SEP] syntax to differentiate between them in prompts

For example, if a man is on the left and a woman on the right in a scene, you could use the following in the positive prompt of Adetailer:
man, old, beard [SEP] woman, makeup, eyelashes, earring.
This will apply the desired adjustments to each character individually, ensuring each character’s features are preserved and enhanced as intended.
With these settings and tips, you can get the most out of ADetailer and achieve the refined, detailed images you’re looking for.
🛠️ Training
For guidance on training, please refer to my LoRA Training Guide. This guide will walk you through the necessary steps and tips for successful model training.
☕ Support
If you'd like to support me, feel free to do so on Ko-Fi.


