Introduction
Outpainting is one of a few methods used to create a larger image by expanding the canvas of an existing image, but it has a rather notorious reputation for being very difficult to work with and which has resulted with the community to prefer one-shot generations for making widescreen displays. The older outpainting-based extensions have a better quality of life for outpainting but the underlying issue of generating multiple heads is not fixed and the process often damages the image by leaving hard edges. This has resulted in outpainting discussions being uncommon and rarely posted.
The ControlNet extension has recently included a new inpainting preprocessor that has some incredible capabilities for outpainting and subject replacement. In this guide, I will cover mostly the outpainting aspect as I haven't been able to figure out how to fully manipulate this preprocessor for inpainting.
This particular preprocessor was designed to mimic Adobe's context-aware generative fill and has several properties that are very similar to it but isn't a 100% replica. However, it is a tremendous step forward for the opensource community and adds a lot of potential for image editing. Overall, I will try to keep this guide as simple as possible and provide some minor findings.
Requirements
You will need the A1111 webui with at least version 1.3 and ControlNet 1.1.222 with the control_v11p_sd15_inpaint.pth inpainting model installed. The context-aware preprocessors are automatically installed with the extension so there aren't any extra files to download.
Txt2Img
To use this functionality, it is recommended use ControlNet in txt2img with Hi-Res fix enabled. You can still run it without Hi-Res fix but the quality won't be as great.
Prompt Settings
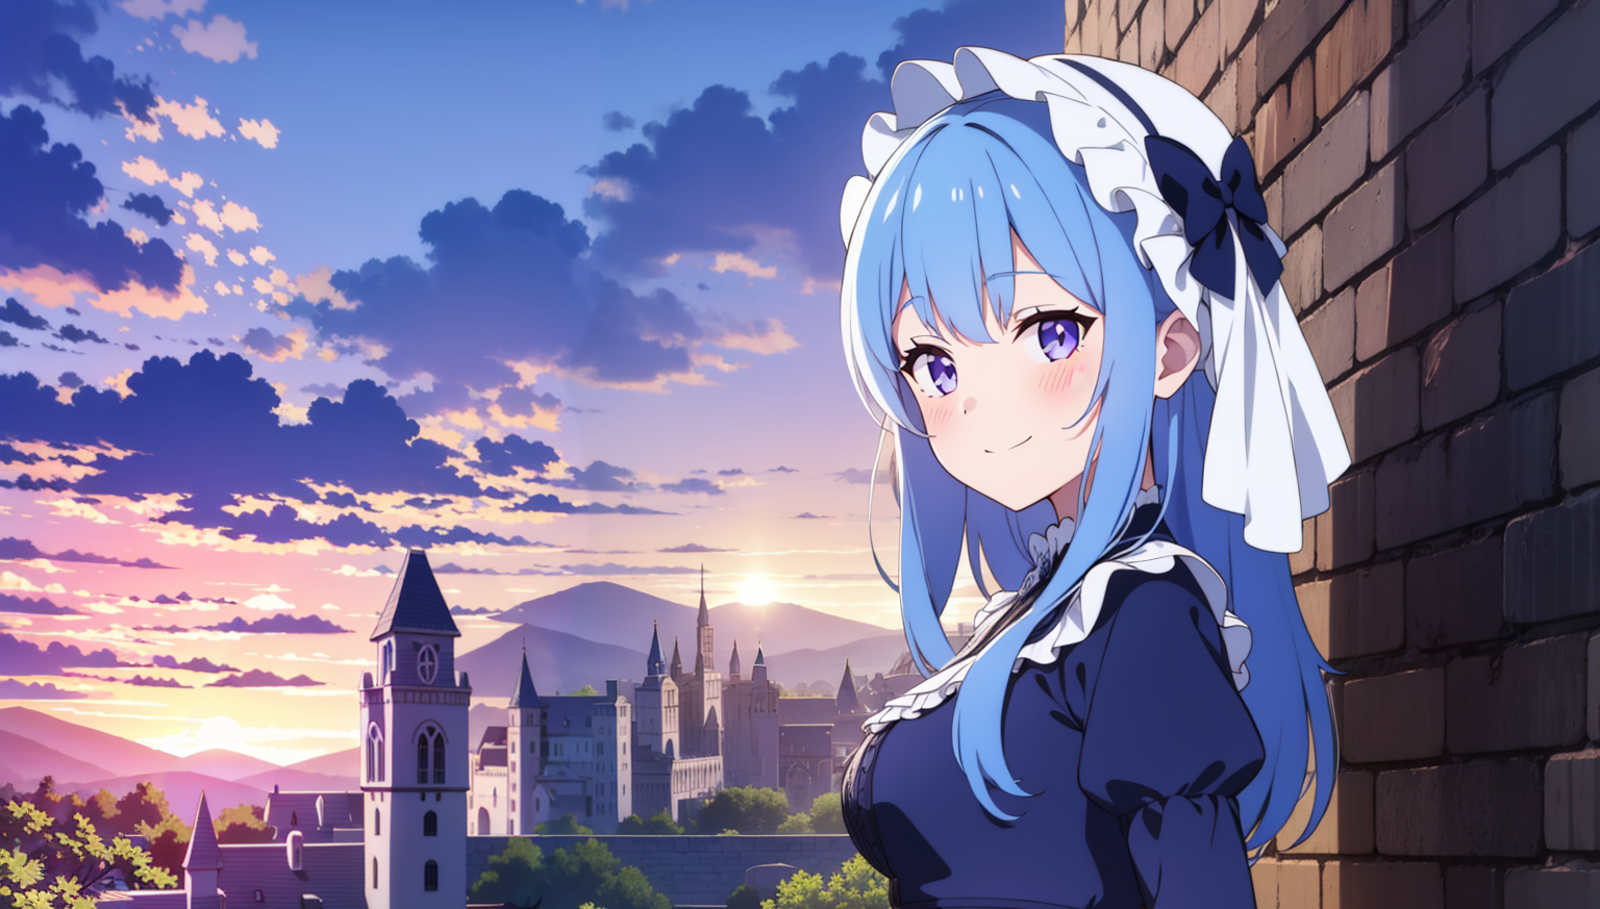
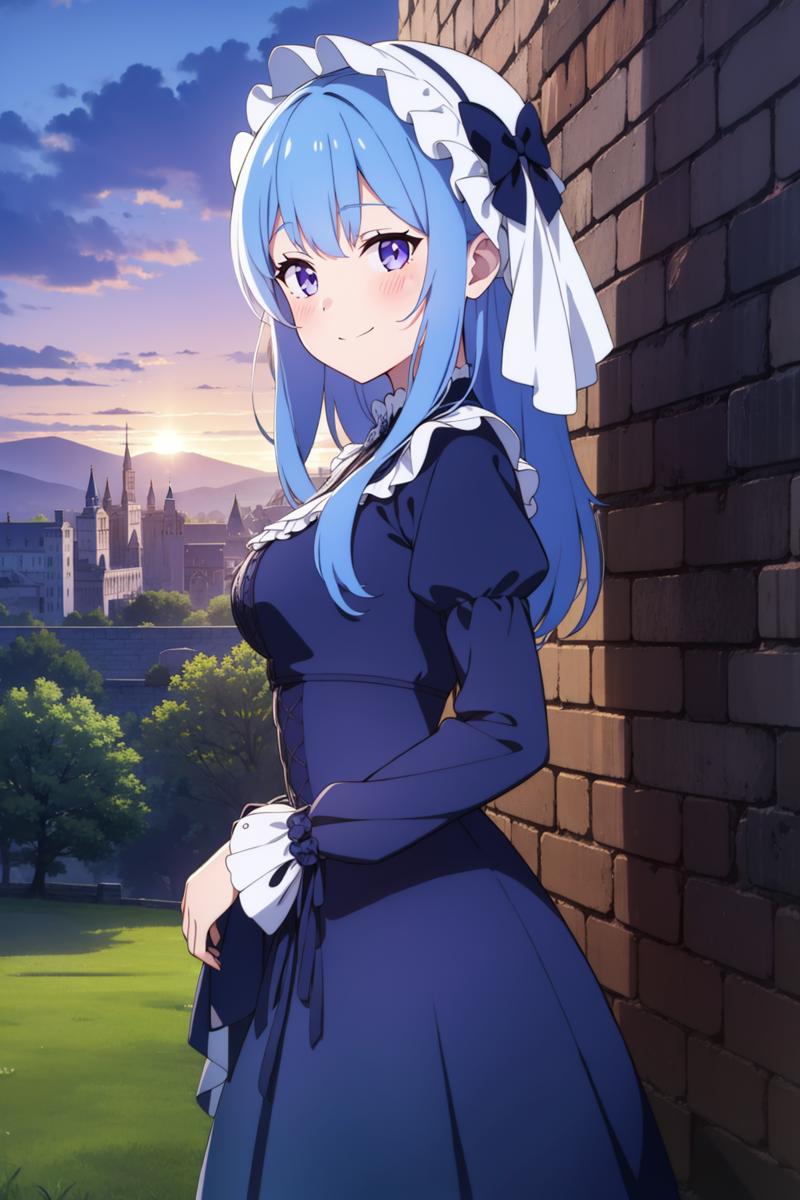
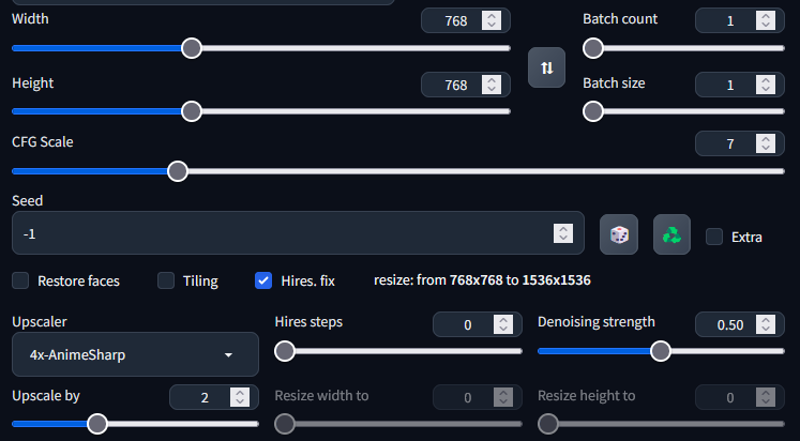
In this example, I will be outpainting a 1024x1536 image to 1536x1536. More specifically, I am rendering at 768x768 with a Hi-Res Fix of 2x. (I am also using the MultiDiffusion extension to help reduce the VRAM usage.)
This is the prompt that was used to generate the image below and is the same one that I will be using for outpainting. While this preprocessor supports context-aware outpainting which is generation without the usage of a positive or a negative prompt, I have personally found that it works better with some prompt included.
Positive Prompt:
1girl,blue_hair,purple_eyes,long_hair,blue_dress,frills,long_sleeves,(bonnet),medium_breasts,looking at viewer, blush,smile,town,country_side,outdoors,dusk,bow,hair ornament, frilled dress,european clothes,medieval,stone, castle, chimney,old,gothic,from_side

Negative:
duplicated, disfugured, deformed, poorly drawn, low quality eyes, border, comic, lowres, bad anatomy, bad hands, text, error, missing fingers, extra digit, fewer digits, cropped, (worst quality, low quality:1.4),normal quality, jpeg artifacts, signature, watermark, username, blurry, artist name, pixels, censored, verybadimagenegative_v1.3, nsfw,EasyNegativeV2
Example) Original Image
General Settings
ControlNet inpaint-only preprocessors uses a Hi-Res pass to help improve the image quality and gives it some ability to be 'context-aware.' The recommended CFG according to the ControlNet discussions is supposed to be 4 but you can play around with the value if you want. Set the upscaler settings to what you would normally use for upscaling. (I forgot to adjust the hires steps in the screenshot; I normally use 10 steps)
ControlNet Settings
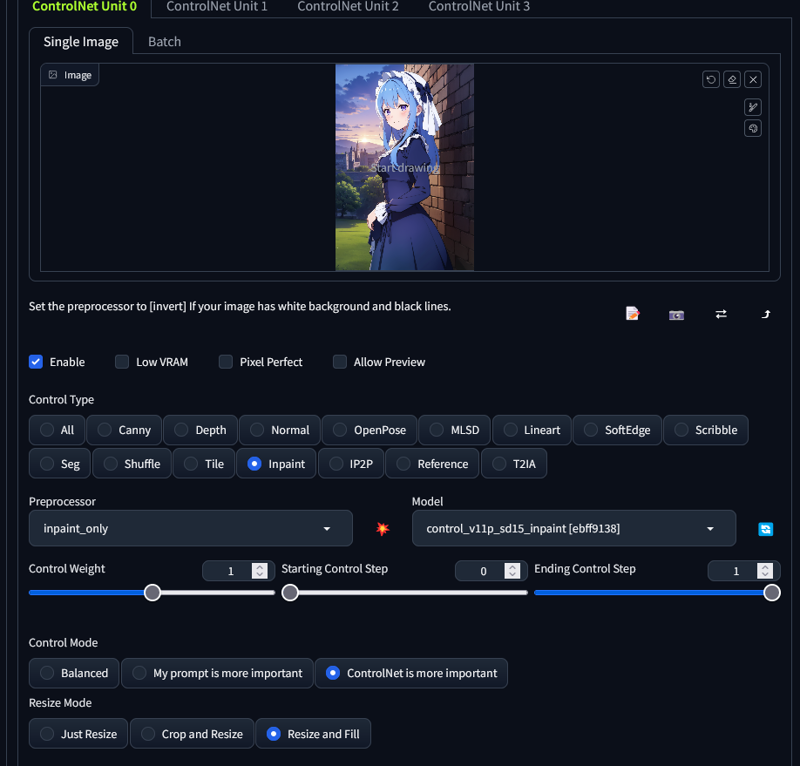
ControlType should be inpaint
Model should be the control_v11_sd15_inpaint from the official ControlNet repository
Preprocessor can be inpaint_only or inpaint_only + lama
Inpaint_only uses the context-aware fill
Inpaint_only + lama is another context-aware fill preprocessor but uses lama as an additional pass to help guide the output and have the end result to become more "cleaner"
Try experimenting with both preprocessor types as they can differ greatly in the output
ControlMode needs to be set to 'ControlNet is more important
Resize Mode should be set to Resize and Fill (This setting lets you outpaint)
Afterwards, hit generate
Result
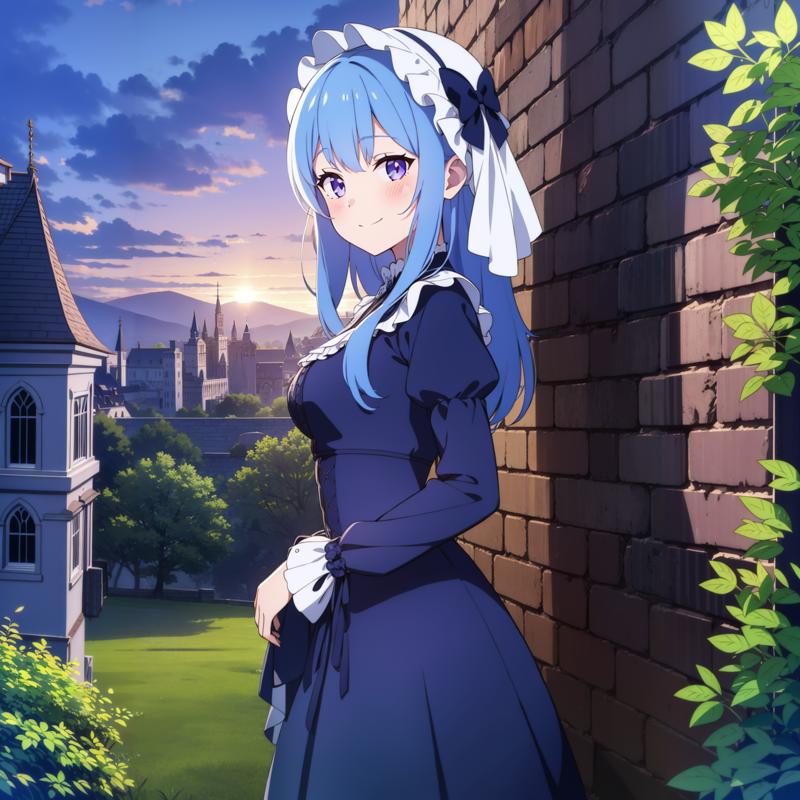
This particular setup evenly expands canvas according to what was specified in the dimensions with the input image as the center of the canvas.
There are some traces of edges left by outpainting but they're not very noticeable.
The rate of producing another head is actually very low. Occasionally, hair or another person can appear but you can easily remove them by using inpainting with the inpaint+lama preprocessor
It's very simple and quick compared to something like openoutpaint or the older methods of outpainting.
Misc
To outpaint large images, you may need to use the MultiDiffusion extension with Tiled Diffusion and Tiled VAE
Keep batch size in Tiled Diffusion as high as possible to avoid color mismatches
Fast Encoder Color Fix can help eliminate excessive random details in the image.
Occasionally, the VAE might not load(?) bug. Just reload the VAE before generating
There's an error(?) that prevents you from generating higher batch counts whenever the image size is too big. Unfortunately, to get around this, you need to just set the batch count to 1.
ControlNet is more context-aware compared to outpainting with an inpainting model. However, it can still occasionally fail so I do recommend using it with a prompt rather than discarding prompts all-together.
Impact of Denoising Strength and ControlNet Weight
Increasing the weight of ControlNet can help with the blending but too high of a strength causes the outpainting to fail as it starts to generate solid blocks
Denoising strength should be what is normally used with that particular upscaler. It seems with outpainting, there's a rate of solid blocks if the denoising strength is set too high.
Default settings are good enough as there doesn't seem to be too much of a gain messing around with these values
Outpainting with an Offset
You may want to outpaint in a certain direction instead of evenly expanding the image but unfortunately there isn't an easy way for this use case and is more error prone compared to evenly expanding the canvas.
Expand the canvas in some image editor. In this image, I expanded to the left. Afterwards, send the image to ControlNet.
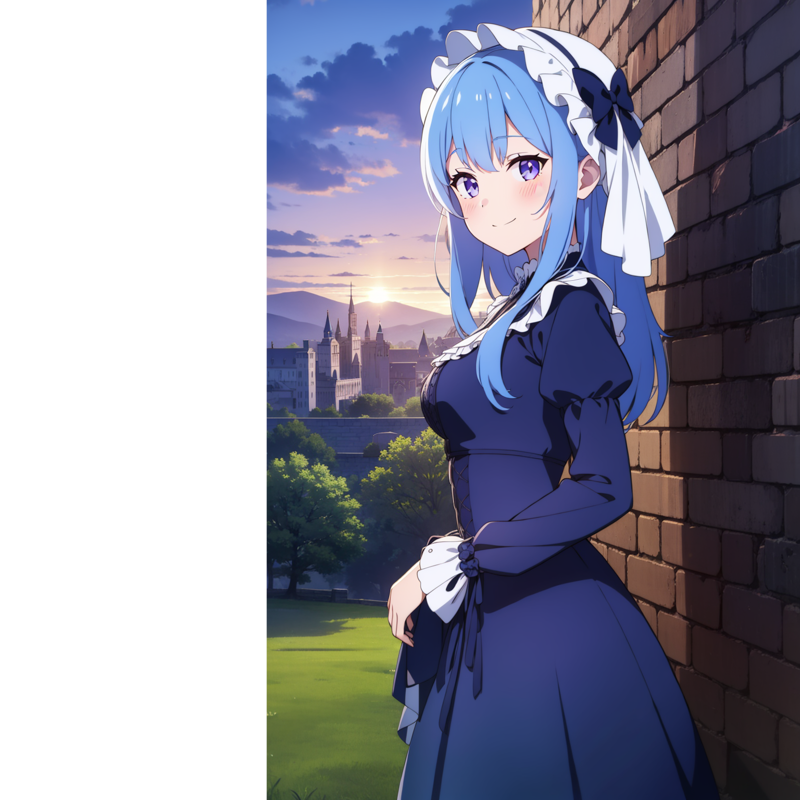
Add a mask to the area that you want to fill in.

Adjust the prompt to include only what to outpaint. Unfortunately, this part is really sensitive to the prompt so there's a very high risk having a second person. Adjust the CFG to 4 to tell the model to not strictly adhere to the prompt. What I used for the outpainting example. The ControlNet settings should be the same as the previous one but the resizing mode doesn't matter anymore.
country_side,outdoors,dusk,medieval,Generated Result
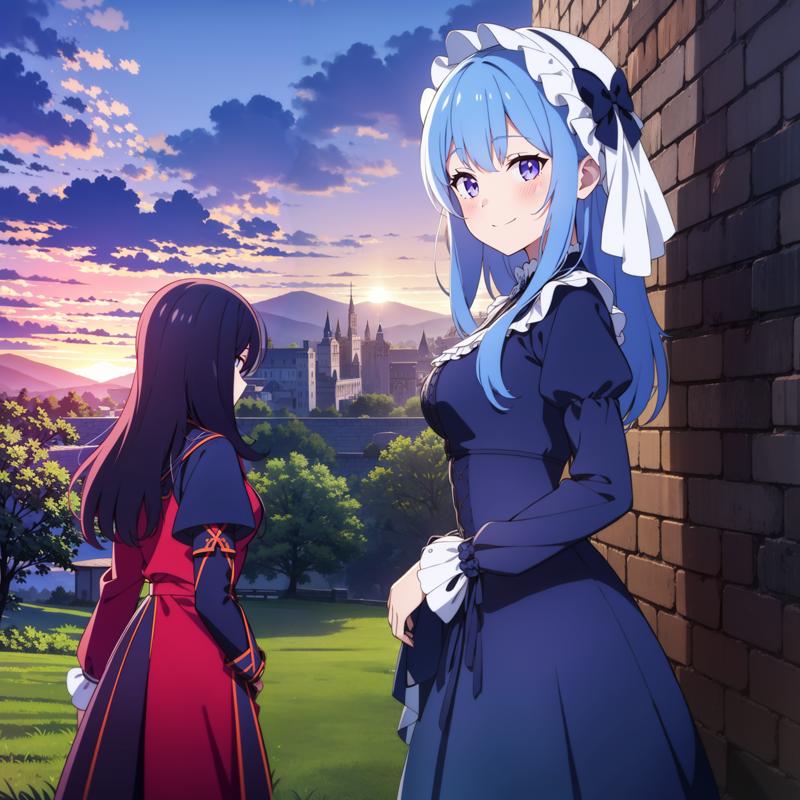
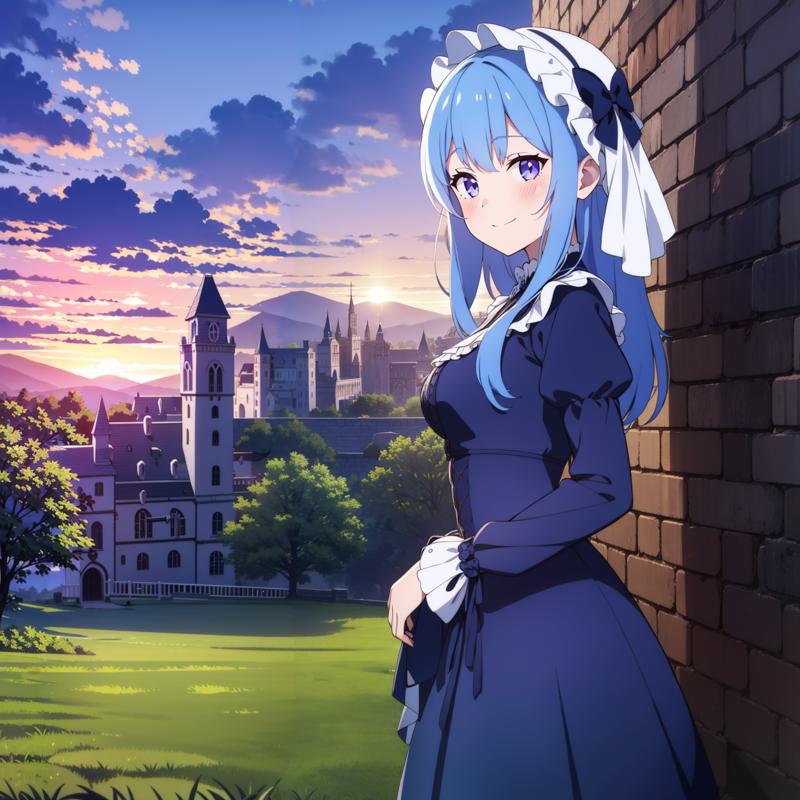
Regrettably, multiple people can still appear even if you remove it from the prompt. Luckily, the inpaint+lama preprocessor is very good at removing objects, so mask the second girl and then hit generate.
After inpaint+lama
Misc
The photopea extension adds additional buttons which can help send your input back to ControlNet for easier iteration.
After outpainting an image, press 'send to photopea'
Next press 'send to txt2img ControlNet'
Mask the desired changes and then hit generate
Inpainting-Only Preprocessor for actual Inpainting Use
Good for removing objects from the image; better than using higher denoising strengths or latent noise
Capable of blending blurs but hard to use to enhance quality of objects as there's a tendency for the preprocessor to erase portions of the object instead.
Potential for easier outfit swap inpainting with MultiControlNet. Example here; NSFW since it changes outfit to swimsuit
Related Documents and Links
[1.1.202 Inpaint] Improvement: Everything Related to Adobe Firefly Generative Fill
[1.1.222] Preprocessor: inpaint_only+lama (Slight NSFW warning;swimsuits)
Conclusion
While there are some hiccups with the ControlNet preprocessor, this is a considerably easier way to outpaint. I hope you learned something and thanks for reading!

