Important - Must read carefully.
Optional - You can skip this.
Update - Added updates or problems I come across
Disclaimers
I am not an expert in this so if someone else can provide advice or correct me in the comments you're more than welcome to.
I'm using Stable Diffusion Forge but this method should also work for Automatic1111, but I don't know if ComfyUI workflow can use this same method.
I cannot guarantee 100% that your generation will have a better result but it should improve, it will depend on how you use your Prompting, Model, Loras, and Embeddings.
This method focuses on adding more details to your background and character to make it feel less simple.
I cannot help you with on-site generation since I've never used it, this method only works with locally generated images.
I mainly generate anime illustration style, I haven't tested how well realistic models improve with this method so please tell me your feedback.
This method works best at high resolution as the details can be seen much better after upscaling.
This method will also take longer to generate due to Adetailer adding more details.
Why do you need this guide?
If you're feeling that your images need more details or feeling a bit too dull, this guide can help make your images shine a little more brighter. This method works with any image and can make the unused images in your storage collecting dust be usable again.
Introduction Optional
Hi all, I've been creating AI images for almost 2 years now and have been having a good time with this tech and learning methods to make my generation better than before. And since I haven't seen anyone create an article about this method I decided to create it myself.
How and why did I manage to find this method?
I was having problems in upscaling my generations using the SD upscaler and Ultimate SD upscaler, they would come out not as good as I wanted especially using Ultimate SD Upscaler. I can't fix the seams and make it look good without it looking all blurry or just unappealing. Then after experimenting and searching online for any tutorial, I discovered this from a YouTube tutorial by ControlAltAI = A1111: ADetailer Basics and Workflow Tutorial (Stable Diffusion).
And then after tweaking and experimenting I found a good method to easily enhance any image.
Step 1 - Installing Adetailer
Important for beginners (If you have it installed skip to Step 2)
What is adetailer? It is an extension that automatically inpaints your image such as the face, eyes, or hands. It is best used for character-focused images with distorted faces or eyes.
How to install Adetailer with two method
First method
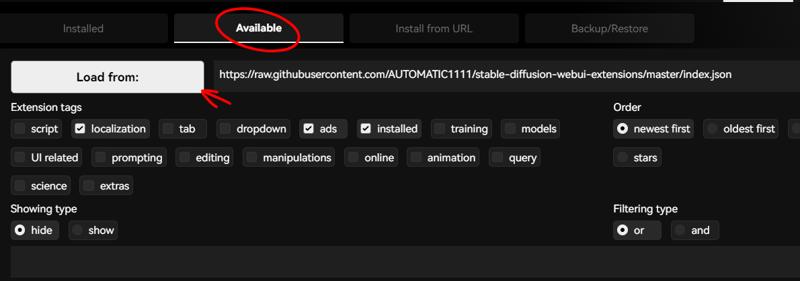
Click on the Extensions tab
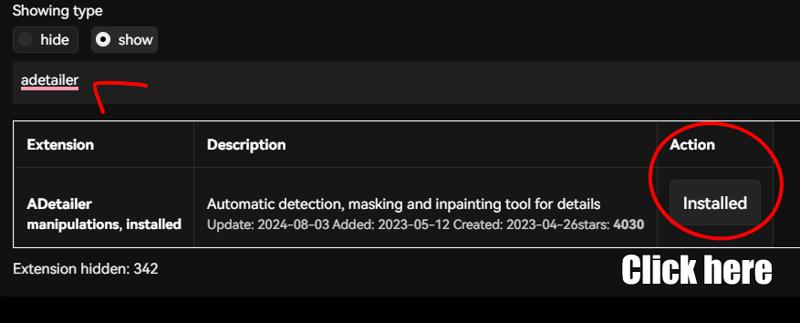
Click on Available and Load from
Search for Adetailer and download it and wait for it to finish.
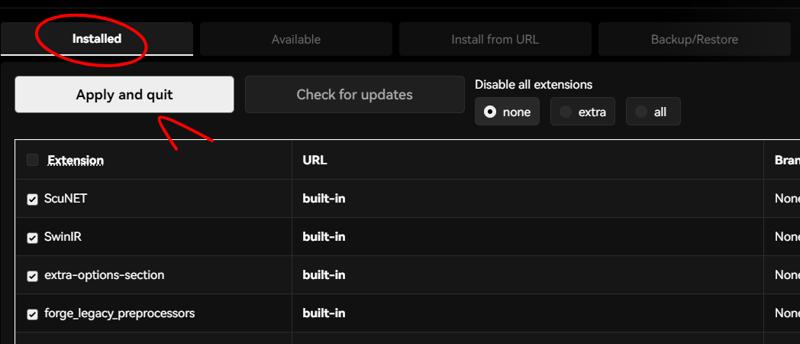
Go to your Installed tab and click on Apply and quit.
Start your Stable diffusion again

Another method
Click on the Extensions tab
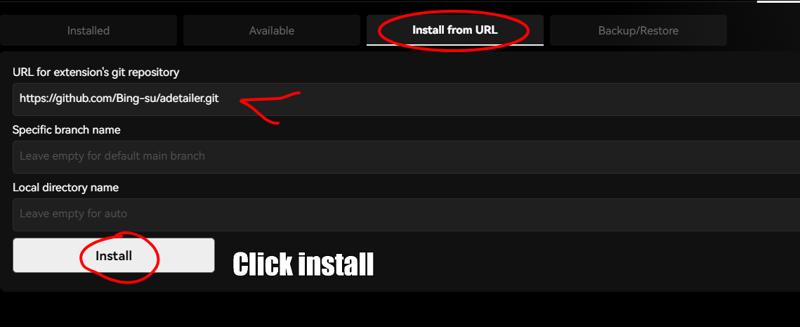
Click on Install from URL
Paste the link below on the URL for extension's git repository
Wait for the download to finish.
Go to your Installed tab and click Apply and quit.
Start your Stable diffusion again


Step 2 - Setting up Adetailer
Important please follow this
Go to the Settings tab
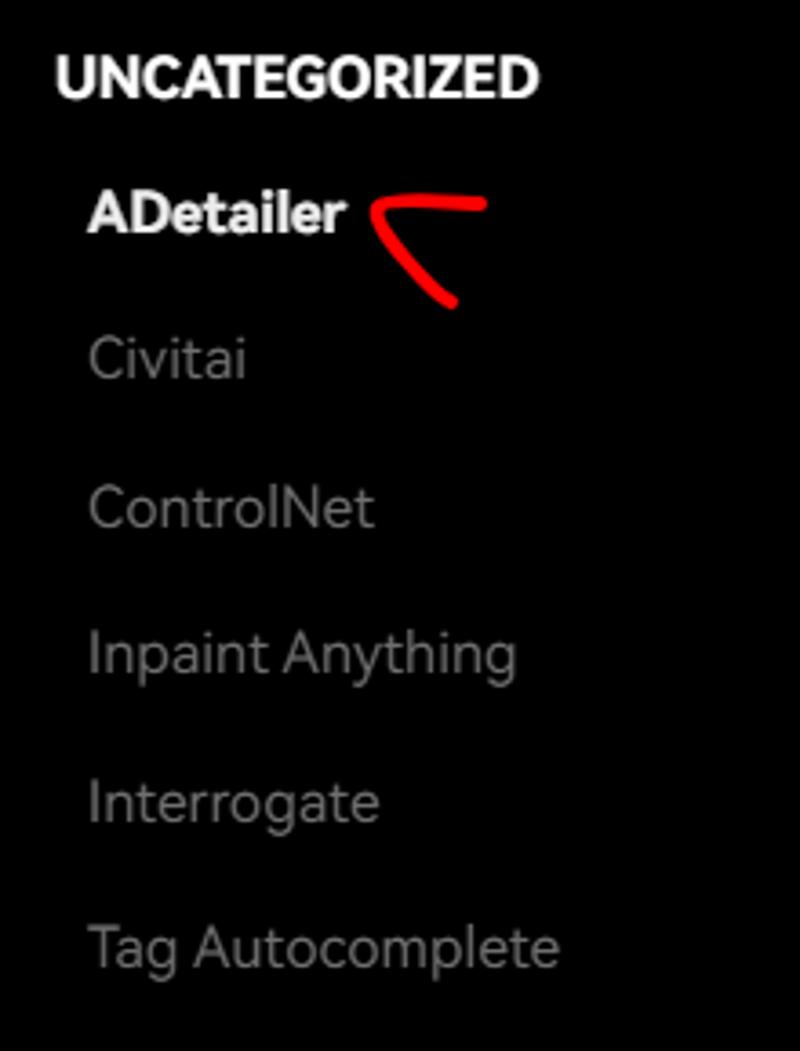
Scroll down until you find Adetailer on the left side
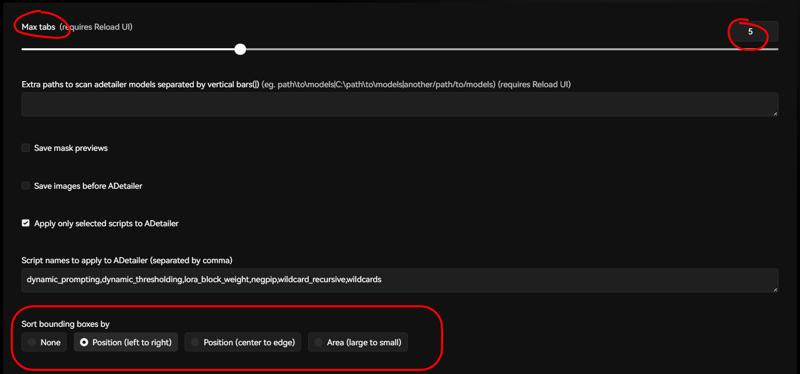
Set your max tabs to 5
Sort bounding boxes by Position (Left to Right)
Click Apply Settings and Reload UI


Step 3 - Using your Adetailer
Important
For this demonstration, I will be using these settings for my generation.
Model = meichidarkMix (Or any model that can generate with the rest of the settings)
Sampling method = Eular a
Schedule type = Automatic
Sampling steps = 30
Width and Height = 720x1120
CFG Scale = 8
Basic usage and test of Adetailer
It doesn't matter if you prefer using the n or s version of yolo it will work either way. I prefer using the s version for the higher quality but it has a slower generation.
Optional for those who know how to use it already.
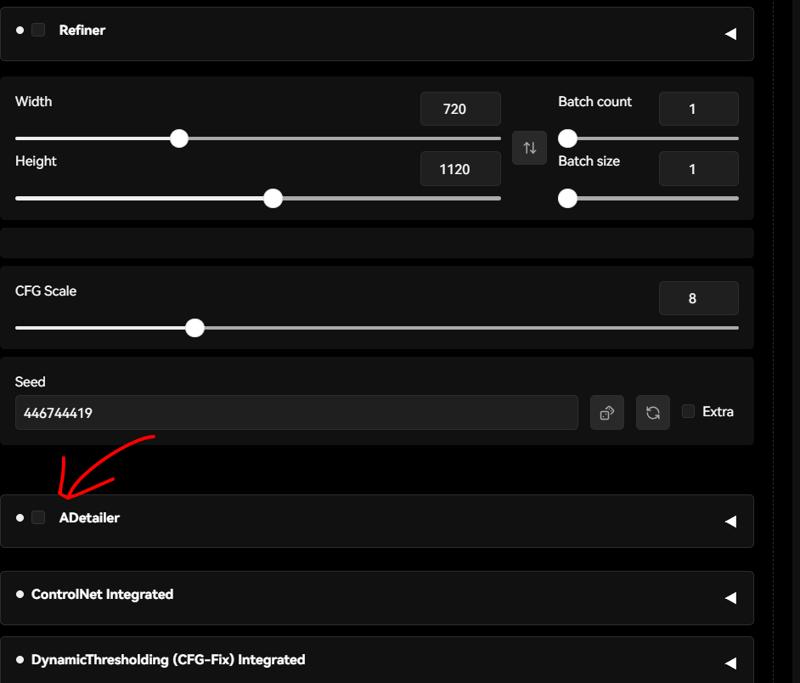
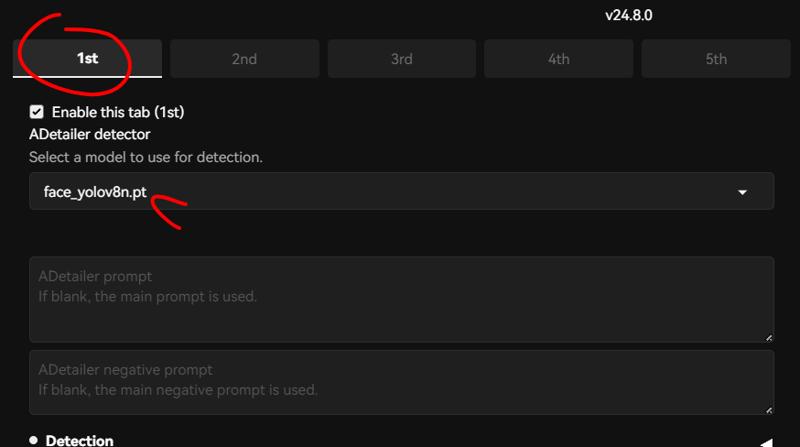
Scroll down on your Txt to Img tab and enable your Adetailer. Expand it and set the first two tabs from left to right face_yolo8n.pt and mediapipe_face_mesh_eyes_only.
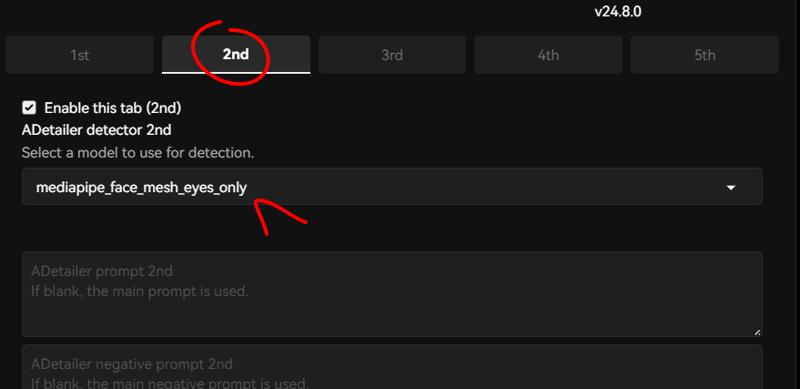
Now try to generate a simple image of your own.
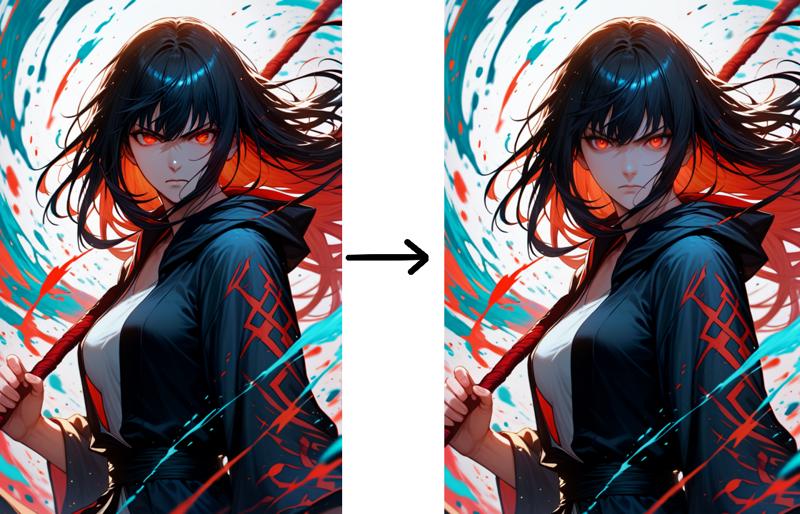
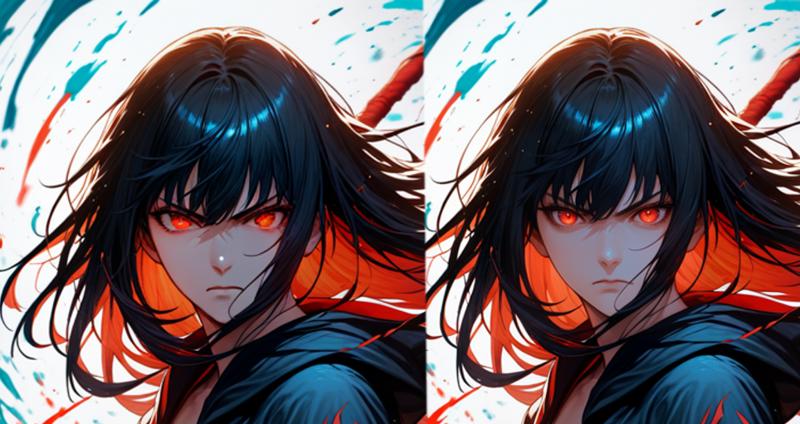
It should improve like this, simple right?
What is this option and what does it do?
Detection model confidence is how the AI identifies the subject they are looking for, with a 0.3 setting a blurry image is easier to identify and inpainted. A higher number limits how the AI identify the subjects but it also can focus on the main character instead of a background one.
Inpaint denoising strength is how the image you're generating differs from the original. A weight of 1 will generate a different image and 0 will not generate any differences.
The Method
We'll be using 4 tabs of Adetailer.
Set your Adetailer tabs from left to right to this:
person_yolov8n-seg.pt
person_yolov8n-seg.pt
face_yolo8n.pt
mediapipe_face_mesh_eyes_only
First tab - person_yolov8n-seg.pt
Expand Detection
Set your detection to 0.6 (I recommend 0.4 and above)
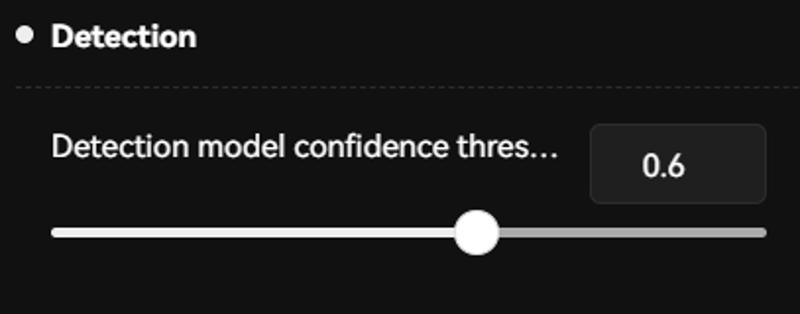
Expand Mask Preprocessing and Inpainting
Set Mask merge mode to Merge and Invert
Set Inpaint denoising strength to 0.3 (I recommend 0.3 or lower, higher will result in a too detailed background and may look unnatural with the rest of the image)
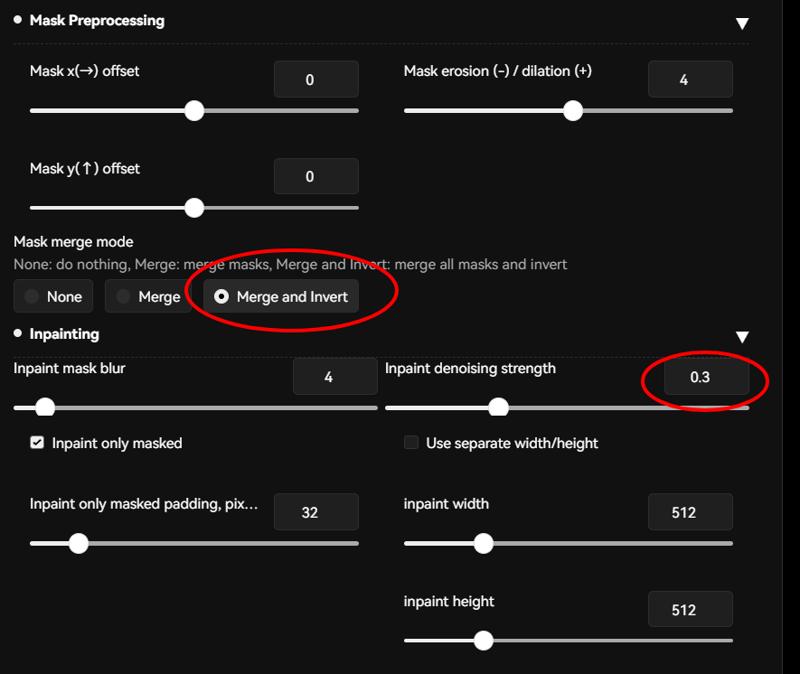
What does this do?
Instead of using the yolo world model, I find this to be much better, instead of inpainting the character it will instead inpaint the background by using the Merge and Invert option. I haven't extensively tested other methods since this one already works for me.
The first tab is used to enhance your background, if you have a blurry background and you want it to stay that way then turn off this tab to avoid making the background clearer.
Second tab - person_yolov8n-seg.pt
Expand Detection and Inpainting
Set Detection model confidence to 0.6 (Lower might result in it detecting not what you want but you can experiment from 0.4 and higher)
Set Inpaint denoising strength to 0.3 (I recommend 0.3 or lower to not over paint the details)
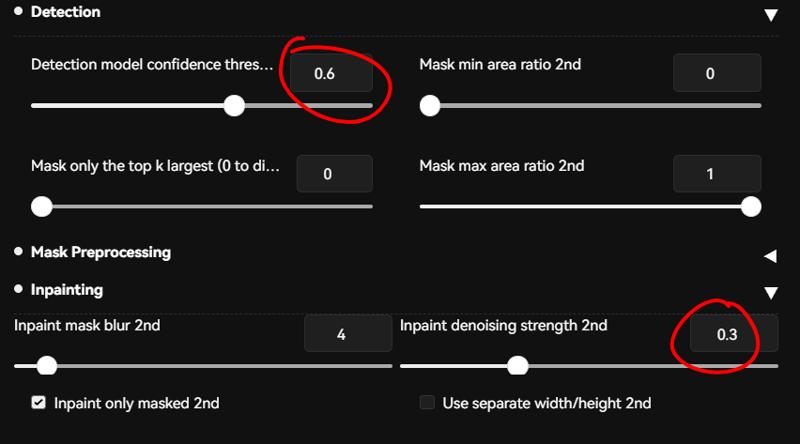
What does this do?
This tab will inpaint your whole character, but the face will not be as detailed.
Third tab- face_yolo8n.pt
Expand Detection and Inpainting
Set Detection model confidence to 0.6 (Lower might result in it detecting not what you want)
Set Inpaint denoising strength to 0.3 (I recommend 0.3 or lower to avoid visible square seams around the face)
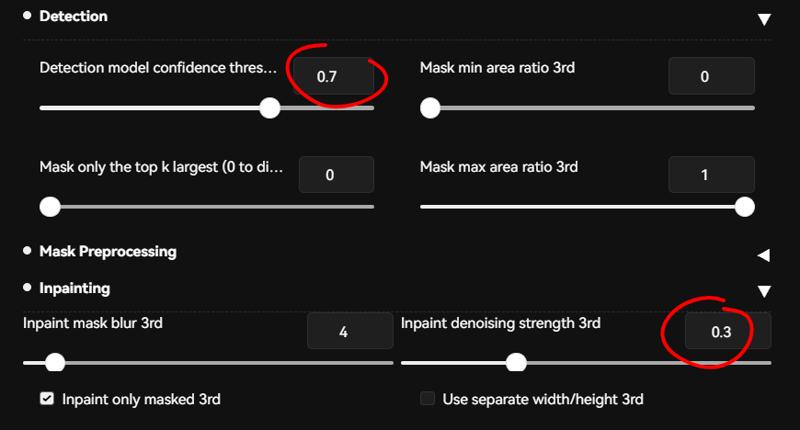
What does this do?
This tab will improve the face and add more details.
Fourth tab - mediapipe_face_mesh_eyes_only
Expand Detection and Inpainting
Set Detection model confidence to 0.6 (Lower might result in it detecting not what you want but if it fails to detect you can lower it to 0.3)
Set Inpaint denoising strength to Default 0.4 (You can experiment depending on how many details you want on your eyes, don't go above 0.4 or it will over inpaint.)
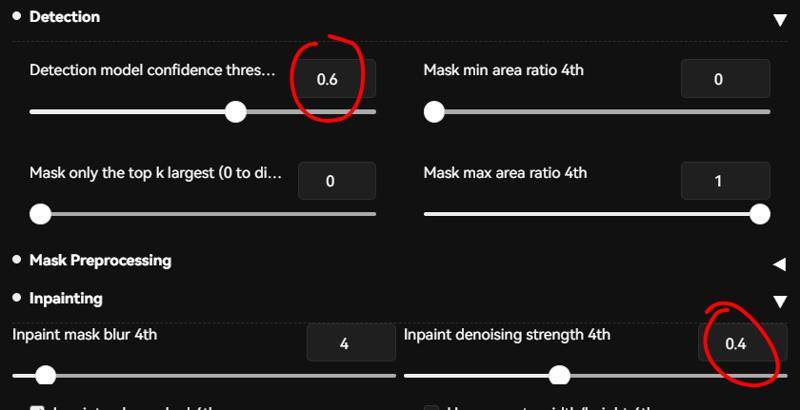
What does this do?
This tab will improve the eyes of your characters and the final step of Adetailer.
Step 4 - Generating your images
Important
Generated images with these settings might not result in a significant improvement, but they will improve nonetheless. Txt 2 Img will only provide an extra bit of details for your images. I find this method works best when you use it on Img 2 Img and upscaling the images.
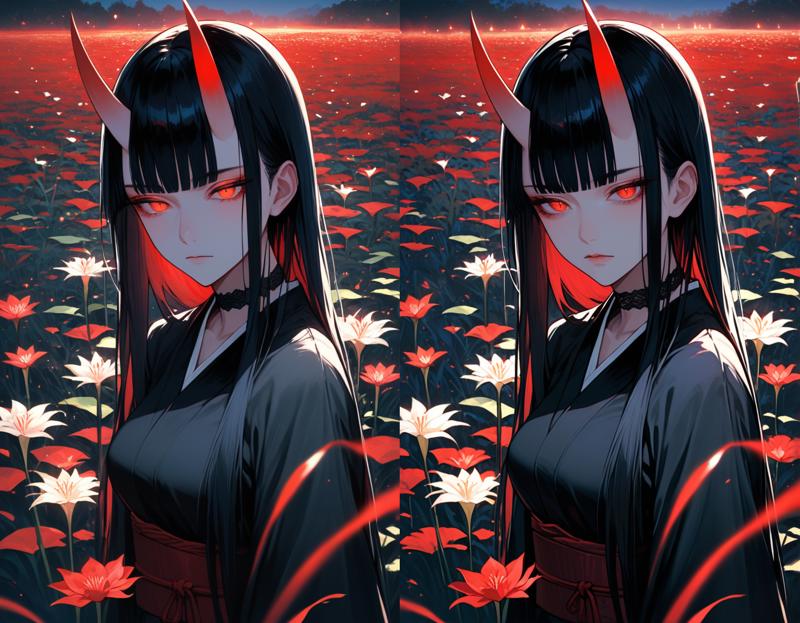
Hires. fix (Optional)
Using Hires. fix is a simple method to upscale your image and to see whether your generations are up to your preferences with this method.
Please follow my settings for a quick test.
If you're PC can't handle it then lower the Upscale by to 1.5 or 1.25
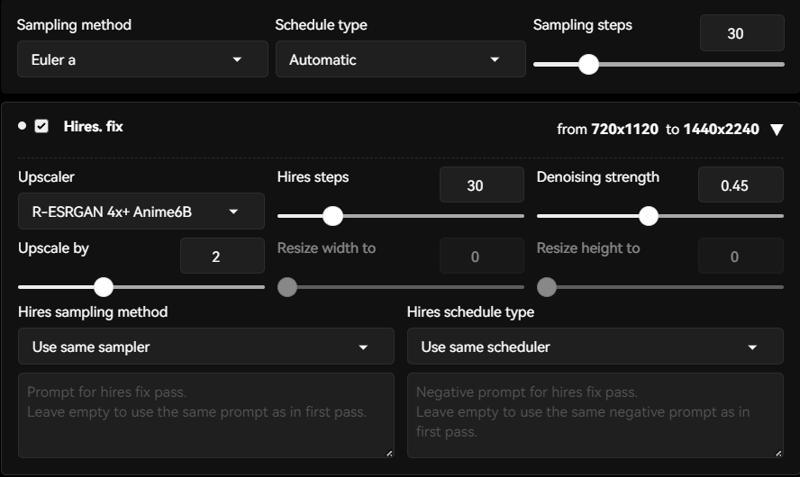
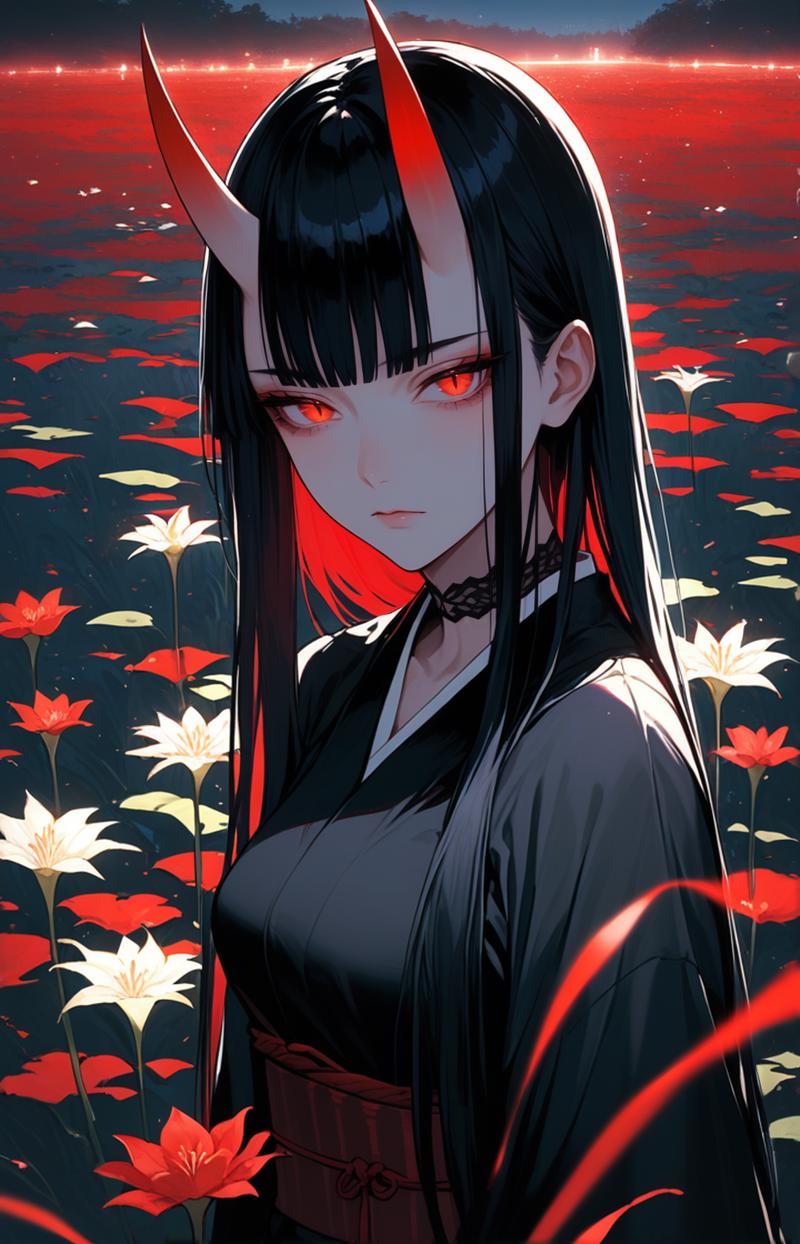
It should look better than without Hires. Fix
Things to watch out for when upscaling
Do not upscale by with too high of a value as it will distort the face and make the anatomy possibly broken in places. There is a higher chance for the image to distort the higher you get unless you are using Stable Diffusion Forge for the KohyaHR fix integrated which can help negate this problem.
Examples:
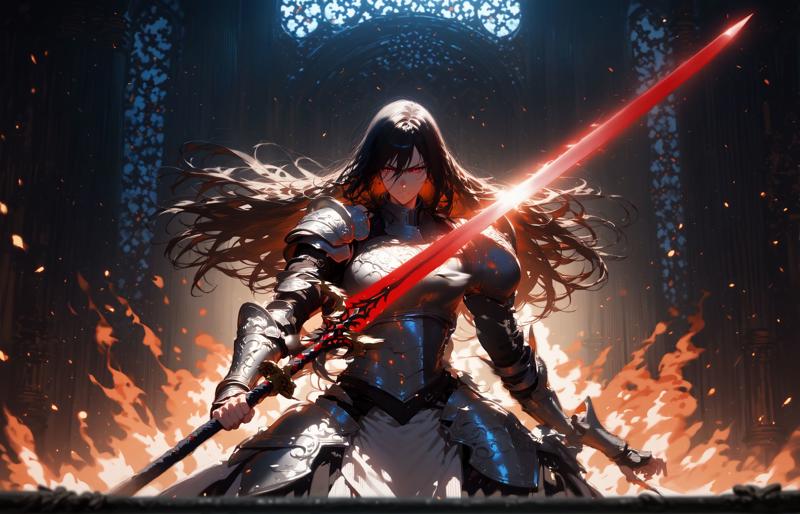
Terrible right?
Update - 19/08/2024
I found that using the prompt "hair between eyes" will result in the eye distance being wrong and cause minor distortions. For Txt2Img, using Hirex. fix seems to be fine but using Img2Img will cause distortions.
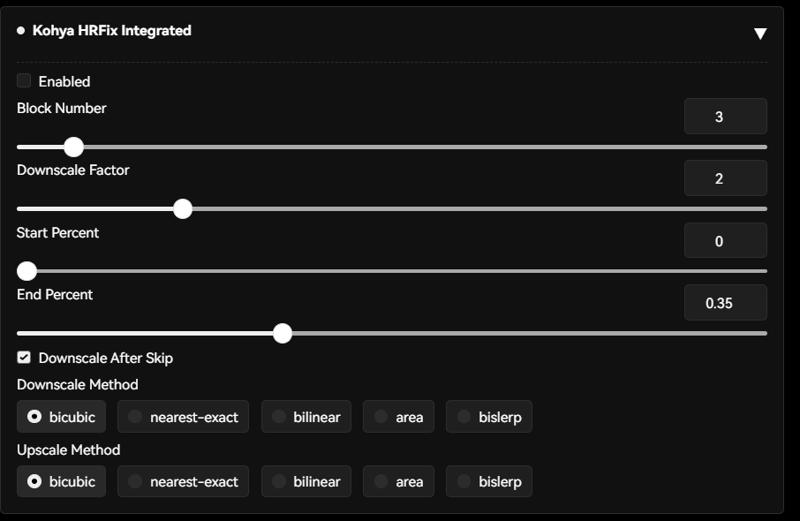
Possible fix for distorted anatomy - Forge user only
Enable the setting Kohya HRFix integrated and just leave everything to default, but you can change the Block Number between 3 to 5. This fix can be a hit or miss.
Step 5 - Upscaling your images with Img2Img
Now that you have your base image that you want to enhance this method will be the same as before but upscaling without the use of SD upscaler or Ultimate SD upscaler.
Send your image from Txt2Img to Img2Img.
You can use the same Adetailer settings as before or if you want to experiment then you can increase the denoising or detection.
Setting up
There are two types of resizing, with and without latent upscale.
Just resize is a safe option for upscaling up to 2 or above 2 as distortions are less likely to happen (I recommend Upscale by 1.5 for a more consistent and fast generation. If you use a higher Upscale by value, it is best to lower the Adetailer denoising for the first and second tab down to around 0.2 as it will get too detailed.)
Latent upscale is best used if you don't resize by more than 1.5 from your original image just remember not to go over as your image might result in distortions. Latent upscale is fickle and has a higher chance of failing so use what you prefer more.
Latent upscale also gives a good result when paired with the Adetailer method but with its own limitations.
Update
I recommend not using Latent Upscale, for more consistent results just use the Just Resize option as it is less likely to fail in generations.

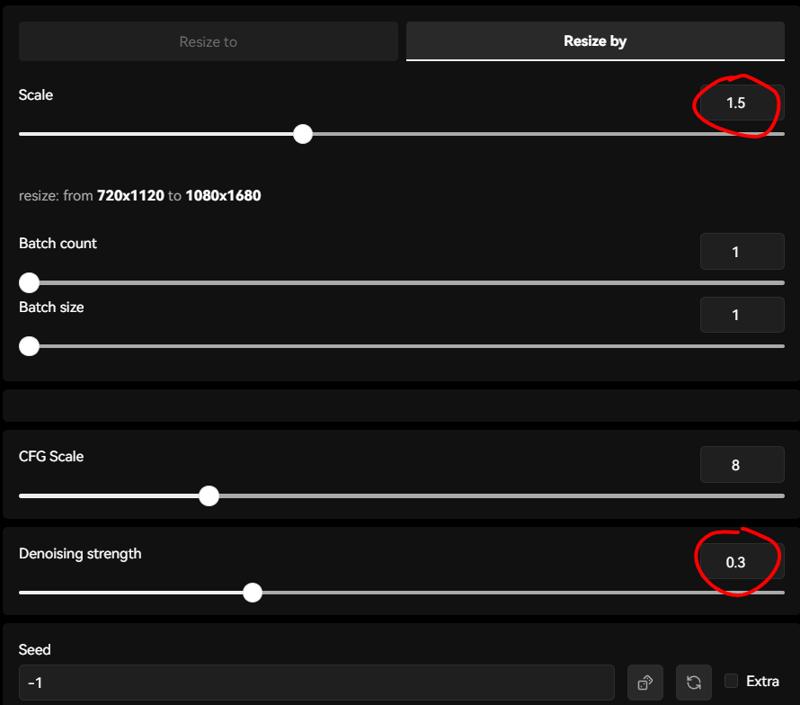
Important not to set your Denoising strength below 0.3 as it will result in weird blurry images if you're using latent upscale, you can try to lower it to 0.25 but the lower the setting the higher the chances for it to distort so be careful.
Examples:
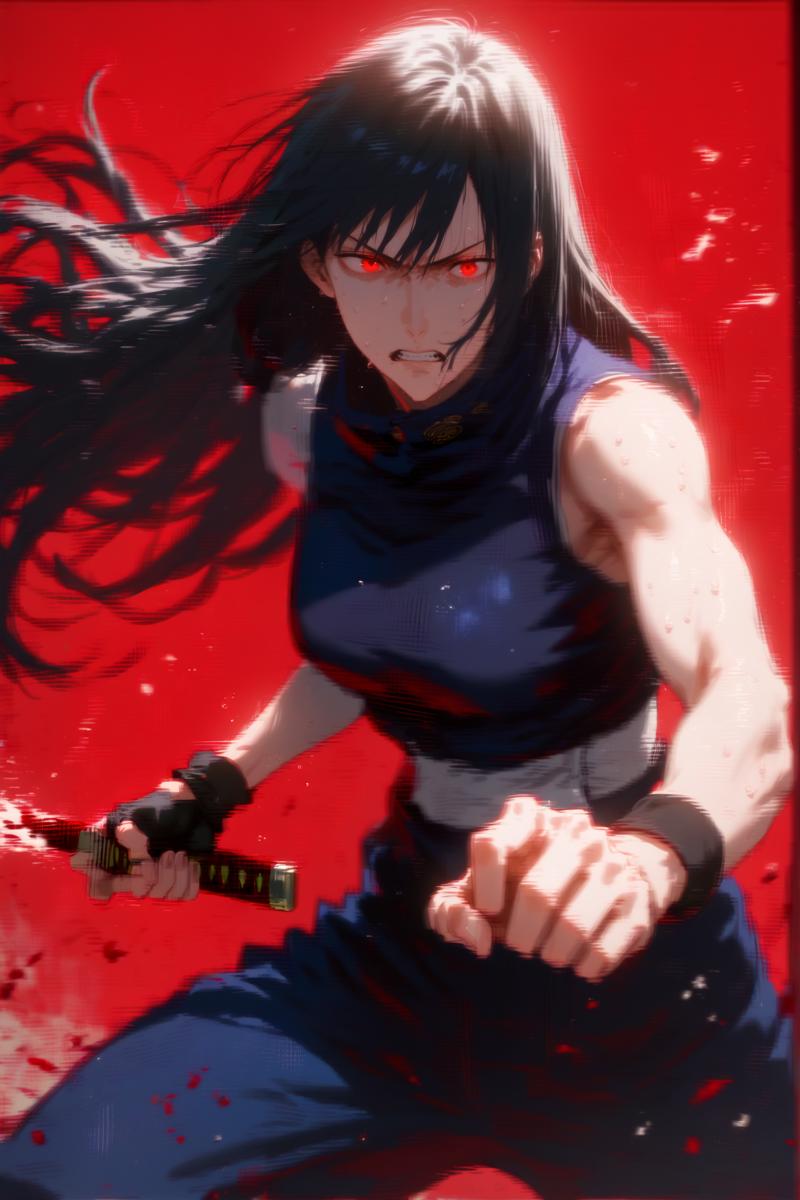
Experimenting with Denoising values
Examples:
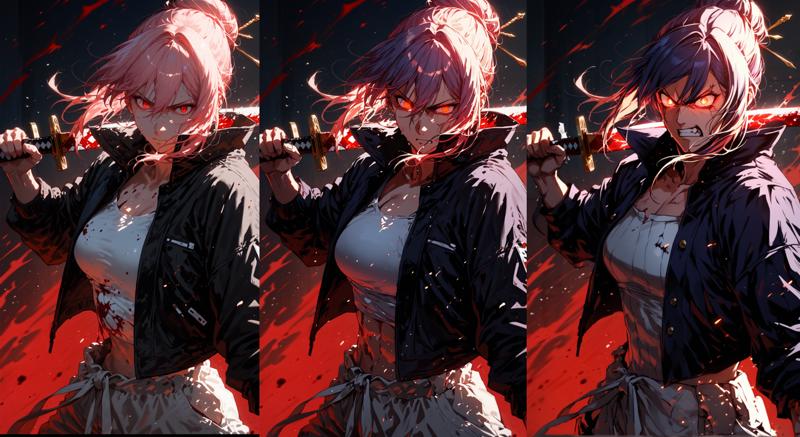
The higher the denoising values the more the image will change.
You can also experiment with your main prompt to achieve something different.
Now you are set to enhance your images.
My result
I increased the Denoising to 0.4 for the first and second tabs so the changes are more apparent.
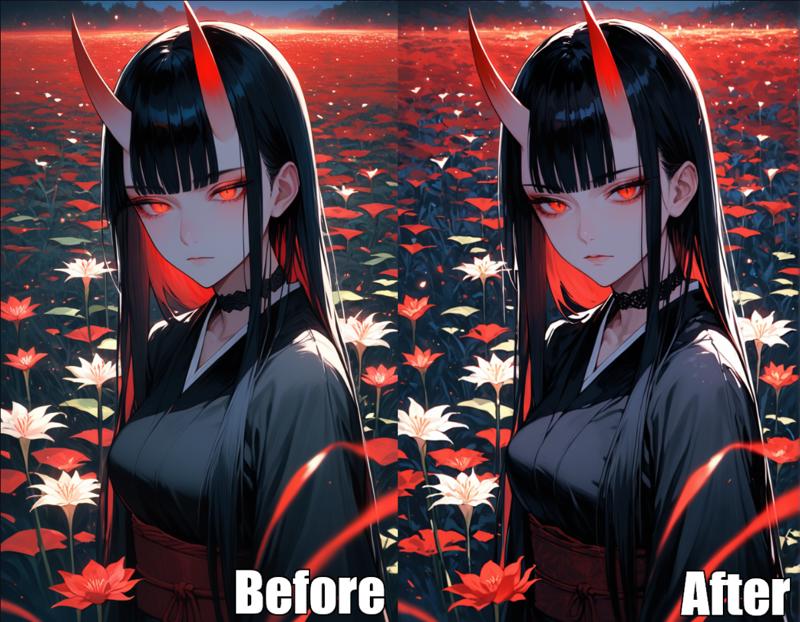
The background is more vibrant compared to the base image without any Adetailer and Upscaling. Using my method can be a hit or miss depending on the image you are working on, it is focused on adding details to a scene or make the blurry parts of your image more clearer. If you don't want to add any details for the background then you can deactivate the first tab of Adetailer.
Step Extra - Forge only
There is an extension that comes with forge which is FreeU Integrated and SelfAttentionGuidance Integrated.
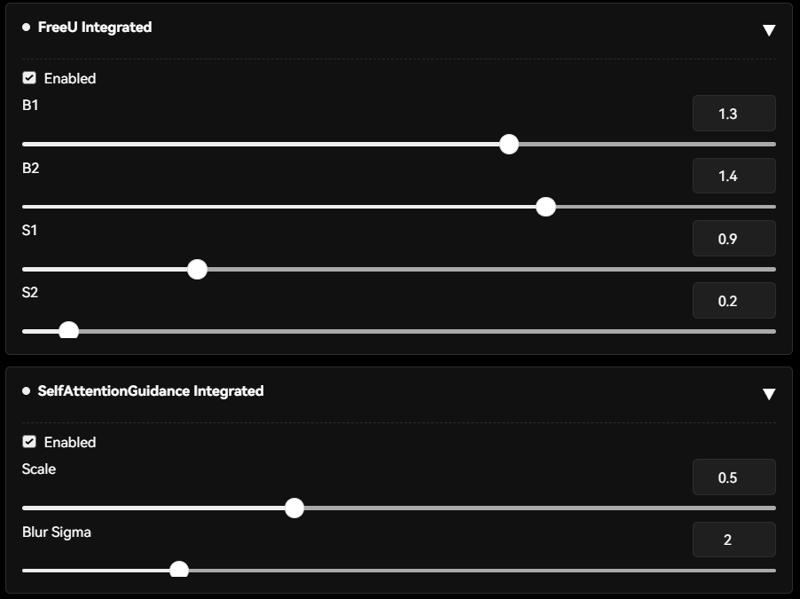
For FreeU settings follow these values if you use SDXL or Pony models.
B1 = 1.3
B2 = 1.4
S1 = 0.9
S2 = 0.2
For SD 1.5 users follow these values
B1: 1.4
B2: 1.6
S1: 0.9
S2: 0.2
What is this and what does it do?
From my understanding, these 2 extensions will help generate a more vibrant and better quality in theory, and in my experience, it does add more colors to the image.
FreeU should make your image much better and it doesn't cost you any performance theoretically.
SelfattentionGuidance is an extension that helps your generation follow your prompt better however, it does make your generation slower but it should help with generation quality.
Using Lora in tandem with Adetailer method
Using Loras can immensely help with your images, I often use Style Loras as it gives my image better lighting or an art style that I am looking for.
For beginners do know that using Loras puts a risk of limiting your model capabilities and depending on the model you are using it may not work well or at all. Sometimes your generations will get stricter the more Loras you are using.
Loras I used - Optional
My go-to for good and give more freedom in prompts are these three:
Do note that these Loras are NSFW based so if you're not comfortable then you can find your own Lora style, I use it for the style and lighting.
My result
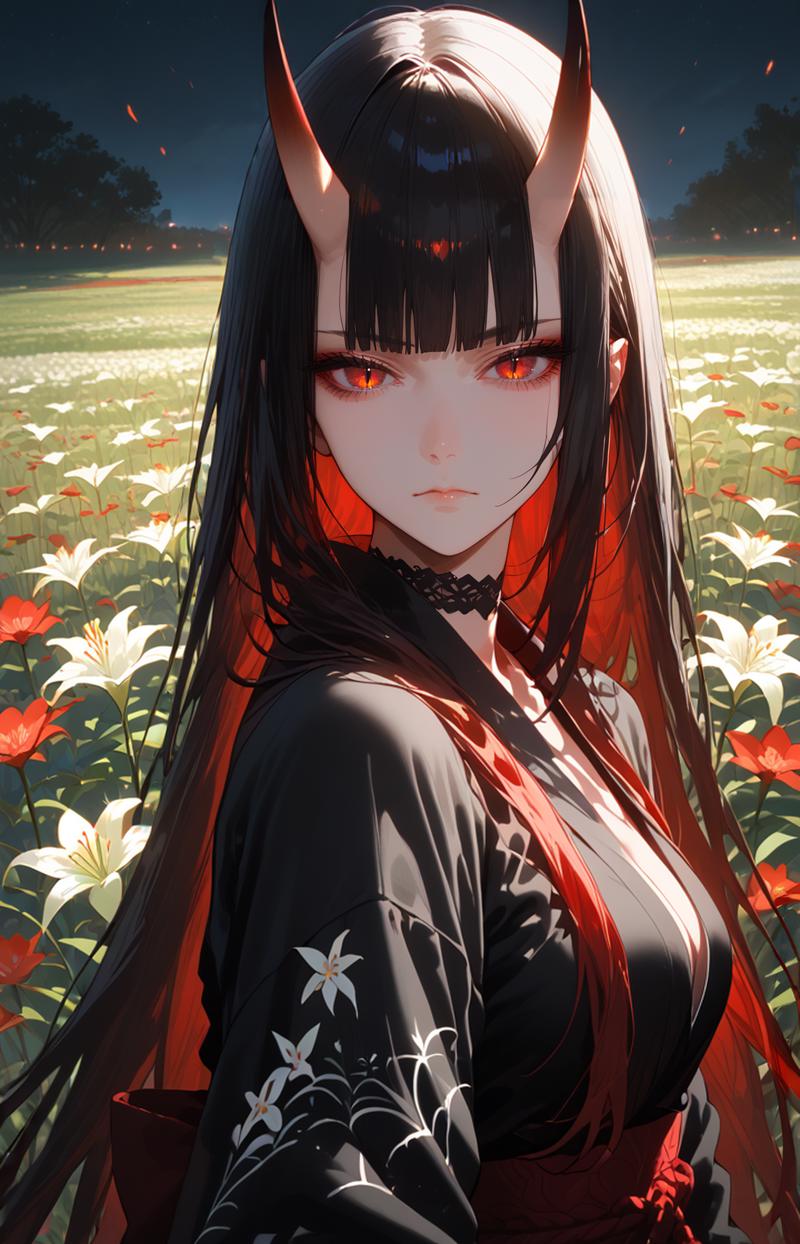
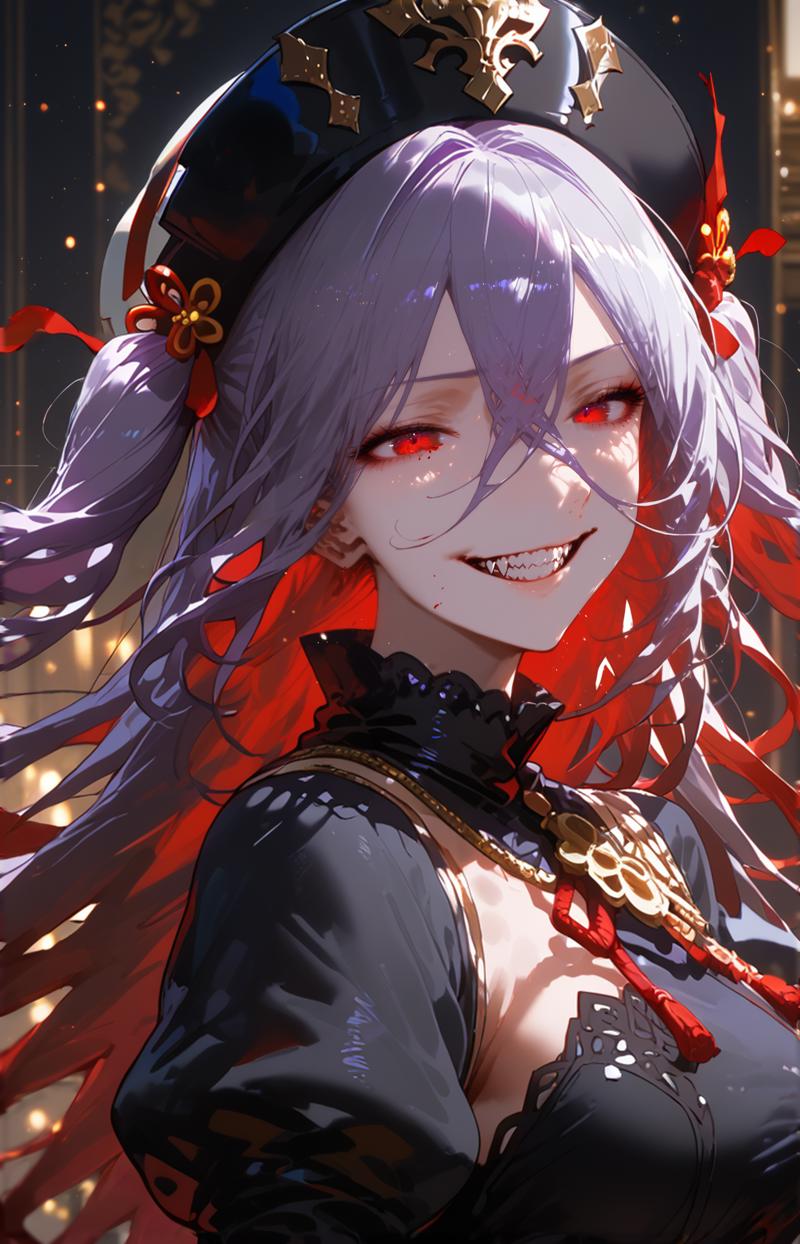
This image used the same prompts and setting with added Loras, Hires. fix, and Adetailer. Adding Loras can make your art more appealing depending on what styles you use, so I recommend experimenting with Loras and mixing and matching.
If you decide to use this method then the usual SD Upscaling or Ultimate SD Upscaler is not needed.
Update and Fixes
Update - 20/08/2024
Smaller eyes upscaling fix
If you're having a problem with characters having smaller eyes after upscaling with a value of 1.5 or 2, then this is a possible fix to it.
Example
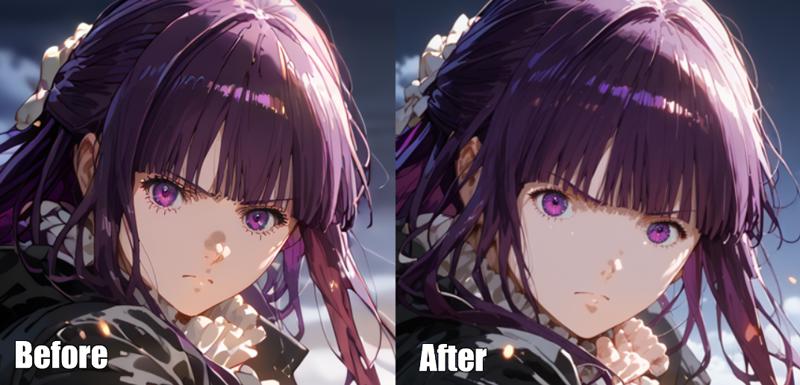
Possible fix
Go to your Adetailer and open the third tab or your face tab
Open the Inpainting options
Enable Use separate width/height
Set both values to 1000 or 1200 (Possible to adjust, but I tested that the max value will distort the face instead. At the 1400 value, the eyes start to become smaller again.)
Set your Inpaint mask blur to 30 (Possible to adjust)
Update - 19/09/2024
Make sure to also set your Eyes tab to the same value as your face, or your eyes will get distorted.
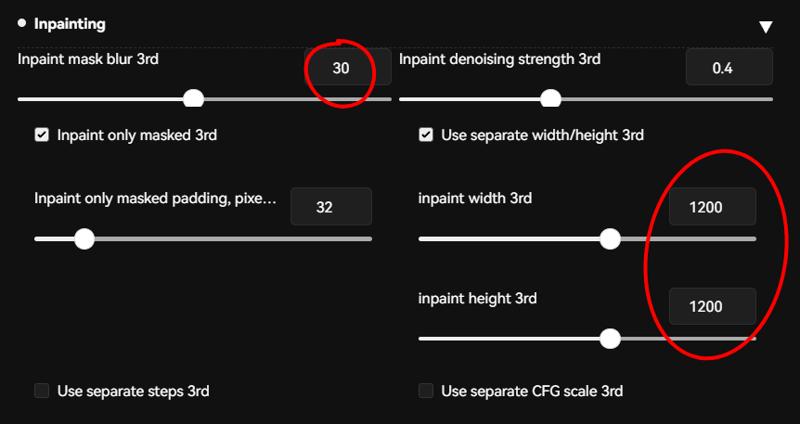
If you're using this setting then the Inpaint denoising strength can be increased to 0.4 without the risk of seams but I haven't tested it extensively.
My Result
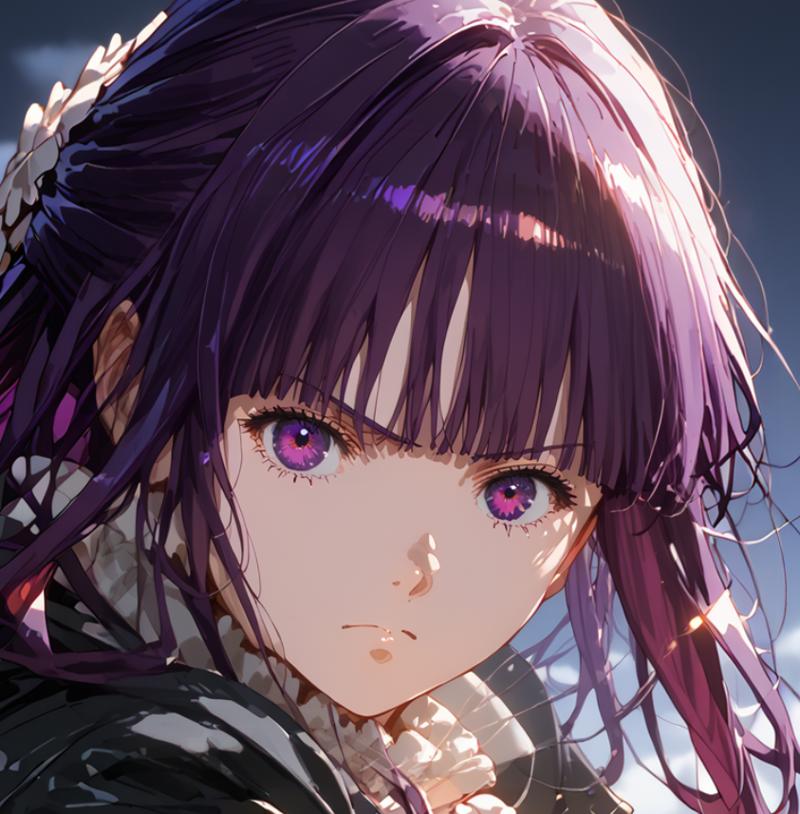
The seams may not be visible but if you look closely then there might be spots that don't align correctly but I doubt anyone would look so closely. The overall image should look good.
I tested with these settings
Face Tab
Inpaint denoising strength = 0.4 (Tip, if you decide to use 0.4 on the face tab, then it is best to raise the value for the body tab too so it will blend better.)
Inpaint mask blur = 30
Use separate width/height = 1200x1200
Eyes Tab
Inpaint denoising strength = 0.4
Inpaint mask blur = 4
Use separate width/height = 1200x1200
Afterwords and Credits
I've been doing AI generation for almost two years now since anythingv3 model came out but hasn't gotten active until recently on CivitAI although I joined CivitAI more than a year ago. So I would like to personally give my thanks to all the great creators that has made the resources for me to use and keep generating art that I love.
My personal thanks to these creators for their resources.
Model Creators
Lora Style Creators
Embeddings Creators
CivitAI
Thank you for making and hosting such a great website for AI enthusiasts.
My followers
Thanks for skyrocketing my follower numbers in just a few days, didn't expect one of my art to reach the front page that soon and raise my numbers so quickly. o7
Do give me feedback if you find this guide helpful to you or not. I'll keep updating and revising this article as I find better settings or ways to make generations consistent and break less.
If you find my guide to be helpful and are interested in supporting me then do please buy me a ko-fi here.
Now go and generate your art and become the one to be on the front page!
:p


![[Adetailer] Enhance any image with these few steps (Beginner/Intermediate)](https://image.civitai.com/xG1nkqKTMzGDvpLrqFT7WA/6c51ef3f-ff52-4332-8cf6-67b3c99fac78/width=1320/00024-2716457684.jpeg)