I hope everyone can understand this correctly, because my English is not perfect
In this guide I will give the step by step that I use to create a (Textual Inversion / embeddings) to recreate faces.
I recently started using Stable Diffusion, and from the very beginning I began to see how image generation times can be optimized. Which led me to read a lot and do a lot of tests based on each result I was seeing, from which the (Textual Inversion) that I uploaded came out.
Well I don't bore you anymore and I leave you the explanations of everything. I hope it helps you, and if you see that something could be improved please leave me a comment so I can do the necessary tests.
First we must look for good quality images (the highest possible resolution) of the person we want to generate.
For this example we are looking for images of McKayla Maroney.
(As always the images I use are public)
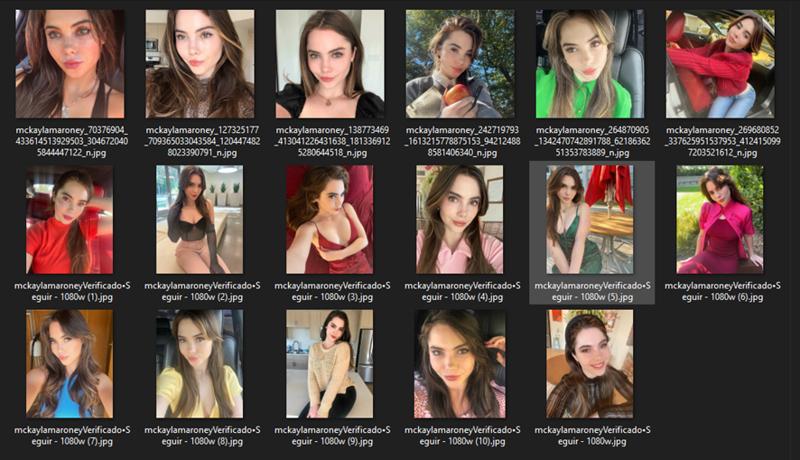
To obtain a good result, it is necessary to cut the images where only the face is visible (up to and including the shoulders at most) and in a resolution of 512x512 pixels.
Something like this would be the expected result.
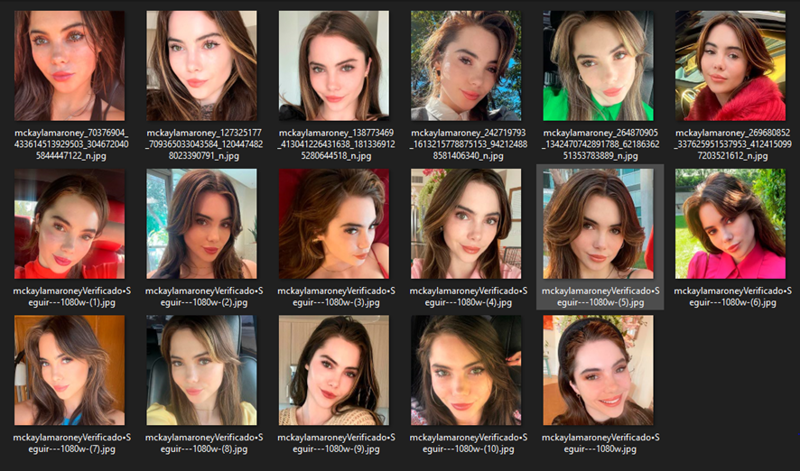
Once we have the set of images ready, we can start working on Automatic1111
First of all, we must download the checkpoint to be able to correctly process the images.
https://huggingface.co/runwayml/stable-diffusion-v1-5/tree/main

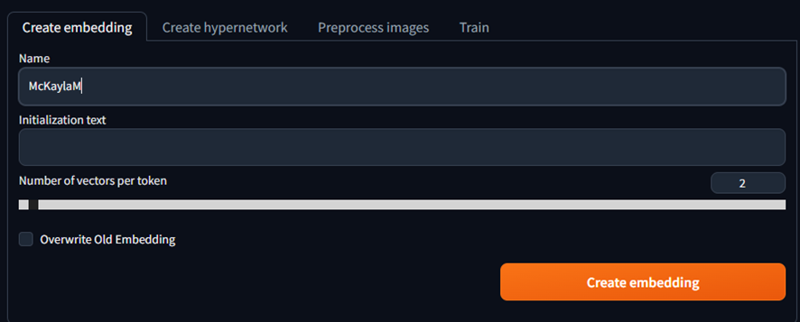
Inside the Train tab, we go to “Create embedding”

In the Name cell we put the name we want and leave the rest of the fields like this, then click the orange button.
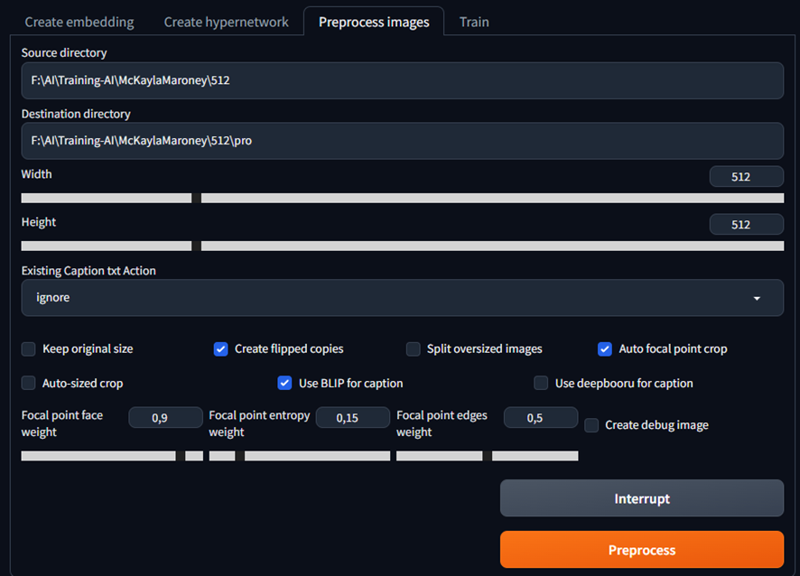
Then we are going to do an initial processing of the already cropped 512x512 images.
Copy exactly all the options (except both directories, which is where you need to put the directories where you saved your images) to generate the dataset.
You're going to get a result similar to this, where the images are "mirrored" horizontally. Along with a TXT with its description. It is almost never necessary, but if you want better results, you should check the TXT so that the description is as exact as possible with what the photo shows.
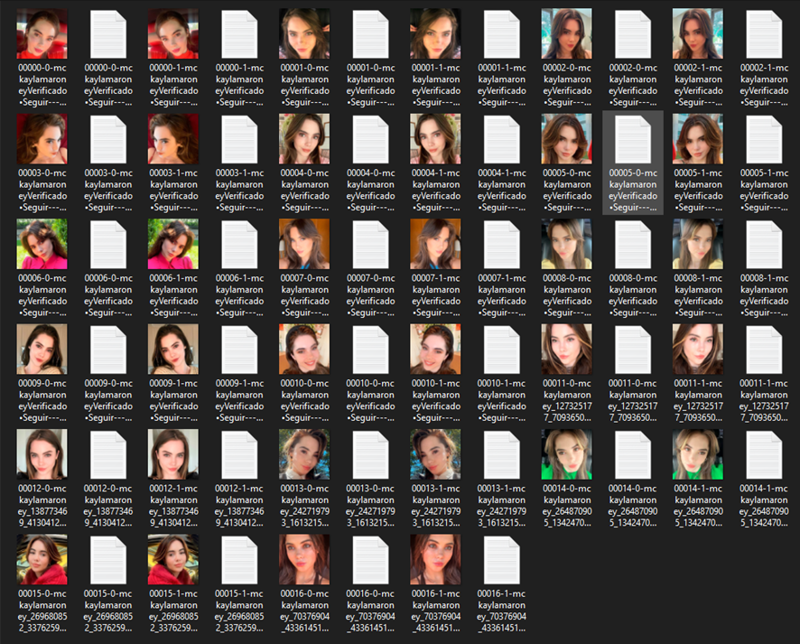
Next step we are going to start with the training.
Here the guide is much more detailed since it is where the values are really going to matter a lot to obtain a good result
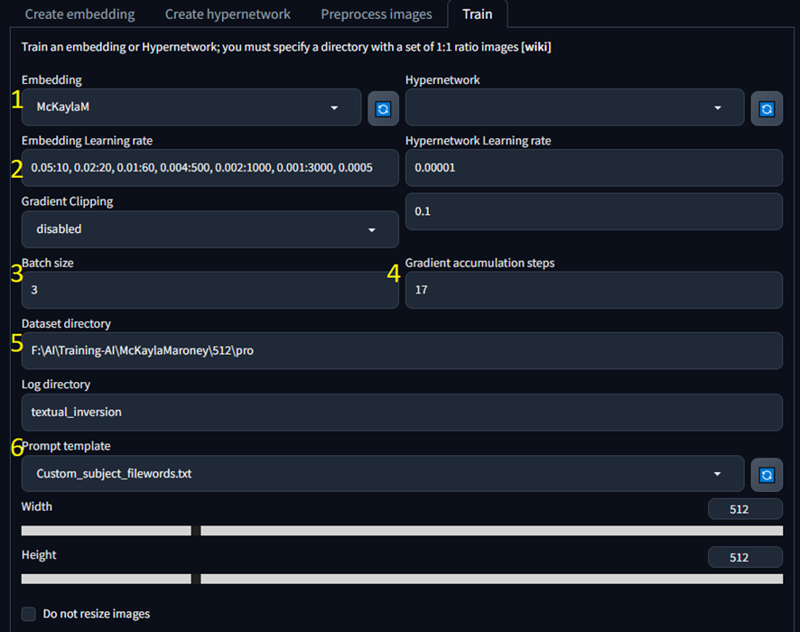
Select the embedding created with the name of the model
This is where most of the magic is, by default comes a value that doesn't really give the best results, I use this string of values:
0.05:10, 0.02:20, 0.01:60, 0.004:500, 0.002:1000, 0.001:3000, 0.0005
Using these values, what we are telling the training is that from step 1 to 10, the learning rate is going to be 0.05, then from 20 to 60 it is going to be 0.02, etc.This will give much more precision in the first few steps.
In this field, it works fine for me to use 2 or 3 as a value. This may vary depending on the GPU you are working with.
In this field I saw that everyone uses different values, what gave me very good results is to put the same amount of images that we have in the 512x512 folder already cut.
We put the address of the folder where we have the dataset.
Here is another of the changes that I think greatly affects the time of training.
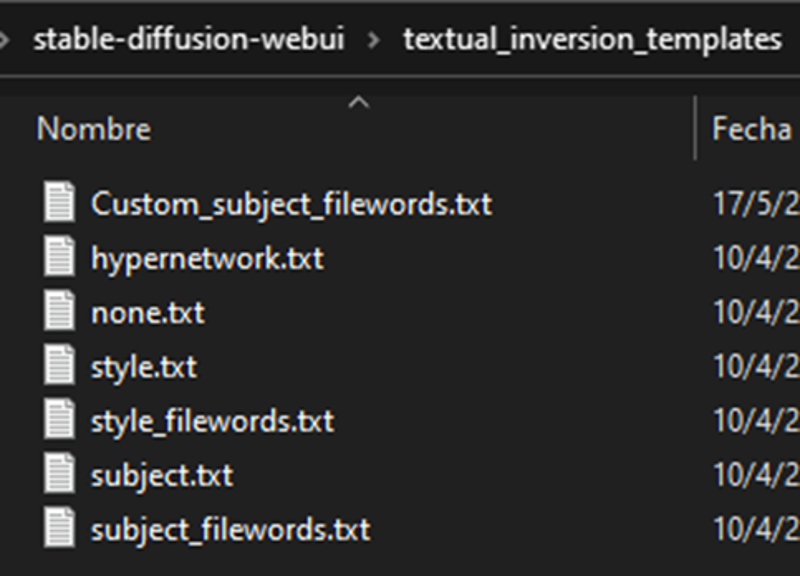
Inside the templates folder, we copy or create a new TXT, in my case I name it Custom_subject_filewords.txt, inside we only add this text
a photo of a [name], [filewords]

Number of steps that we are going to train, in this case I put 150 which I think will be more than enough.
10
10
Why do I put such a low value in trucks 8 and 9? The answer is simple, every 10 steps it will generate an embedding and we will be able to see if our model reaches the trained steps or if perhaps it has overtrained. Which is very common, because if you use too many steps you will get a worse result, or it just won't really be a big change.check the box
set the value to 0,1
deterministic
Click on Train Embedding and that's it now, all you have to do is wait… the magic is already done!
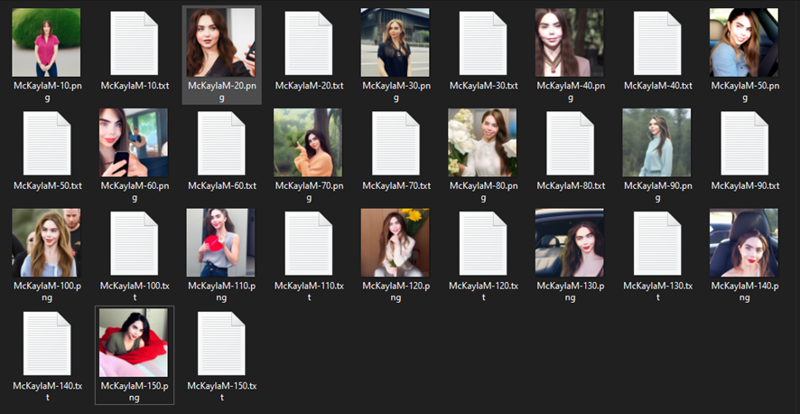
Inside the folder (stable-diffusion-webui\textual_inversion) folders will be created with dates and with the respective names of the embeddings created.
There we can see the examples of the trained steps and also the .pt to be able to carry out the tests in case the (Textual Inversion) has not turned out as we wanted.
As I was saying before, perhaps we train it with 150 steps, but the best sample is 120 steps.
Example of training every 10 steps.
I hope I have been as clear as possible and I really hope I can help those who asked me how I got good results with so few steps.
As always, you know that I like to receive your comments since I learn a lot from you.
If the guide helped you, could you support me by giving me a coffee? ♥
Thanks for reading me!

