中文
看完以下内容如果还有问题,国人qq群:924271291。discord在我C站个人首页,因为我没有固定邀请码。
这是一篇根据自己的使用经验,和使用偏好总结的经验
首先我是基于生成高分辨率图片使用模型(1536+),所以低分图如892x1152和1024x1024只用来构图
Sampler:
Euler: Euler对比度比EulerA色彩鲜艳一些,但没有EulerA柔和,需要Step较少,速度较快,个人比较喜欢用Euler做低分,看情况需要选择Euler或EulerA做高分,EulerA做高分的话,颜色和线条会柔和一些,颜色稍有减弱
EulerA:需要的Step数会比Euler高一些,不然细节会有所减少,最好30以上
dpmpp 2m sde:需要30以上的步数,构图效果也不错
个人建议:低分优先考虑构图,大概色彩,如果觉得对比度不够高分用Euler,对比度太高用EulerA来降低。我最常用的设置 低分:Euler 40 steps,高分:放大到长边2048,Euler 或 Euler A denoise 0.5, 20 steps.
Hires设置:
Steps:我一般20,可以适当降低,没具体试过差异
分辨率:半身图像一般1536就够了,全身像一般2048,如果变形严重且靠denoise难以修复我会适当降低,如1700,1800,随意
denoise:我一般是0.5,看低分图需要修改的程度,比如少了脚趾,0.5修不好就0.6,如果原图脚趾是5根,修完了变6根甚至7根,降低denoise到0.4或者降低分辨率,0.4以下的出图效果开始会慢慢减弱。我很少使用0.4以下的数值。
提示词:
我常用的是score_5-9,较低的score可以减少欧美感,如直接去掉score或者使用5-7,如果使用的提示词导致欧美感太重实在板不过来,建议使用score_anime
最近偏好加上masterpiece, top quality, best quality,可以增加清晰度,选择性增加colorful。有可能会影响构图,不要盲目添加,试用几次你就知道怎么回事了
负面词我喜欢使用 ((simple background), white background), 个人建议最好加上 white background,不然有时会有种过曝的感觉,不过也看个人偏好了
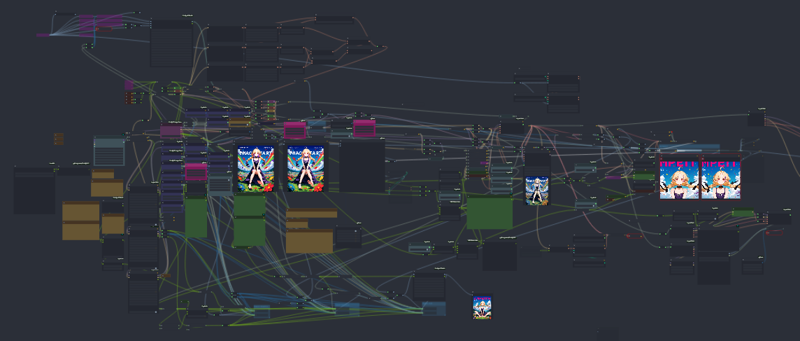
最后说一下个人出图流程吧,这是我的workflow

输入提示词,生成4xBatch 低分图。
通过ImageFromBatch node选择一张图,根据LongerSide放大图片,进入高分Sampler
如果高分图片不满意的话,更换高分seed重新生成细节到满意为止,如果细节难以修正,更换LongerSide或者denoise,sampler等参数继续尝试
在高分时,一定程度上修改提示词可以帮你完善图片,因为通常使用0.5或以上的denoise,所以大部分修改能够得到支持
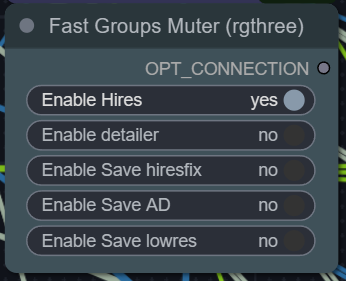
根据高分图片考虑是否需要facedetailer以及detailer要做1次还是2次,一些手绘风格的图片如果盲目使用facedetailer可能会显得不和谐(面部过于清晰)
保存图片
ComfyUI最好的地方在我看来就是可以分步进行,不会每次尝试高分时都要重新生成一次低分图,而且可以更换高分seed来反复生成不同的高分图,facedetailer也可以如此重复生成。

ENGLISH with ChatGPT
If you still have questions after reading this, join the Discord is linked on my Civitai homepage since I don't have a permanent invitation code.
This is an article summarizing my personal experience and preferences.
First, I use the model primarily for generating high-resolution images (1536+), so low-resolution images like 892x1152 and 1024x1024 are only used for composition.
Sampler:
Euler: Euler has more vibrant colors compared to EulerA, but it's less soft. It requires fewer steps and is faster. Personally, I like using Euler for low-res images, and depending on the situation, I may choose either Euler or EulerA for high-res. If I use EulerA for high-res, the colors and lines tend to be softer, with slightly reduced saturation.
EulerA: Requires more steps than Euler; otherwise, details will be lacking. Ideally, the step count should be over 30.
dpmpp 2m sde: Needs 30+ steps and produces good composition.
Personal Suggestion: For low-res images, prioritize composition and general color scheme. If the contrast is not high enough, use Euler for high-res; if the contrast is too high, use EulerA to soften it.
My most frequently used settings:
Low resolution: Euler, 40 steps
High resolution: Upscale to a long side of 2048, Euler or Euler A, denoise 0.5, 20 steps.
Hires Settings:
Steps: I usually set it to 20, though it can be lowered. I haven't tested the differences extensively.
Resolution: For half-body images, 1536 resolution is generally sufficient. For full-body images, 2048 is ideal. If there's severe distortion that can't be easily fixed with denoising, I may lower it to 1700 or 1800, depending on the situation.
Denoise: I usually set it to 0.5, adjusting based on the extent of necessary modifications to the low-res image. For example, if a foot is missing toes and 0.5 doesn’t fix it, I’ll raise it to 0.6. However, if the original foot has five toes and after denoising it turns into six or even seven toes, I'll reduce the denoise value to 0.4 or lower the resolution. Denoise values below 0.4 will start to weaken the image quality. I rarely use values below 0.4.
Prompts:
What I commonly use is score_5-9. Lower scores can reduce the Western-style feel, such as directly removing the score or using 5-7. If the prompts make the image feel too Western and it's hard to adjust, I recommend using score_anime.
Recently, I've preferred adding masterpiece, top quality, best quality, which can enhance sharpness. You can also optionally add colorful, though it might affect the composition. Don’t add it blindly; after a few tries, you’ll get the hang of it.
For negative prompts, I like using ((simple background), white background). I personally recommend including white background, as not doing so can sometimes result in an overexposed look, but this also depends on personal preference.
Finally, here is my image generation workflow:

Input the prompt and generate 4x batch low-res images.
Select one image using the ImageFromBatch node and enlarge the image according to the LongerSide, then move to high-res sampling.
If the high-res image is unsatisfactory, change the high-res seed and regenerate the details until you're satisfied. If details are hard to fix, adjust the LongerSide, denoise, sampler, or other parameters and try again.
While working on the high-res image, modifying the prompt can help improve the image to some extent. Since I usually use 0.5 or higher denoise, most modifications are supported.
Depending on the high-res image, consider whether to use Facedetailer and how many times (1 or 2). For certain hand-drawn styles, using Facedetailer blindly may make the face look overly sharp and unnatural.
Save the image.
The best part about ComfyUI, in my opinion, is that you can work step by step. You don't need to regenerate the low-res image every time you try high-res, and you can repeatedly change the high-res seed to generate different high-res images. Facedetailer can also be used repeatedly to regenerate results.


