

What is Style Transfer in AI?
Style transfer in AI allows you to apply the artistic style of one image to another. For instance, imagine a photo of a city skyline transformed to resemble Van Gogh's "Starry Night," adopting its signature swirls and vibrant colors. AI blends the content of your photo with the unique features of the painting, creating an entirely new, visually striking image.
In this guide, we will explain some basic ideas behind this method and show you how to do it yourself in ComfyUI. We'll be transforming a dancing video of a human into a dancing noodle dish.
Big fat special shout out to the original creator of this concept, the talented James Gerde! Please check out his incredible work here
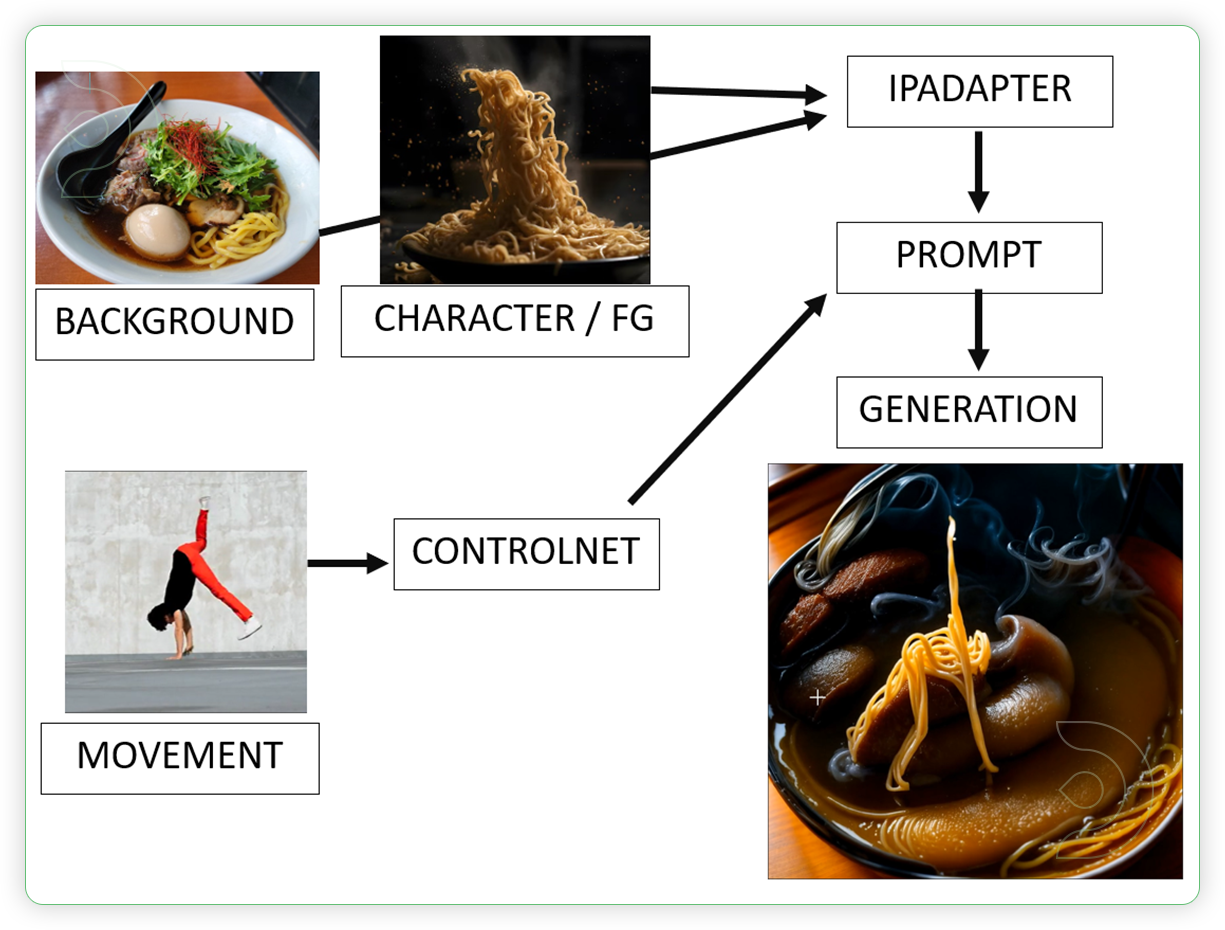
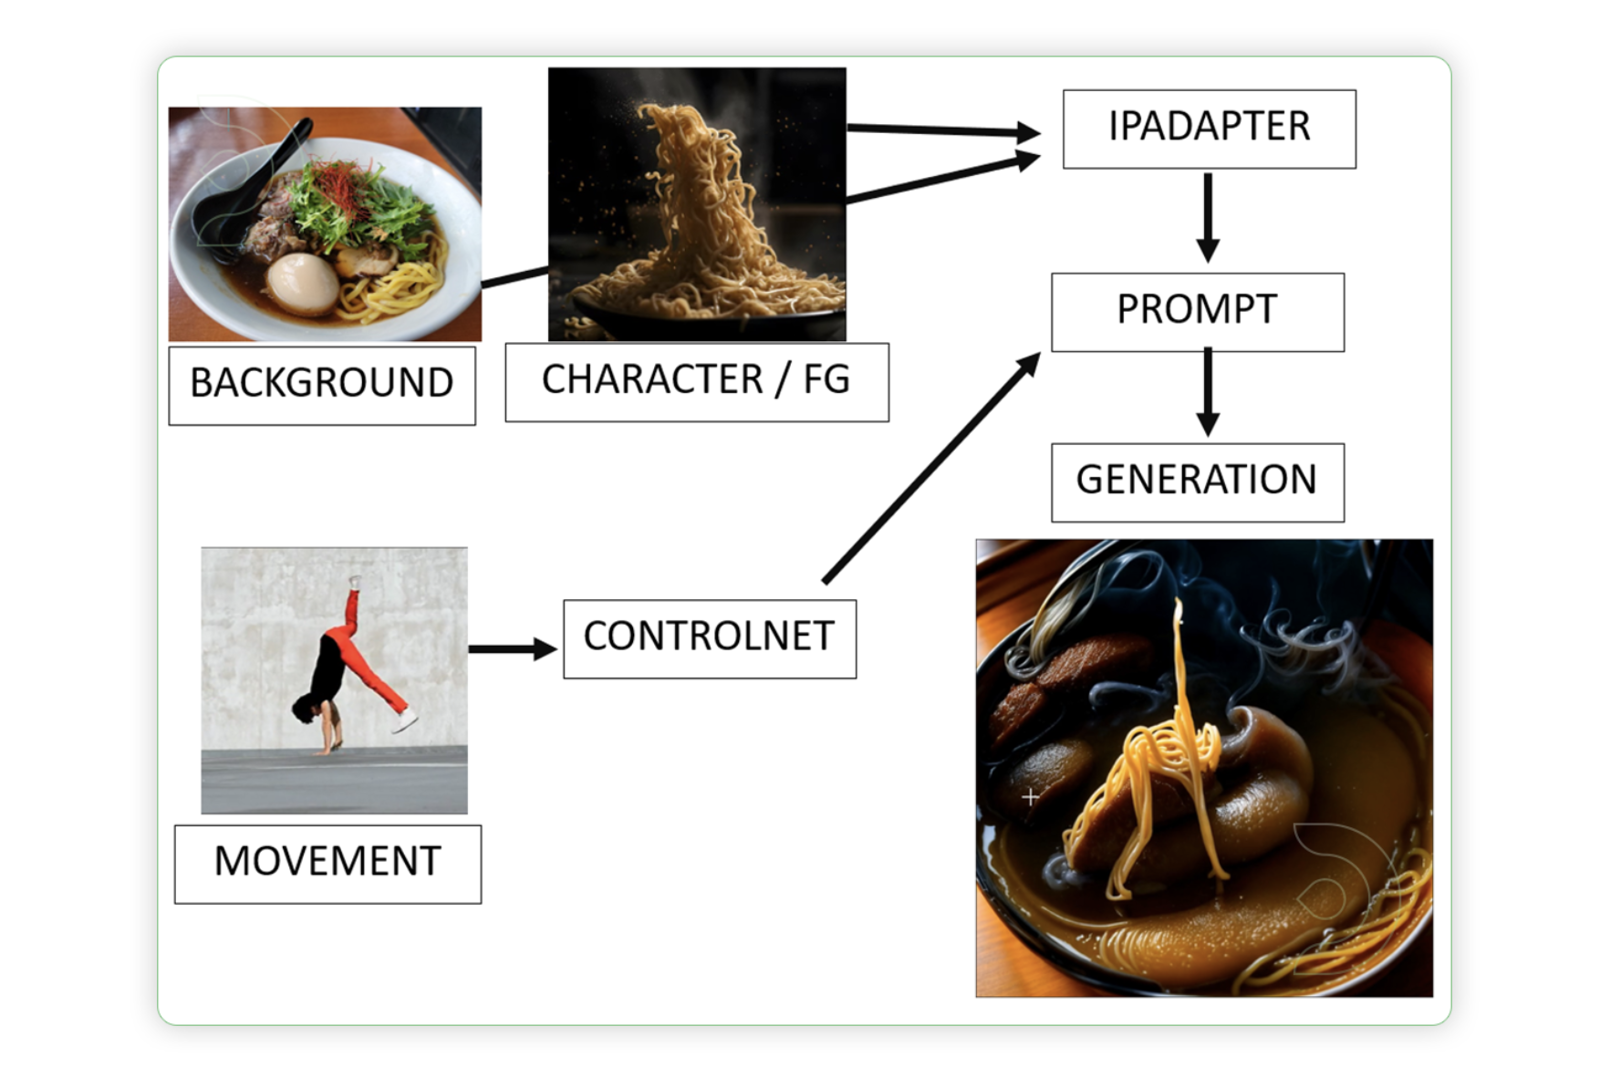
The purpose of style transfer is to generate a new image that has both the semantic content of a content image and the style of a reference style image.
Why use ComfyUI?
User-Friendly Workflow Sharing: Download workflows with preset settings so you can get straight to work.
Creative Applications: Ideal for artists, designers and marketers who want to create unique visuals and engaging content.
Democratized Creativity: ComfyUI uses powerful open source AI, allowing anyone to create stunning, style-rich images and videos quickly.
One-Time Setup
Step 1: Load the ComfyUI workflow into ThinkDiffusion
Transform Videos with AI with Dance
Download the workflow and drag & drop or 'Load' it into your ComfyUI window, whether locally or on ThinkDiffusion. If you're using ThinkDiffusion, use the ComfyUI machine. It's necessary to use at minimum the Turbo 24gb machine, but we do recommend the Ultra 48gb machine.
Step 2: Install Custom Nodes
If there are red nodes in the workflow, it means that the workflow lacks the certain required nodes. Install the custom nodes in order for the workflow to work.
Go to ComfyUI Manager > Click Install Missing Custom Nodes
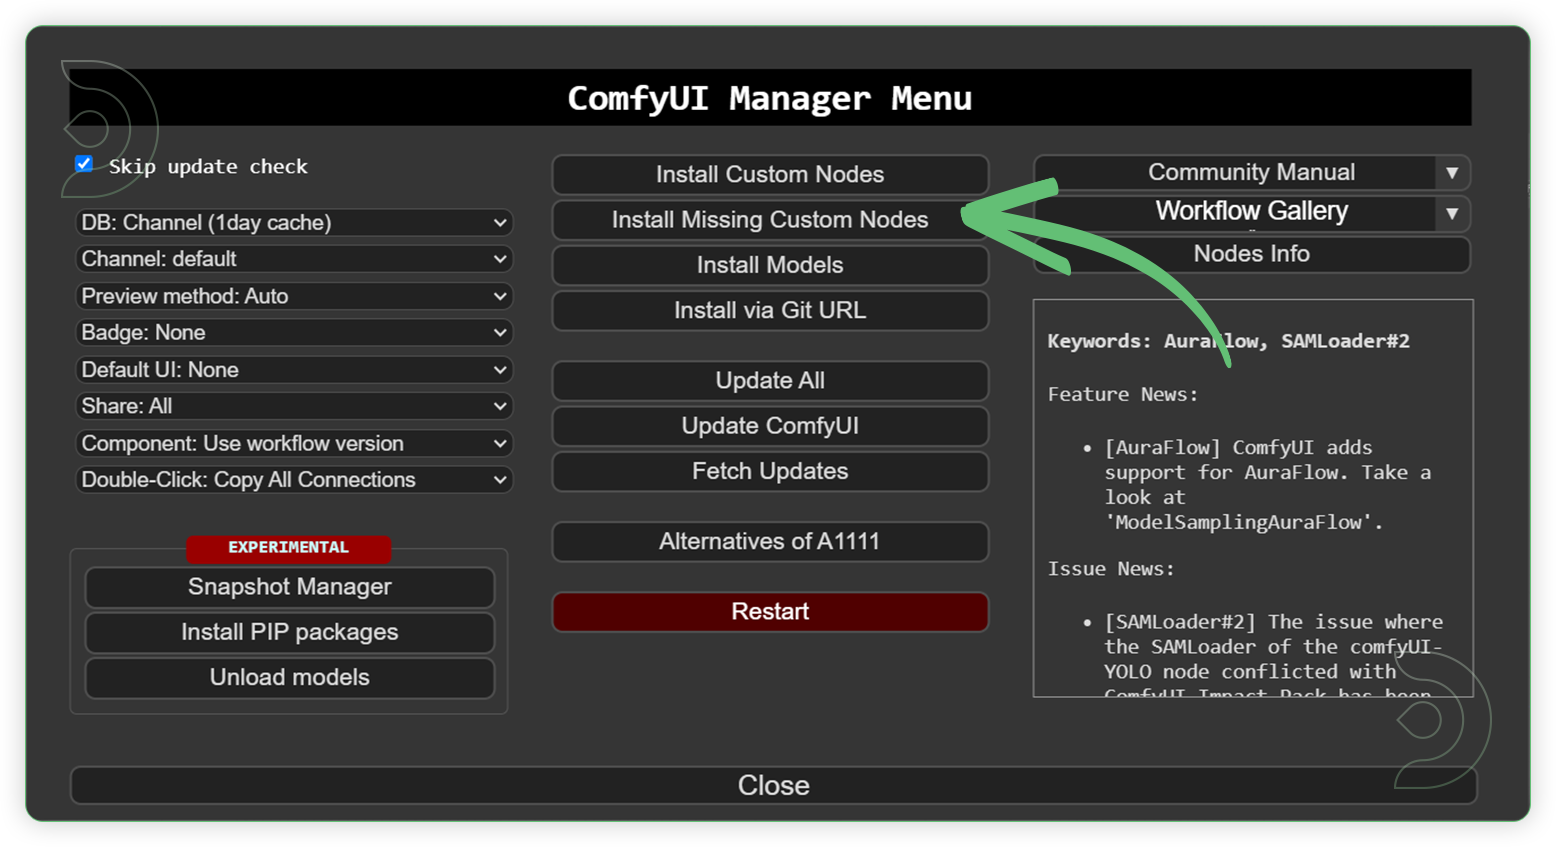
Check the list below if there's a list of custom nodes that needs to be installed and click the install.
💡
If you prefer the installation using the Git URL, you can search for them on Google and include Github.
Step 3: Install Models
Download the recommended models (see list below) using the ComfyUI manager and go to Install models. Refresh or restart the machine after the files have downloaded.
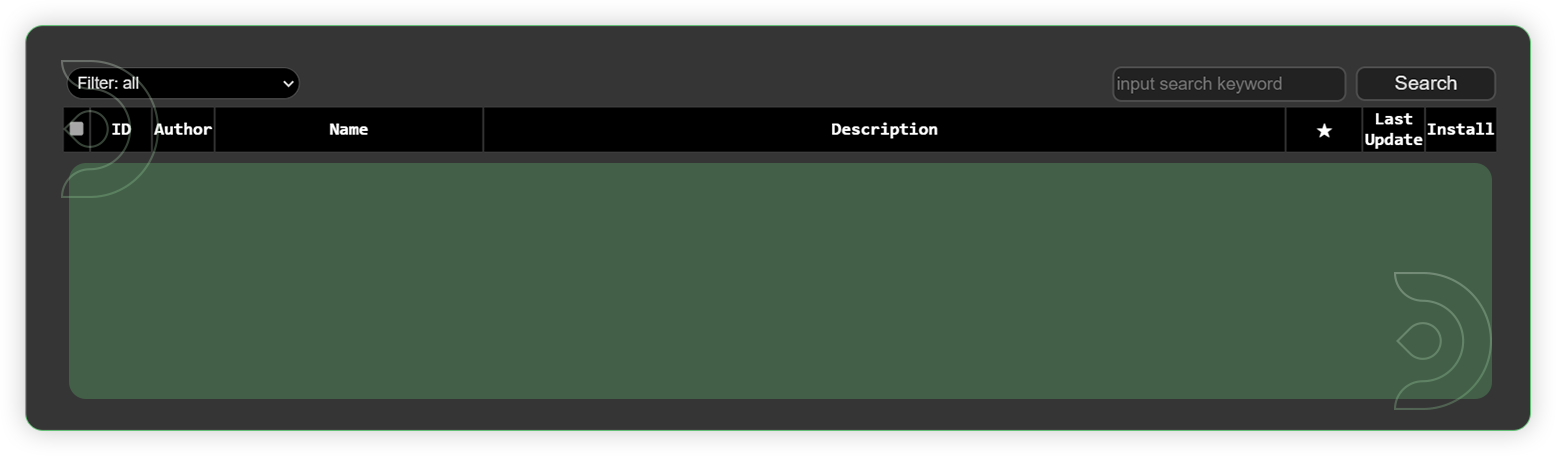
Go to ComfyUI Manager > Click Install Models
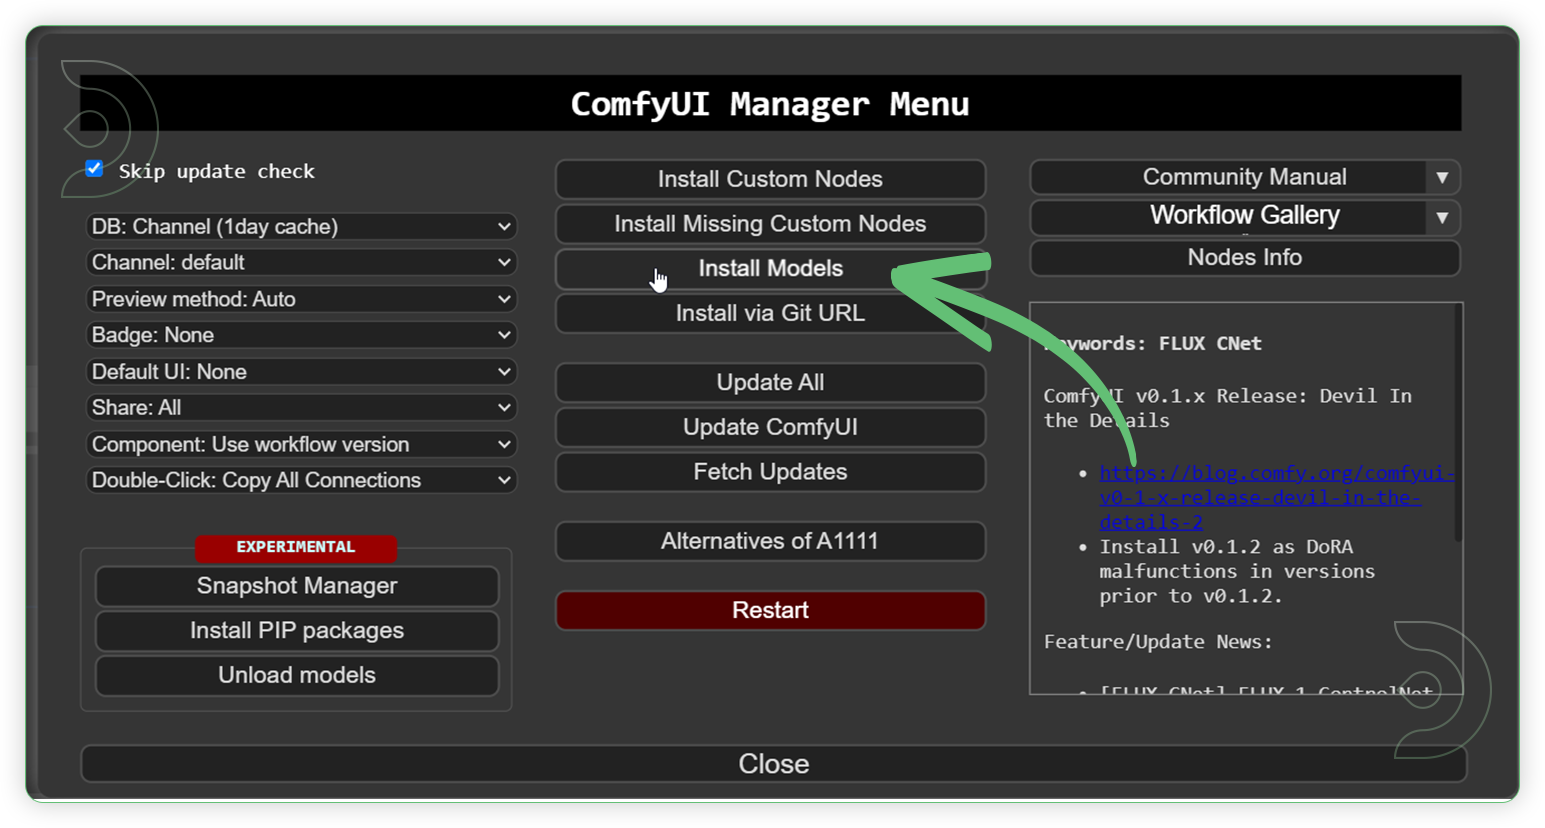
When you find the exact model that you're looking for, click install and make sure to press refresh when you are finished.

Model Path Source
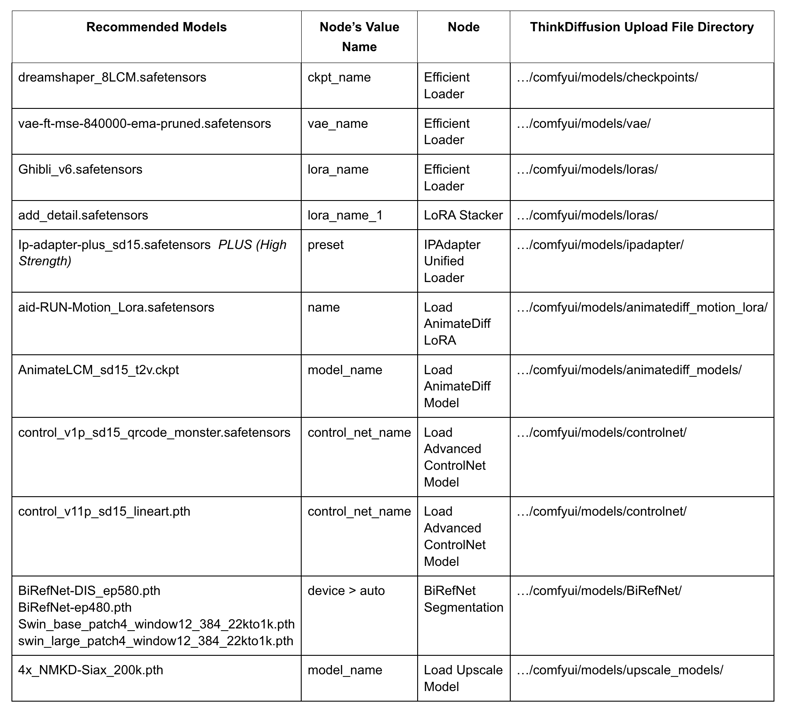
The easier way to install the models, is to 'Copy Path' from the table below and paste the URL into ThinkDiffusion MyFiles using the 'upload' option. Use the 'Guide Table' to find the directory for each model.

Guide Table for Upload
Tips
💡
Refresh or restart the machine after uploading the files in ThinkDiffusion My Files.
💡
If you are getting an error message CLIP Vision Model not found: /ComfyUI/models/clip_vision folder, CLIP-ViT-H-14-laion2B-s32B-b79K.safetensors you can download another, like CLIP-ViT-bigG-14-laion2B-39B-b160k.safetensors - make sure to reselect the new model in the dropdown.
💡
If you are getting an error message IPAdapter model not found: You are likely missing the IPAdapter model. In ComfyUI Manager Menu click Install Models - Search for ip-adapter_sd15_vit-G.safetensors and click Install.
💡
You can upload models by copying the link address of download button/icon from Civitai or Huggingface and paste into the Upload section of ThinkDiffusion My Files using the copied URL.
If you prefer to upload from your Google Drive, follow the instructions here UPLOAD HELP
Step 4: Run the workflow
Now that the hard work is out of the way, let's get creative. You need to follow the steps from top to bottom. The workflow is a one-click process after everything has been set up.
💡
You can use the workflow for Low VRAM / RAM if you need test a style transfer into the image, which has a fast generation. Otherwise, go for the main workflow if you have a high specs machine or using Ultra mode
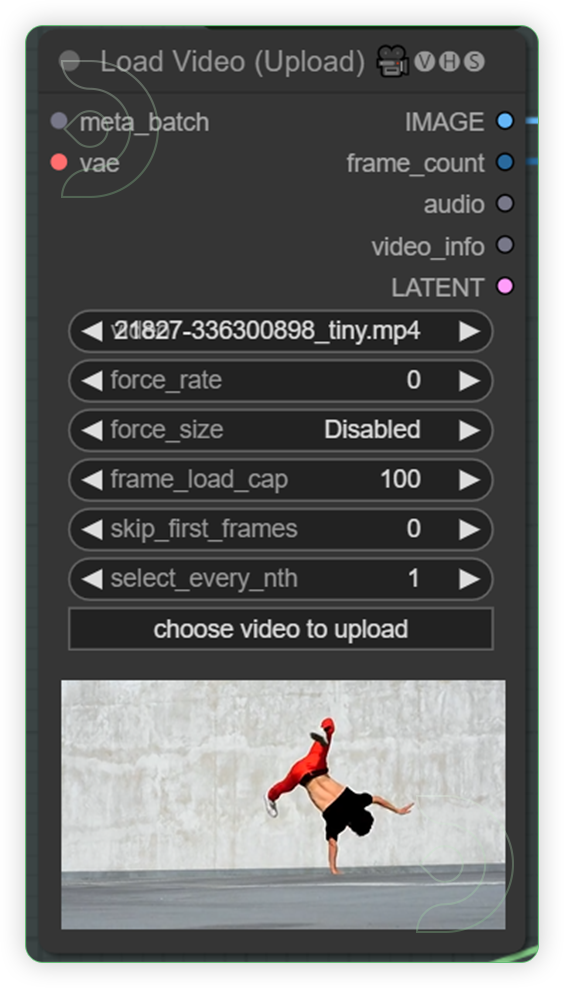
StepsDescription / ImpactDefault / Recommended ValuesRequired ChangeLoad a Dance Video or Dance MovementUpload a video which shows a dance style or body movement. It will create a video mask using this video. Set your desired limit for frame_load_cap. Default is 0.
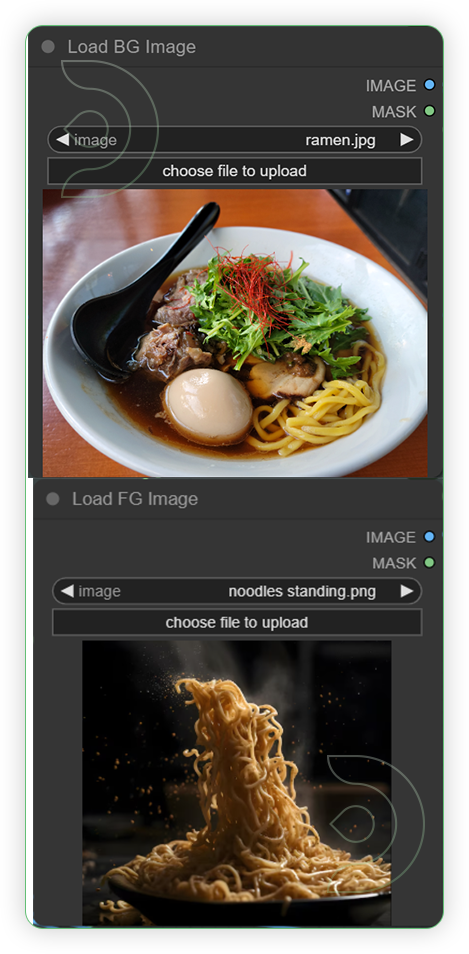
YESLoad a 1 image for the background and 1 image for the foreground.The Load Image node can be used to to load an image. Images can be uploaded by starting the file dialog or by dropping an image onto the node. Once the image has been uploaded they can be selected inside the node. I needs 2 images; 1 for background and 1 for the subject or character.
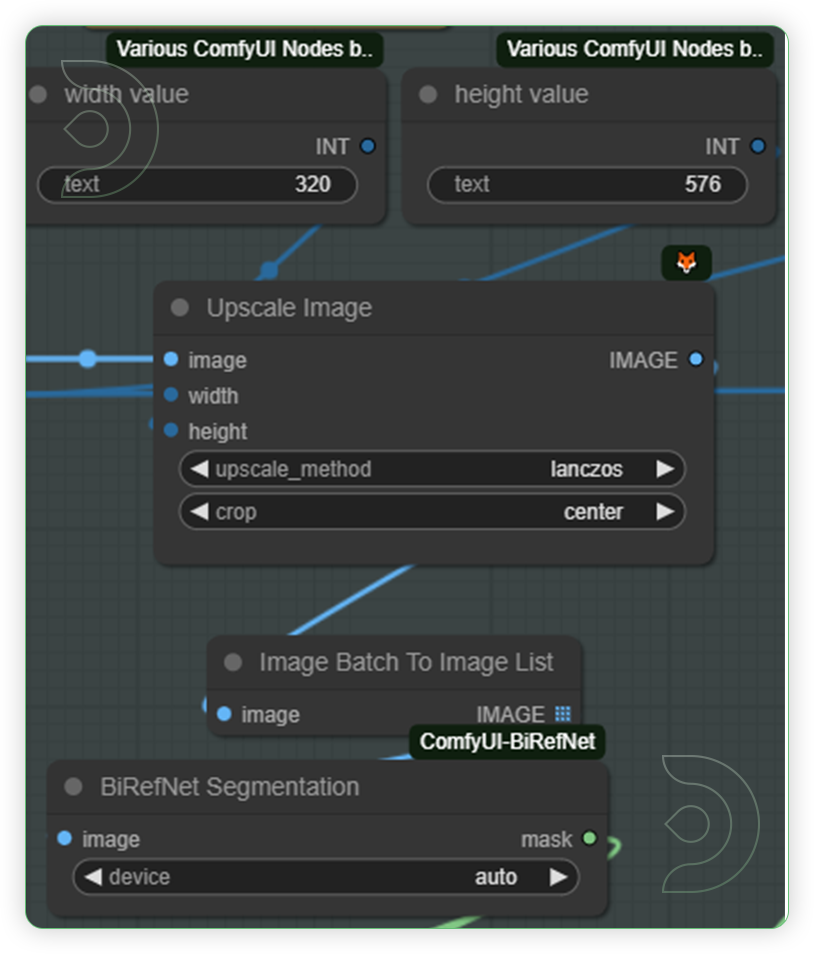
YESCheck the video settings for dance maskThis is an area of nodes where you can set the dimension of upcale image before it will process for generation. Recommended upscale methods are lanczos and crop at the center. Otherwise you can disable for a wide angle view of output.
Check the Efficient LoaderA collection of ComfyUI custom nodes to help streamline workflows and reduce total node count. Set it to the recommended default value for the checkpoint, vae and lora. When writing a prompt, put descriptive words on what should be the appearance of the subject or how it appeared while moving.

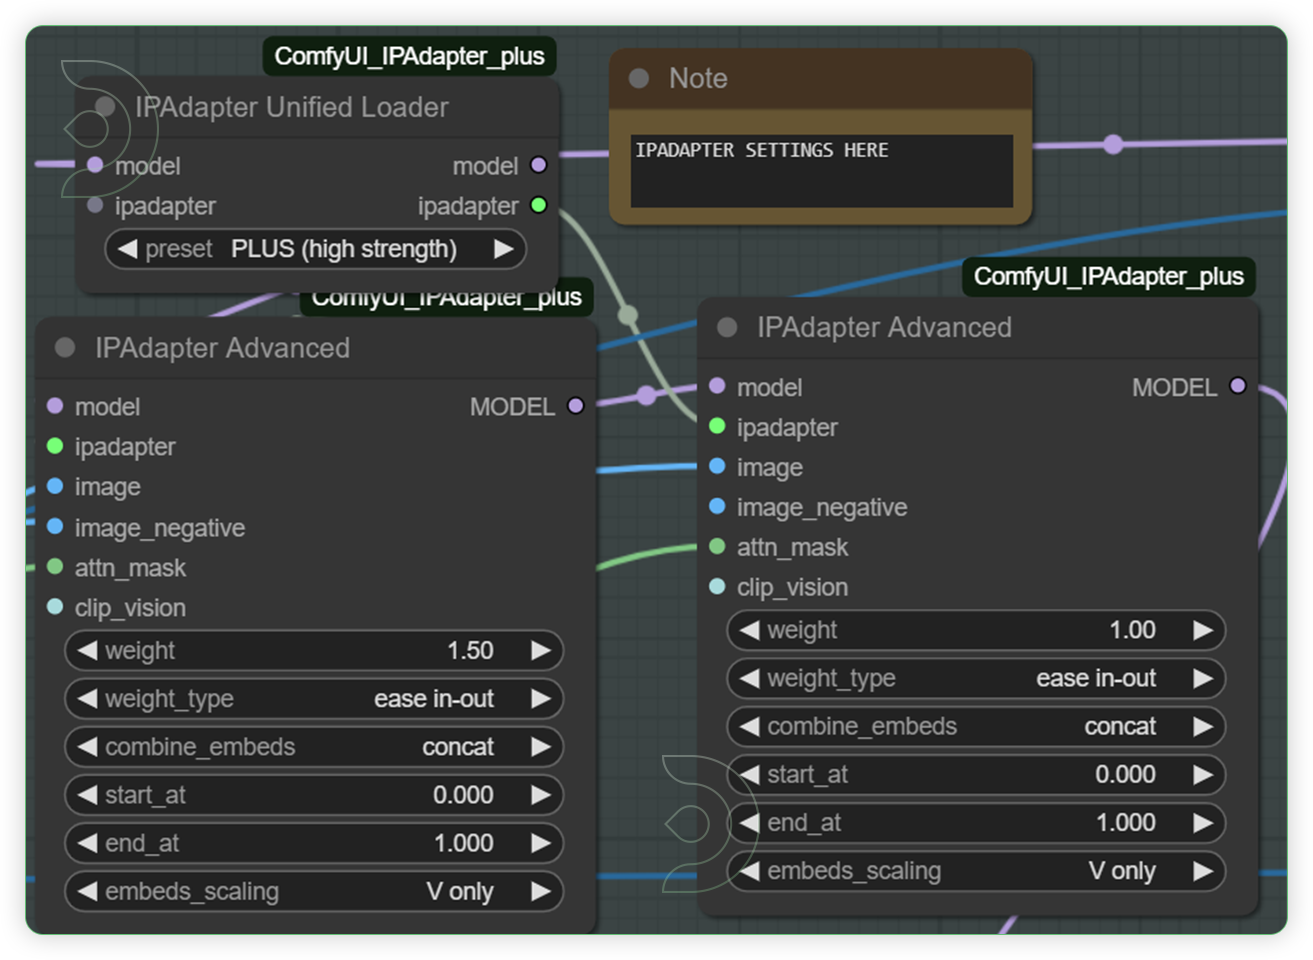
Check the IPAdapter Plus settings and adjust the weight when necessaryThese are the groups for ipadapter, a novel approach for enhancing text-to-image diffusion models with the capability to use image prompts in image generation tasks. IP-Adapter aims to address the shortfalls of text prompts which often require complex prompts to generate desired images.
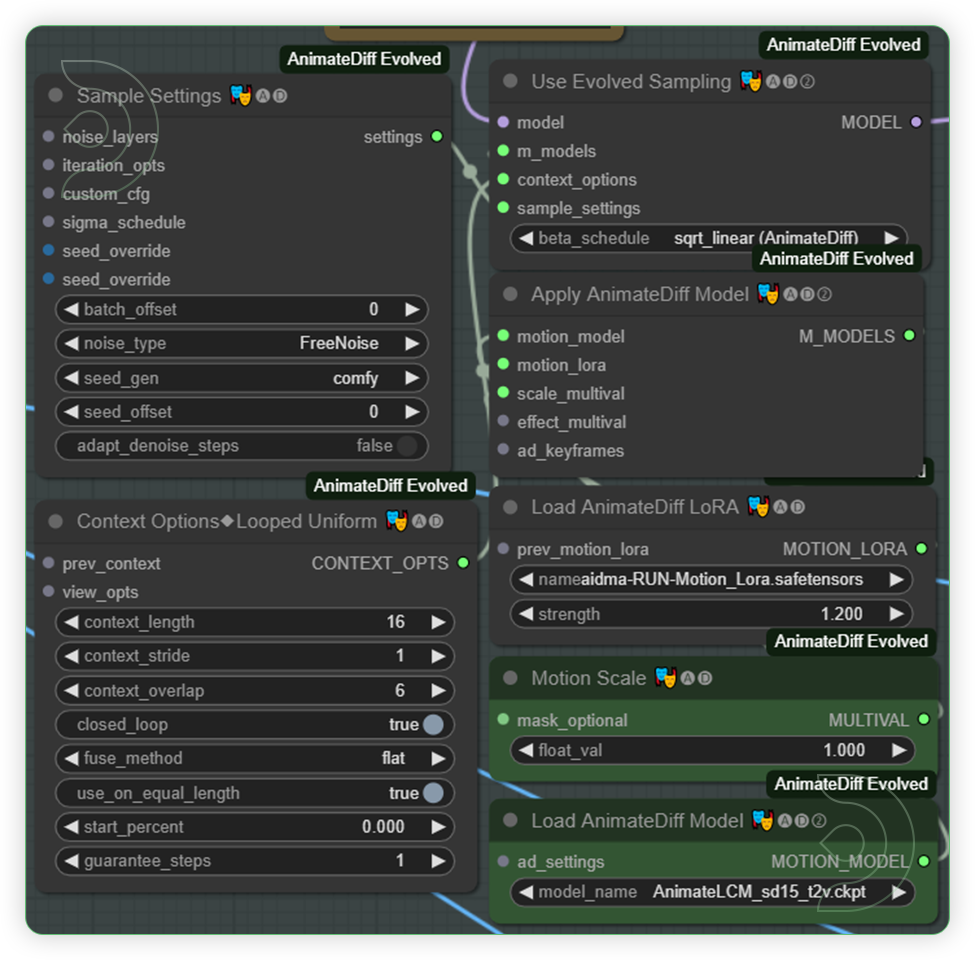
YESCheck the AnimateDiff settings and you may adjust the strength of animationThese group of nodes enhances the generation by integrating improved motion models. The only change that you can adjust is the strength of motion lora.
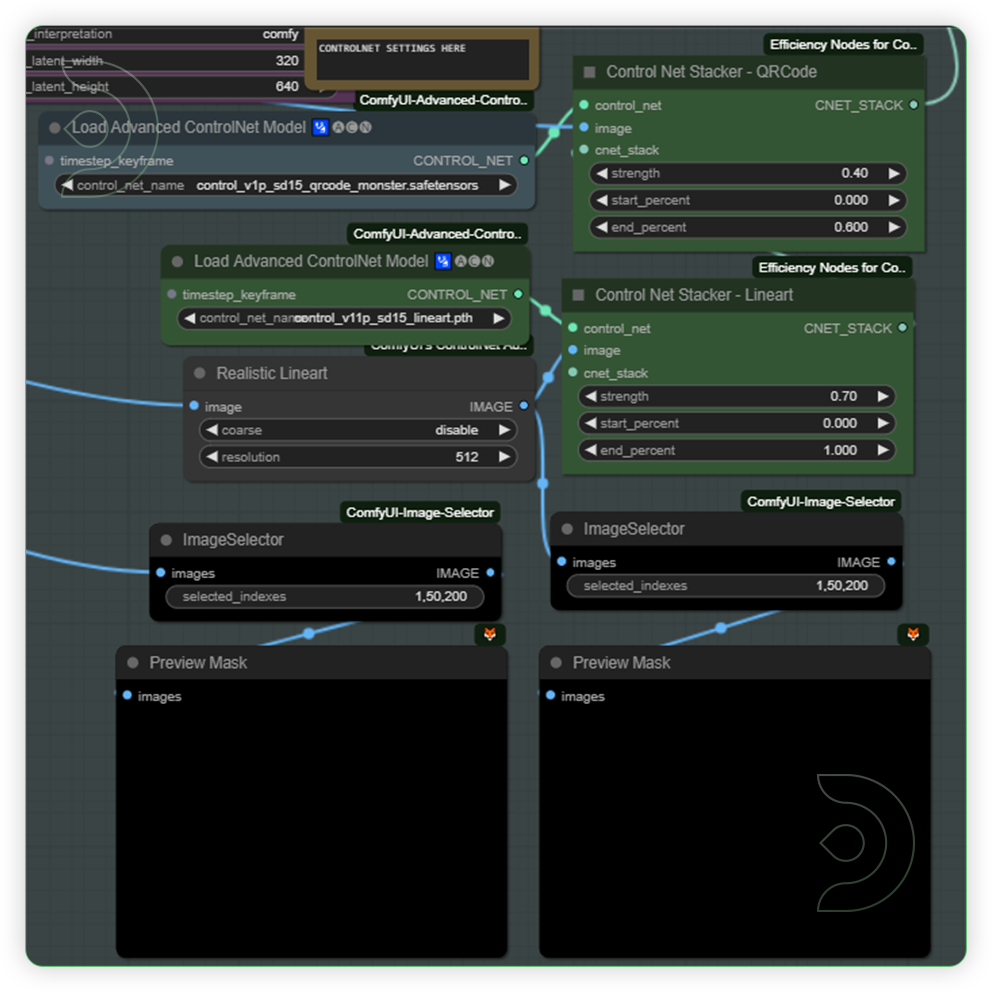
Check and adjust the controlnet strength while testing the prompt.These groups of nodes can be used to provide further visual guidance to a diffusion model. This is an essential area because it will control the appearance of your output.
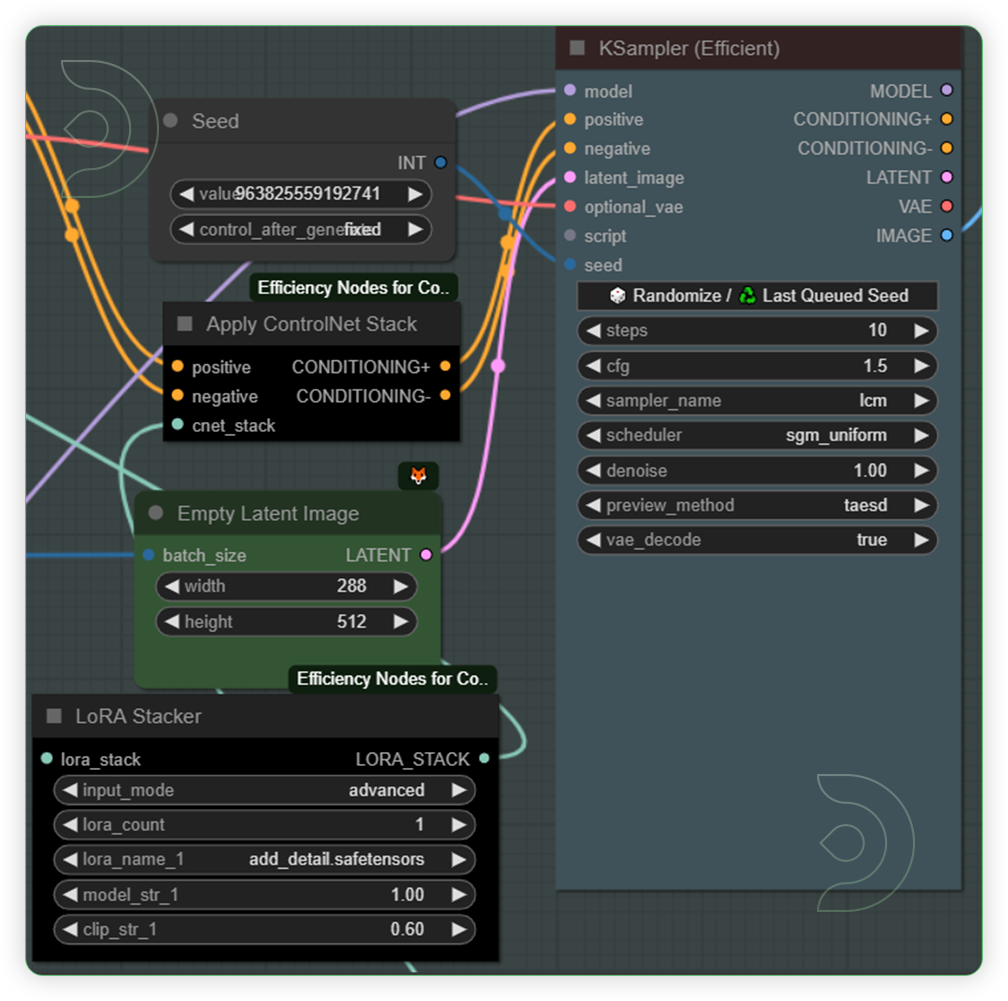
YESCheck the KSampler and Latent Image Size and set it to preferred sizeThis is where your images are generated. The KSampler uses the provided model and positive and negative conditioning to generate a new version of the given latent.
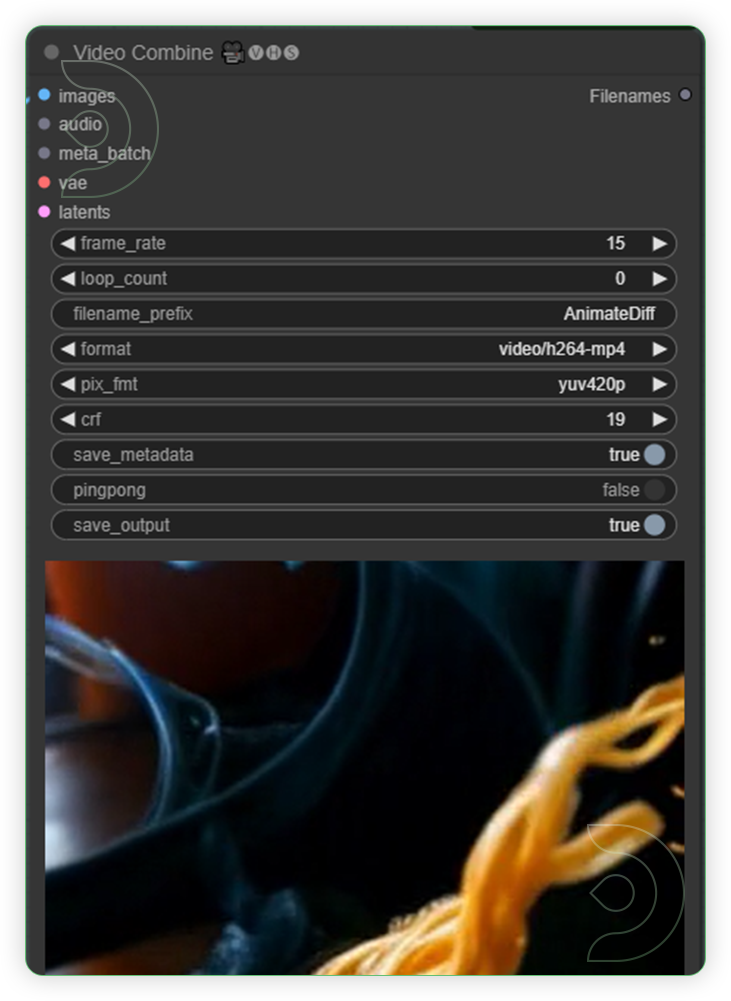
Check the Video Combine which shows your videoThis node merges a sequence of images into a cohesive video file.
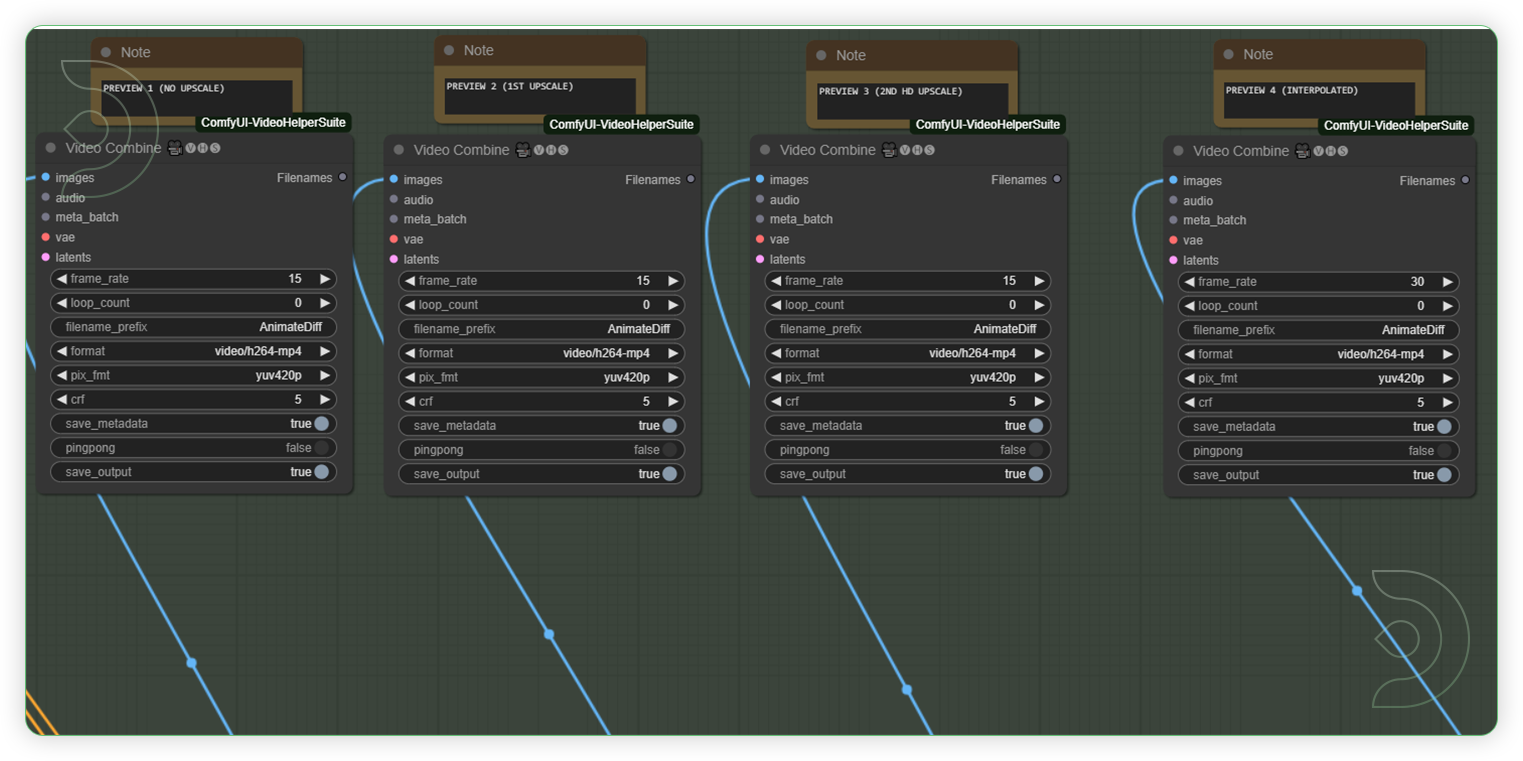
(OPTIONAL: for High RAM/VRAM workflow) Check the settings of additional workflow for video refinementThese groups of nodes are settings for your upscale and video interpolation. See the recommended values such upscale model, steps, cfg, denoise, etc
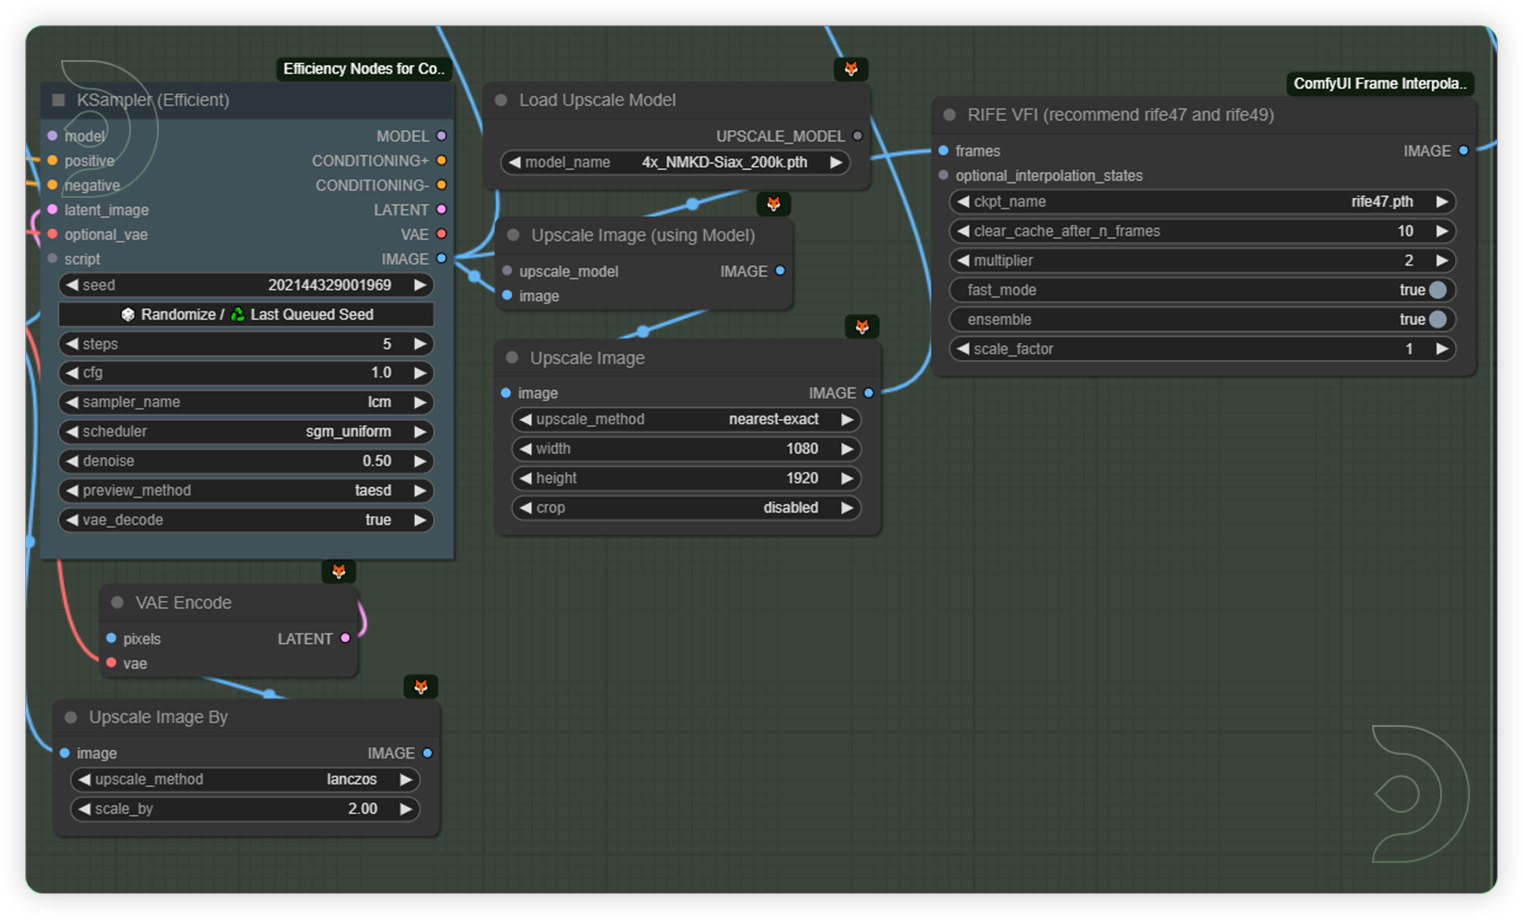
(OPTIONAL: for High RAM/VRAM workflow) Check the preview of the video combineThese groups of nodes are preview for your upscale and interpolated video.
Tips
💡
Use the workflow for low RAM/VRAM if your machine has a low specs. Otherwise, use the workflow for high RAM/VRAM which generates an additional upscaled and interpolated videos.
💡
For new comfyUI users, check your input model, like Lora, checkpoint, controlnet, animatediff, and upscale model, and don't forget to update your comfyUI all.
💡
Don’t let my reference examples stop you from exploring. In fact, any object can dance, such as water, rocks, clothes, cars, particles, etc.
💡
Use QRCode Controlnet to control appearance and action, use IPAdapter to control the content and style of conversion.
💡
The two workflows use the same base. There were only added nodes for refining the video output.
Examples
You can check the examples below together with its prompt settings.
Click the toggle below for you view the recommended settings.
Cactus Dance Settings
Ice Cream Dance Settings
Fire Dance Settings
Resources
Download the Input and Output Files Here
Transform Videos with AI - Google Drive

It contains of images and videos for you to test in the workflow.
Frequently Ask Questions
How can we define Style Transfer in AI?
This process creates a new image that preserves the key elements of the original photo but mimics the artistic appearance of the second image. This technology is commonly used in digital art and photo/video editing to generate unique and striking visuals.
How to use ComfyUI with Civitai on Mac?
We recommend using ThinkDiffusion so you don't have to install locally on your mac, but here are some quick steps on installing on a Mac computer.
To use ComfyUI with Civitai on a Mac, first install Python, clone the ComfyUI repository, and set up a virtual environment. Install dependencies using pip, download models from Civitai, and configure ComfyUI to recognize them. Launch ComfyUI, access it via your browser, and load the Civitai models. Upload your content, apply the desired style transfer, then save and export your final images or videos.
How to create a dancing noodles video with AI?
Follow this guide and you can create your own dancing noodle video with ThinkDiffusion. To produce a video of dancing noodles using artificial intelligence, begin by generating a noodle dance using the picture of a noodle and background of ramen bowl within the ComfyUI interface. Subsequently, employ an AI-driven animatediff, ipadapter and controlnet nodes to imbue the noodles with dancing movements. Assemble the animations using a video editing software like Adobe, which allows you to include backgrounds, synchronize music and finetune your result.
Original article can be found here: https://learn.thinkdiffusion.com/transform-videos-with-ai-dancing-noodles-step-by-step-tutorial/