Hi, I want to show you a new method I've find to make animations with Loras and PonyXL models.
We'll need the extensions: deforum and animatediff.
Both extensions are included in the extensions section of A1111, so just go to Extensions and click on available.
For animatediff to work properly, you must install exiftool, gifsicle and ffmpeg.
Exiftool instalation: Go to https://exiftool.org/index.html And download the executable.
Once unzipped, leave the folder unzipped and place it wherever you want. Once the folder is placed, right-click on the .exe and copy the path.
Then go to Start menu and type "env" to enter the system variables editor and search for "path"
Click on "path" and click on "edit". Then click on "new" and paste the exiftool path and click OK.
Gifsicle instalation: Go to the magnifying glass and type "cmd" press enter and write: git clone https://github.com/kohler/gifsicle.git
and click OK.
FFmpeg instalation: Visit this web, it's has a great explanation: https://phoenixnap.com/kb/ffmpeg-windows
Now let's move on to Deforum.
Deforum may give you an error saying that it could not download gifski.exe. So you download it from this link: https://github.com/hithereai/d/releases/download/giski-windows-bin/gifski.exe and copy the .exe to stable diffusion/models/deforum and problem solved.
It turns out that Deforum can actually handle XL and Pony models and the BREAK command without breaking a sweat!! 🥹🤩🥳👍💃🕺
So the first thing is to make a video with deforum. For that we are going to choose an XL or Pony model and ask it to make a video that we like.
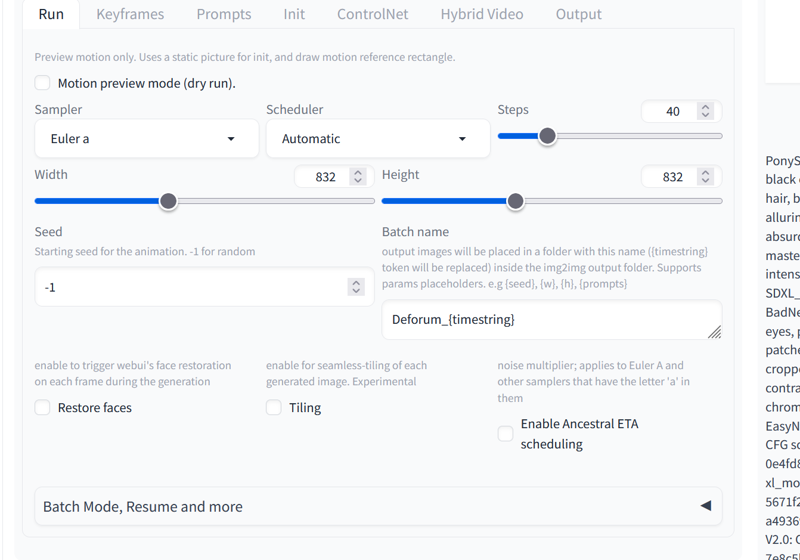
These are the parameters that we are going to have to change:
I have chosen Euler A and Automatic so that I could make the videos quickly and so that I could tinker around changing things, but you can use other samplers that you like.
I have used the 832x832 resolution because it is the minimum that PonyXL uses and so it makes the images well and does not take too long, then we will see that deforum includes the upscale option in case you want the video bigger, but for this method it is better to use it small so that later animatediff does not suffer and makes us suffer.
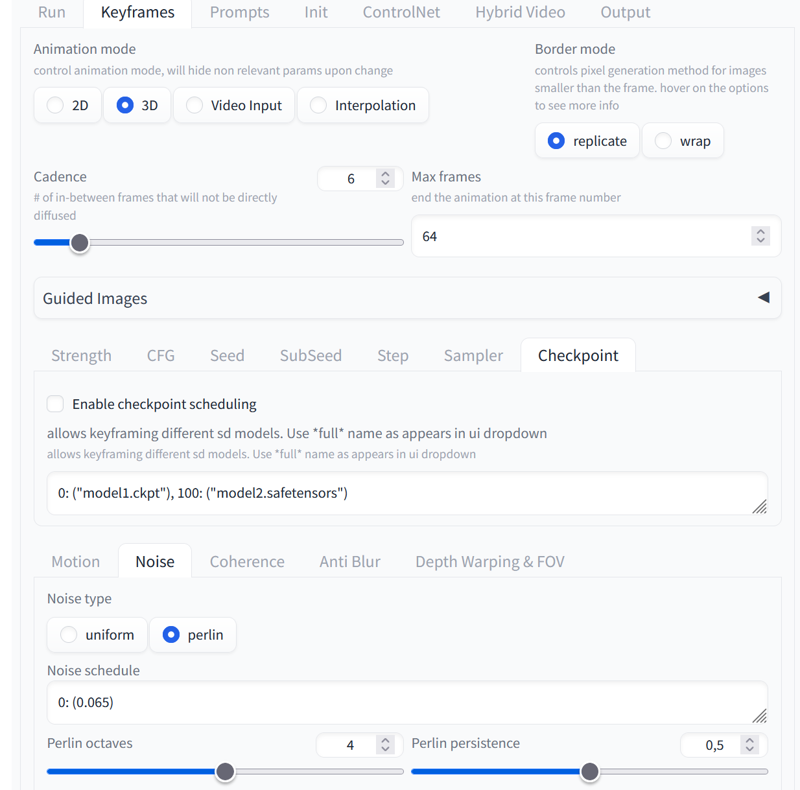
I've been playing around here and these are the options that make the best videos. A very low cadence makes the changes more random and doesn't create a clear video, and a high cadence barely allows any changes in the animation.
You can change the "max frames" depending on how long you want the video to be. But you must take into account the number of frames when using prompt travel.
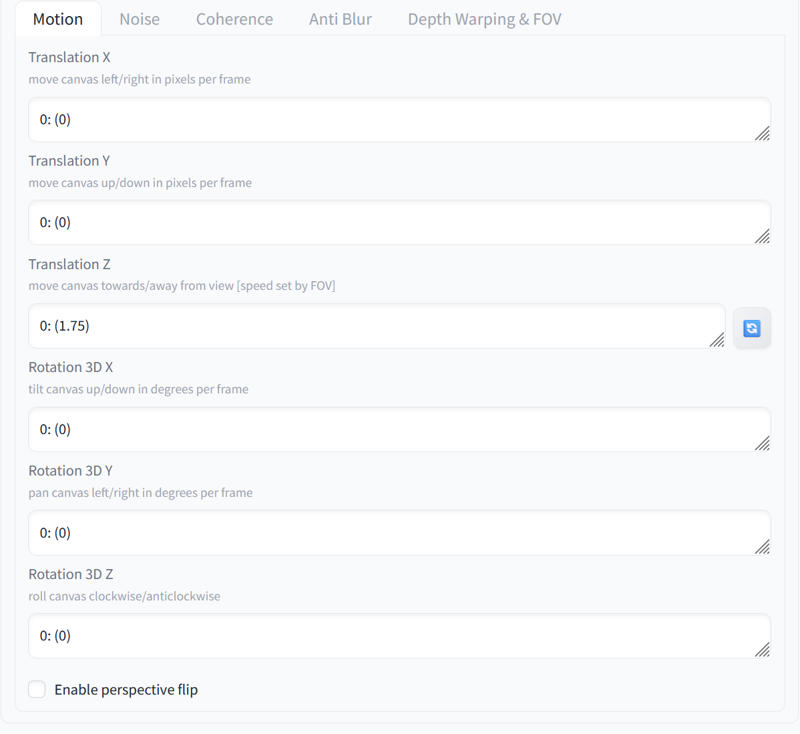
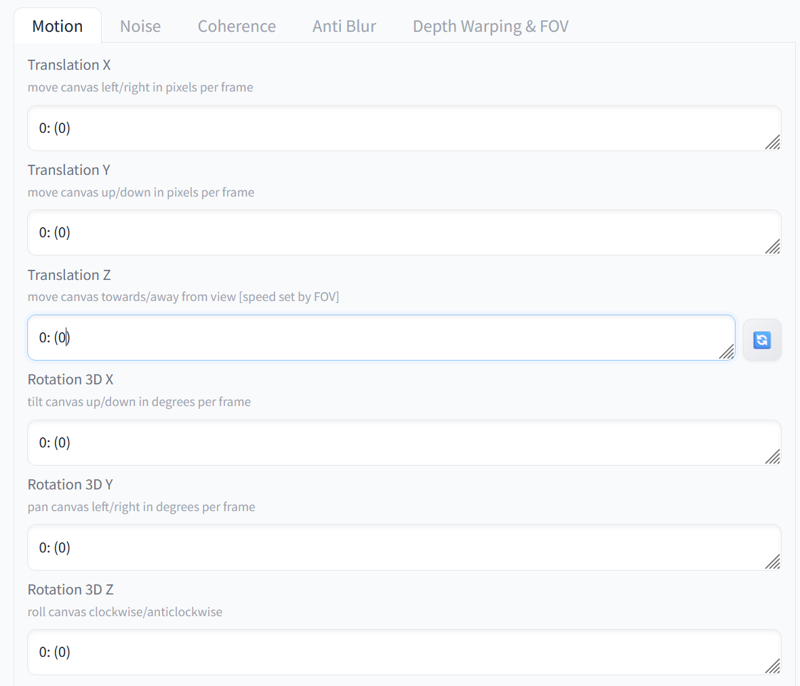
Change this in motion so it doesn't zoom in if you don't want it to!
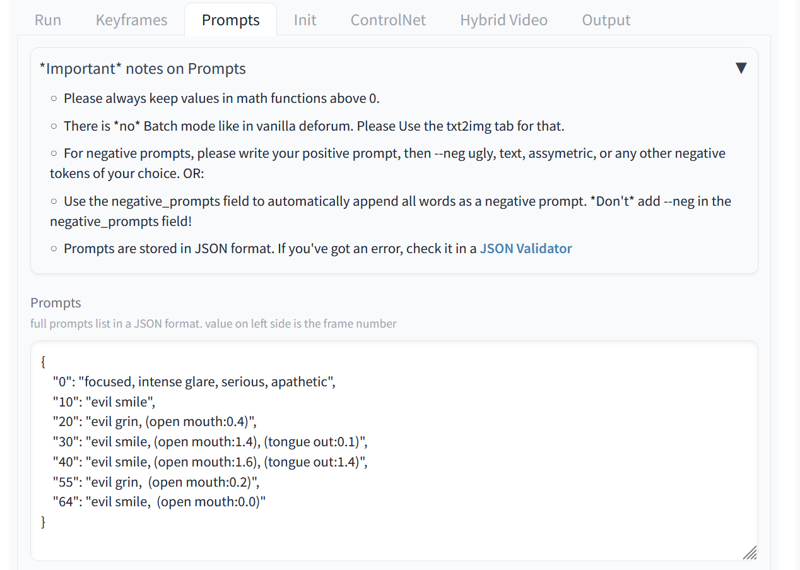
This is prompt travel, at first it's a little scary to use with so many commas, brackets and numbers, but we'll soon learn to love it.😱🫣🤗🥰😘
This is the prompt travel I used. As you can see, there are no Loras or character descriptions. That's a separate topic. So here we'll focus on the changes we want. I wanted to make something simple to experiment with, so I just put in face movements. Once you have a prompt travel you like, you can save it for other videos.
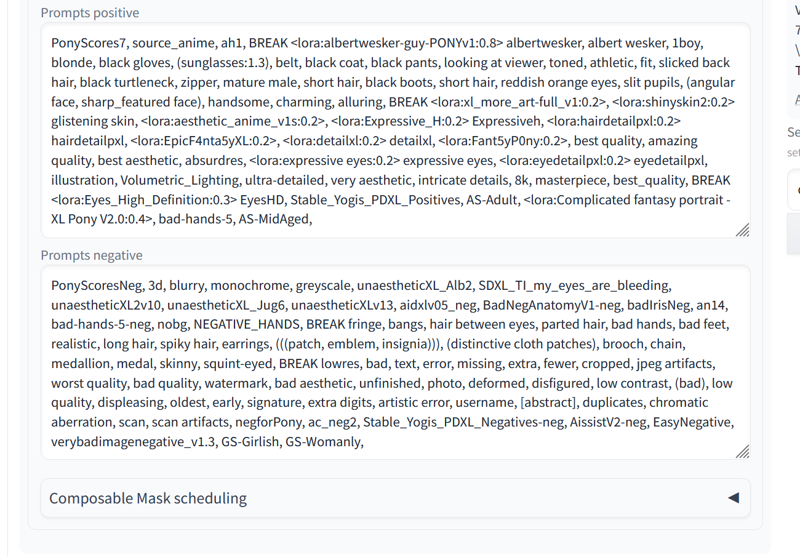
Here are all the prompts that describe the character. You can include Loras, embeddings and the BREAK command.
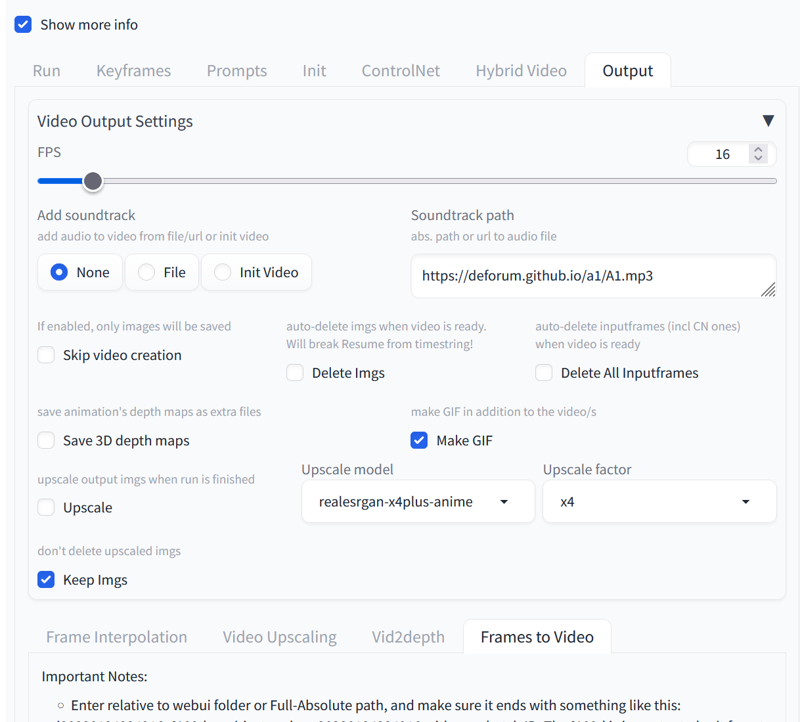
Here I used 16fps because I wanted the animatediff to understand the video well enough to play around with it.
I haven't looked into the audio option yet so I didn't use it and there you can see the upscale option in case you want to use it.
Click on "Generate" and wait for the video to finish.
You can see the result in this link: https://civitai.com/posts/6744052
As you can see, there are some little squares in the images, so we are going to use animatediff to improve the video.
We go to img2img and load an SD1.5 model and an SD1.5 vae.
And we put the same prompts and prompt travel that we used in deforum.
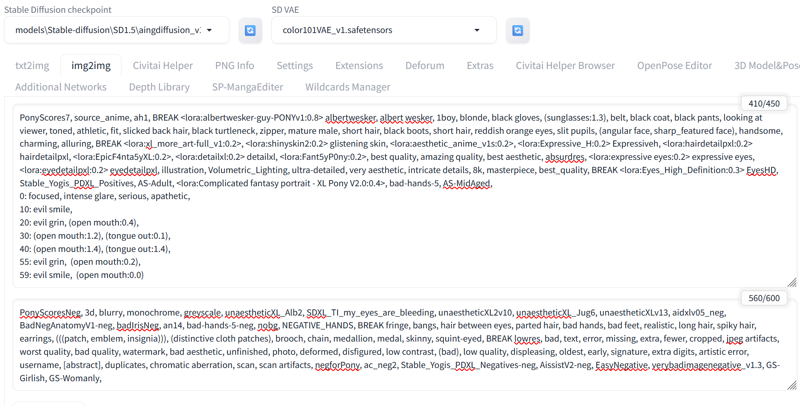
In order for animatediff to understand prompt travel, you have to remove the quotes and brackets. Also, if the video has 60 frames, the last prompt travel should always be the second to last frame, otherwise it gives an error, that's why my last prompt travel is frame 59.

Normally deforum saves a separate folder with all the frames, the video and a txt. So we go to that folder that deforum has created and place the first frame.
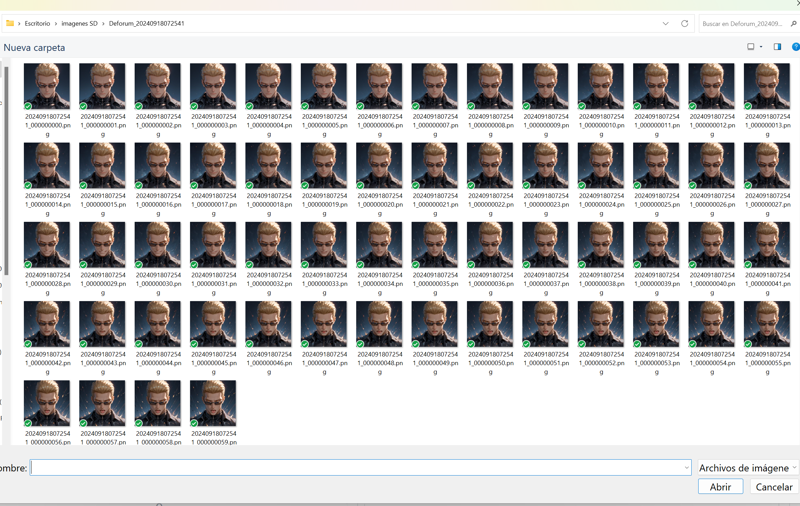
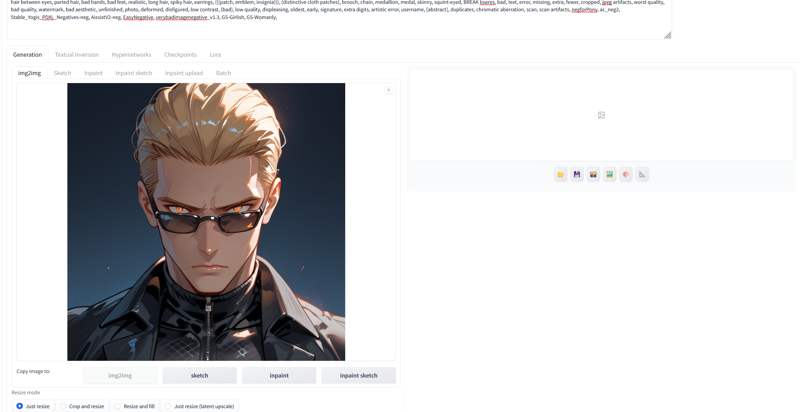
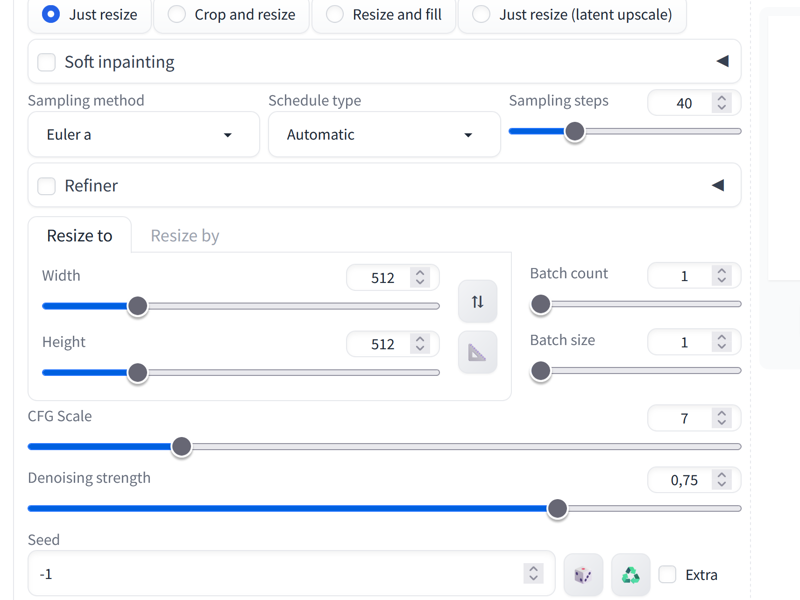
I made the video with these parameters so that it would take you little time to make the video.
Enable additional networks.

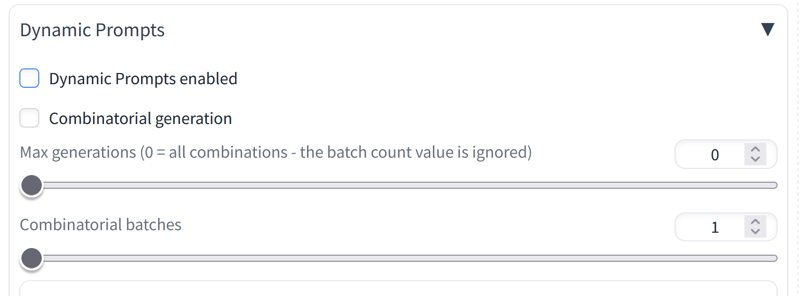
And this is very important!!! DISABLE dynamic prompts!!! Because if not prompt travel will not work!!!😱😭👀💦🔨💣
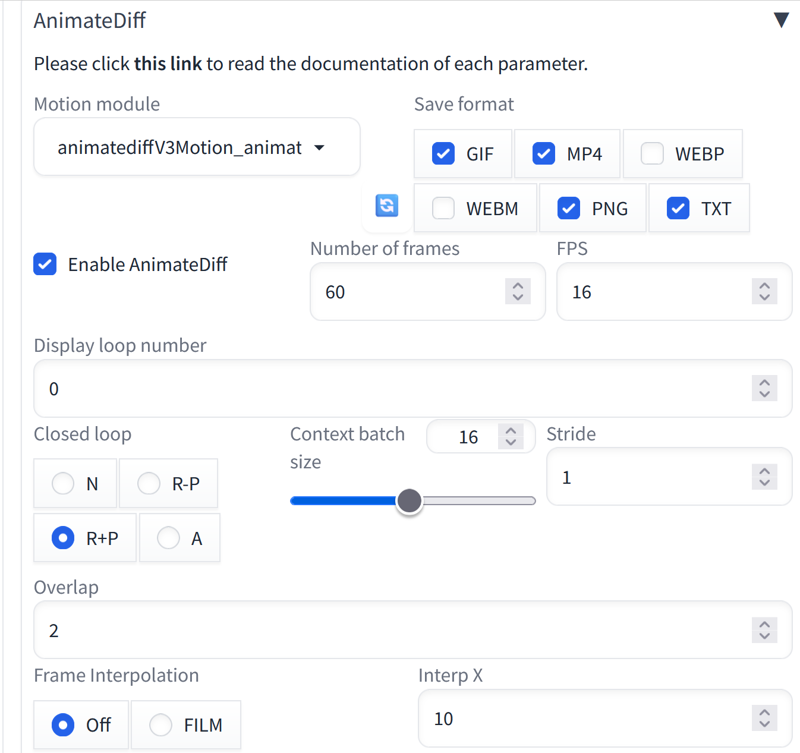
These are the parameters I used in animatediff, the frames and fps appear automatically when you load the video you made with deforum.
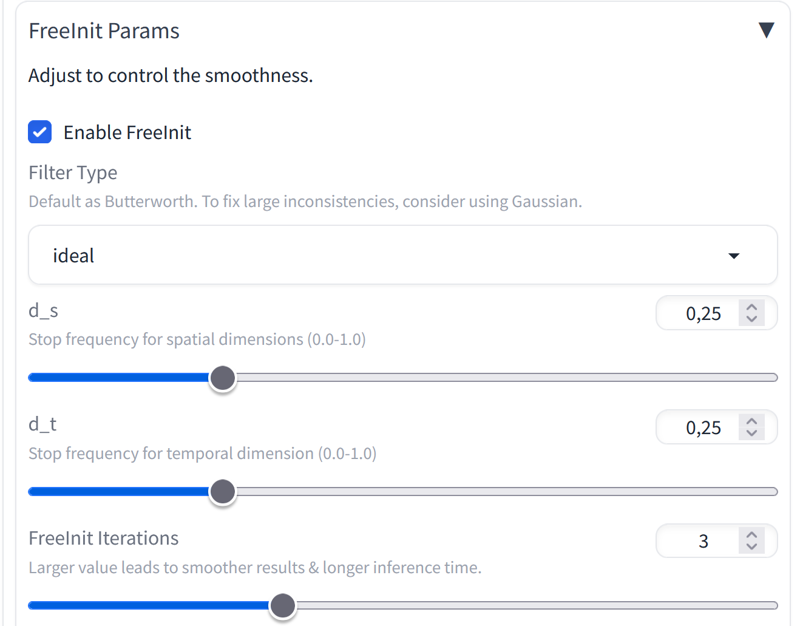
Expand the freeinit params tab to use it and get a better quality video.

These are the settings I used.
Here we have placed the video that deforum made us.
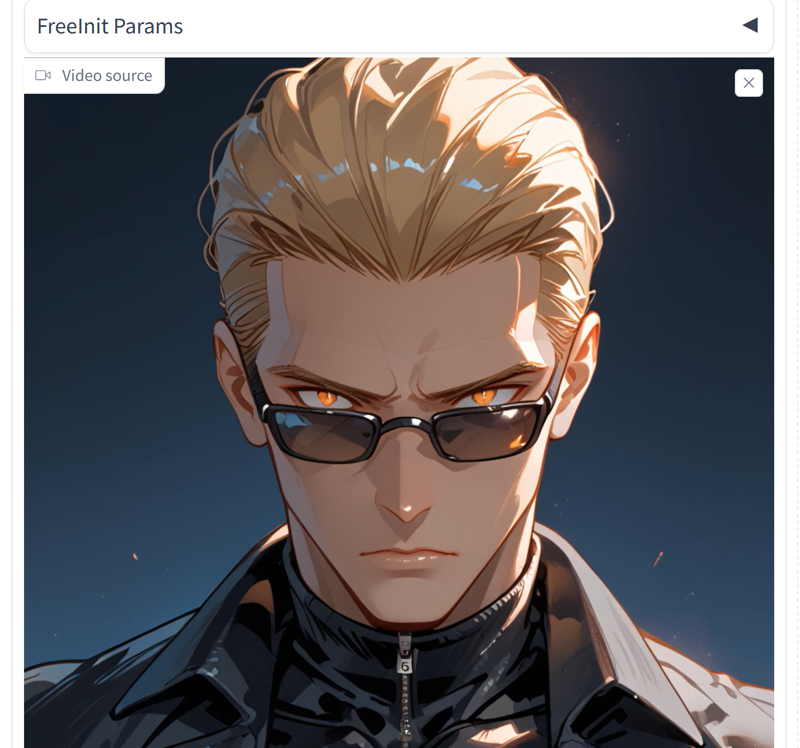
We display the I2V Traditional tab to place the last frame of the video.

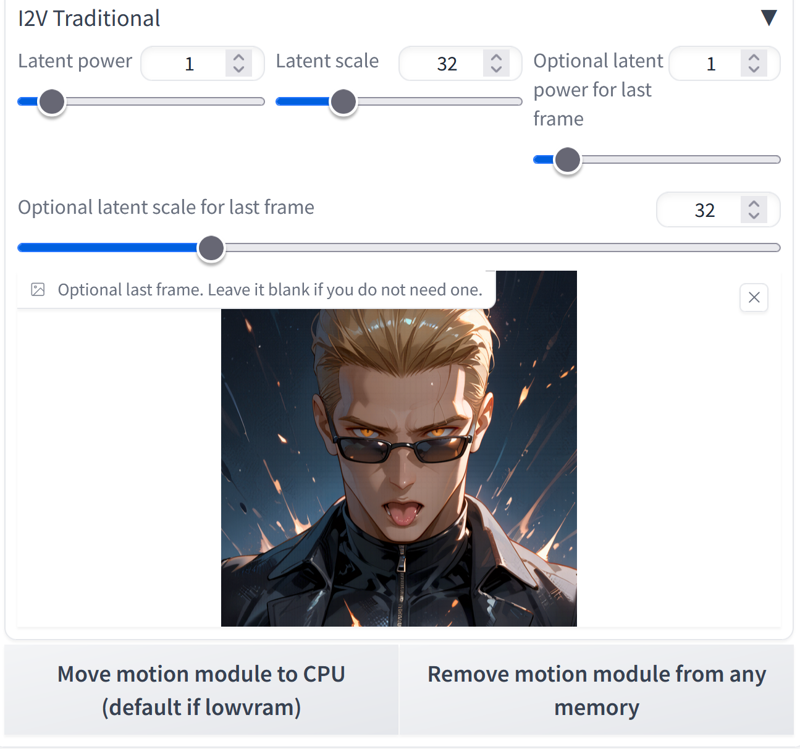
We click on generate and it will make this video for us: https://civitai.com/posts/6744781
Once the video is done, we go to img2img and load the same PonyXL and vaeXL models that we used before. And we delete the prompts from the travel prompt.
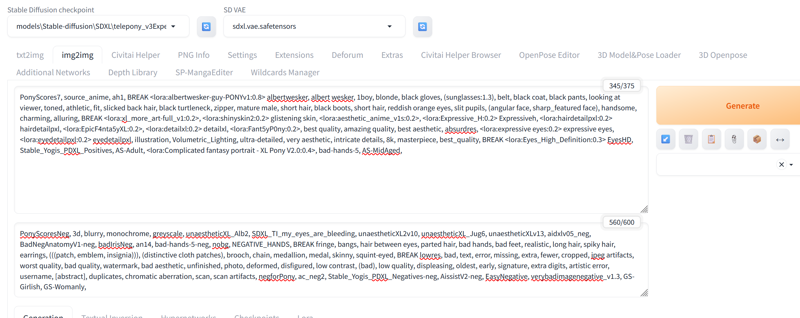
We run a test in img2img by loading the first frame of the video that animatediff made for us. And we use the same dimensions and sampler that we used in Deforum.
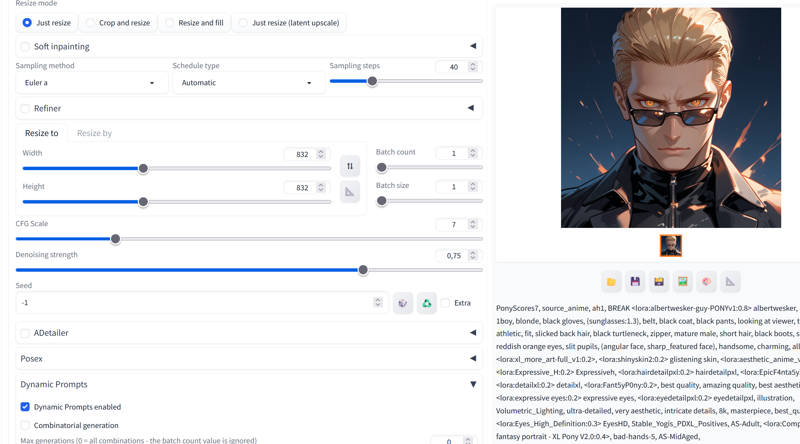
As you can see, the frame results in an image identical to the video that deforum made.
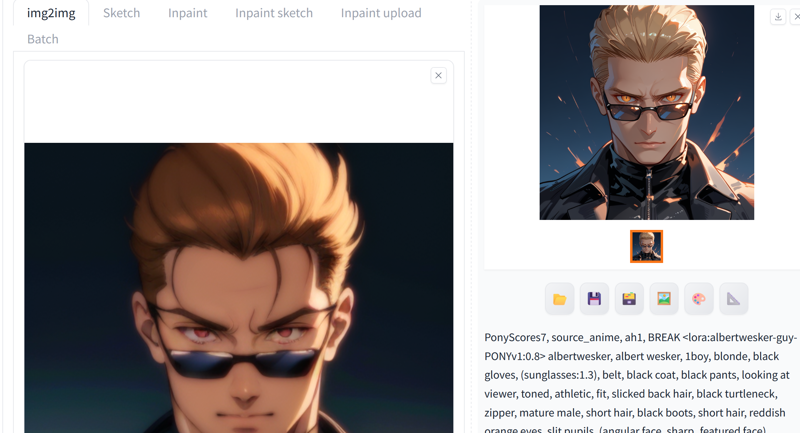
Go to the "Batch" tab and click on "from directory".
Copy the path to the folder where animatediff saved the frames and create a folder on the desktop to store the new frames.
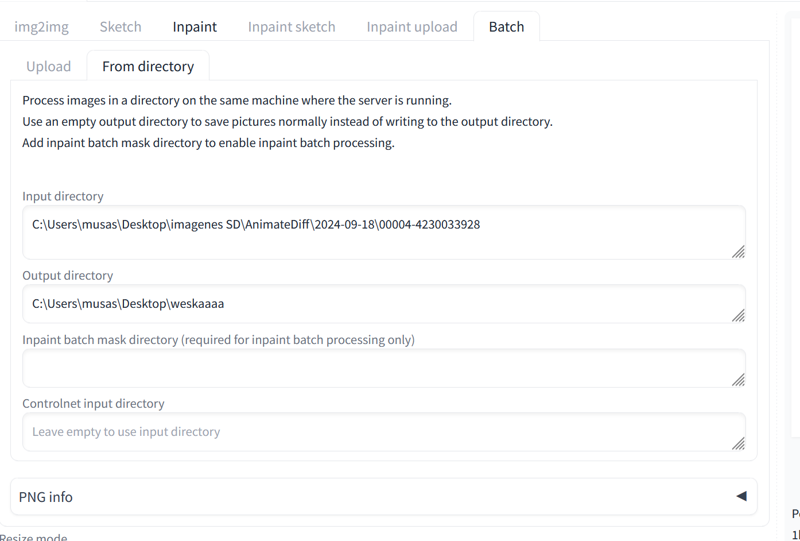
Since I can't get controlnet to work with XL models, I have to find alternative ways to make each frame the same, so I have to do this. haha😅
First method, it gave me funny results haha:
It consists of putting the images in Batch and making them with the travel prompt set. It makes images with the travel prompts mixed together.
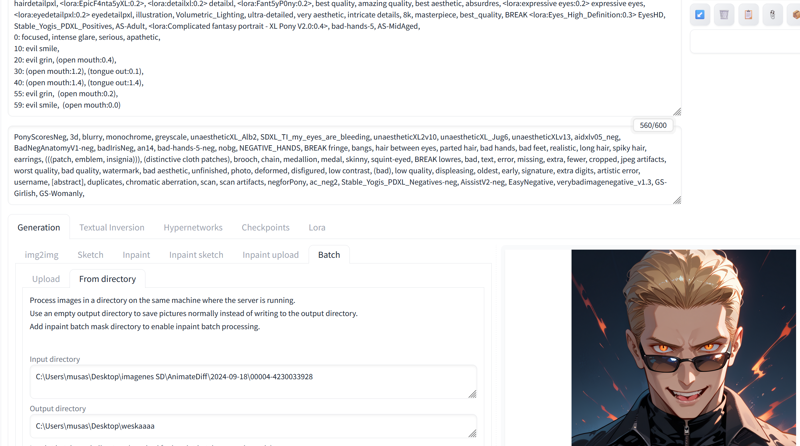
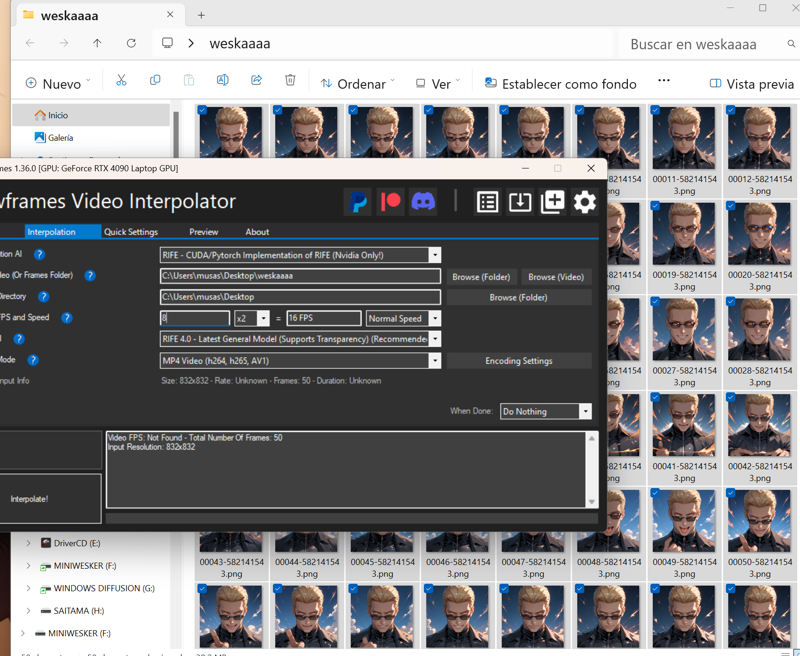
Then you stitch the frames using the Flowframes program.
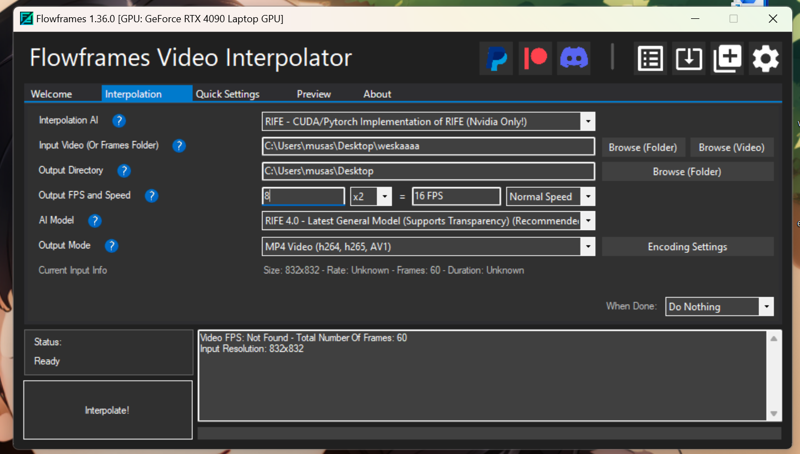
And give it a second pass.
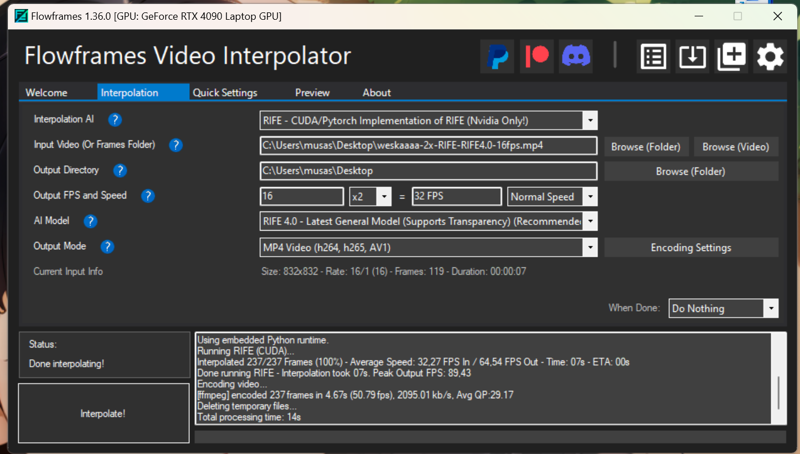
This is the result haha: https://civitai.com/posts/6746768
The second method is this:
Let's go to the folder where Deforum saved the video, the frames and the txt.
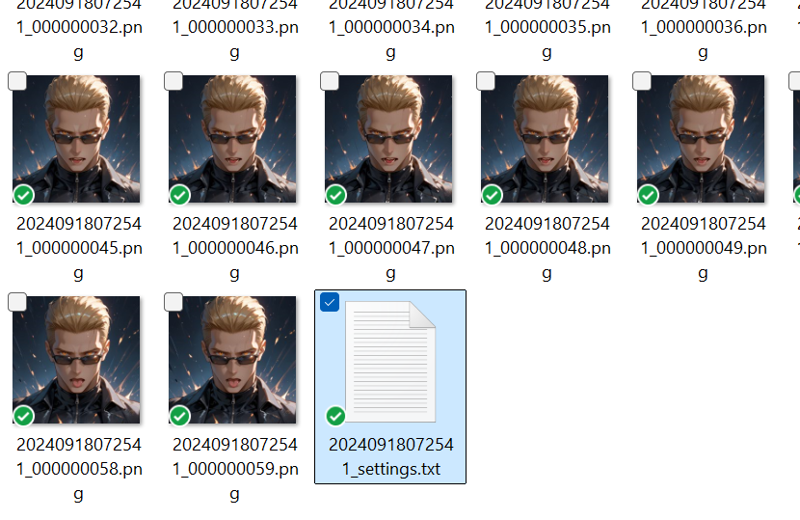
If we look at the text, we can see which frames each paragraph corresponds to.
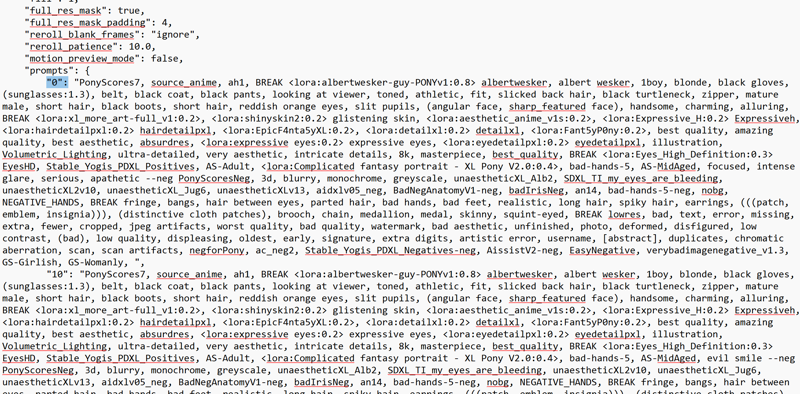
There we have the prompts for the travel prompt.

Basically it's about changing the prompts by hand, image by image, using the same seed and parameters... I've searched and searched, scripts and extensions... but I haven't found one that lets me put independent prompts on each image in a Batch...😖😫😭🤕
The first frame would be putting the general prompts and then replacing in each frame the weight of the prompts that we put in prompt travel.
Frame 1:
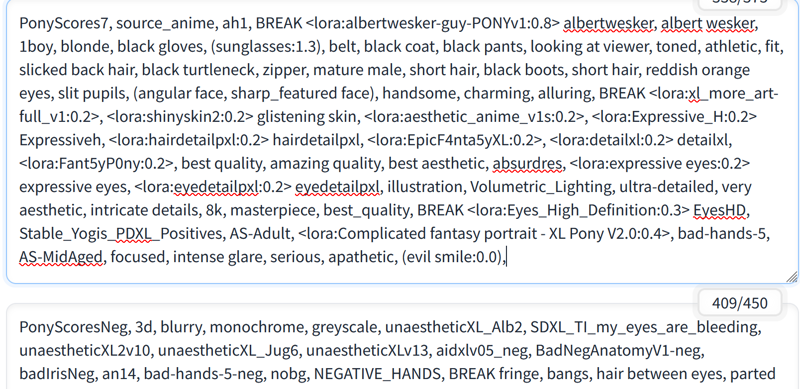
Frame 9:
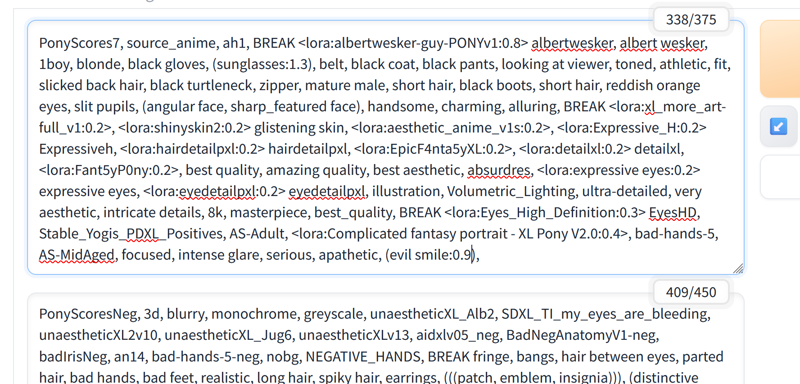
Frame 10:
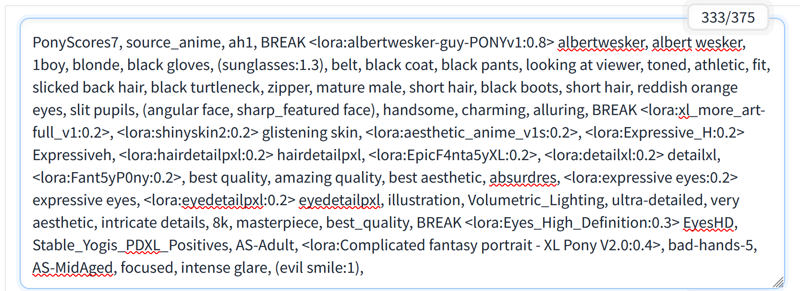
Frame 11:
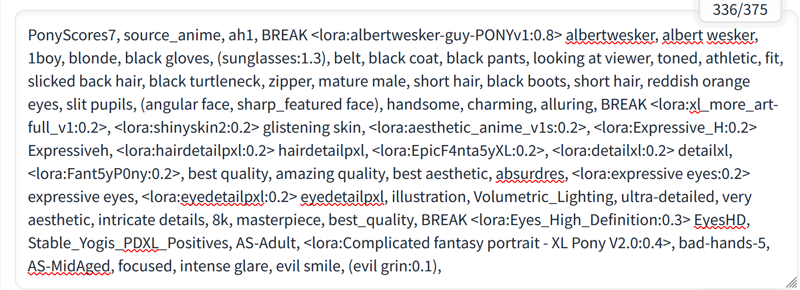
Once all the frames are made😵😵💫, we glue them together making a video with the Flowframes.
We give the video a second pass with Flowframes. I added slowmotion because it was going very fast.
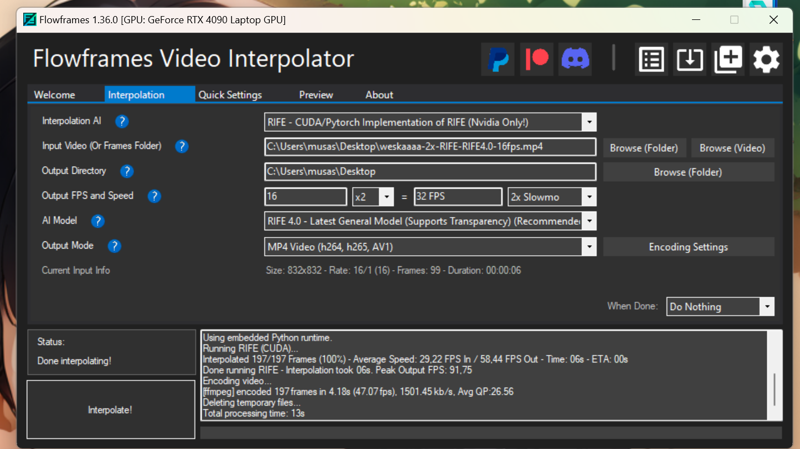
Then I gave it a third pass removing the slowmotion, because I wanted to see if it looked better.
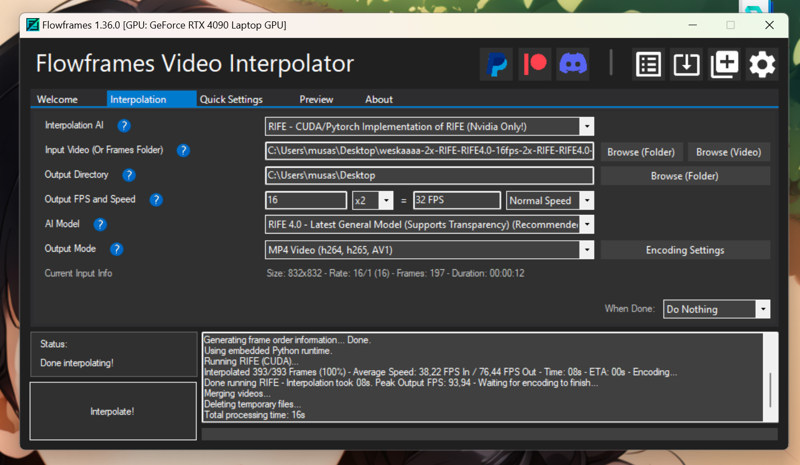
The result is this: https://civitai.com/posts/6754679
Maybe using inpaint so that only the face changes and the body doesn't move as much would be better. Or using the "skip img2img" detailer option so that only the face changes and not the body... It's all about trying...🤔🤔
Edit:
I have found another method!!! Using adetailer with the World model!!
The third method is this:
Telling adetailer to skip img2img and using the YoloWorld model and not specifying what to detect, it simply detects the entire image.
You can download the Yoloworld model here: https://github.com/ultralytics/assets/releases/download/v8.2.0/yolov8x-worldv2.pt
You copy it to a1111/models/adetailer and that's it.
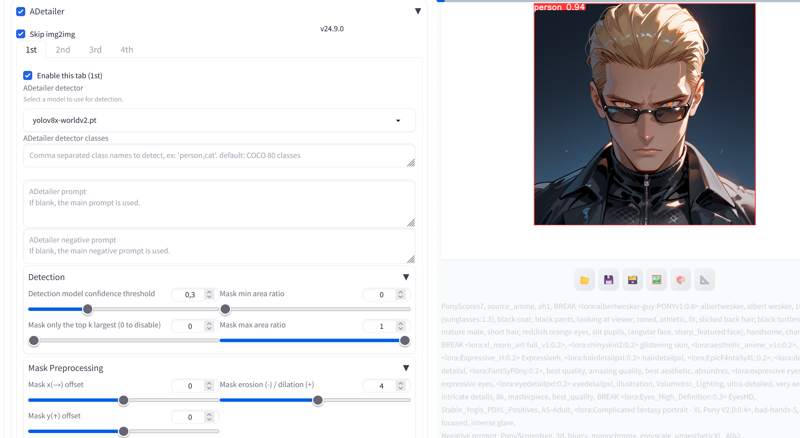
Use Flowframes to paste the frames and you're done.
The result is this: https://civitai.com/posts/6757782
One more method!!🤩🥳💃💃
I think this is the best and easiest one and of course the last one that occurred to me... it could have saved me a lot of hours of work, but I have learned things along the way haha🤦♀️
Go to settings -- upscaling and choose the upscaler you like best for img2img. I use 4x-ultrasharp because I like it a lot.

You can download 4x-ultrasharp here: https://mega.nz/folder/qZRBmaIY#nIG8KyWFcGNTuMX_XNbJ_g
Now put it in A1111/models/ESRGAN
If you want to learn how to use 4xultrasharp better, I leave you this tutorial by Olivio:
Just go to "Resize by" and set the resolution you want. Use a low denoising so that it doesn't change the batch images.
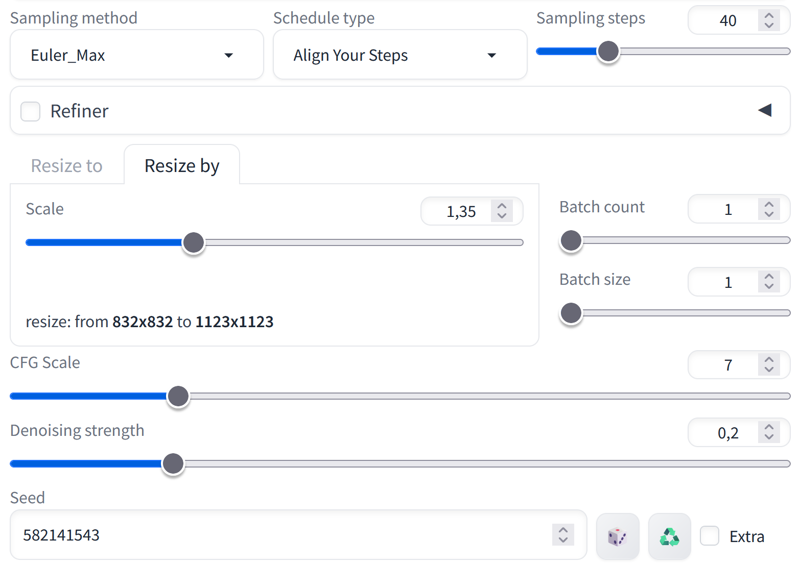
Once you have finished making all the images, we paste the frames with Flowframes and this is the result: https://civitai.com/posts/6758381
As you can see, the little squares that Deforum made for us are no longer visible.
I hope it was useful!! Have a great day!!😊😗👋

