If you find our articles informative, please follow me to receive updates. It would be even better if you could also follow our ko-fi, where there are many more articles and tutorials that I believe would be very beneficial for you!
如果你觉得我们的文章有料,请关注我获得更新通知,
如果能同时关注我们的 ko-fi 就更好了,
那里有多得多的文章和教程! 相信能使您获益良多.
For collaboration and article reprint inquiries, please send an email to [email protected]
合作和文章转载 请发送邮件至 [email protected]
By: ash0080
Introduction
This article is based on a question from one of our members: How to generate a character's three views from a reference image of the front view?
In fact, a few months ago, mousewrites provided a set of tools for generating three views. However, the challenge of this question is not to generate the views directly, but to generate them based on a reference image.
Therefore, in this tutorial, I have developed an improved workflow that can partly answer this question based on mousewrites' previous work.
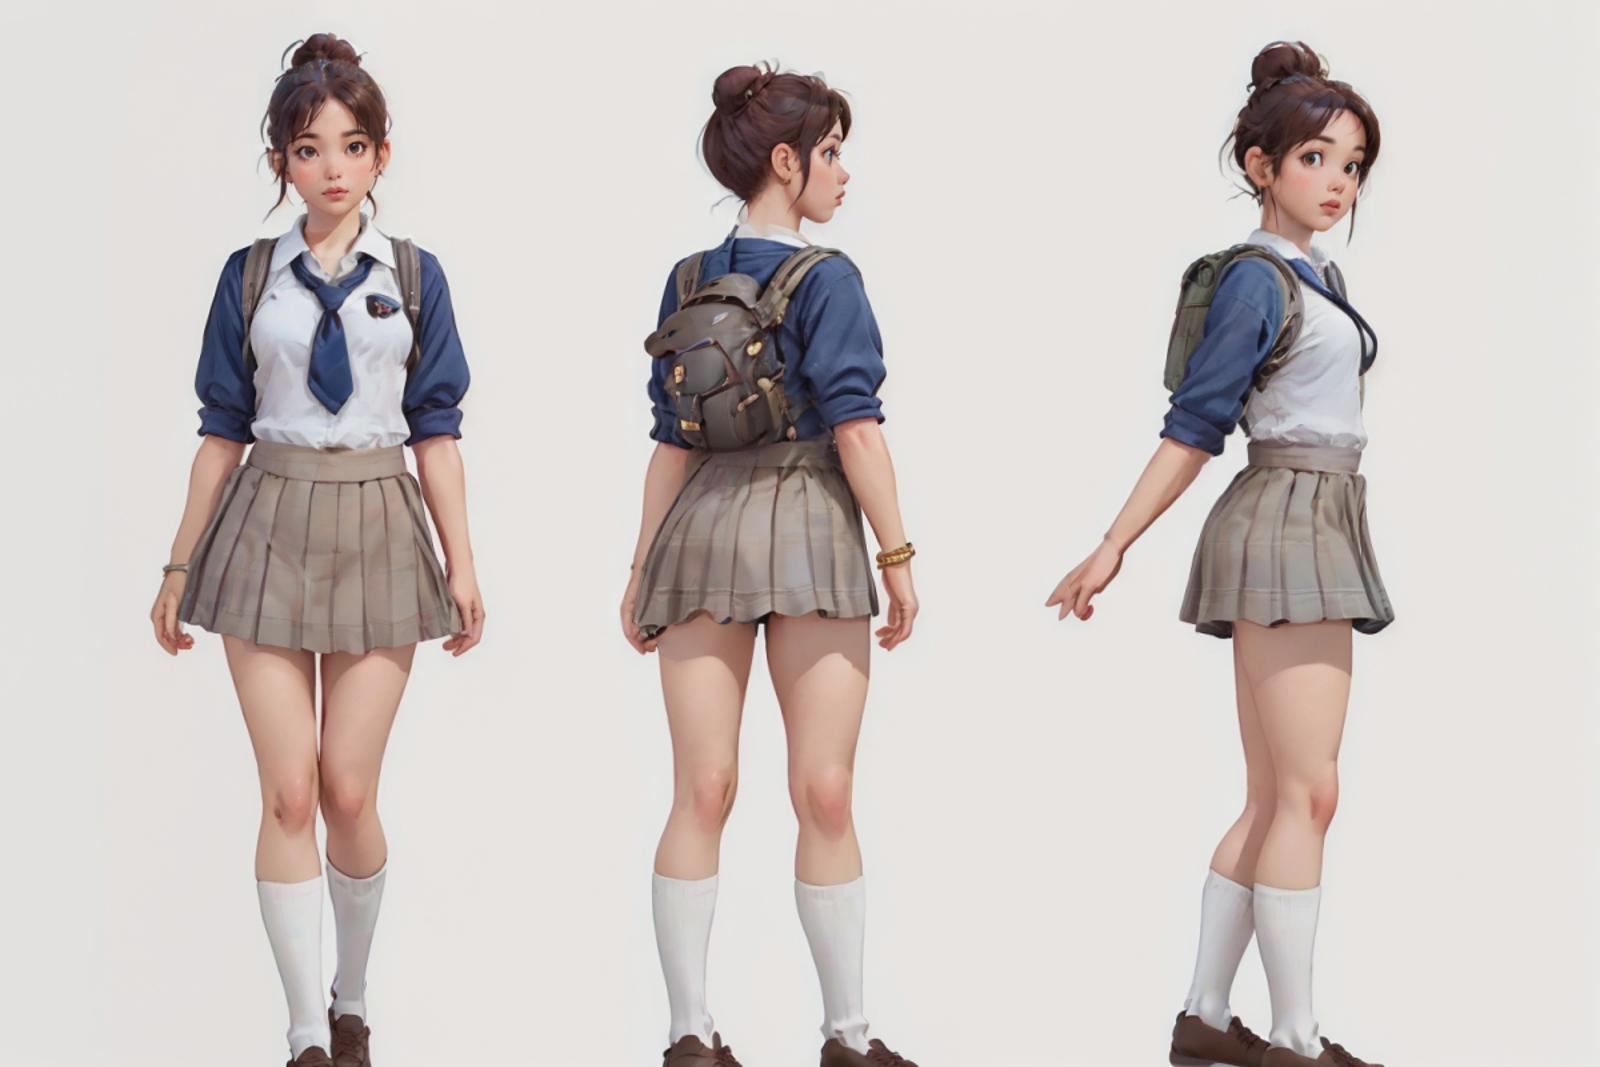
Let's take a look at the results first. The image on the left is the original input image, and the image on the right is the final output.

The tools used:
1. inpaint + CharTurner+ CharTurnerBeta-Lora
2. photoshop + canny/lineart + reference
3. img2img
Layout
The first step is to create the required layout template, which we will do in inpaint.
1. First, we input the image to "img2img" and use "deepbooru" to analyze "prompts". Here, we need to manually adjust the prompts by deleting quantifiers such as "1girl" and directional words such as "looking_at_viewer", and only keep the vocabulary that describes the appearance of the character.
2. Add the tools "chartunnerv2" (texture inversion) and "charturn3" (Lora).
3. Apply the prompts template suggested by "chartunnerv2".
4. Add directional words such as "from_side" or "from_behind".
5. Draw a mask in inpaint and select "fill" for the masked content. Choose a denoising strength of around 0.95 and a model that is similar in style to your input image, but there are no strict requirements.
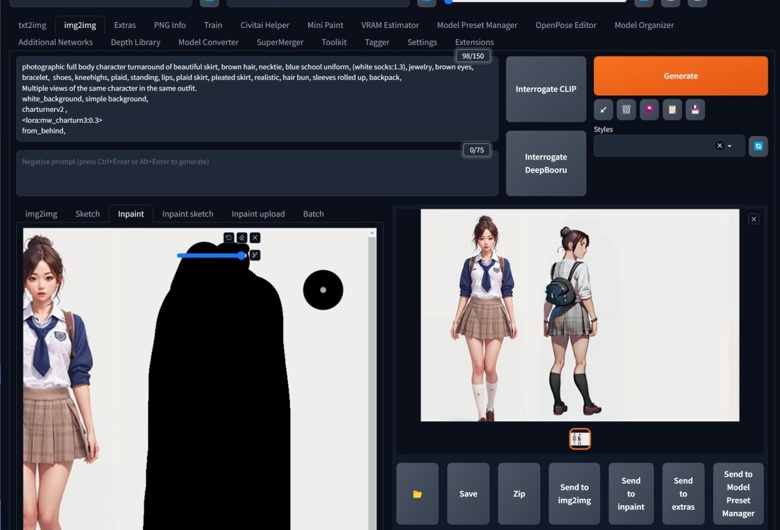
You may notice that the size and color of the character I drew do not match the original image, but that's not important! As long as the pose, angle, and clothing and props are satisfactory!
When you are satisfied with the drawing, resend the generated image to inpaint.
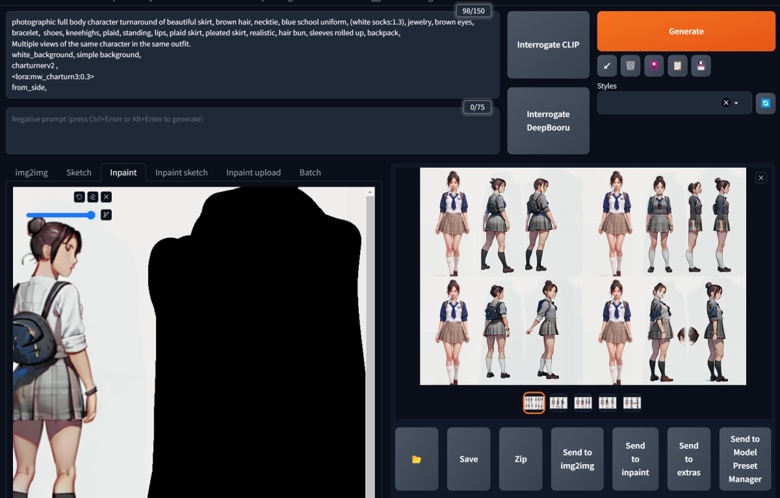
Repeat the previous step and continue to draw the third position. Using batch can help you quickly screen the images. If you need more angles, you can also repeat this step multiple times.
Generation
Before generating the final output, we need to process the images generated in the previous step. The processing method is also very simple.
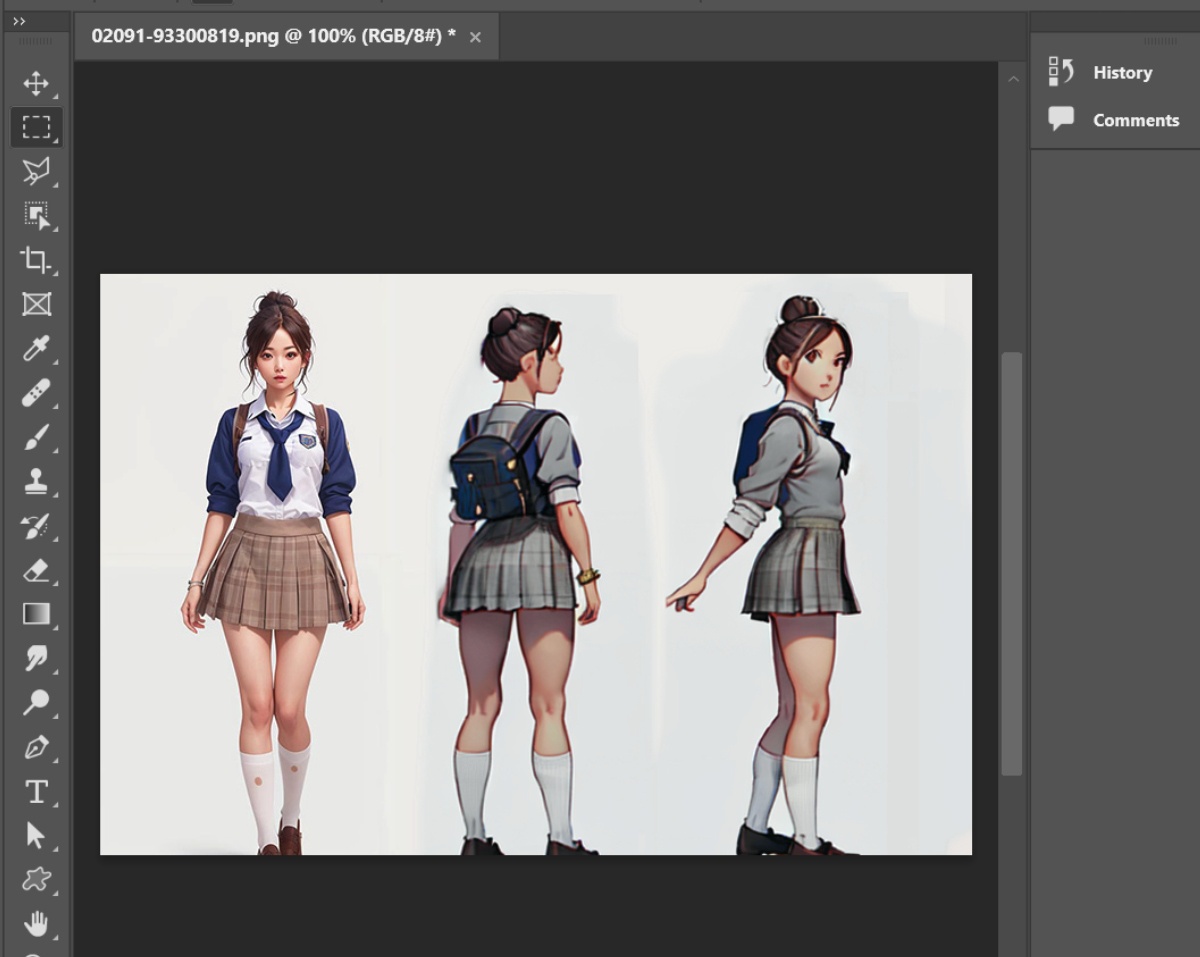
Adjust the size of the generated images in Photoshop to match them with your reference image.
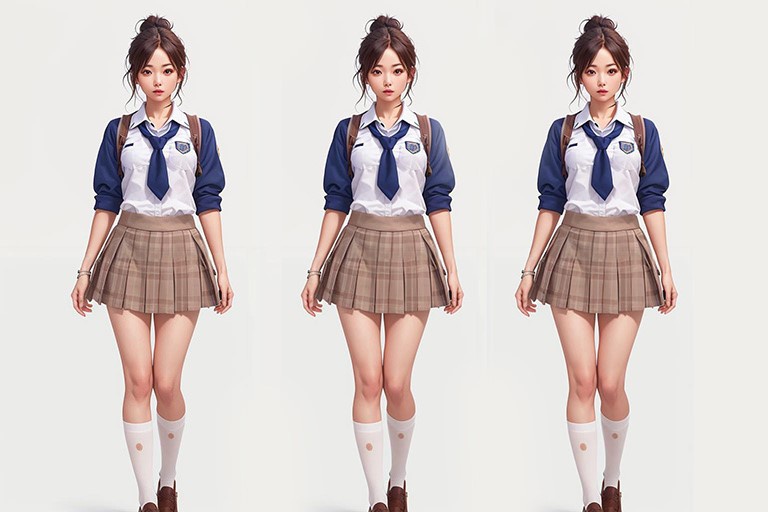
Before closing Photoshop, let's make another image. Copy the reference image several times and place them in the corresponding positions in our layout (it doesn't have to be very precise, just roughly).
OK, after preparing the two images, let's go back to SD. This time we will use tex2img to generate the final output. We will still use the CharTurner prompts template as before, but this time we will use ControlNet to apply the two prepared images to the lineart (or canny) and reference respectively.
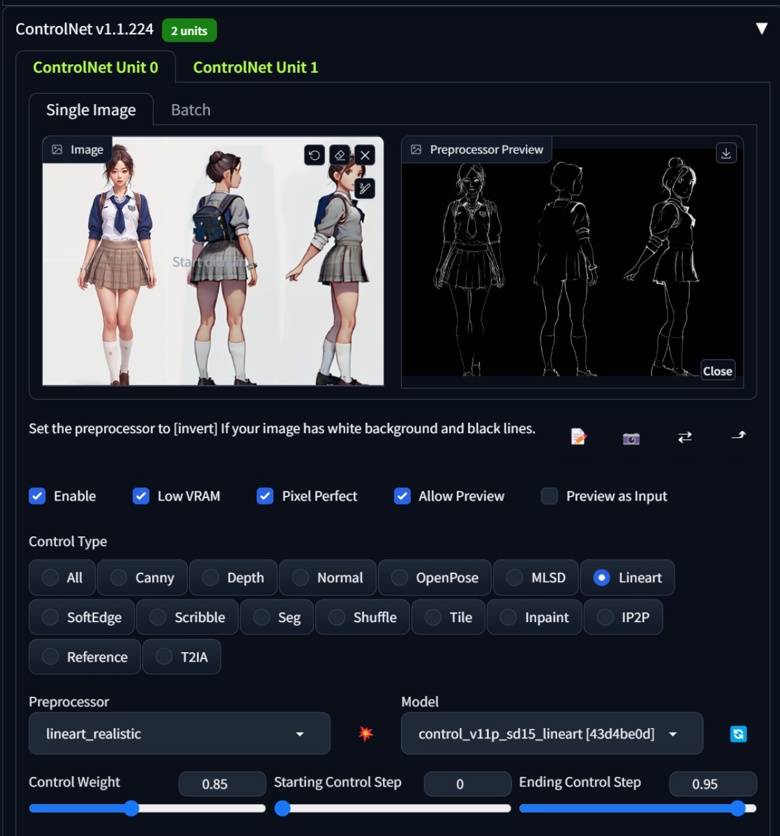
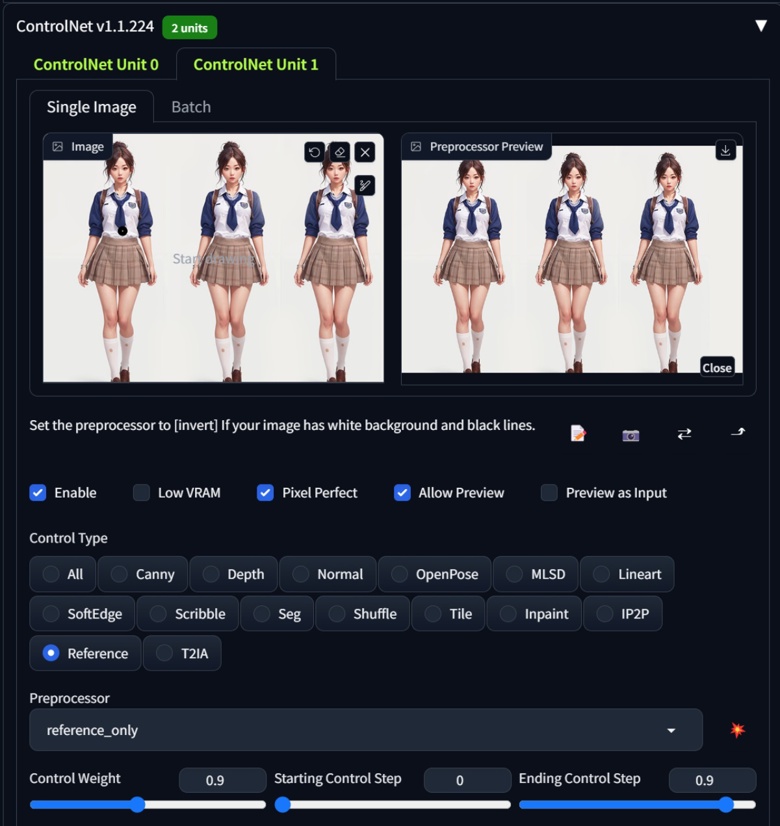
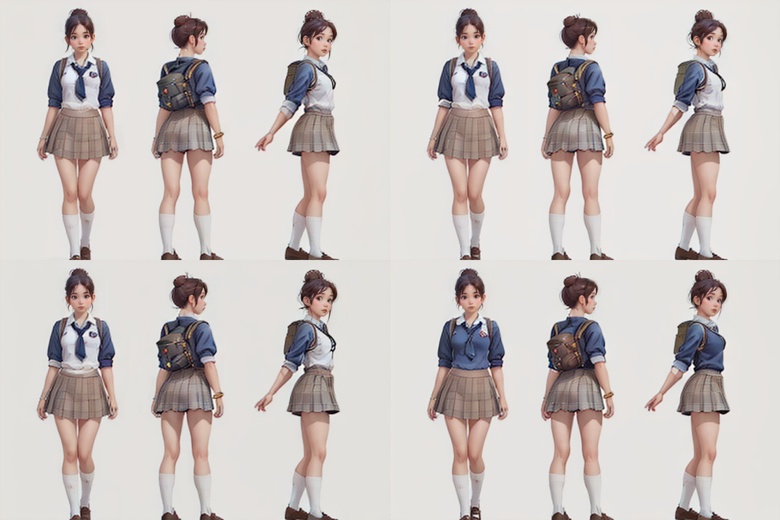
Select the model you want and click "Generate". To facilitate selection, I also used batch.
Upscaling
Do not use Hires directly! I mentioned this issue in the previous Controlnet Reference article.
Black Magic Master Class: Controlnet Reference, Pushing the Limits of Spells
Using Hires along with reference will produce different results. In other words, if you use Hires directly, it is almost impossible to ensure the accuracy of the reference colors!
Select an image that you are satisfied with and manually upscale it. Use img2img to manually redraw it with a redraw amplitude of around 0.33 (adjust according to your actual situation).
If your image has some problems that need to be manually fixed, you can also use tools like Photoshop to repair the small image before using img2img.
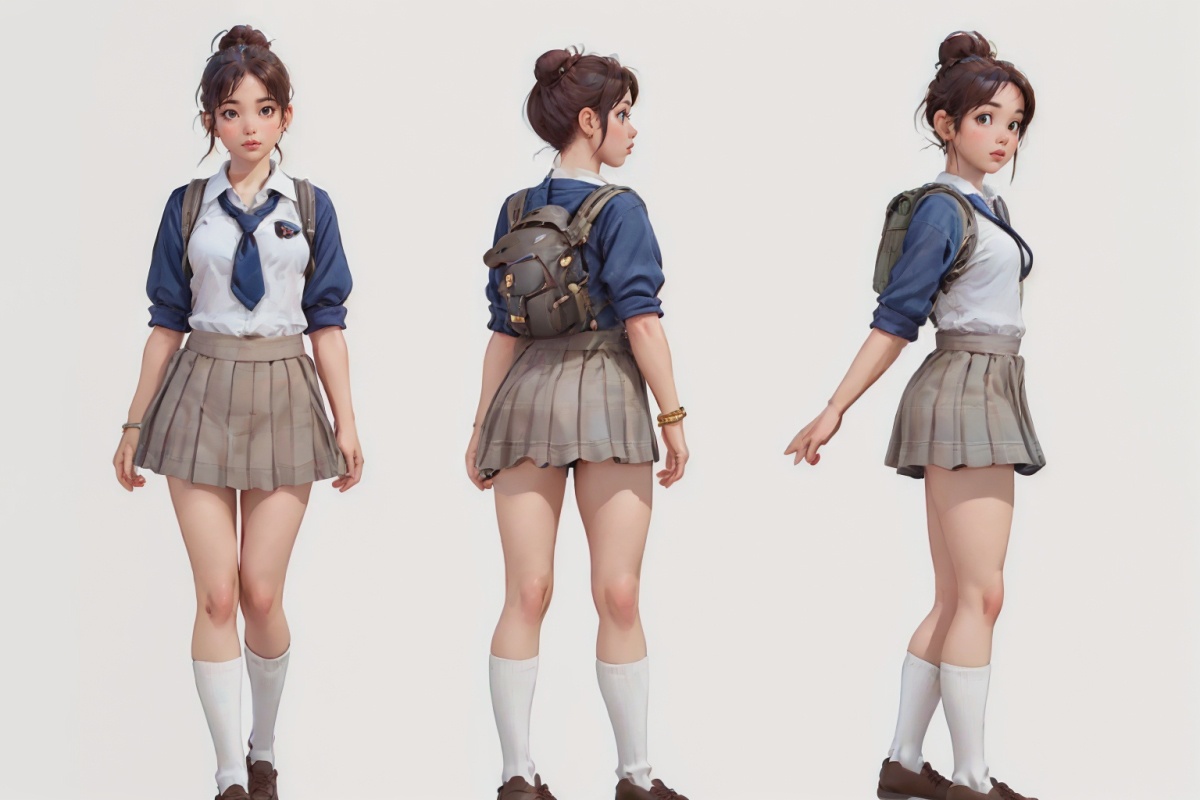
You may notice that there is a slight error in the knee of this image. This can be fixed by generating multiple times or by using tools like Photoshop to make corrections. However, since I am just introducing the workflow, I don't plan to redo it. I like to leave a little challenge for my readers ;)
Summary
1. The biggest difference between this improved workflow and the one proposed by mousewrites is that it completely eliminates the influence of CharTurner on the style of the output image. In fact, the role of the CharTurner tool in this process is only to help us increase the probability of generating images from other angles. You can completely omit it, but then you may need to try more times.
2. Like the CharTurner process, this process cannot draw things that cannot be drawn with prompts. For example, if your reference image is a very strange monster, SD may still not be able to draw it well. However, because we use reference, the likelihood of generating usable images with this process is still higher.
3. After writing this article, I realized that I could try to create a new Turner model using a completely different method. I hope I have good luck with that ;D, If I succeed, I will come back and share my results with you.


