

When developing a ComfyUI workflow for a group of users, sharing your work can be difficult. The recipients will have to install all of the nodes and the models required to run the workflow, and get over the fact that the interface can be intimidating. Moreover, in some cases, you might want to protect your IP and only show the workflow’s output to users. One easy and free solution to get over this problem is to use ViewComfy’s Open Source UI builder together with a ngrok tunnel. In this guide, we’ll go over all the steps.
Just a quick heads-up for people who are not familiar with working directly with the terminal, I am using a Linux terminal to run all the commands in this guide. Most of them should also work with Mac or Windows terminals, but if you run into issues, I’ve included some links with useful resources.
1. Installing NodeJS
ViewComfy is a Next.js app and the first thing you will need to do is to make sure that you have node version 18.18 or higher installed. You can check your node version with:
node -vIf you get an error, or you are running an outdated version, you can install NodeJS programmatically using the node package manager: https://nodejs.org/en/download/package-manager
Alternatively, you can download it directly from their website: https://nodejs.org/en
2. Launch ComfyUI
ViewComfy uses the ComfyUI API as a backend. To use it, you will also need to launch ComfyUI and note the port where it is running. Make sure your workflow runs without error in your version of ComfyUI before trying to use ViewComfy!
To start ComfyUI, you can run the usual command:
python main.pyThe port number is the four-digit number at the end of the URL where ComfyUI is running. For example, if ComfyUI is running at “http://localhost:3000”, the port number is 3000.
3. Installing and running ViewComfy
Once you have the right version of Node, you can install ViewComfy directly from the repo: https://github.com/ViewComfy/ViewComfy
git clone https://github.com/ViewComfy/ViewComfy
cd ViewComfy
npm install
Now that you have everything installed and ComfyUI is running, you can start the ViewComfy app builder by running:
COMFYUI_PORT=<The ComfyUI port number> npm run devSo, if ComfyUI is pointing to port 3000 like in the previous example, the command would be “COMFYUI_PORT=3000 npm run dev“.
After a few seconds, you should get a link that looks something like “http://localhost:8188”. This link can be opened directly in your browser. Take note of this url, you will need it again to share your app later.
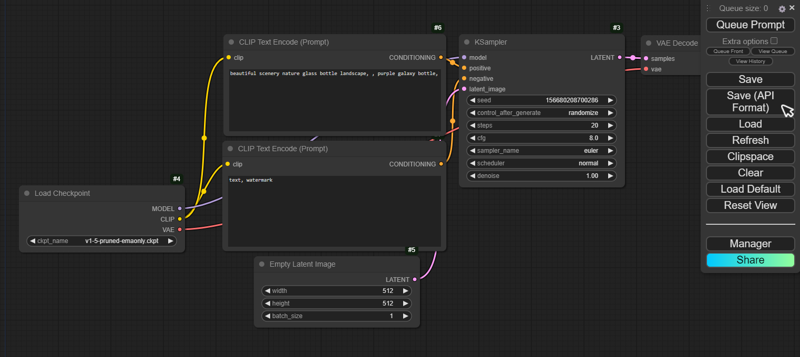
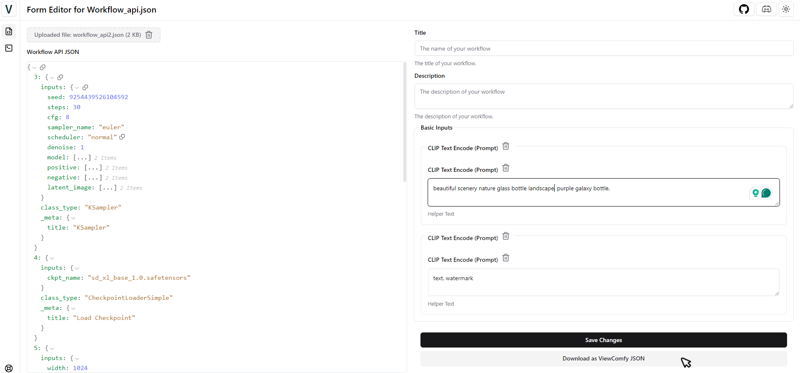
There is a video on the ViewComfy repo explaining how you can build your app so I will spare you all the details here. The app is fairly easy to operate, the only thing you need to be aware of is that you need to use your workflow_api.json file to get started. You can download it from ComfyUI:
Enable dev mode options in the ComfyUI settings
Export your API JSON using the “Save (API format)” button.
4. Sharing your ViewComfy app
4.1. Installing ngrok
Right, so you have your app ready and running on ViewComfy, now it is time to share it. To do so, you can use a service called ngrok. This will effectively create a tunnel between the machine where ViewComfy is running (your computer, a RunPod instance, Google Colab, etc.) and the end user. For people who are not familiar with what this means, the end user will effectively be using your machine to run the app, it won’t be running somewhere in the cloud.
Installing ngrok is a relatively straightforward process. You can follow the two first steps here (installing ngrok and connecting your account): https://ngrok.com/docs/getting-started.
4.2 Setting up ViewComfy view mode
You could share your ViewComfy app as it is, but if you only want to give users access to the playground page, there is a handy feature called view mode.
To activate it, the first thing to do is to put your workflow_api.json and view_comfy.json files in your ViewComfy folder. You can download the view_comfy JSON directly from the ViewComfy form editor.
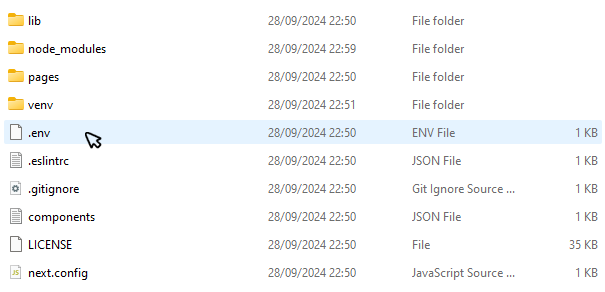
You will then need to set the NEXT_PUBLIC_VIEW_MODE in your “.env” file to true:
NEXT_PUBLIC_VIEW_MODE="true"This file should be in the folder where you downloaded ViewComfy. Note that it is usually hidden, so make sure that your file manager is displaying hidden files. If you don’t have an IDE, you can use Notepad to edit the file, just be careful not to overwrite the file format.
After editing the .env file you need to restart ViewComfy. (you can close the terminal where it is running and type “npm run dev” again in a new one.)
4.3 Putting your app online
Your app is finally ready to share. You can run:
ngrok http http://localhost:8188Make sure that the URL you are using to launch ngrok is the one where ViewComfy is running (eg. http://localhost:8188). Ngrok will then generate a “Forwarding” url that you can share with your audience. It will look something like that: “https://84c5df474.ngrok-free.dev”.
People with your forwarding url will have access to your ViewComfy app for as long as ViewComfy is running, so make sure to close it when you are done sharing.
And that’s it! I hope you find this guide useful.
To stay up to date with what the ViewComfy team are doing, you can join their discord or sign up for the beta on their website.