WARNING!
I’m not very experienced in this matter, so I recommend first learning all the functionality and reading a few more tutorials on how to do it. Also, training SD & XL doesn’t matter; just use different links.
Train LoRA URL:
How do I create a dataset:
1. Decide what you want to create: a concept, style, or character.
2. Find and save images (Free Colab accepts from 20 to 250 images).
3. Describe everything you see in the image (for style, use one custom tag, for example, "/name_style/").
3.1 Not good at describing? Use this Colab to describe all images (maybe someday I'll teach you how to use it) or use CivitAI as usual. When it asks to send the dataset, send the images and use the "auto label" button.
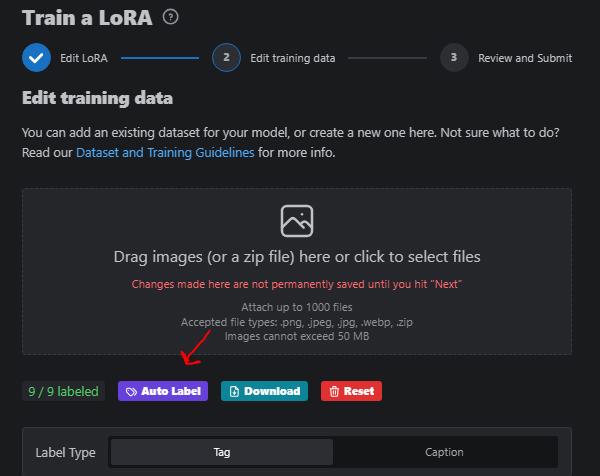

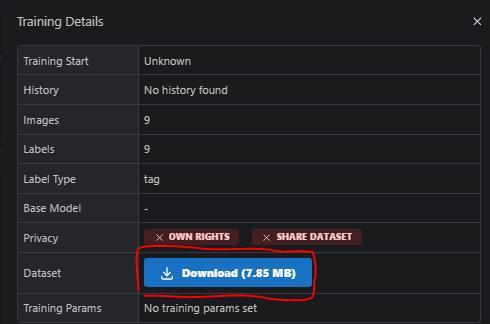
4. Save your dataset in Google Drive under "drive/Loras/name_lora/dataset/" (the dataset folder should contain both image and text files).

4.1 Image names should not be similar to each other; use different names even if the files have different formats (jpg, png, jpeg).
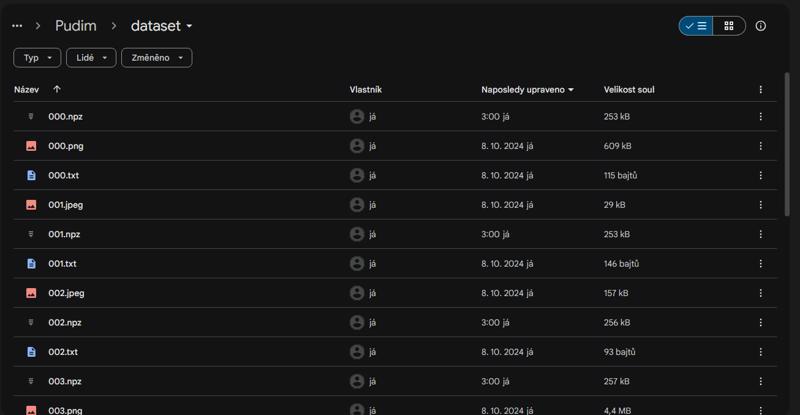
(Ignore the npz files; they appear when you start training the LoRA.)
Congratulations, you have created your first dataset! <3
Prompt / TXT Dataset:
Character: Use everything you see on the character, for example, “1boy, solo, green eyes, orange hair, white skin.” I also recommend reading all the files to ensure everything is correct.
Concept: You can use the same text for all files, but it should not be brief. (One tag) Try to use 5-10 photo concepts such as poses but different characters and send 1-3 to chatgpt and write this: "Create a prompt for Stable Diffusion in simple tags like e621" (nsfw chatgpt will not describe)
Style: There are two ways here: Use a very detailed description of the image or use one custom tag/trigger.
Trainer LoRA:
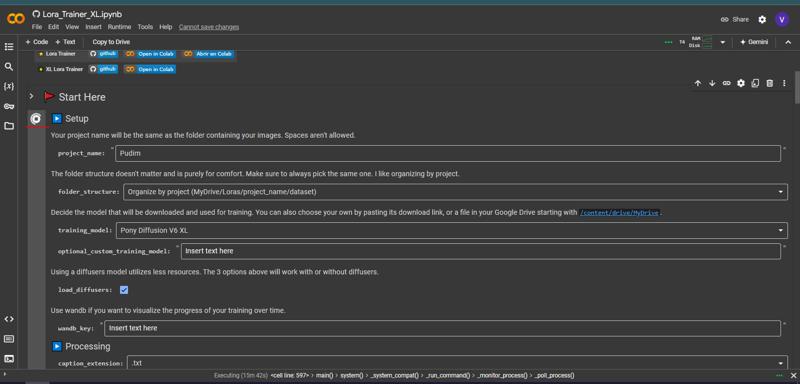
Settings:
I am showing what I usually use
Pony:
project_name ~ Name of the LoRA
folder_structure ~ Path to the dataset (Organize by project (MyDrive/Loras/project_name/dataset))
training_model ~ Model for training (Pony Diffusion V6 XL) or use another SDXL model (optional_custom_training_model)
activation_tags ~ Choose how many custom tags you use (1)
preferred_unit ~ Choose how you will train the LoRA in Epochs or Steps? (Epochs | I have never tried steps)
how_many ~ This parameter depends on the dataset (It indicates how many attempts the AI will have to repeat the dataset it memorized. I usually use from 5 to 20, but it depends on the dataset)
optimizer ~ I recommend using AdanW8Bit, but if you have a small dataset, read the note above (Prodigy manages the learning rate automatically and may have several advantages, such as training faster due to needing fewer steps and working better for small datasets.)
Done! After this, you press start!
Notes:
If your dataset is large (200-250 images), I recommend using 1 repeat, 5 Epochs.
If your dataset is small, I recommend using 10-20 repeats, 10-20 Epochs.
Do not change what you do not know.
SD 1.5:
training_model ~ Use AnyLoRA for furry or other types (Or you can experiment with other SD checkpoints using optional_custom_training_model_url)
Notes:
There’s no point in adding anything else here, so if you’re interested in other parameters, you can check the pony version.
Finish:
After training the LoRA, I recommend checking Google Drive to see if there are “safetensors” files.
You don’t need to use other buttons for training the LoRA; you only need one button (the first one). If you have the question, “Is it possible to automatically generate a test image?” my answer is no, you need to do it yourself.


WARNING!
Try to keep the LoRA training to no more than 1250 steps (This really depends on the dataset; you can find out the number of steps by pressing the button and turning it off).

Remember that Free Colab provides 3-4 hours of free usage. After that, you will need to wait another 12-24 hours to use it again.
After training, your LoRA will be in the folder named Output.
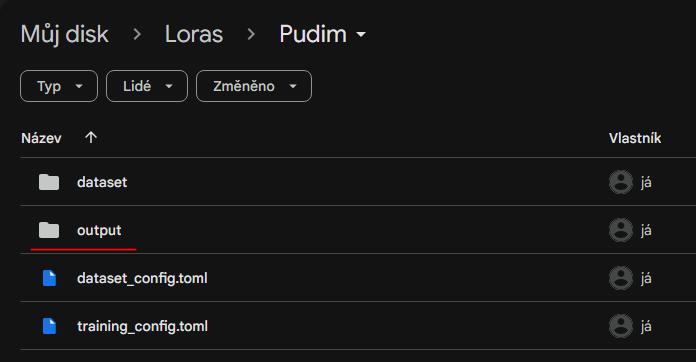
Do not close the tab. If you do, the training will stop, and you will have to start over.

.jpeg)