WARNING!
I’m not very experienced in this matter, so I recommend first learning all the functionality and reading a few more tutorials on how to do it. Also for using XL or SD 1.5 u only need one link!
Stable Diffusion URL:
SD 1.5 And SDXL <- click
Initial Tips:
It’s not mandatory, but connect Google Drive to avoid losing your art! (If you don’t connect it, you’ll need to manually download the zip archive)
from google.colab import drive
drive.mount('/content/drive')
Do not try to use Flux; it won’t work.
Free Colab can load slowly, so I recommend using the “Fast_experimental_installation” button.
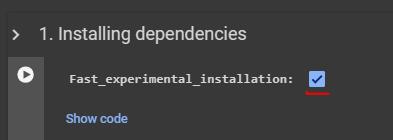
Start:
Click the first button (This loads Stable Diffusion and all necessary dependencies to make everything work).

Models and LoRA:
download_model ~ Used only for SD 1.5 models.
download_vae ~ Used to download VAE.
download_lora ~ Used to download LoRA (SD 1.5 and SDXL).
CIVITAI_API_KEY ~ You need to load your API key from CivitAI (Don’t worry, it just downloads models from the site).
hf_token ~ Use if your LoRA is private and stored on HF.
To download an SDXL model, use load_diffusers_format_model (You need to find this model on HF).
Pony v6: kitty7779/ponyDiffusionV6XLPony Real: GraydientPlatformAPI/ponyreal-finalface-sdxlIL: Laxhar/noobai-XL-1.1or
John6666/fifth-mix-illustrious-absinthe-sdxl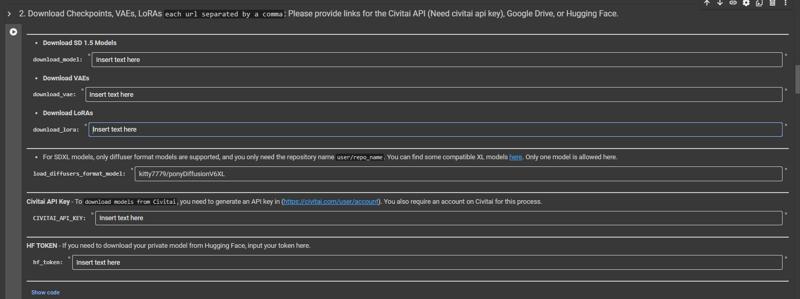
How to Download LoRA?
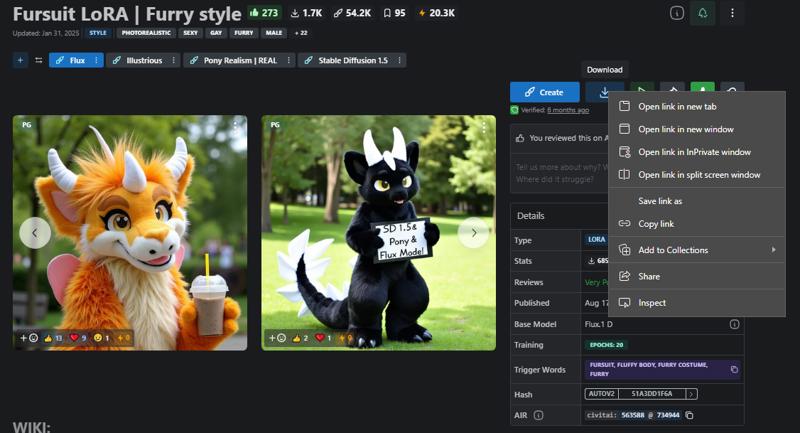
Civitai:
Find the "Download" button.
Right-click the blue "Download" button and select "Copy link".
Paste the copied link into "download_lora".
Hugging Face:
Find the LoRA you need (you can use my repository).
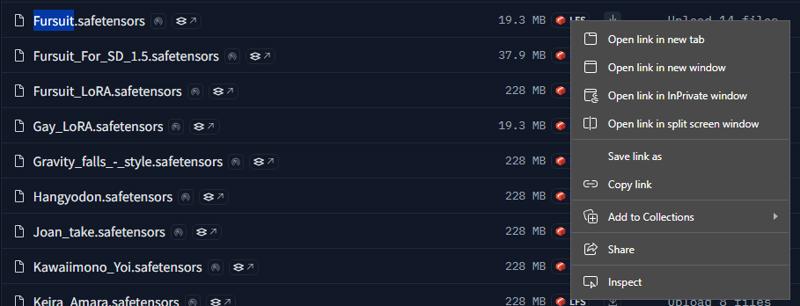
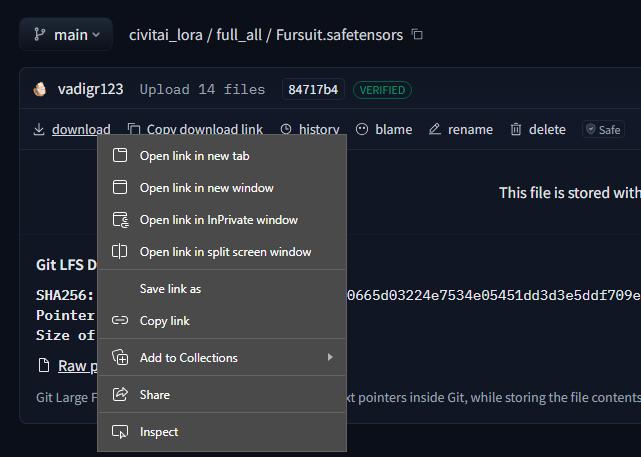
Look for the "LFS" button or click on the LoRA name to find the "Download" button.
Right-click on "LFS" or "Download" and select "Copy link".
Paste the copied link into "download_lora".
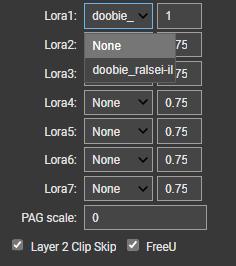
How to use LoRA:
Notes:
To download the model for SD 1.5 Use the same but with checkpoint
Error?
If you encounter the following error:RuntimeError: Failed to import diffusers.models.controlnets.controlnet because of the following error (look up to see its traceback):
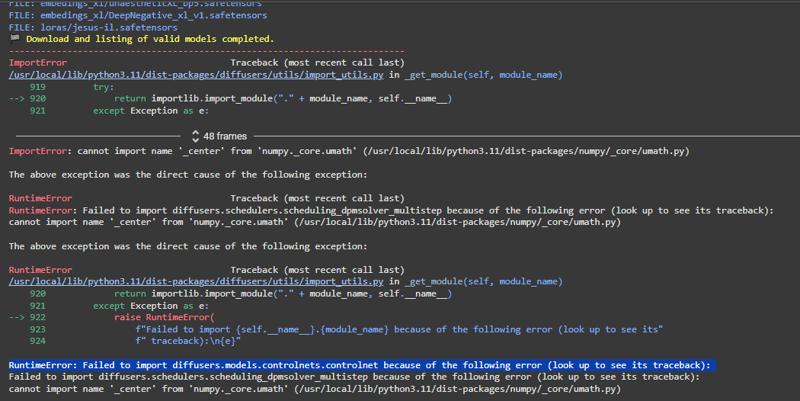
while running "2. Download Checkpoints, VAEs, LoRAs", try fixing it by adding a new code cell and inserting the following snippet:
!pip uninstall -y numpy transformers diffusers
!pip install numpy transformers diffusers --no-cache-dir
After running this code, you will see a "Restart session" window – this is normal! Simply click "Restart" and then try running step 2 again.
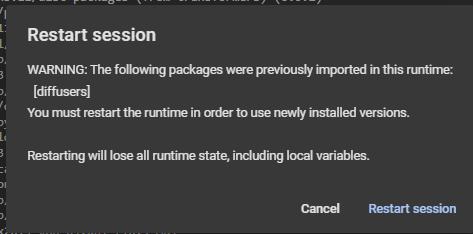
🔹 Important Notes:
First, try pressing button 2, and only if you get the error, add this code.
If you have any questions, you can ask ChatGPT by saying:
"Hi, I have an issue in Google Colab with the following code, and I'm getting this error: {Code}
"Error: {Error}"Or join our Discord server for help:
🔗 https://discord.gg/UtYvGwFfvx
GUI:
I recommend using save_and_load_config to prevent settings from resetting each time.
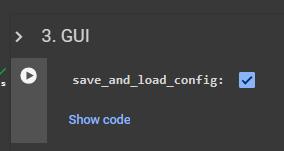
After running this button, start Button 3. GUI and click the “Generate” button to download the model.
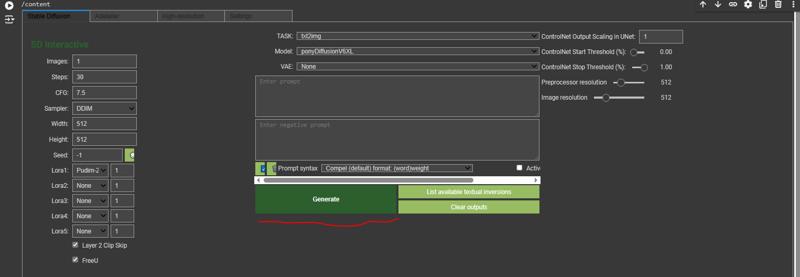
While we wait for the model to download, let’s set it up so that the art is saved automatically:
Click on the folder icon on the left.
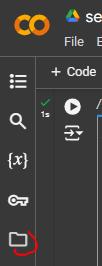
Find the drive folder and click on it, then click on drive -> MyDrive.
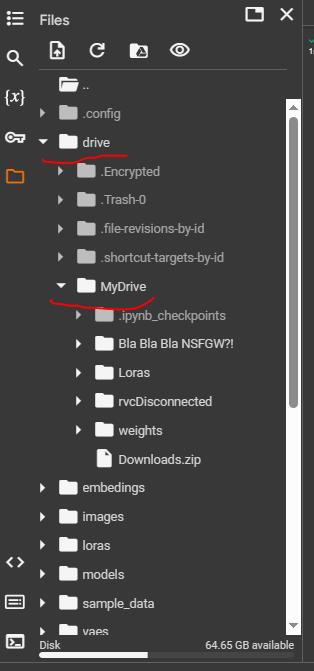
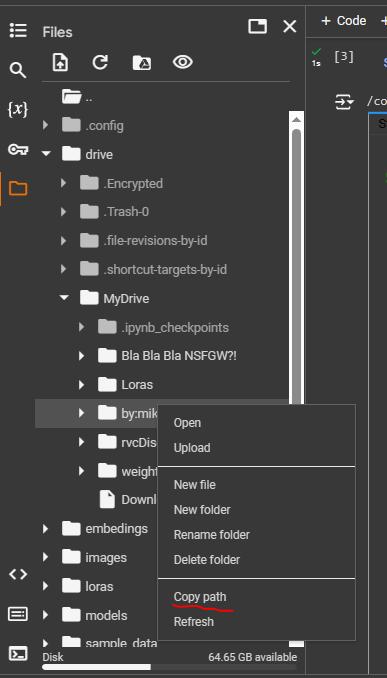
Create a folder where the art will be saved. After creating it, right-click on it and copy the path.
Find the “Settings” button and locate “Image storage directory,” then paste the copied path (It should look like this: “/content/drive/MyDrive/Your_Folder”).
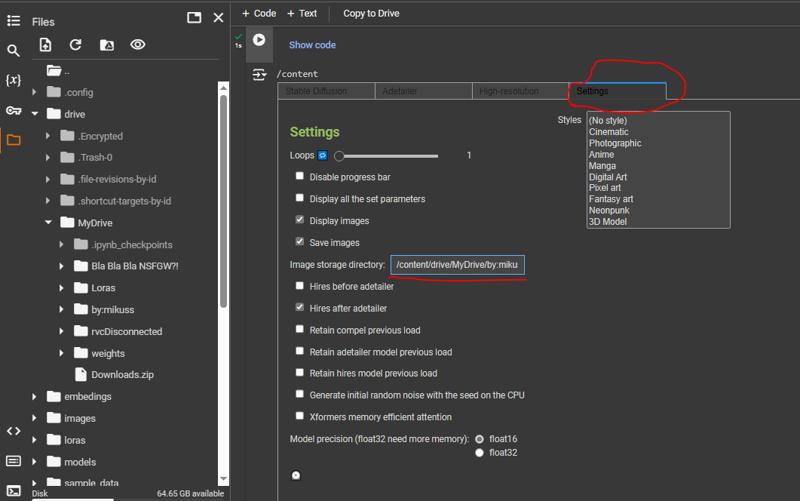
Done! Now the art will be saved in Google Drive!
You are now ready to use the GUI as you wish!
Notes:
I recommend not using Epochs less than 20 and more than 50.
A well-working CFG: 7.5.
The sampler depends on the model, so if you are using pony, try Euler a or DDIM.
Every time you add a new LoRA, you need to click on Button 3. GUI.
Use FreeU for good quality.
TASK: txt2img.
Model ~ Your downloaded models (SD 1.5 and SDXL are different, so be careful not to mix them up).
Inpaint & Openpose
Inpaint:
Find the cell "Upload an image 👈 🖼️🖼️🖼️" And click on "Create_mask_for_Inpaint:"

"stroke_widt" the size of the brush on which you will draw the mask
Click on the cell, after that you will see the button "Choose Files" click and select the picture
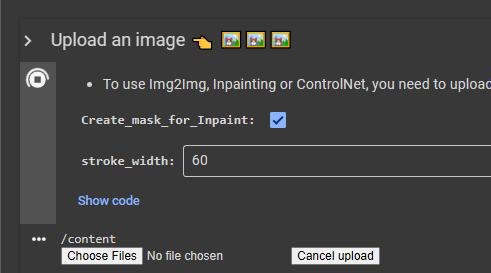

You see your image use the mouse to draw the area you want to change or add.
After that, click the "finish" button
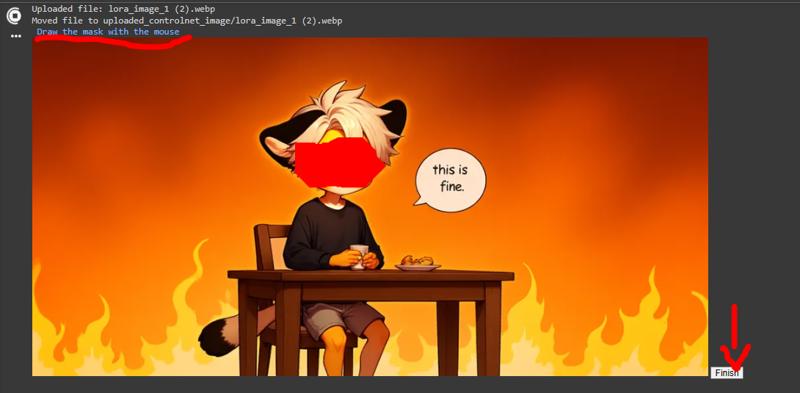
After that, go back to your GUI and do everything that is written below:
* Use the same size as the image
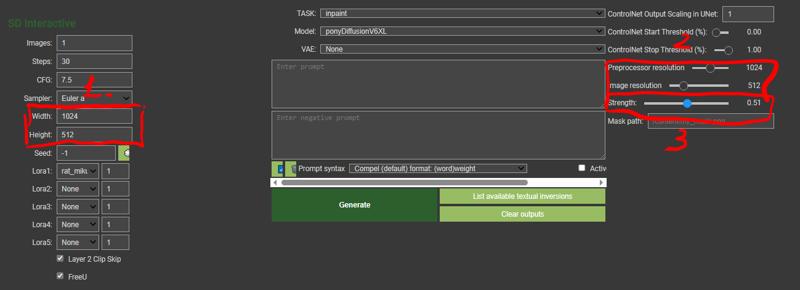
1. Image size
2. Image size
3. Strength use Inpaint
4. Check TASK! -> inpaint
Tada! Done after that you use "prompt" to add or change something on the image ((I can't promise that everything will work out well on the first try))
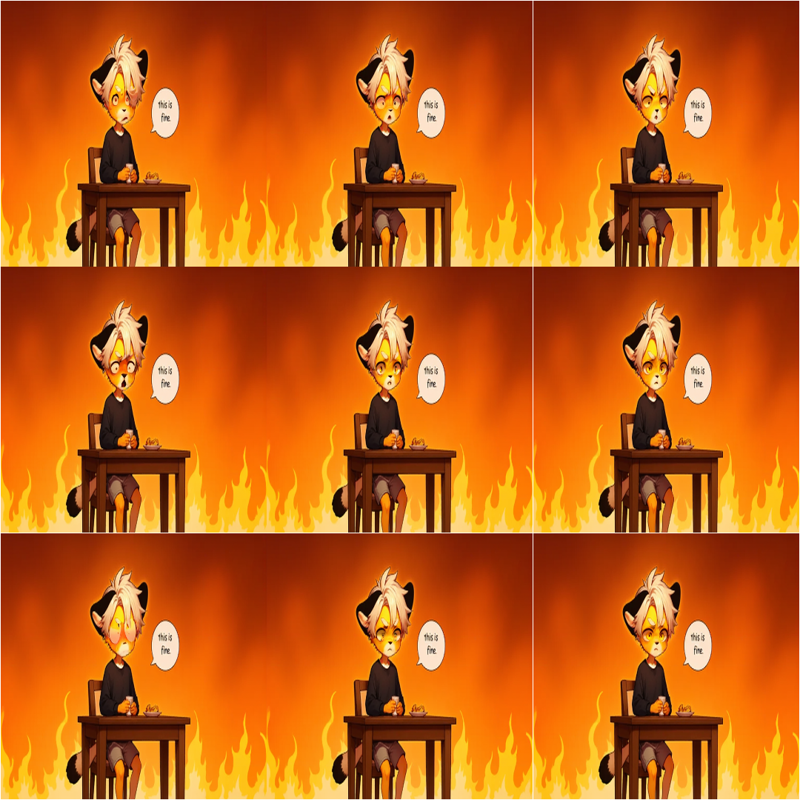
Openpose:
Use the same "Upload an image 👈 🖼️🖼️🖼️" But this time disable "Create_mask_for_Inpaint" (You can use Image or Openpose)

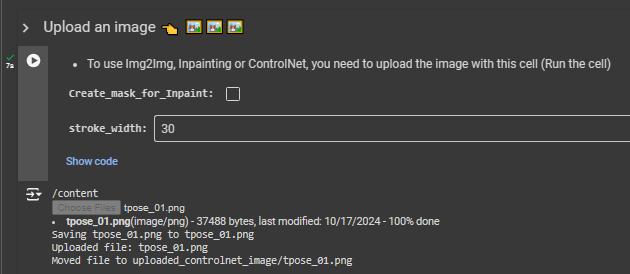
(SDXL openpose can work very badly, but SD 1.5 works well)
I recommend using 1024x1024
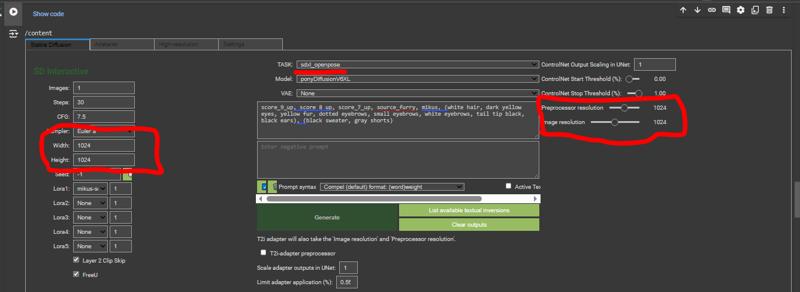
If you use sticks (Example in the picture) RECOMMENDED Disable "T2i-adapter preprocessor"
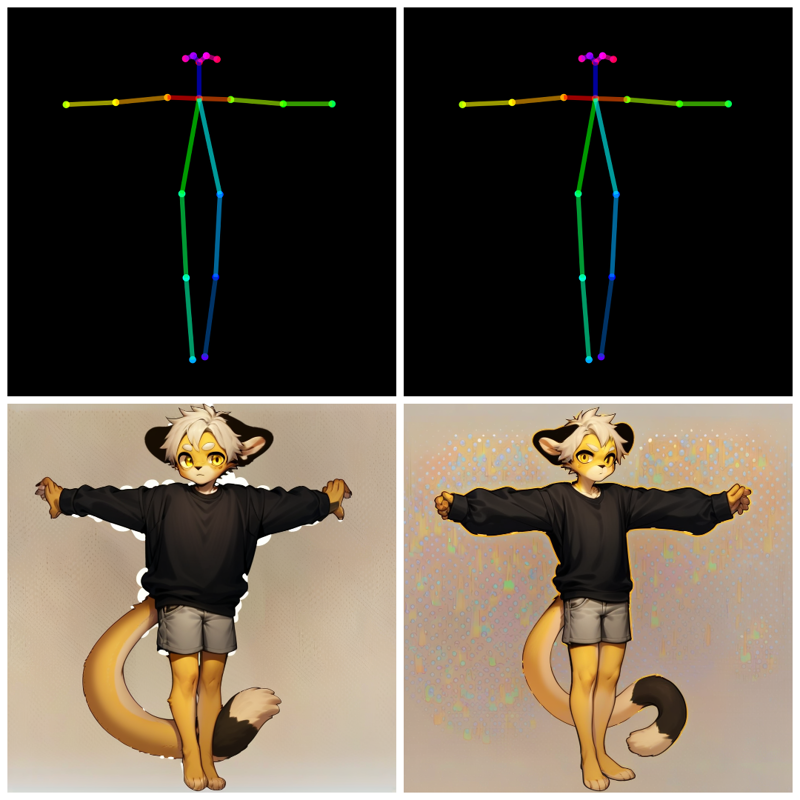
Tada! Done, after that you use "prompt" to describe the character who should do it
Saving without GDrive:
Scroll to the very bottom of the page and you will see "Download Images"
Click the button and just wait.. The more pictures the longer you will wait (I do not recommend using it without Disk as it will take a very long time)

You definitely need to check if there is a folder named "image" -> /content/image If the folder is empty it will not be able to download the image (It saves them with the prompt inside)


