Greetings
https://civitai.com/models/271305/video-to-video-workflows
Intro
This article go over video masking, a topic I think is important in making video to video conversions in comfy ui. And really has been important in video creation and editing since its inception. Comfy ui and Ai just can make masking less time-consuming than manual masking done in the past.
This article uses SAM 2 masking, as it is the most robust and useful way to reliably mask a video at the moment.
This will go over settings and info on how to use this workflow
Video Paths
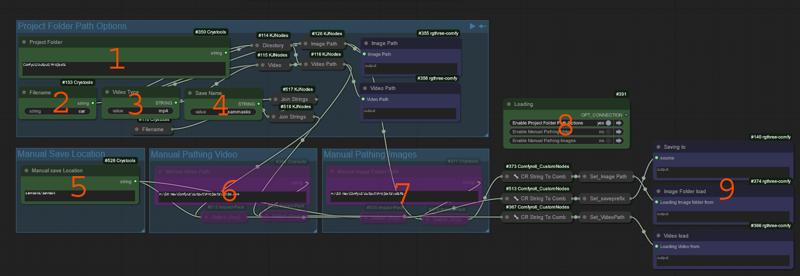
First thing we do is load a video to mask, this flow default loads from the project folder we created in the control net workflow, however you can manually override that and load any video from anywhere.
In this image
Project folder Group
The project folder, you can change this... but all my flows go by this. Just keep it as is.
The video filename/foldername inside the projects folder to load, ensure your video is the same name as the folder and inside the folder. The controls' workflow saves with 00001 endings, you need to remove the 00001 from the video to load it in properly here. It should be the same name as the folder. If loading an image path, it does not need to be renamed.
The type of video to load .mp4/.gif
The save name that is used to save the masks. Default sammasks can change this to anything you want.
Manual Options Groups
This sets where to save the masks when you are using a manual path to load the video. Defaults to sammasks/sammasks.mp4 inside the output folder of comfy. You can change this to where you want it saved inside the comfy output dir.
Manual path for video allows you to set a manual path direct to a video instead of using the projects' folder. I found myself using this when I wanted to mask my generations that were not in the project folder.
Manual path for images allows you to set a manual path to an image folder. This loads the same as the video but loads in an image folder instead.
This is the 3 options for loading. You can enable the ONE you want.
Info for where the video mask will be saved and where the video/image folder path is going. This was for debugging but can help you find things.
Image path or video loading
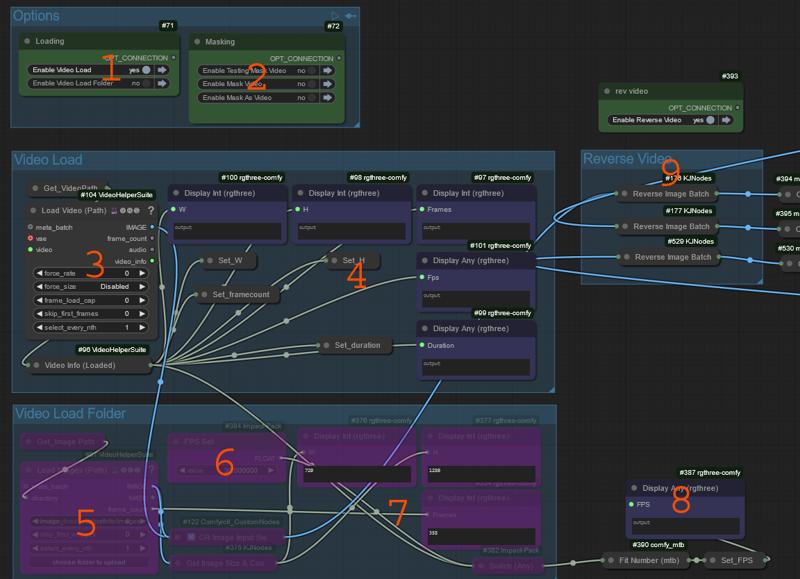
In the image
Video load Group
This is where you choose to load in a video or image folder, select the one you are using.
This enables the masking groups at the end, you can disable these until you have all the point editors correct.
This loads the video to be processed, you can change the settings, I have gone over them already in the controls flow so i won't waste time. They work the exact same as the all the loaders do and allows you to change fps, skip frames, and limit the frames.
This is the info for the loaded video, H/W/Frames/fps/duration
Video load folder group
This loads in the image folder to process, same settings as the video loader. If you don't have all options you can right-click and click fix node, these video combine and loaders are updated often and sometimes break my workflows, you can fix them by doing this.
This sets the FPS of the image folder you are loading, it does not really change anything as it's just the fps of the mask preview, and it's not used in the video creation, but I try to set this to the proper fps to ensure the previews are not fast/slow motion.
Info for the images in image folder H/W/frames
Options
This group when enabled will reverse your video for the masking. You can use this if your subject is not in the first frame of the video to mask from the end. This group will save the masks the proper way after masking is completed.
This shows the fps setting for the masks you are going to save.
SAM 2 model loading
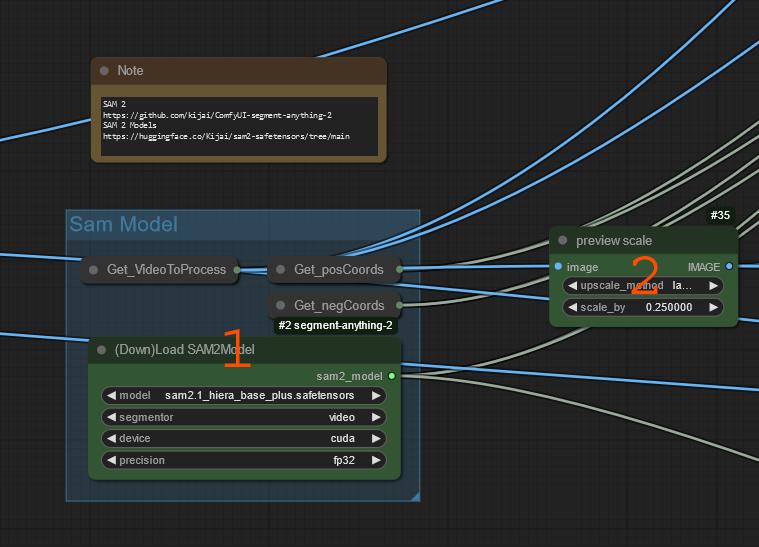
In this image
this is the SAM model and options. You can change the settings here, it needs "video" but others can be changed if you see fit Sam2.1 seems best IMO.
This allows you to downscale the previews. The previews use a mask overlay that is memory intensive when using large images. This does not downscale masks, just previews.
Once you are this far, you can run the workflow to load in the video and the previews for the point editors.
This flow has 2 ways to use SAM 2.
2 ways to mask
- Method 1
- this works well and has a tester to allow easy tuning of the points, however it fails on fast moving scenes and or changing camera shots sometimes.
- I always try this first.
- Method 2
- this works much better at fast motion and tracking people throughout a video, even with camera changes.
- This can use up to 3 point editors to call in 3 frames. I think the first needs to be frame 0 but the other 2 should only take effect on the frame you set up onward.
- Its downsides are that if enabled, the masking will run EVERY time. It does not cache the masks, and it can not be tested like the other due to the multiple point editors needing certain frames.
Masking Option 1
I always try this option first
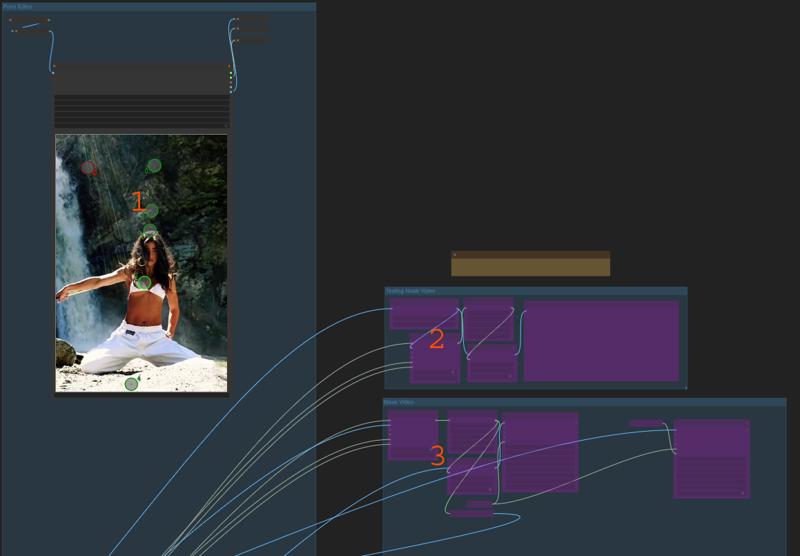
in this image
This is the point editor for masking option 1.
This will load frame one of your loaded video or image folder when you run the workflow. This is the only frame you can use for this method. You have the option to reverse the video (and return it at the end to proper order) If your first frames do not have what you want to mask and the end frames do, this can work.
Once an image or frame is loaded you can move the green and red circles, these are positive and negative points. Put the negative where you don't want to mask, and the positive where you do.
You can add more points by holding shift and left/right click. 3-4 positive and 1-2 negative usually work.
This is the masking test area, this brings in a portion of your video to run the masking on. Use this to test if this method can mask your subject before you run the entire video. Edit the points if you need to.
This is the main mask work for method 1. This uses SAM 2 to mask the video, then shows a preview and saves to the folder you specified
There is a mask fix node that allows you to dilate, erode, blur, and many other options for the saved mask.
Masking Option 2
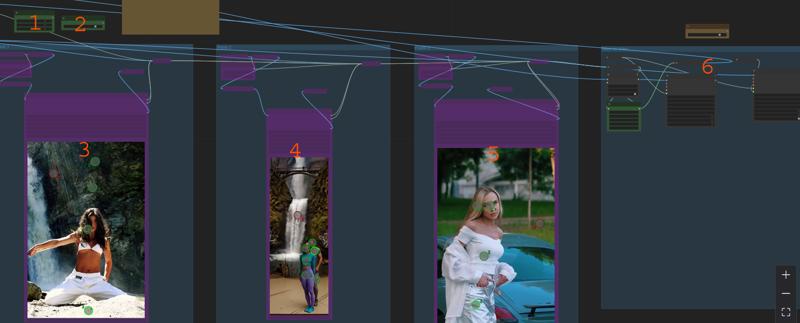
This is the main video masking option for more complex videos. This holds coherence better through fast movement, and scene changes.
In this image
This is the 3 point editor options. You can enable 1,2 or 3 editors. I recommend using just 1 first to try it.
This option enables the masking, do not enable this until you have your points set up in the editors you wish to use.
4,5. - These are the point editors,
they work exactly the same as the above single one, however these allow you to bring in up to 3 frames to point with.
Not all are needed, try one, then if you find some frames are not good you can add another frame to point with.
All editors should autopopulate with the frame you select from the green frame index box for each editor.
You can change the frame brought in to point at for each editor with the frame index box.
Once an image or frame is loaded, you can move the green and red circles, these are positive and negative points. Put the negative where you don't want to mask, and the positive where you do.
You can add more points by holding shift and left/right click. 3-4 positive and 1-2 negative usually work.
This is the main masking for method 2. Keep this disabled until you have all things ready and loaded with points set.
Again, this has a mask fix node that allows tuning.
Shows a preview overlay.
Saved to the location you have chosen
Hope this helps you understand how to use this flow for your needs.
The next article will be using this flow to mask a few example videos, we will go over what I look for when masking and where I place points to get the needed masks.

