https://civitai.com/models/271305/video-to-video-workflows
This article will explain how I mask subjects in my SAM 2 masking workflow.
General Tips
Positive on faces, can sometimes mask the person with 1 point.
If the subject is not in the first frame, you can try to reverse it if they are in the final frames
When adding and subtracting masks to control control nets like depth / line art, you will need to both erode and dilate the masks to ensure they work. When masking to line art, dilate the mask to ensure it sees the actual lines of the video. Masks are on the inside of what you mask, you need to dilate slightly to see line art properly in the control.
if subtracting masks, it's best to dilate the mask you are subtracting to ensure it removes the entire area.
Video 1
The first video to mask is a video of a woman in a skirt and tank top with her hair up, walking by other people. The attachment has all the masks, and controls created from this article.
This video will use method one only from the masking flow.
First we mask the subject, the woman
Subject
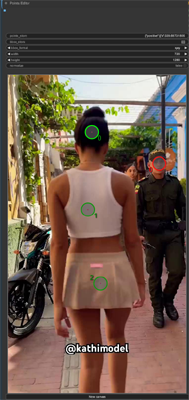
This is the point editor points that I used to mask the woman, this captured hair, skin, and clothing
This also did NOT mask the kathimodel text, which is nice.
Skin
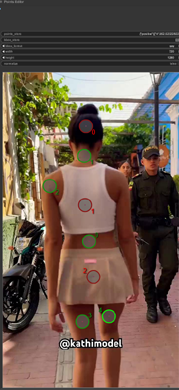
Above you see that I negative the hair, and both clothing, then positive all area with skin that is not connected to each other.
Skin is something you can mask if you have trouble masking clothing, skin can be subtracted from subject masks to get clothing/hair
Skin masks can be used to just use depth or line art on those areas, while not on clothing.
This can be masked to controls like line art and depth for body physics.
Clothing
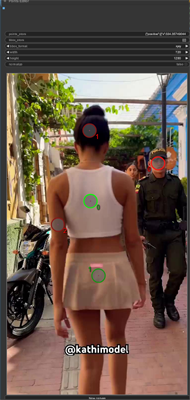
Above is the clothing mask points, 3 negative, and 2 positive both clothing, and negative out skin, hair, and BG.
This can be used to subtract it from the subject masks to allow better changes of clothing.
If you change one of the clothing points to negative, you will get only the skirt or shirt.
Hair
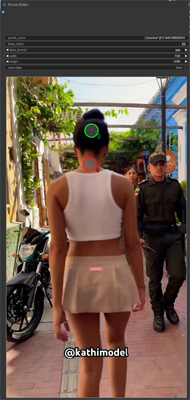
Above is hair mask points, only 2 were needed, POS on the hair and NEG on the skin.
This can be subtracted from the subject masks to allow better changes to hair,
This can be masked to a control net to follow hair physics, hair flips, etc.
This is all the masks for this I made
Video 2
The second video is a woman using a BO staff.
This uses the second method for better fast moving object tracking.
This masks
subject
BO
pants
hair
face
ground
First we mask the subject, we try here to NOT get the BO in the subject mask.
Subject
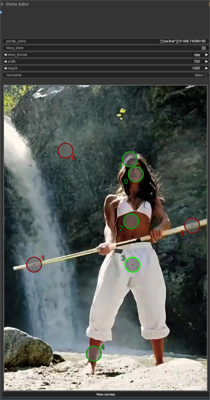
Above is the points I used to get the subject, notice I negative the BO, as I want as little of it in this mask as possible.
Pos points on face, hair, pants, skin
Next we mask just the BO
BO
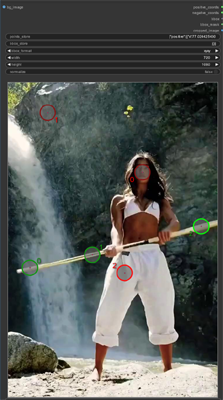
Above is the points I used to get the BO mask.
Negatives on face, pants, and background with 3 positives on the bow
Hair
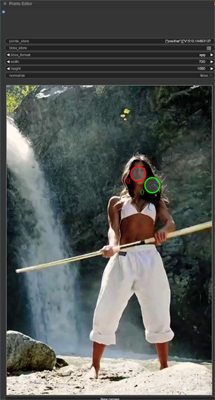
Above is the points used to get a hair mask, there is wild hair physics in this you may or may not want to copy
Masking this to depth/line art can follow the physics
Masking this away from controls allows you to change the hair.
Pants
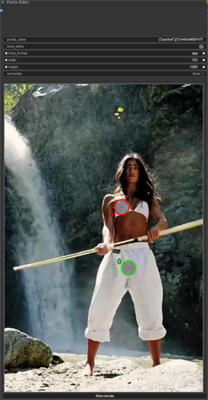
Above is the points i used to mask the pants, this was needed if i wanted to change the pants to anything else. Neg on the top, as it tried to add it.
Can mask this away from controls to not copy the pants.
Can subtract this from subject masks to do the same.
Ground
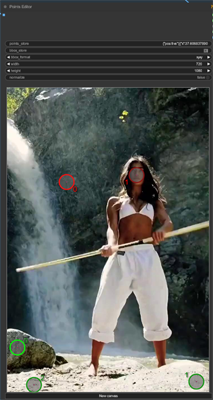
Above is the points used to generate a ground mask. This is useful to allow you to copy the ground she is standing on, but still change the waterfall in the background.
This is useful with moving camera shots to ensure you can change the location, while still having the ground to have the subject stand on.
Both of these should have a walkthrough article when I finish up the last of v6, i don't want to do that until v6 is done as much has changed.
Now to finish V6...

