To get good training data for a model can sometimes be a struggle, especially if you want to create a unique concept when there are no good images to use to train your model. In this article I will describe the workflow of a process that I have found that works really great for me.
That is to use whatever images that are available to train a model (lets call it Model A), and then use Model A to generate new images that then are used to train another model (lets call it Model B). This is an iterative process.

Image 0. The beginning and end result using an iterative process.
The Workflow - Overview
The workflow itself can be described as:
Collect images
Caption the images (don't forget the trigger word if you use one)
Train your model
You now have Model A
Use Model A to generate new images
Select and Caption the best images generated by Model A
Train Model B by using the captioned images from step 6
You now have Model B
This can be repeated as many times as necessary until you get a model that you feel can generate the images that you were aiming for.
The Workflow - Detailed explanation
I will now describe the workflow more in detail using my model Arachnid as an example.
1. Collect images
The first thing first is to collect the images that you would want. I tried to generate images using Bing Image Creator but since that failed I ended up collecting 30 images from Google.
These images weren't perfect, many of them were blurry and of low quality but when training a model several steps, that is not an issue. The most important part is that your model can learn the concept of the images.

Image 1. Pictures from Google, used for the original training data to train Model A
2. Caption the images
The second step is to caption these images and use a trigger word if you like. I chose to use a trigger word, 4r4chn1d, when training this model.
To give some idea on how I captioned the images that I used to train Model A, is here my caption that I used for the three images that you will find above in Image 1:
Image to the left:
4r4chn1d 1girl, long hair, breasts, black hair, navel, holding, cleavage, medium breasts, weapon, horns, sword, cape, holding weapon, armor, holding sword, helmet, hand on own chest, shoulder armor, pauldrons, shield, fake horns, giant, knight, full armor, helm, horned helmet, warriors, building, cave, stone
Image in the middle:
4r4chn1d solo, white background, black skin, holding, weapon, mace, white hair, sword, holding weapon, holding sword, bug, silk, spider web, crown, quiver, arrows, bracer, spiders, skeletonImage to the right:
4r4chn1d 1girl, solo, breasts, holding, low res, whip, green skin, tree stump, outdoors, skyTo do my initial captioning, I use the WD-14 tagger in Kohya_SS. It gives you a solid base and saves time. I then refine these using the Image_text_viewer program.
3. Train your model
Here you can use CivitAI Train A Lora-feature to train your model. During the setup of the training, you can write a training sample prompt for which images that the model should generate during the training itself.
When you write the training sample prompt, try prompting for something that weren't part of your training images. For example, an Arachnid duckling. This is a great way to get an idea on how good the model has learned the concept from the training data and how flexible it is.

Image 2. An Arachnid duckling. The result from the training sample prompting during training of Model A.
4. You now have Model A
Celebrate! You have (hopefully) successfully trained your model.
5. Use Model A to generate new images
Use Model A to generate images that will be used to train your model B. Try to get a variety of different images because this will make your model B more versatile.
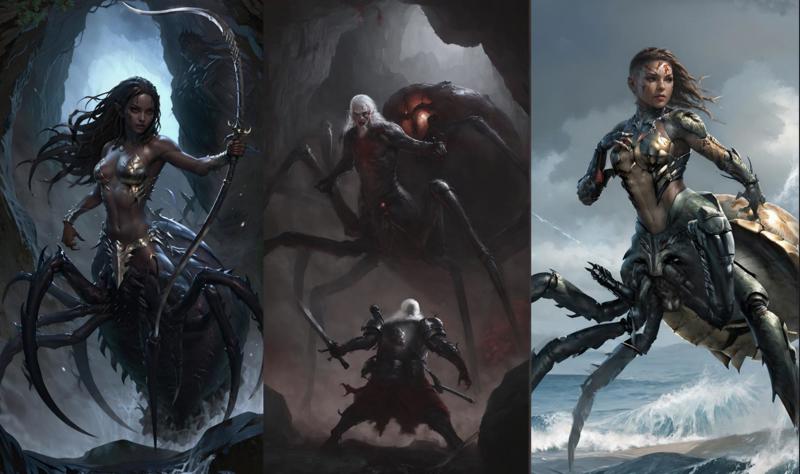
Image 3. Example images generate using Model A.
6. Select and Caption the best images generated by Model A
When selecting the images that was generate by Model A and to be used to train Model B, focus on picking images that are versatile from each other but still staying true to the concept.
I selected 30 images when training Model B, the same amount that I had when training Model A.
Image 4 displays an example of images that are very similar to each other and thereby not good to use them all when training Model B, while Image 5 displays examples of pictures that are more suitable for training Model B.
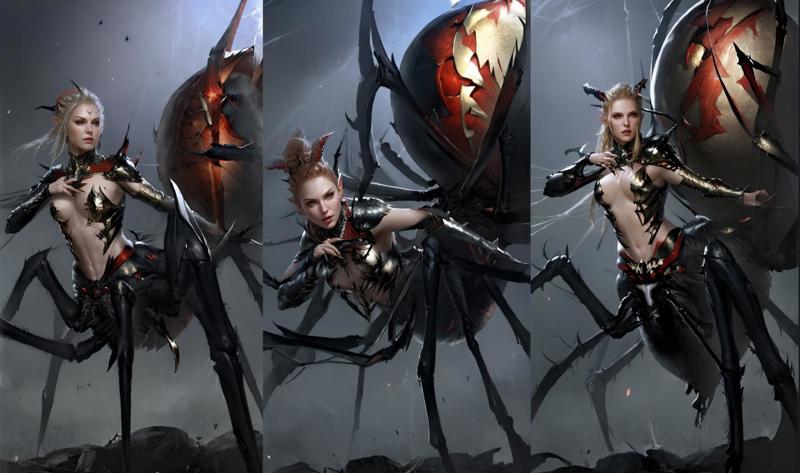
Image 4. An examples of images that are to similar to each other to be part of the training data used for Model B.
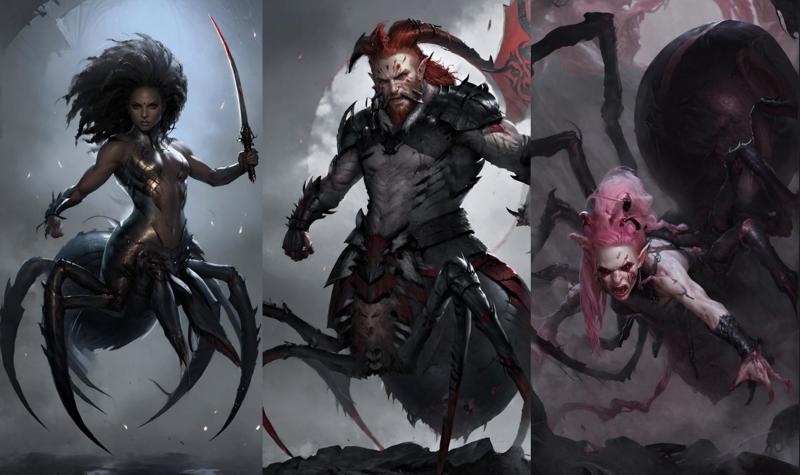
Image 5. An example of images that are more versatile and could be used to train Model B.
Caption the images that you have chosen from the images that were generated by Model A. Now it is possible to change the trigger word if you have thought of a better one. I usually use the same trigger word throughout the entire process.
Caption the images the same why that was described in the step 2. Caption the images.
7. Train Model B by using the captioned images from step 6
Same procedure as step 3. When training the new version, Model B, I sometimes reuse the prompting that I used for Model A, just to be able to compare how the different models handle the same input.
8. You know have Model B
Time to celebrate again because now you should have a second model that should be even better than your first one. For more complex concepts, you can always repeat the steps and create Model C, Model D and so on.

Image 6. Examples of images generated by using Model B.
Getting rid of bad habits
Here are some examples of bad habits in the model that I managed to get rid of by training my models using a iterative process.
The less versatile images you use when training a model with few images the higher the risk is that the model learns some “bad habits”. One example of mine is that my Arachnids images very often seem to have a hand placed on their chest if I prompted for the arms/hands to be placed otherwise. This turned out to be because two out of the original images from Google, the Arachnids had a hand placed on their chest. This habit was picked up even if I captioned their placement from the beginning when training Model A.

To resolve this, I took the best images that I had and really put a lot of focus on prompting the position of the hands/arms.
Another similar bad habit that the model had picked up was that the background/environment of the images was always very similar. This was resolved the same way as with the hands/arms i.e. better captioning of the background.
I didn’t have to train a model for fixing the hands/arms and then retrain it another time for resolving the background issue. With good prompting of both the hands/arms and the environment, the issue was resolved during the same retraining.
Conclusion: Several bad habits can be resolved in the same retraining step.
Future improvements
Even if I am really happy about how Model B turned out in the end, there were I couple of things that I would have done differently. If I had redone it I would have put more focus on captioning the body placement of the arachnids, e.g. climbing down a wall, hanging up side down and so on.
Practice make perfect and I would recommend to put a lot of effort selecting the images that are to be used to train Model B. It can be difficult in the beginning but the more experience that you get when using this method, the easier it becomes.
I hope that you have enjoyed reading this article and that it can be of use to you. If you have questions or if something is unclear, just ask and I will do my best to bring some clarification. Also, since this is my first article, feel free to give feedback on things that I can improve for the next article that I write.