


SD 3.5 is extremely new, there is still much to learn about it, so this guide will only touch on the technical aspects on how to run the training but not on how to get good results or how to prepare the dataset.
*Parts of the guide are likely to break as AI Toolkit releases newer versions
**I took parts of the guide from a flux guide of a user who is sadly no longer on the site
Deploying a Pod with RunPod
Please download the attached config.yaml attached to the guide.
Visit the RunPod site.
Create a new account or log in to an existing one.
Ensure you have $5-$10 available.
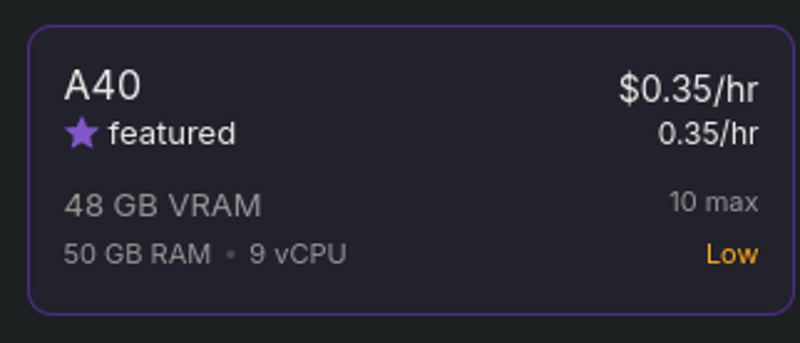
Deploy a new pod, selecting the A40 option.
Editing the Template
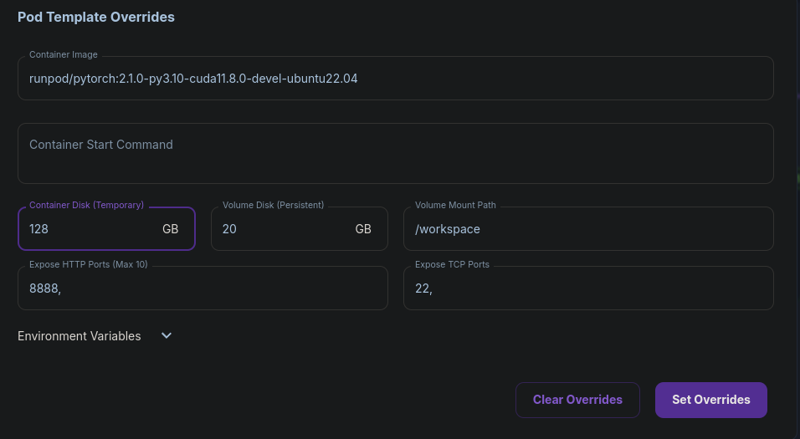
Edit the template, set the Container Disk (Temporary) size to 128 GB and click "Set Overrides."
Deploying the Pod
Click the large "Deploy on Demand" button this will create the pod. After the pod is created click "Connect."

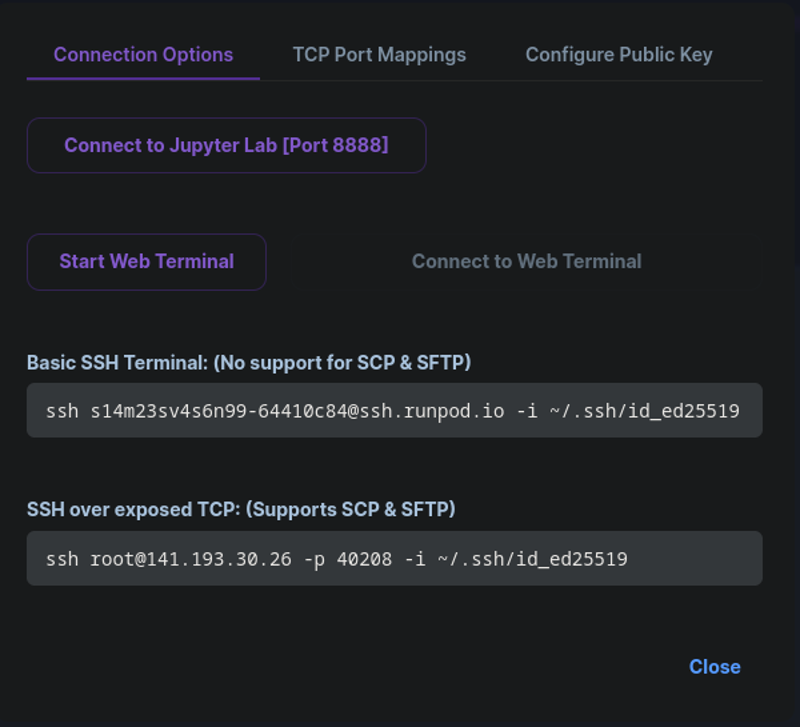
Connecting to the Pod
Click "Connect to Jupyter Lab [Port 8888]" to open your pod in a new tab.
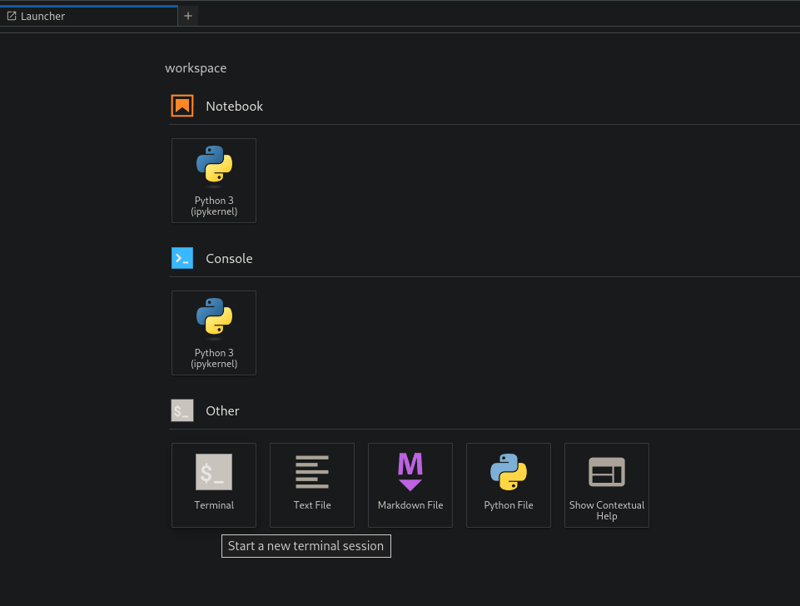
Opening Terminal
Click on "Terminal" to open the terminal in a new tab.
Installing AI Toolkit
Setup
git clone https://github.com/ostris/ai-toolkit.git
cd ai-toolkit
git submodule update --init --recursive
python -m venv venv
source venv/bin/activate
pip install torch
pip install -r requirements.txt
pip install --upgrade accelerate transformers diffusers huggingface_hub
Upload your dataset
Create a new folder in the ai-toolkit folder, name it
datasetor your trigger word.Drag and drop your .jpg, .jpeg, or .png images and .txt files inside the newly created dataset folder.
Login into Hugging Face with an Access Token
Get a READ token from here and request access to Stable Diffusion 3.5 model from here.
Run
huggingface-cli loginand paste your token.Paste your Hugging Face token when prompted. (Make sure to accept the EULA to download the flux models).
Press
nwhen asked if you want to add the token as a Git credential.
Training
Download the
config.yamlattached to the guide. If you want to change the training settings feel free to edit it.If you want to change the default sample images in the config.yaml go to
        prompts:
          # you can add [trigger] to the prompts here and it will be replaced with the trigger word
#          - "[trigger] holding a sign that says 'I LOVE PROMPTS!'"\
          - "a man holding a sign that says, 'this is a sign'"
          - "a bulldog, in a post apocalyptic world, with a shotgun, in a leather jacket, in a desert, with a motorcycle"
and change/add/remove the lines
 - "a man holding a sign that says, 'this is a sign'"
 - "a bulldog, in a post apocalyptic world, with a shotgun, in a leather jacket, in a desert, with a motorcycle"
Place the config file at the /ai-toolkit/config folder
Run the file:
python run.py config/config.yaml.
When the training ends
Downloading the LoRA
After training completes, navigate to the
ai-toolkitfolder then go to Go to theoutputsfolder.This is where all checkpoints and sample images are stored.
To download, click on the desired checkpoint(s) and right-click on
*.safetensors, then select "Download."

After training completes, exit and shut down the pod, then delete it to avoid extra charges.
Closing thoughts
So far I didn't have too much succuss with Stable Diffusion 3.5, this I believe is mostly because of faults on my end (training config, workflow, dataset, etc...). Overall I think Flux is still the better model but... Stable Diffusion 3.5 is distilled which makes me optimistic about future finetunes of it.