
About
This writeup is a slightly updated version of my Liv workflow that I posted on reddit. The main difference between the previous write up and this one is that I go into more detail about the entire workflow. This is an explanation of my thought process, issues and workflow when I was creating the image and is not a tutorial on inpainting or outpainting.
When I made this artpiece, my goal was to learn and practice with inpainting and outpainting. I didn't understand much about inpainting/outpainting back then so this article is an attempt to show how much you can do with little knowledge of art and Stable Diffusion. Because I made this piece when I was barely starting out, I did stumble into a lot of mistakes. For the vast majority of my inpainting, I left everything to the default settings. I'll try to make this as beginner friendly as possible.
Basic Knowledge
Some knowledge of being able to install and setup extensions for the auto1111 webui
Basic ability to use an image editor
Inpainting?
Inpainting is a process where you select or "mask" parts of an image and tell Stable Diffusion how to redraw it. Inpainting is used to give you more control over the final image but it's also more time consuming depending on how far you want to customize the image.
For this piece, I did not do anything particularly fancy with inpainting and used the default settings for automatic1111 and for Krita extension. (Lack of knowledge at the time)
Outpainting?
Outpainting is one of many methods that can be used to create larger images as a workaround for VRAM limitations. Rather than generating at a different resolution and upscaling it, outpainting works by extending a base image. During my outpainting step, I did not make any adjustment to the settings (Lack of knowledge at the time).
Tools Used
automatic111/webui
Krita
XYZ Plot
For the sake of brevity, I will not be explaining how to install these extensions or tools. You can alternatively use the photoshop or photopea extension instead as well. I prefer using Krita due to the opensource nature and quality of life for editing.
Workflow Explanation
Models/LoRas Used
For those who are interested.
VAE: OrangeMix.pt, vae-ft-mse-84000-ema-pruned
Prompt Engineering Process
This isn't a very clean process but it's what I was doing when I was first starting out.
1. Brute Force using XYZ plot find compatible models
The basic prompt that I used was a copy and paste from Liv Character LoRA example. I ended up using WinterMoonMix since I ended up liking that one the most.
2.Brute Forcing Artstyle LoRA using XYZ plot
I used XYZ plot again to find the LoRA weights that look well with the image. I ended up opting for low weights for stogpt and ligne claire style LoRA due to personal preference. I don't use style LoRAs as much anymore but this is just for the sake of transparency.
3. Brute Forcing Character LoRA Weights using XYZ plot
I did another around of XYZ plot but to find the best weight for the character LoRA. I ended up using 0.6 due to personal preference.
4.Brute Forcing Sampler Quality using XYZ plot
At this point, you're probably aware of the general process of brute forcing things for Stable Diffusion when trying to figure things out. I ended up using DPM++ 2S a Karras due to personal preference.
5.Minor Edits to the Example Prompt
I did not make many edits to the prompt. I mainly adjusted the prompt for location and clothing along with adding some things for the negative prompt such as wings.
Final Prompt.
Positive: solo,masterpiece, best quality,1girl,grey_eyes, long hair,looking_at_viewer,braided hair,smiling,birds,sunlight,,flowers,floating hair,((forest:1.2)),falling petals, outdoors, sky, solo, frills, blouse,<lora:punishingGreyRaven_liv:.6>, liv,<lora:stogpt_v1.3-03:.2>, <lora:ligneartStyleCogecha_v10:.3>,bow,hair ornament,pink ribbons,bangs,exposed_back,bare_collarbone,medium breasts, 4kNegative: ((wings1.4)),tie,corset,white dress,red background,water,ocean,((city)),hat,lowres, bad anatomy, bad hands, text, error, missing fingers, extra digit, fewer digits, cropped, worst quality, low quality, normal quality, jpeg artifacts, signature, watermark, username, blurry, bad feet, bad-hands-5 EasyNegative,((worst quality, low quality, extra digits, male:1.4)), bad_prompt, (loli, child:1.2)note: I do not have the bad-hands-5 textual inversion. I have a habit of copy and pasting prompts.
5. Batch Production until I see something favorable.
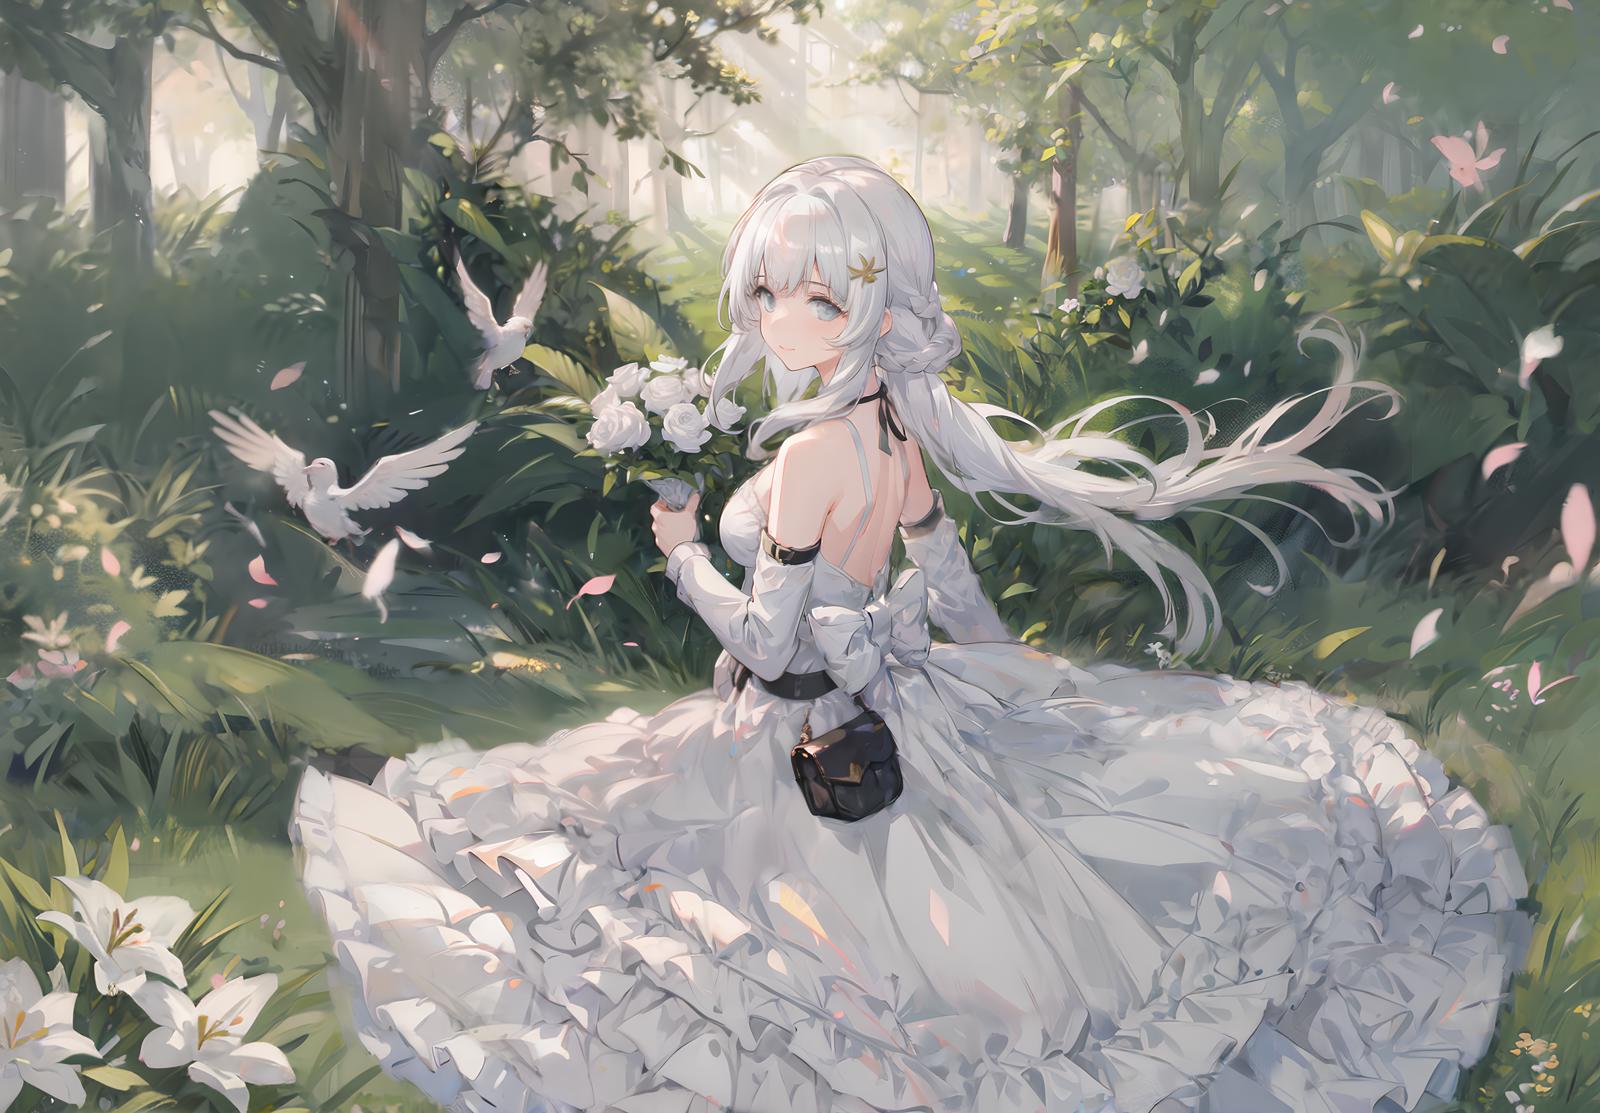
I used a batch size of 8 to generate pictures for a couple of times. Afterwards, I just pick the one that is the most suitable to my preferences. The image does not have to be perfect but it should contain a decent portion of the details that you want in the end. This was the result that I ended up with.
Outpainting Step
I did not change any of the settings for OpenOutpaint. I ended up using the same model for the outpainting process since I did not want to make an inpainting model. My prompt remained mostly the same but I added some more words such as city, and ruins to the negative prompt. I did not save entire prompt for this process.
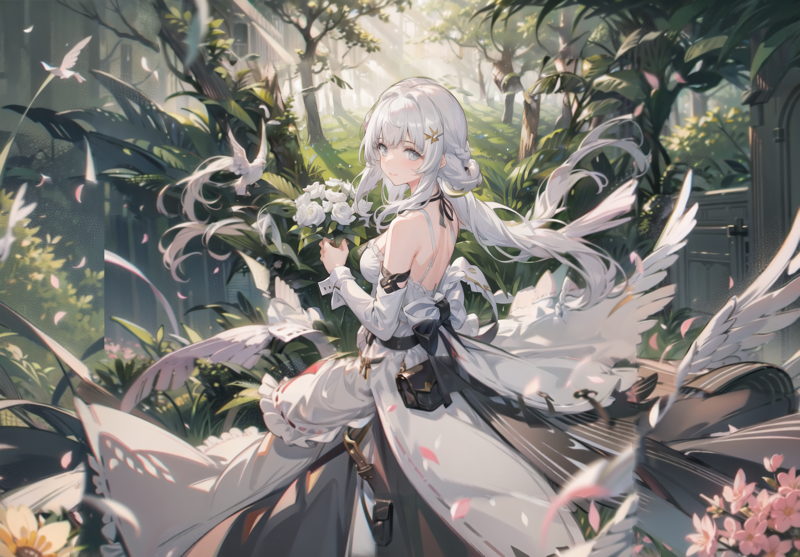
My goal with outpainting was to extend the canvas as much as I could before getting the NaNtensor error. (For anybody experienced with this error, yes, it was a rookie mistake. I'm putting this here more for transparency)
For the outpainting image selection, I picked anything that did not include the character's face again. For me, it did not matter if the outpainting step looked ugly as that could be fixed via inpainting.
Final Outpainting Result
Inpainting Process
This is where 99% of the total work was spent. During my inpainting process, I used Krita for quality of life reasons. For inpainting, I adjusted the denoise as needed and reused the model, steps, and sampler that I used in txt2img. I reused my original prompt most of the time but edited it when it came to redoing the dress.
Part 1. Fixing the outpainted edges.
It's pretty normal to get edges during outpainting which isn't much of problem since it's fairly trivial to fix with inpainting. I created a mask around the sharp edges and inpainted at 0.4 denoising strength. Due to the overall image size, I had to fix edges one at a time to avoid VRAM issues. In Krita, the selected area can be used for the image size for inpainting. I had to select areas with sizes under 1024x1024 and then inpaint one at a time.
Part 2. Fixing the background.
I used a lot of inpainting to fix the trees in the background. The trees couldn't be inpainted in a straight position, so I had made to make a crude sketch of a tree. This step is pretty simple.
Use the colorpicker tool to select the color of a tree
Using the brush tool, draw the rough shape of the tree. It does not have to perfect, it's just there to give more guidance during the inpainting step.
Inpaint the area with 0.4 ~ 0.6 denoise. Try to select what is the most interesting. It's trial and error to get something decent.
This is my general process for inpainting things.
Part 3. Getting rid of the ruins and dark areas.
This is similar to step 2. I basically used the colorpicker tool to select a green color and then painted over the dark areas and buildings. Afterwards, it's trial and error with denoising strengths similar to step 2. I occasionally had to raise the denoising strength to around 0.8 for some troublesome areas.
Part 4. Trouble with Inpainting dark areas.
For some reason, the model would always try to generate gloomy landscapes that wasn't easy to inpaint away. I tried higher denoising strengths but that always resulted in a dark image. Recoloring the entire thing in a different color didn't work since seaside images started appearing during inpaints.
My solution to the problem was to create another image layer that I painted in yellow, but lowered the transparency to 50%. Afterwards, I inpainted away at 0.4 denoise and was able to get trees in a brighter setting.
Part 5 . Trying to maintain Consistency.
While there are some more interesting details within the original outpainting, it was difficult to maintain consistency with inpainting so I opted for a more simplified image instead. I got rid of complex accessories and then simplified the dress as I have no idea what the AI was trying to add. I tried to reason about the previous details and attempted to guide the AI (by crude sketches) but it started making random tree barks and ponds for some reason. I think I could have simplified the dress some more as it wasn't able to properly draw all of the frills and resulted in blurry details and distortions. I did try adding frills to the prompt but it did not have much of an effect.
Part 6. Trying to get rid of the blurs.
This is something I don't recommend but this is what I did during the time. After inpainting, it's natural to see random images within the image. As a beginner, I attempt to inpaint these blurs away using a lower denoising strength of 0.15 ~ 0.25. It was very time-consuming and inefficient. There are still some blurs present within the final image but it wasn't a big deal. I ended up getting a ton of NaNTensor errors in the process and attempted to do some weird selection mask choices which ended up wasting a lot of time. I ended up getting angry over the NaN-tensors error and swapped to a different VAE towards the end. Haha.
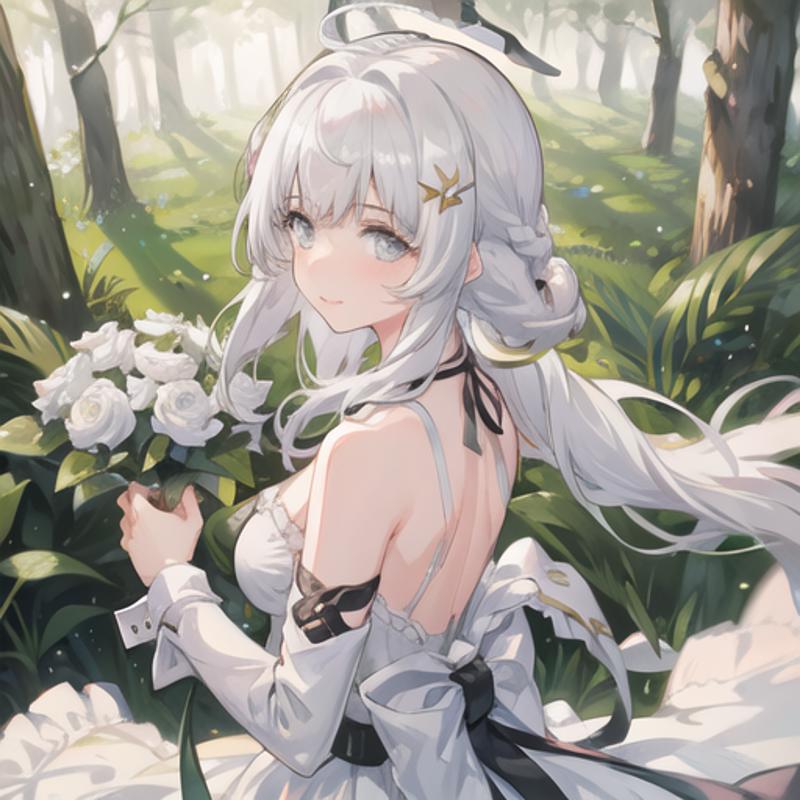
Part 7. Hands
I tried my best to guide the AI as to where the hands and fingers should be. I didn't spend too much time here and relied on a smaller denoising strength around 0.2 ~ 0.3. I don't quite remember this portion.
Part 8. Arm
I gave a crude sketch of the arm and it was surprisingly able to create the arm in a few tries at 0.4 denoise.
Part 9. Hair.
I tried to correct the strands with a lower denoising strengths around 0.4 ~ 0.2. I mostly had to try and remove the wing that stuck in the hair. Luckily, it did not take too many tries to fix it.
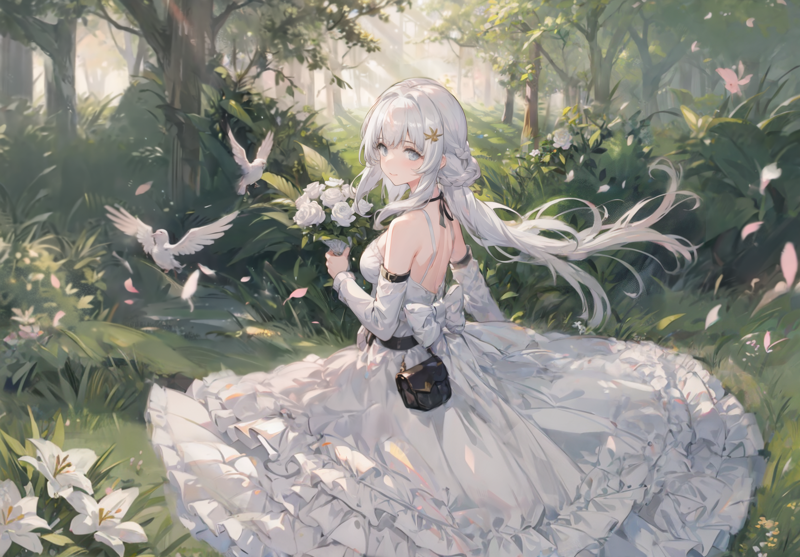
Part 10. Personal Polishing?
At this point, the vast portion of the image was already completed so I tried to clean up the minor issues via inpainting (blurs and odd orange tints on the ground). I couldn't quite fix the one of the birds well enough so I gave up on it.
Upscaling
This was pretty simple. I just went to the extras tab and upscaled the image by 2x using SwinIR_4X. There was a lot more that I could do with this but I wasn't aware of it at the time.
Final Result
After about 5 days of effort, I completed my first inpainting attempt while making a ton of mistakes. It was a fairly tedious effort and the final filesize would be have about 10~20 GB if I didn't delete all of the inpainted images in between. (I deleted the in-betweens since Krita gets unstable after a certain filesize)
Reflections and Mistakes
Creating a full writeup on possible improvements is long enough to be another article so I'll try to keep this portion short as possible. I won't mention some of the newer extensions as a reflection since that can another article as well. These are most important reflections.
I should have used Hi-Res Fix. I was not aware of the denoising strength thresholds before Hi-Res would work properly. Fairly big mistake.
I should have added --no-half-vae to my cmd command to avoid the NaNtensor error
Lower Step count for inpainting. Inpainting is more reliant on the base image and drawing skills so prompting better doesn't help as much as expected.
Should have used a faster sampler to iterate faster
I didn't have to try and fix all of blurs manually. I still don't have a solid solution to this problem. I have some ideas that qualify as musings but nothing concrete.
Thanks for reading and maybe you learned something from this! The upscaled image can be found on pixiv.