Original link:https://docs.qq.com/pdf/DR2V2ZlhHbnJUVHBa
中文版请看以上链接↑↑↑
Reminder: Before taking this course, please make sure you have already studied the foundational content related to the parameters.
introduction
The value of img2img is often underestimated, with some people considering it unstable, others finding its results unsatisfactory, and some finding it difficult to control compared to the more conventional txt2img approach. As a result, there is less interest in img2img, and its user base is limited. However, the actual value of img2img is not low. On the contrary, it can achieve much more than what can be done with txt2img alone. With the help of img2img, AI can transition from generating random images to generating deterministic ones.
Redrawing, in fact, involves using more inputs, modifying the input images in advance, and intervening in the AI generation process to achieve a result that lies between human and machine. The goal is to gradually enable precise control, which is the essence of img2img. And the ultimate goal of redrawing is actually hand-drawing. Imagine being able to control each individual pixel,isn't this just artificial drawing?
However, redrawing is still an intermediate stage and not everyone has the talent for drawing. But everyone possesses basic intelligence, which already surpasses machines by a great deal. By giving AI a portion of that intelligence and providing it with a push, human-machine collaboration can produce an effect where 1 + 1 > 2.
This article will be divided into three parts, discussing the basics of img2img from the perspectives of tools, applications, and research. The tools section will not focus on specific applications but will discuss the methods of usage. The applications section will present several specific cases as references for different usage scenarios. The research section will explore areas of img2img operations that are not yet clear. If you only want to understand how to use it, you can read the first two chapters. If you want to use it flexibly, you should not limit yourself to the usage described in the second chapter but instead combine various materials organically to develop your own applications. There are many aspects to img2img, and this article may not cover all of them.
Tool section
img2img
i2i is the simplest tool for redrawing. The explanation will start from here. First, let's take a look at the UI interface of i2i.
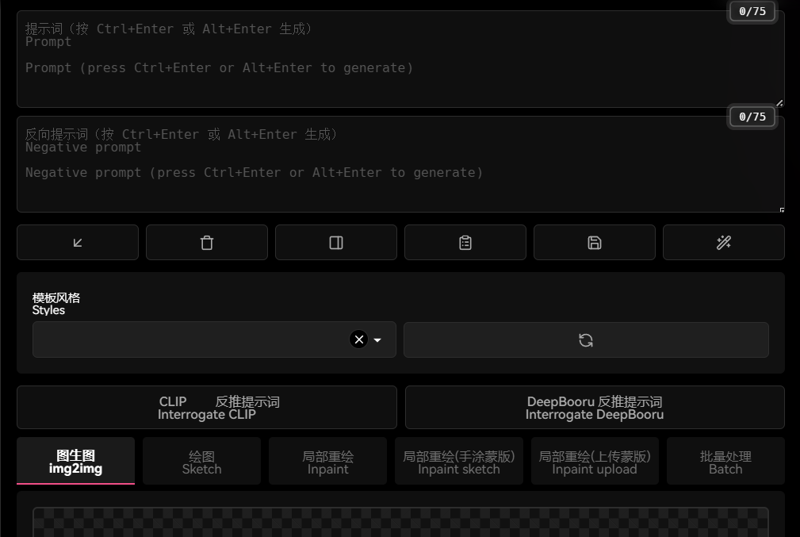
The top of the interface is similar to t2i, with the addition of two reverse inference prompt buttons. These buttons are used to reverse infer prompts based on the images uploaded to image-to-image. The effect is average and not as good as tagger. The reverse inference model needs to be downloaded for the first-time use, and error messages are usually related to network issues. Generally speaking, tagger is more suitable for batch reverse inference, while for single images, manual observation is better.
On the left side of the middle of the interface is the location for uploading reference images. It supports direct dragging and dropping, as well as pasting from the clipboard.
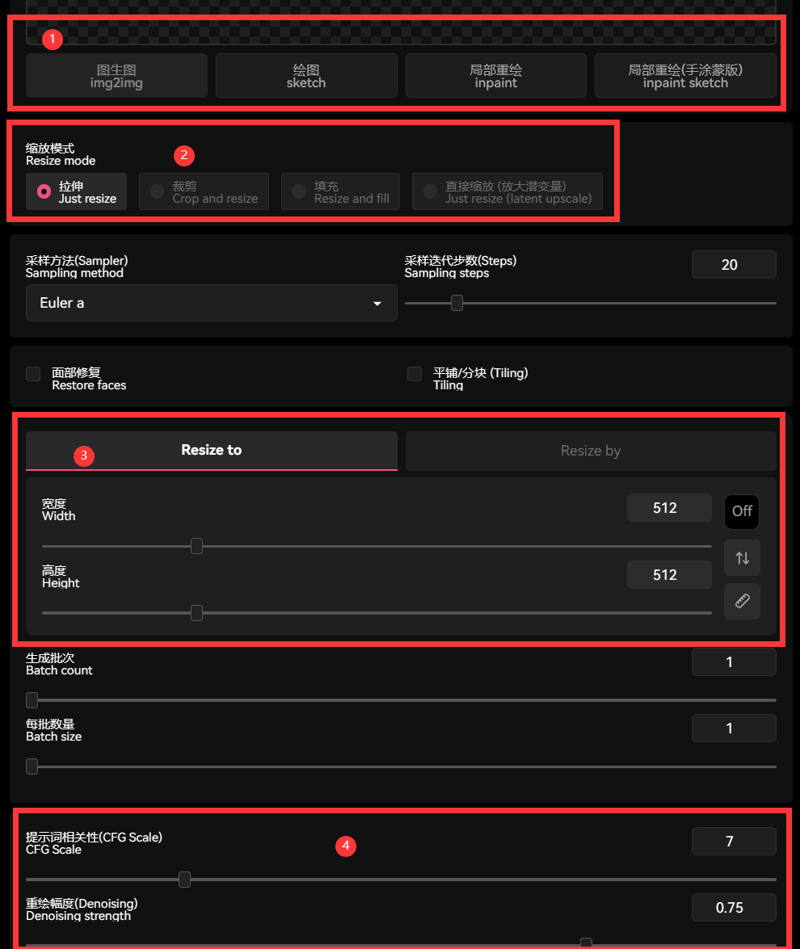
③ is the area for setting the generation size. When the slider is dragged, the proportion relationship will be displayed on the reference image. In the latest version of the web UI, you can directly adjust the multiplier, which means scaling the image while maintaining the original aspect ratio. The ruler icon in the bottom right corner is used to directly set the resolution to that of the original image.
② is the position for adjusting the processing method when the reference image does not match the set size. Simply adjusting the size will stretch the image, changing the aspect ratio. Scaling after cropping involves cutting off parts of the original image, which can maintain the aspect ratio. Scaling and filling the blanks involves scaling the image proportionally and extending the shorter side. Enlarging in latent space is a special method where the image is stretched, but it involves reverse-propagating into the latent space and then enlarging, similar to the latent variable amplification algorithm used in high-definition restoration.
④ Set the region for denoising strength in img2img. Depending on specific needs, the denoising strength can vary greatly, 0 represents a reproduction of the original image, while 1 represents a reproduction of the new image. It is recommended to use 0.5 as a threshold: values below 0.5 will preserve most of the original content, while values above 0.5 will result in more content generated by the AI.
Below the interface is the plugin area.
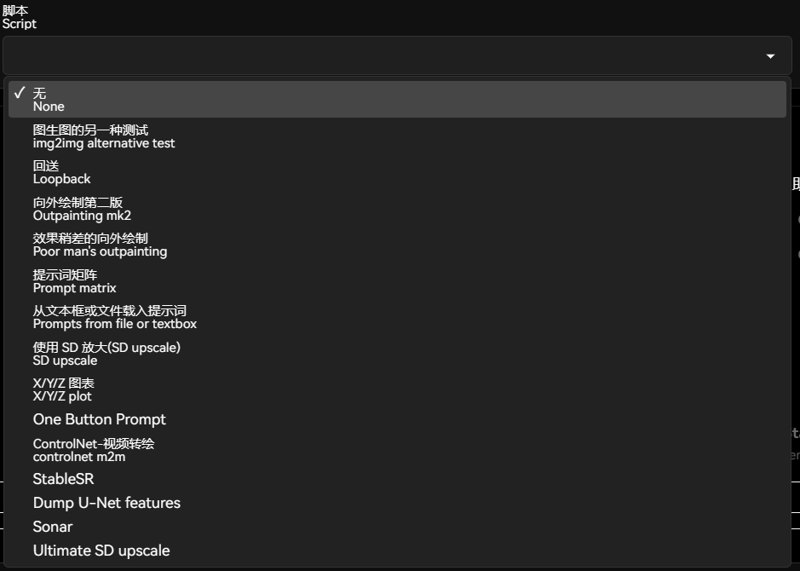
The script panel has some additional plugin functions, such as SD zoom and external drawing.
inpaint
Regular inpaint is located on the third tab of the img2img page

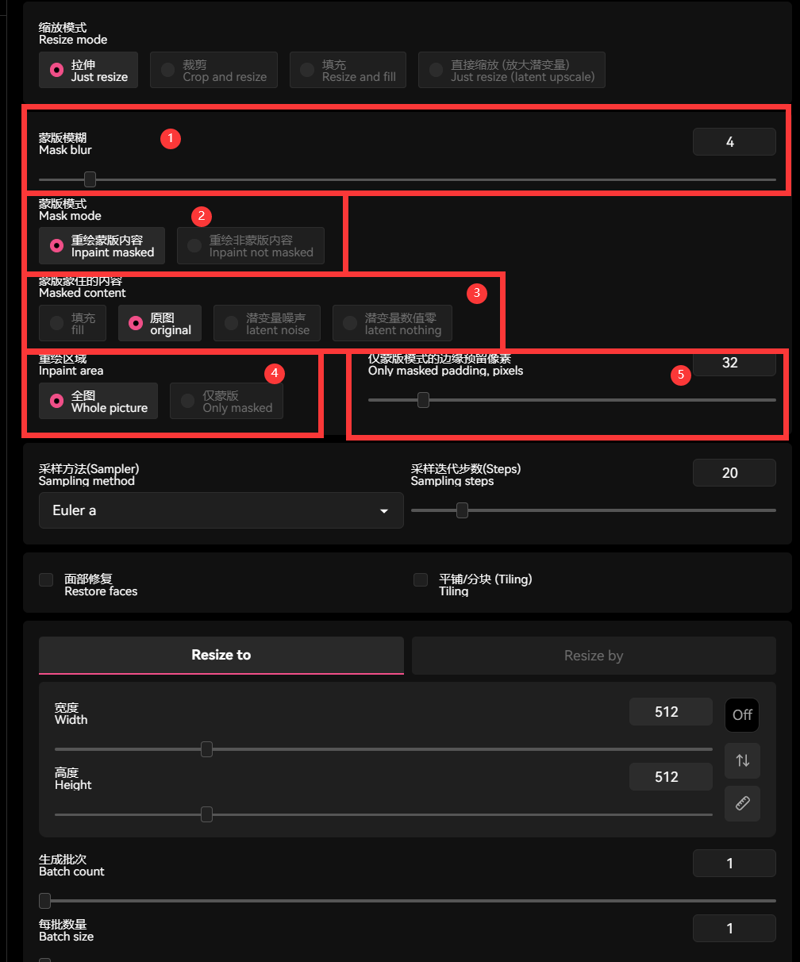
② Select the inpaint target region, where you can choose whether to inpaint the painted area or the unpainted area, based on the extent of the desired changes. Choose the region to be modified or the unchanged region.
①To adjust the blurring of the mask's edges, which refers to the blending degree between the redrawn area and the original image area, changing this parameter affects the fusion level between the partially redrawn area and the original image. A high level of edge blurring can result in an imprecise mask, where there are unchanged areas within the intended range or changes occurring outside the range. Conversely, a low level of edge blurring can lead to a harsh transition.
③To select the pre-processing method for the mask region, there are four options available: fill with solid color, no processing, fill with inpainted noise, and leave blank. These options determine how the masked content is handled before the redraw process.
④To select the reference range for AI-based redraw, you have two options: either redraw based on the entire image as a whole or only use the surrounding area of the mask as a reference. In the "Only masked" mode, the effect is similar to cropping out the masked portion and redrawing it separately. It is important to note that this mode limits the model's understanding of the entire image, resulting in a decrease in the blending degree of the redrawn portion with the rest of the image.
⑤is only applicable to the "Only masked" mode. It controls the size of the portion that is cut out and redrawn along with the mask. The larger the value, the larger the area that is cut out based on the mask alone.
The black color overlaid by Inpaint serves as a mask, representing a transparent selection rather than an actual color block.
When applying the mask, it is not necessary to have strict and precise control (unless you want a very precise distinction between the modified and unchanged parts, in which case you should use an uploaded mask). The inpainting process takes the entire image into consideration, so the content outside the masked area will not be completely altered. On the contrary, including some content outside the modified area helps the AI understand the context better and improves the blending of the inpainted image.
sketch
Sketch is the second option in the tab, and its function can be seen as a variant of image generation through drawing, but with less utility.
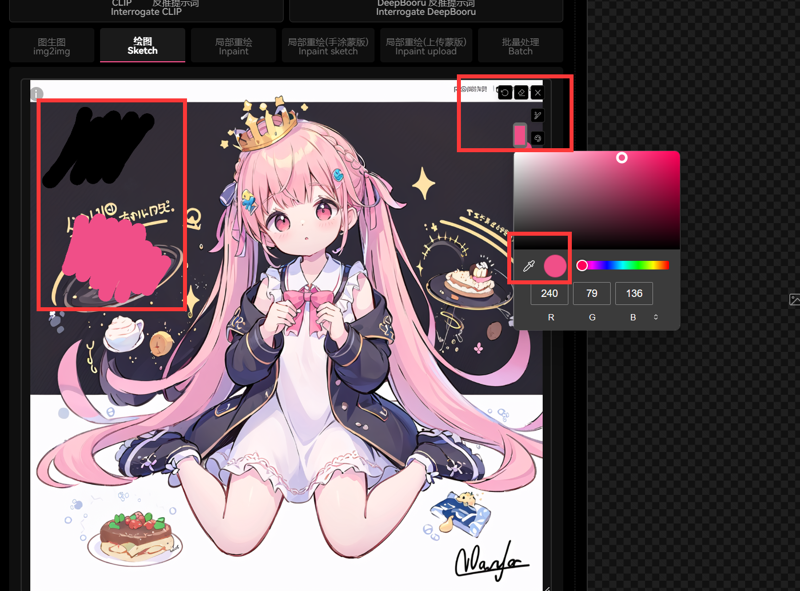
Compared to regular image generation, Sketch has an additional brush tool, similar to Inpaint Sketch. It allows you to choose the brush size, select colors, and even sample colors from the entire screen, including content outside of the web UI.
Doodle Mode is like adding color blocks to the original image before performing regular image generation. It is difficult to achieve satisfactory modifications using the brush tool provided by the web UI. To achieve similar effects, one would typically import the image into software like Photoshop for modifications before exporting it for image generation. This provides more advanced functionality and a more user-friendly interface, making it unnecessary to elaborate further on this feature.
inpaint sketch
This feature is located in the fourth option of the i2i tab. It is a variant of local redraw and is very powerful.
Its panel is similar to Inpaint, but with an additional slider option called "Mask transparency".
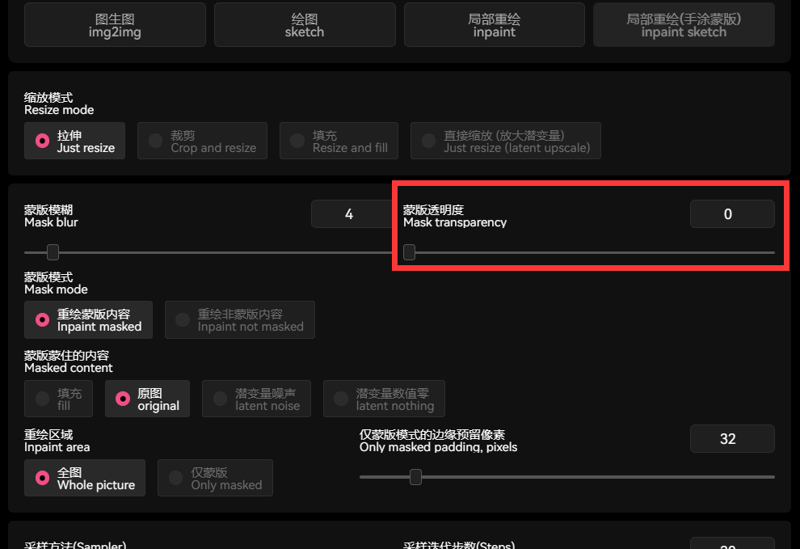
This is because the painted mask in the colored mask mode is a combination of a semi-transparent color block and a selection area. The slider is used to adjust the transparency of the painted mask. The higher the transparency, the weaker the influence of the mask color. When set to 100, it is equivalent to no mask. The lower the transparency, the closer it is to a redraw after applying the color block. The painted mask has a stronger influence on the colors in the area and also covers more of the original image content.
When a reference image is uploaded, the colored repaint mask overlay is displayed as follows:
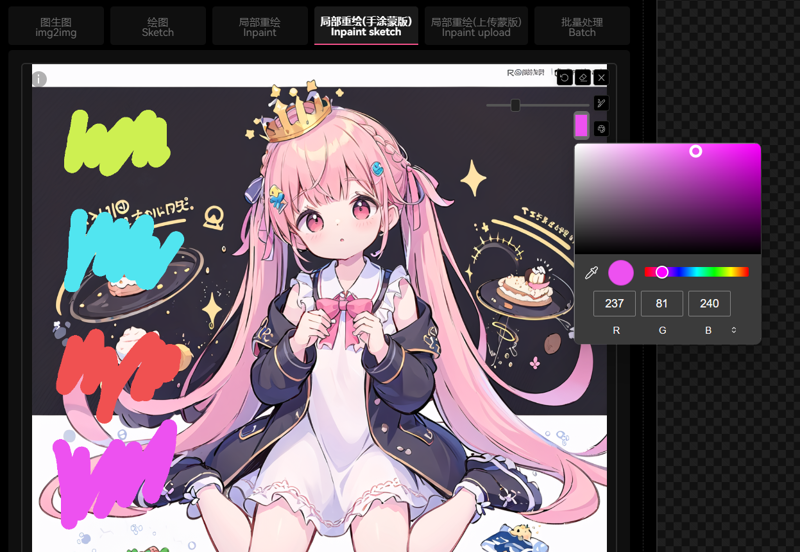
You can adjust the brush size and set the brush color. It is recommended to use the eyedropper tool to sample colors, and you can also sample colors outside of the web UI.
When applying a colored repaint mask, it is recommended to use a doodle-like approach, sketching the rough shape with a basic outline. The crucial aspect is to ensure the colors match and roughly indicate to the AI which areas should be colored in what way. Local repaints do not require high precision in the mask since the AI will refer to the original image rather than strictly following the mask.
inpaint upload
The "inpaint upload" mode is also a derivative of the inpaint function, located in the "img2img" tab as the fifth option. The parameters are the same as inpaint, with the only difference being that you can upload a pre-drawn mask to replace the default canvas in the WebUI. This mode is required for achieving precise differentiation.
The rules of the mask are similar to the grayscale-to-opacity conversion of masks in Photoshop. In the mask, white represents the selected area, black represents the non-mask content, and using a solid color is sufficient.
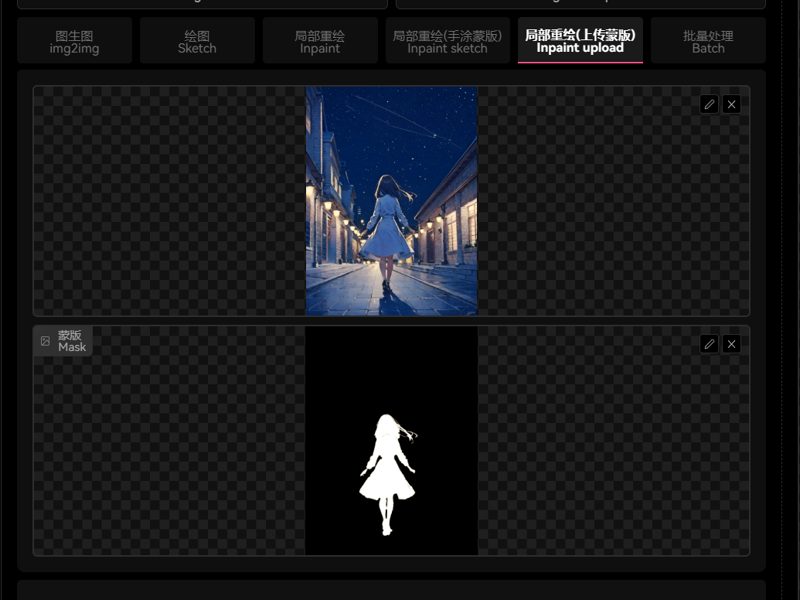
The advantage of uploading a mask is that it allows for the creation of precise masks using tools like Photoshop, enabling accurate local inpainting. The built-in drawing board experience in the web UI may not be ideal, but using tools like Photoshop provides additional features such as subject selection and the ability to combine semantic segmentation with Sam Anything for precise selection of inpainting areas.
Controlnet
Controlnet essentially provides additional parameters to apply multi-dimensional control. All Controlnet models require reference images and can be seen as a special type of image generation. Controlnet is not natively included in the web UI and requires installation of a plugin. The git address for the plugin is: https://github.com/Mikubill/sd-webui-controlnet. To install it, please copy the address and paste it into the extension page, then install it from the URL. After the installation is complete, restart the web UI, and you will see a dropdown menu.

In addition, you will also need to download the Controlnet model you need. The preprocessor does not need to be downloaded separately as it will be automatically downloaded the first time you use it. You can see the download link in the console. The Controlnet 1.1 model can be found on Huggingface: https://huggingface.co/lllyasviel/ControlNet-v1-1/tree/main. The model files have a .pth extension, and the corresponding YAML files are configuration files. Both files are required for usage. However, the Controlnet webUI plugin already includes the YAML configuration file after installation, so you don't need to download it separately if it's already in the folder. Additionally, I recommend downloading the half-precision version, which does not affect the performance but has lower resource requirements. You can find the repository here: https://huggingface.co/comfyanonymous/ControlNet-v1-1_fp16_safetensors/tree/main.
After downloading the model, there are two directories where you can place it, and both are equivalent: the "\models\ControlNet" folder under the main directory of the web UI, and the "\models" folder under the main directory of the "sd-webui-controlnet" extension. In other words, one is the model folder within the plugin, and the other is the "controlnet" folder within the model directory. The models are optional, so you don't need to download all of them at once. Make sure you know which model you need, and you can download it temporarily when you need it.
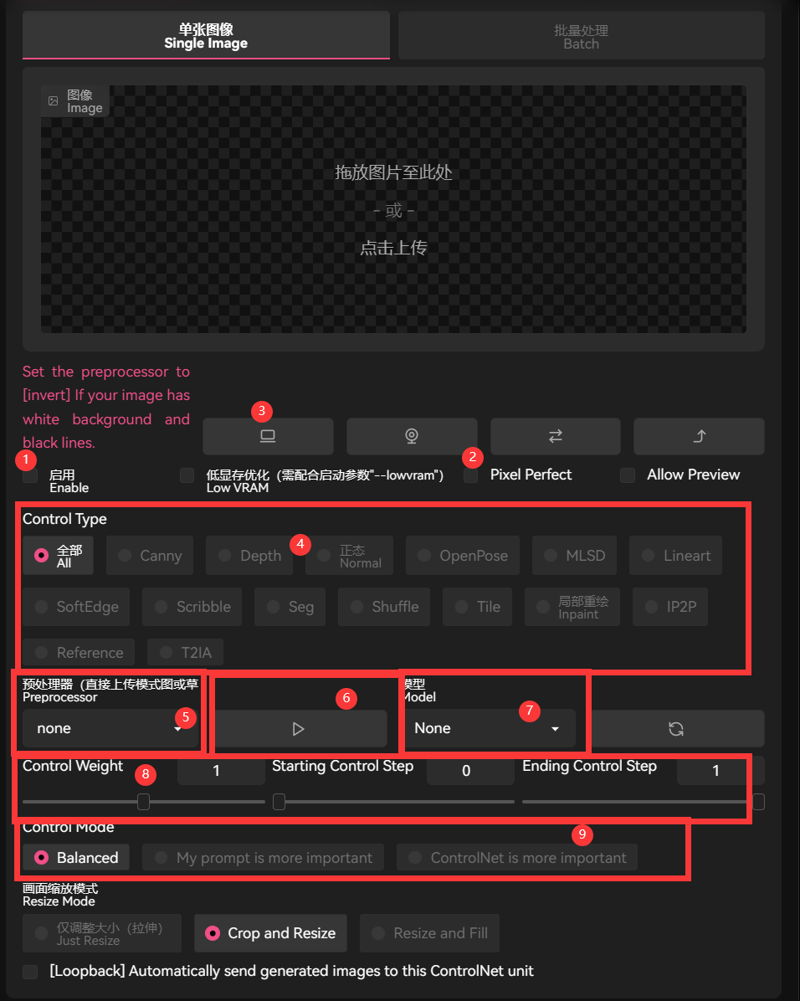
①The button needs to be clicked to enable it, without clicking on ControlNet, it won't be activated at all. Once it is clicked, even if the dropdown menu is collapsed, it remains in the activated state and can only be closed by deselecting it.
③A blank canvas is created,
②After selecting this option, if the reference image and the target image have different sizes, the reference image will be adjusted to maximize its pixel dimensions.
④This area is where you can select presets, and once chosen, the corresponding preprocessor and model will be automatically selected.
⑤ is the selection area for the preprocessor. Its purpose is to convert the uploaded reference image into a format recognizable by the controlnet model. Therefore, if the uploaded image is already recognizable, there is no need for the preprocessor.
Display a preview of the preprocessed results.
⑥This allows for easy verification of the proper functioning of the preprocessor, while also serving as a prerequisite for the activation of certain plugins.
⑦Please select your model.
⑧The settings for controlling the intensity. Similar in function to adjusting weights and stepwise rendering in prompt engineering, reducing weights and decreasing the time of controlnet's effect can alleviate control, both in terms of intervention timing and termination timing.
⑨The options for selecting the control mode.The new version of the plugin serves as an alternative to the original command mode, but with some differences. This option has a significant impact on the output results, so it is advised not to switch back and forth constantly.
Other options are either generic or not significant, so there's no need to explain them. Now let's briefly talk about the model of ControlNet 1.1. You can find information about the model's performance and a demonstration on the ControlNet 1.1 GitHub page: https://github.com/lllyasviel/ControlNet-v1-1-nightly. Therefore, I will provide only a concise explanation.
When you open the ControlNet model selection, you will see the models that you have downloaded:
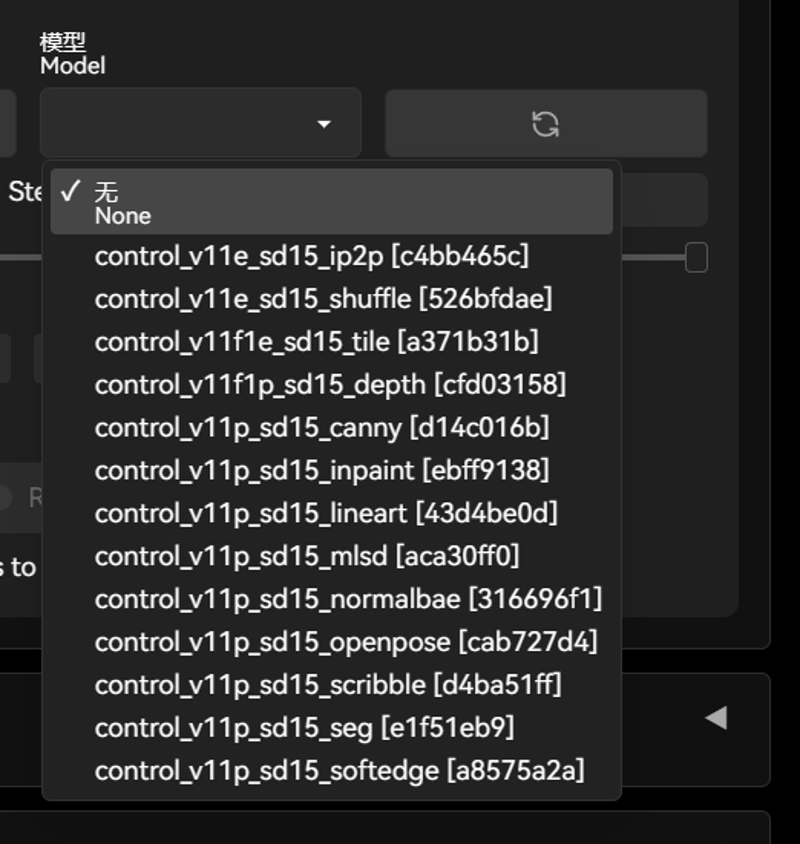
If the newly downloaded model doesn't appear, click on the button on the right to refresh.
Openpose - input pose skeleton image, keep the pose unchanged, randomize other parts. The pose skeleton image can be obtained by uploading a selfie photo and applying a preprocessing model, or it can be obtained through various Openpose editors. If the uploaded image is already a pose skeleton, select "none" for preprocessing.
Canny - input line contours to preserve the same contour shape in the generated image. The contour image can be obtained through preprocessing by uploading an image or by drawing it manually.
MLSD - input straight line contours to control the shape. When used in conjunction with the corresponding preprocessor, it detects and preserves the trends of straight lines, commonly used in architectural applications.
Softedge - Softedge is a stronger edge detection technique compared to Canny, but it also limits the freedom that AI can exhibit while being more similar.
Normal - Normal mapping is a technique used to preserve the shape of a three-dimensional object while altering its texture. It involves inputting a 3D contour and modifying the texture. Normal maps can be obtained through preprocessing or from a 3D OpenPose editor.
Depth - Its purpose is to take as input a depth map represented in grayscale, preserve the spatial relationship in the depth of the scene, and modify other parts. Both pre-processors and 3D open pose editors can obtain it.
Seg - Semantic Segmentation Map represented by color blocks as input, preserving the content of each region/object and can be used for specifying composition. Semantic Segmentation Maps can be obtained through pre-processing models, SAM (Semantic Annotation Module) anything, or can be manually painted. Manual editing can involve color picking and brushing based on a semantic reference table.
Lineart - Lineart recognition is a process where the input lineart is preserved while applying color. You can directly input the lineart or upload an image to obtain it through preprocessing. You can also hand-draw the lineart, ensuring the lines are clear and distinct.
Tile - Tile-based semantic assignment. In simple terms, when a block is enlarged, it ensures that each block retains only the portion of the tag that belongs to its own image. This helps alleviate the issue of having to redraw each block as a complete image when scaling up.
Inpaint - Inpaint is a model that uses a brush mask to locally repaint areas, with weight control over the degree of repainting.
Shuffle - Randomly rearrange the elements in the original image.The preprocessor is optional. In practice, it results in a similar effect of maintaining elements of the same color while shuffling and rearranging them, which can be used as a color constraint.
Scribble - a place for people with poor drawing skills to express themselves. You can create a new canvas and draw on the web UI, or draw elsewhere and upload it. The preprocessor needs to be selected from the same series. Scribble is useful for finding inspiration or communicating your desired content to AI when words are not sufficient. It offers a higher level of detail than techniques like Canny, providing a more natural output. However, it also allows for more freedom and lacks strong constraints.
Partial Setting Options Explanation
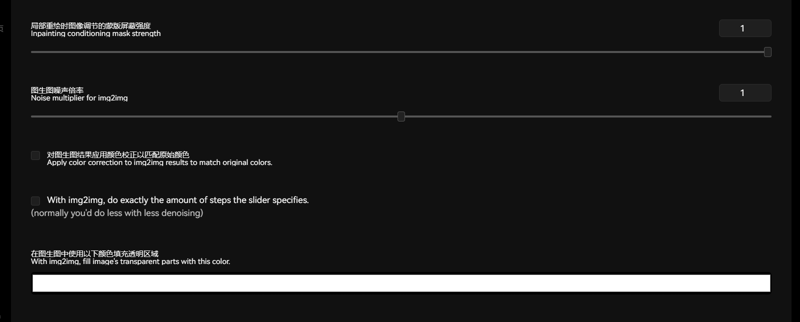
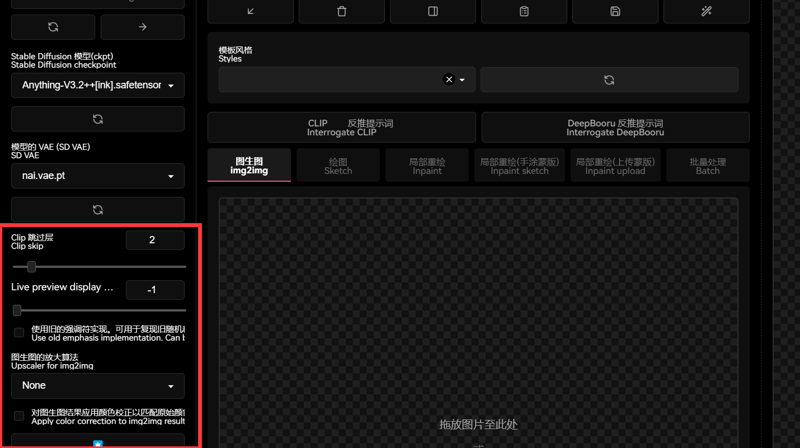
The parameters of img2img are not limited to those displayed on the panel. There are many more options available in the settings. To facilitate adjustments, it can be placed outside and can be adjusted in the Settings - User Interface section.
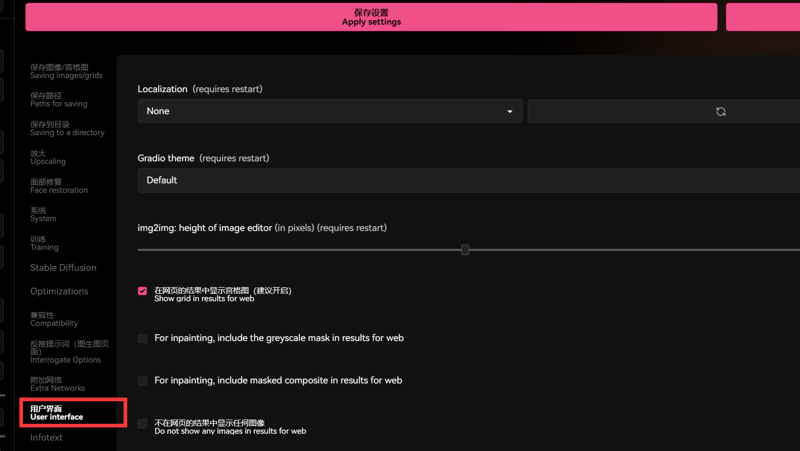
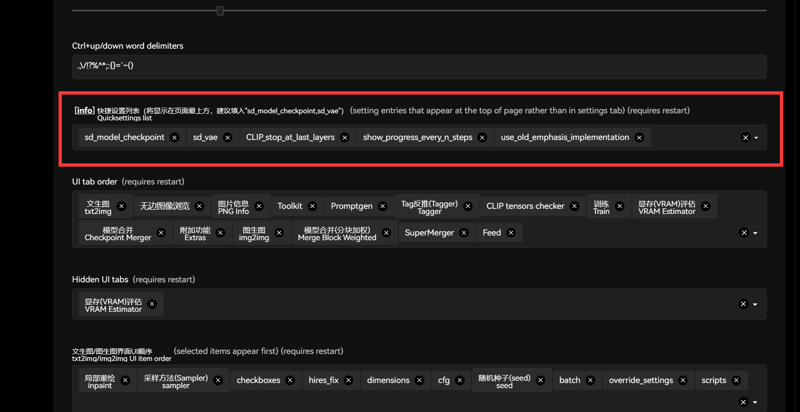
I suggest moving these options outside so that you can freely adjust them just like regular parameters.

Photoshop
You should go watch Photoshop tutorials instead of trying to learn Photoshop here!
Actual usage
Basic theory
Before we start this chapter, it is necessary to explain a few common knowledge points, which also serve as the foundation of image-to-image editing (img2img). The various methods mentioned in this chapter all originate from these simple facts. Of course, many people are already familiar with them and can skip ahead if desired.
The SD model tends to draw objects with a higher proportion in the image more effectively, while it struggles with objects that have a lower proportion. For example, when generating images, AI often produces distorted faces for people in the background, but it excels at drawing close-up shots. Another example is drawing hands, which is known to be challenging for AI. However, when given prompts that emphasize hands, such as "beckoning," the likelihood of generating good hands increases significantly. These characteristics are inherent to the diffusion model itself, and we can leverage them to our advantage. For instance, by cropping out poorly drawn hands from an image and using img2img, we can greatly improve the chances of generating well-drawn hands. Similarly, AI tends to draw large objects more clearly than small ones. By resizing small objects to larger proportions through redrawing and then placing them back into the original image, we can ensure that everything is drawn well.
img2img also requires prompts. Although prompts are weakened to some extent by multidimensional constraints, they are still a major reference for AI. While prompts can be inferred, your eyes are more accurate than the inference model. Only by providing the AI with correct guidance (at least not conflicting with the desired content) can good results be achieved. The prompts used in img2img should describe the desired content, for example, if you want to change the style of the image, you need to describe the elements in the image that should not be changed and include style keywords, and even assign weights. If you find that the object being redrawn loses its connection with the entire image, you also need to describe some content outside the mask to help the model understand.
The essence of image editing with img2img is applying multidimensional constraints. When you provide prompt words or use masks for retouching, how much information are you actually providing to AI? Is this information enough to accurately determine what you want? Clearly, it is not. The simple truth is that without providing more specific requirements, AI can only guess to complete the task. When the information you provide is limited, it is essentially giving vague hints, making it difficult to achieve accurate results. Therefore, strong constraints mean higher control, but correspondingly, AI's creativity is limited. If you are unsatisfied with the freedom of AI, it is much better to use colored masks, Photoshop, or control networks along with your own painting skills to give more specific guidance to AI than giving vague hints.
The img2img model requires more computational resources compared to text generation, as it needs to convert the original image into latent space data. Additionally, the larger the size of the reference image, the more resources are required. For inpaint, the resource requirement is slightly higher than simple image generation, but this doesn't mean that it's not possible to perform inpaint on devices with low VRAM. In fact, by using the method of cropping the redraw region, local redraw can be achieved on low VRAM devices. Furthermore, due to the two passes of VAE (Variational Autoencoder) in the image generation model, using an abnormal VAE model may result in the image becoming blurrier with each redraw iteration, making it difficult to recognize. Therefore, it is preferable to use a normal VAE model.
When selecting a model for img2img, it is important to choose one that matches or at least closely resembles the style of the reference image, and should not be contradictory. For example, it is not advisable to use the SD1.5 base model to process an image of an anime character. However, this does not mean that it has to be exactly the same. On the contrary, using completely different models for image generation and redraw can sometimes result in a blending of styles.
When using the method of image-to-image generation, it is not necessary to complete the entire image in one go. Instead, you can extract good backgrounds, good characters, good compositions, and good poses separately, and then combine them organically using image-to-image generation techniques. Additionally, it is not always necessary to directly generate the entire image. For example, you can let AI generate some elements and then paste them into the composition. Finally, it is important to note that the capabilities of the model are limited. If the model does not have relevant data, it is not possible to generate certain special perspectives or compositions. In such situations, it is suggested to take matters into your own hands and solve the problem by picking up a paintbrush.
fix hands
The first case in this chapter is about fixing hands. After all, drawing hands is a common challenge in SD, and it's difficult to depict hands satisfactorily. Sometimes, even after finally creating a satisfactory image, the portrayal of the hands may still fall short of expectations, which is also a common occurrence.
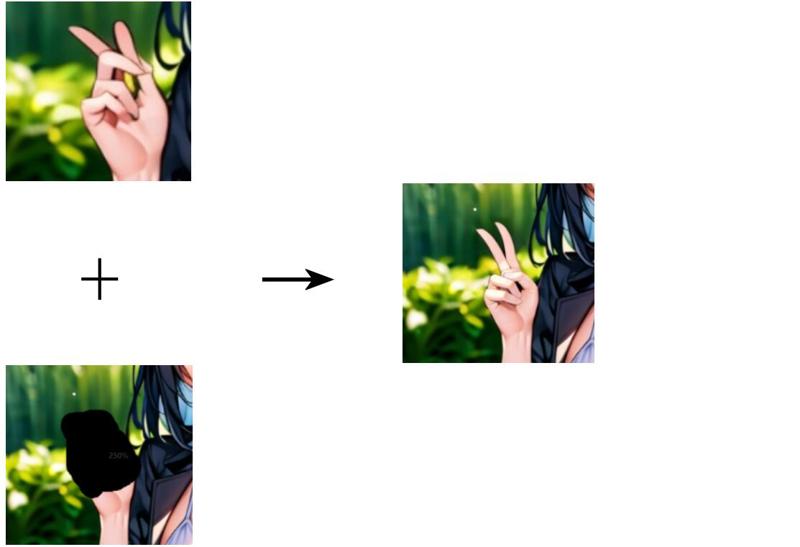
So, first of all, we randomly generated an image where the right hand is completely broken and the left hand has some issues. Following the principle of starting with simpler methods before moving to more complex ones, we suggest using inpainting as the initial approach. If that doesn't work, we can then try more powerful restoration methods.
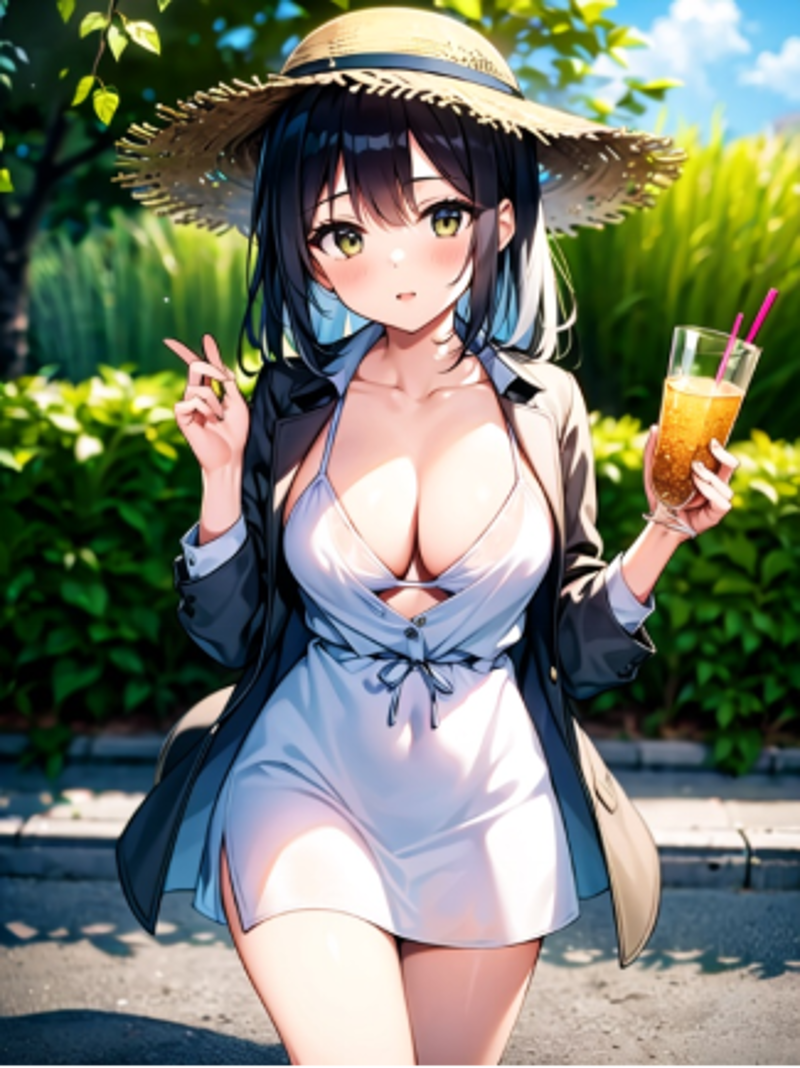
We will import it into img2img and output the corresponding parameters.
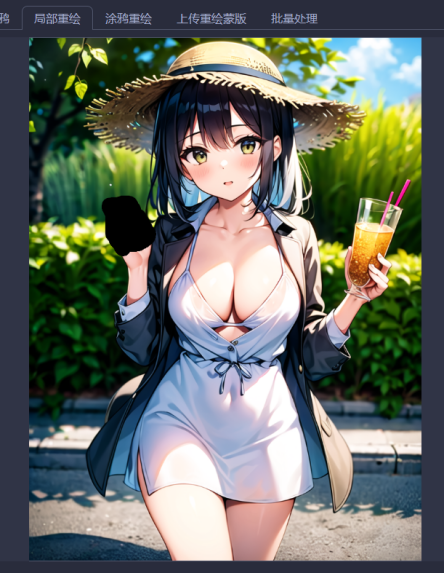
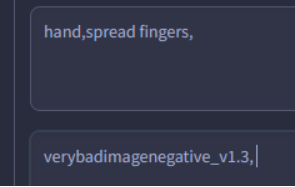
After multiple iterations of generation and comparison, we obtained an image of the right hand that appears to have the least amount of issues.
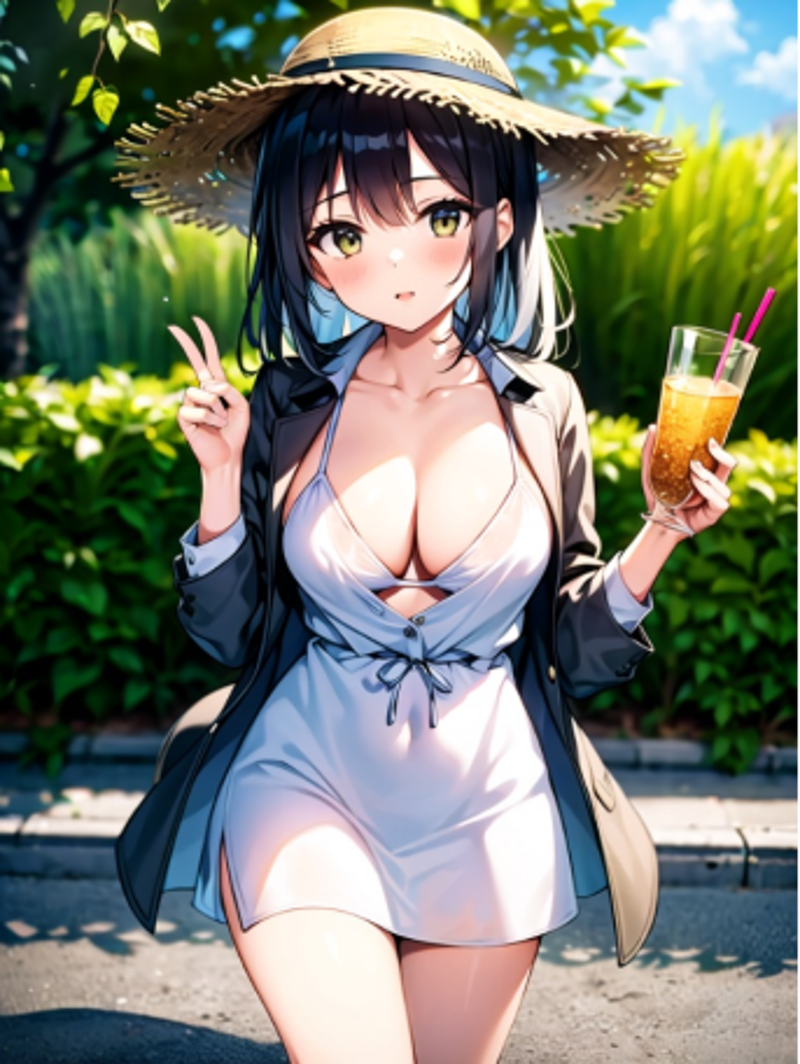
The next issue is that the left hand is missing a finger.We will put it into the inpaint sketch interface.We will use the color of the surrounding skin to paint a finger.
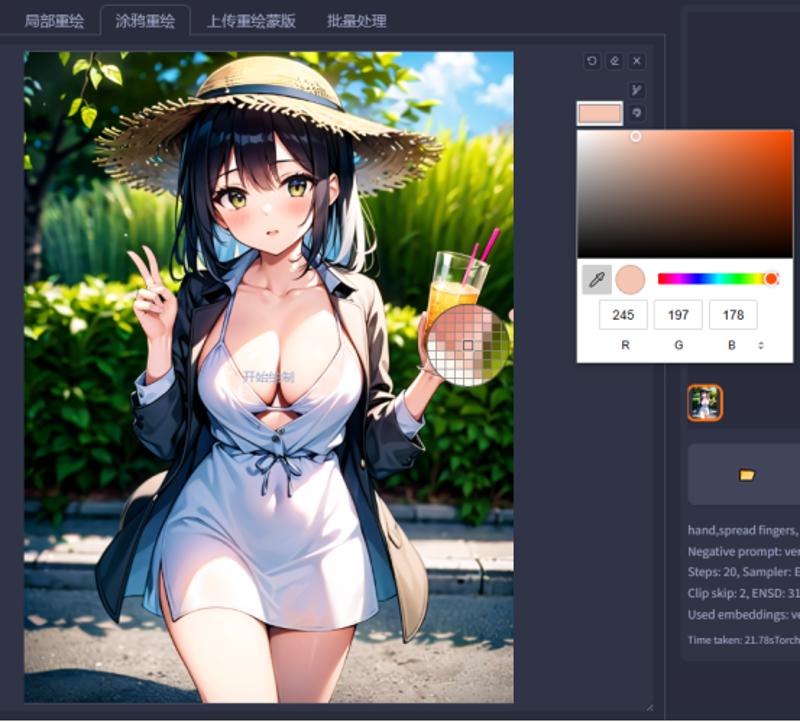
It's okay even if the drawing is not good.
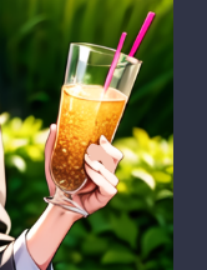
The prompt word has been changed to "finger" and the sampling method has been changed to DDIM. We obtained an image like this, which has been slightly repaired, but the result is still not satisfactory.
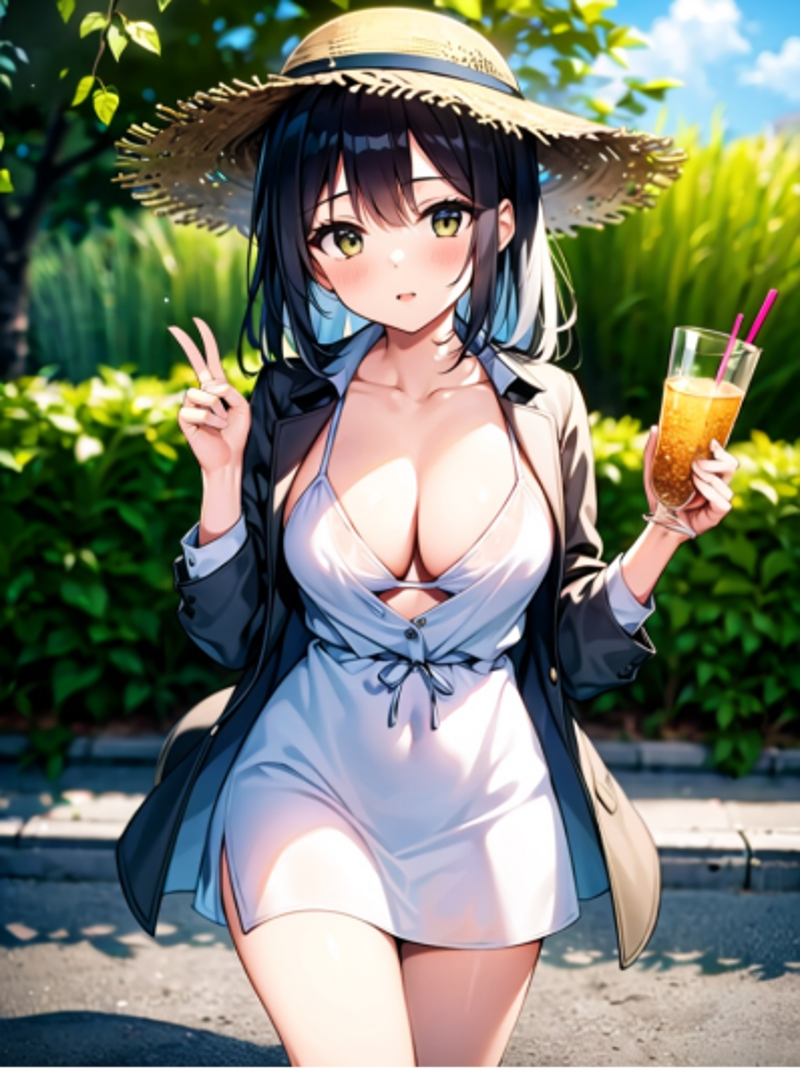
The next method would be the third one, which involves directly using Photoshop to crop out the small area that needs to be repaired, and then importing it back into the img2img interface.Certainly, to generate the desired image more effectively and ensure seamless stitching, we should enable proportional image upscaling. Typically, doubling the size (2x) should suffice.
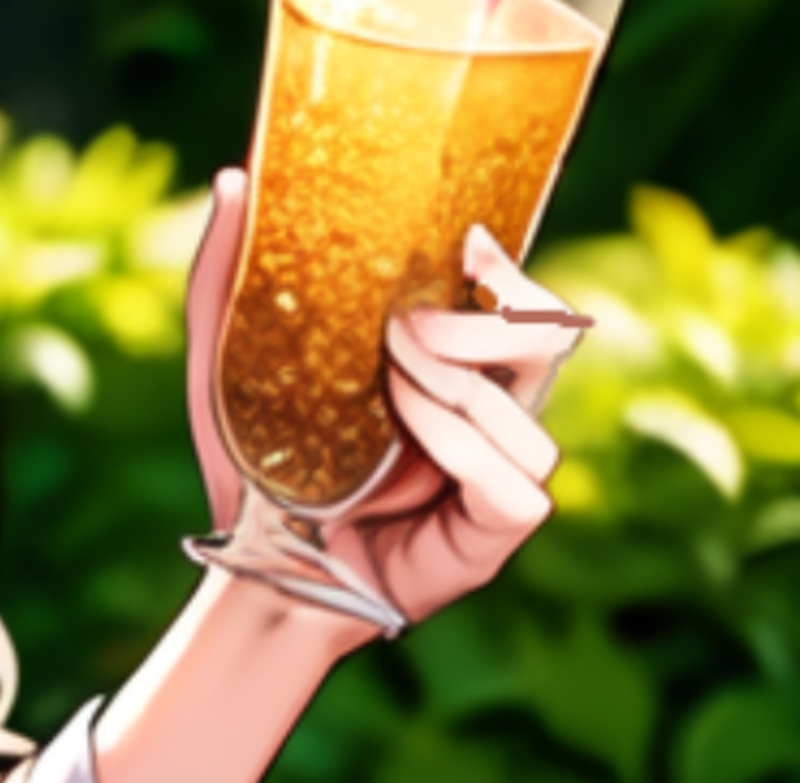
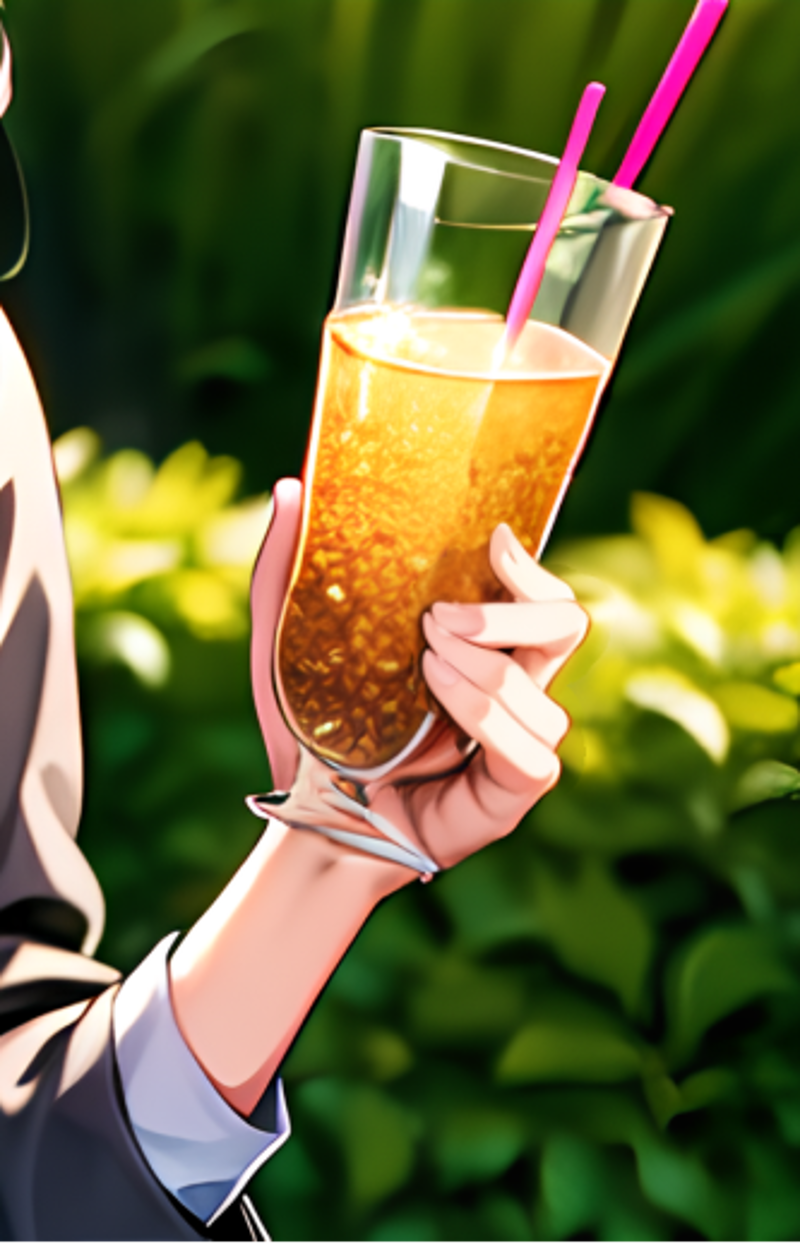
Alright, this seems reasonable. At this point, we can proceed to stitch the images back together, and the process will be complete.
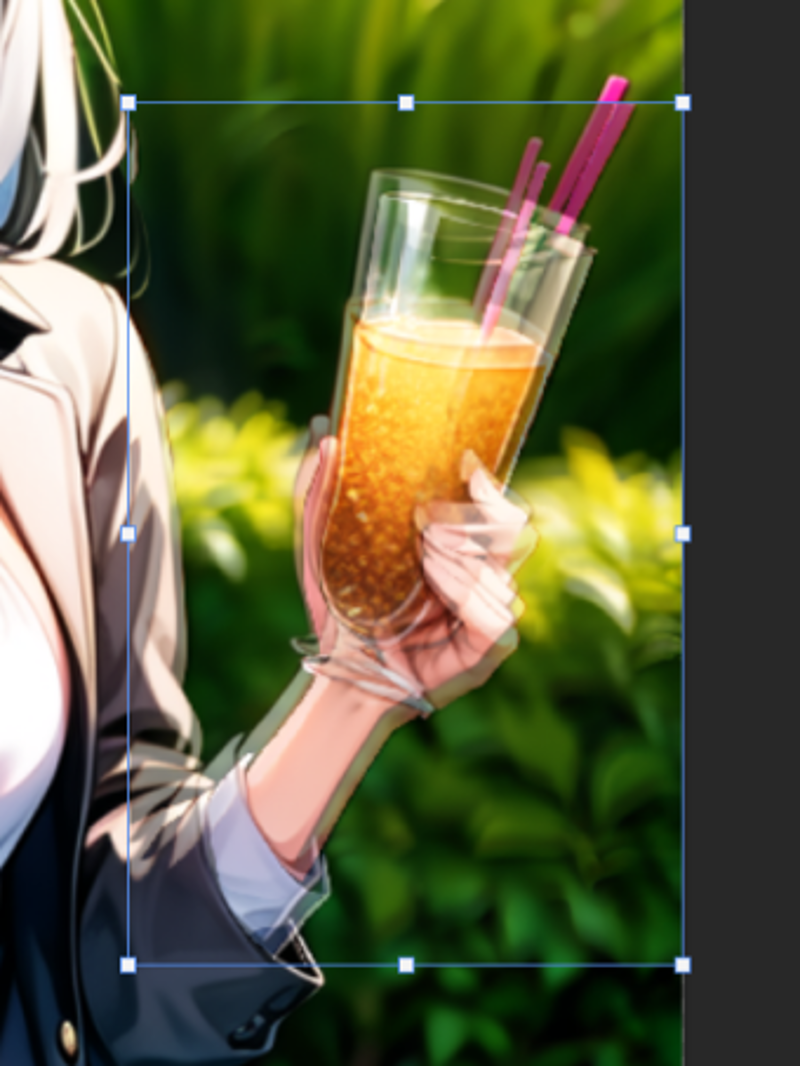
Here is the processed image after completion.
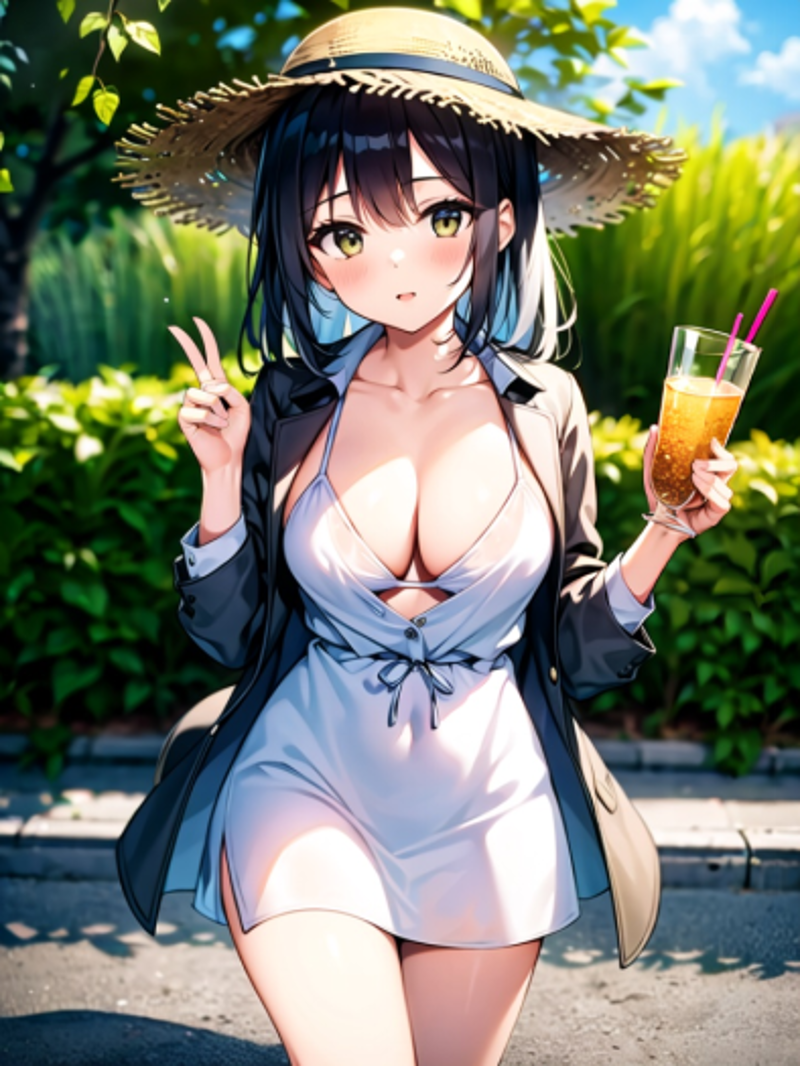
There are many other methods for fixing the hand besides the ones mentioned earlier, such as drawing it manually, using ControlNet for multiple controls, or using material pasting and redrawing. Of course, if you ask me whether those hand fixing embeddings are actually useful, all I can say is: good luck!
workflow
In this project, we will start with a background image and gradually add elements to create a complete picture. First, we will use the Scribble model of Controlnet to roughly sketch the background.
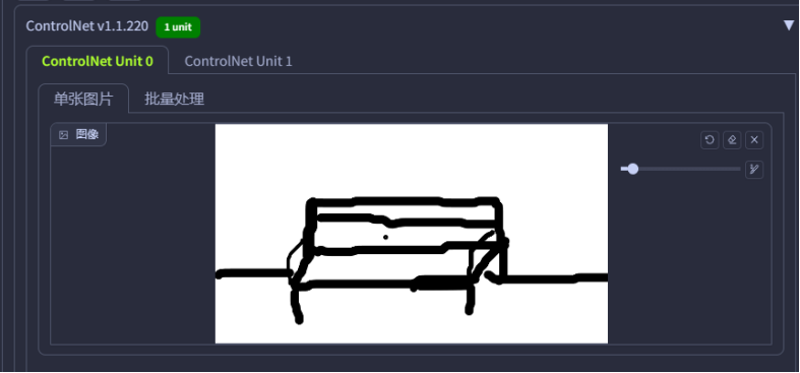
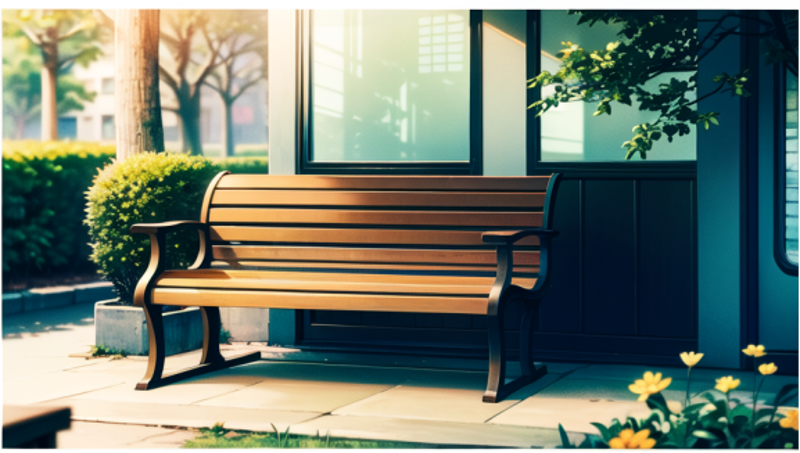
Next, we will add characters to the background image. We will demonstrate the simplest method first, which is inpaint.For the mask, simply outline the rough shape. Since we are creating something out of nothing, we need to use a higher redraw rate (around 0.85). Then, control the appearance of the character through prompt words. Write down the desired characteristics of the person as prompt words. Change the mask handling to "latent noise" and select "DDIM" for sampling. Generate multiple times and choose the one you prefer.
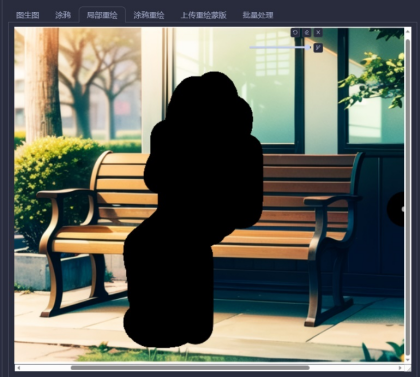
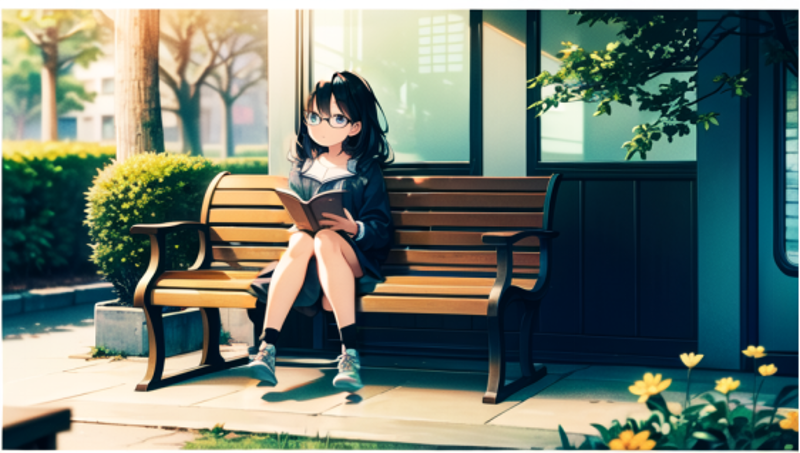
Add a bus stop sign next to the bench: Switch to the "inpaint sketch" tab, roughly draw the shape, and generate using the same parameters as before.
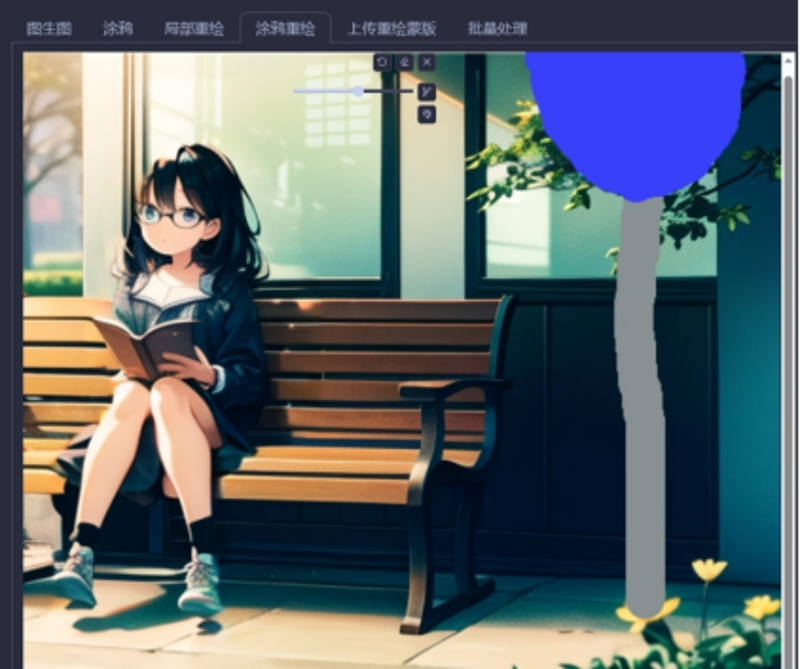
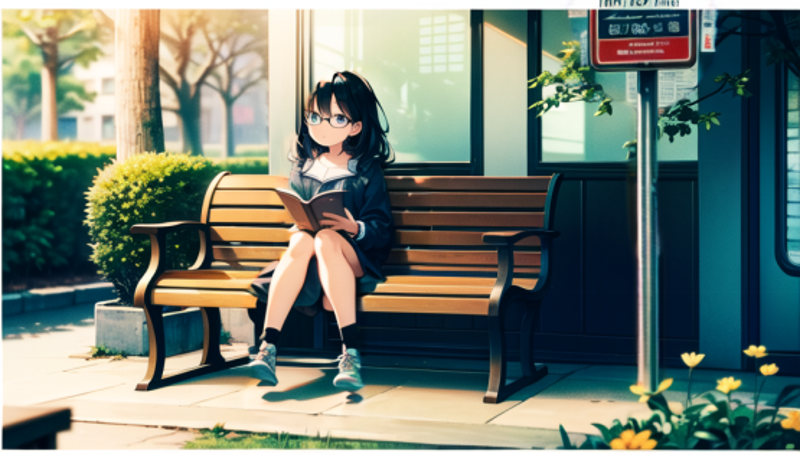
differences
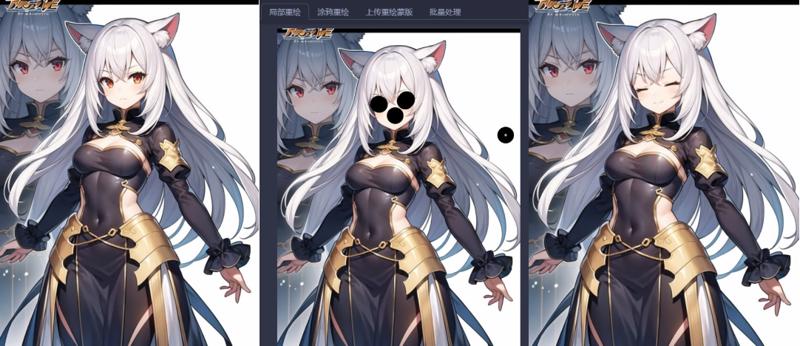
Replacing facial expressions for general characters is quite simple. Just apply a mask and add the corresponding expression prompt. The basic parameters are as follows: choose DDIM as the sampling method, select "fill" for masked content, and set masked content to 0.75.
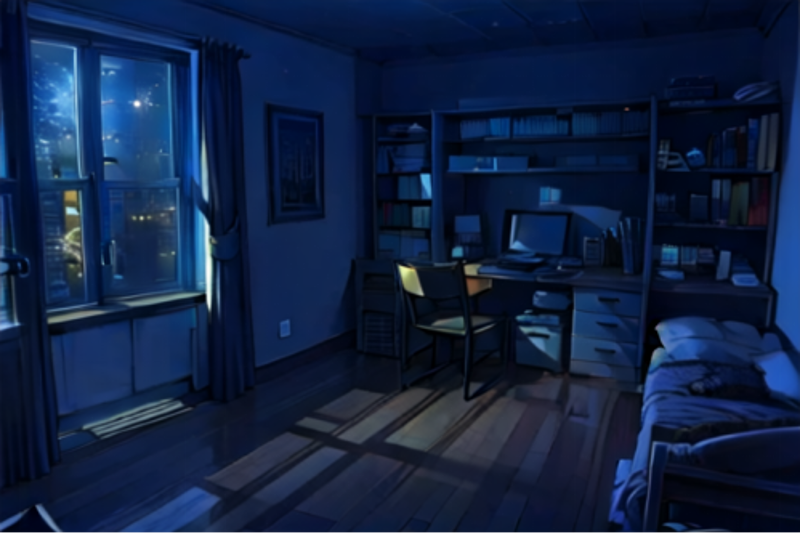
In addition to expression differentiation, day-night differentiation is also achievable. For example, we can start by randomly generating a scene image.
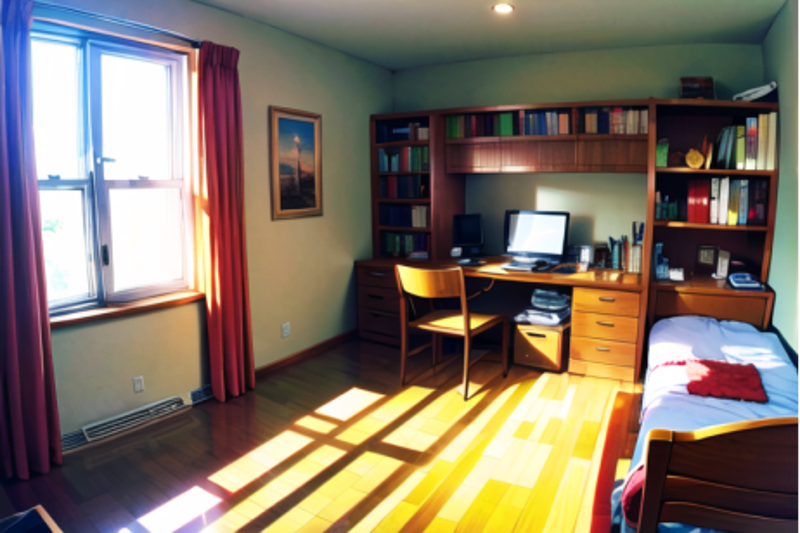
In the "txt2img" tab, put this image into Controlnet. Choose "canny" for both preprocessing and the model. Click on "preprocess" to see the results.
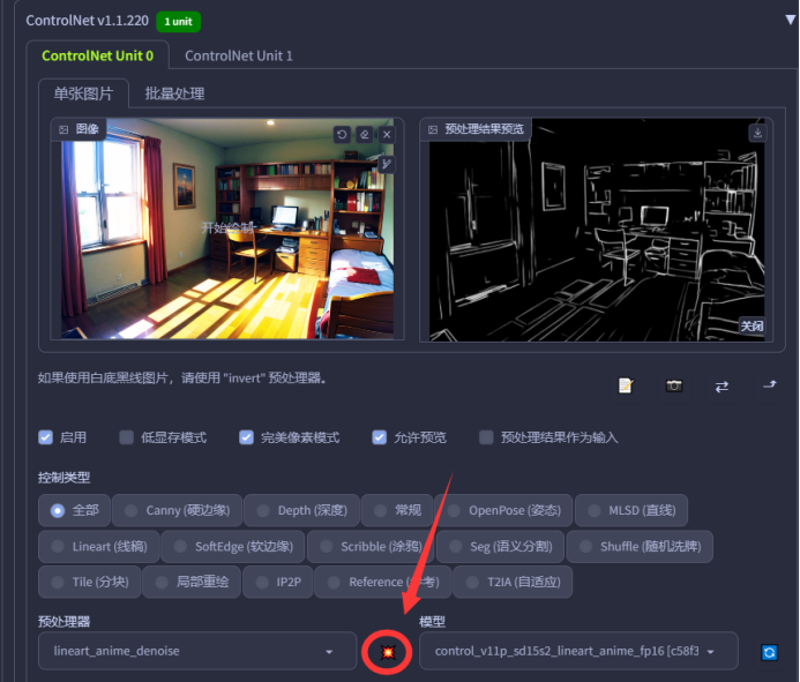
To achieve better results, you can save the preprocessed image and open it in Photoshop to erase the lines that were identified as shadows on the ground.But here I got HAPPY LAZY
To generate the following content with night-related prompts, I used a LOHA model. However, it's important to note that most models are not specifically trained to depict nighttime scenes.Of course, if the lines are too prominent, you can decrease the Ending Control Step. If the effect is not sufficient, you can increase the weight.
Lora
Whether it's Civitai or other platforms for model communication, there are always some models whose results we desire, but they suffer from severe overfitting issues.
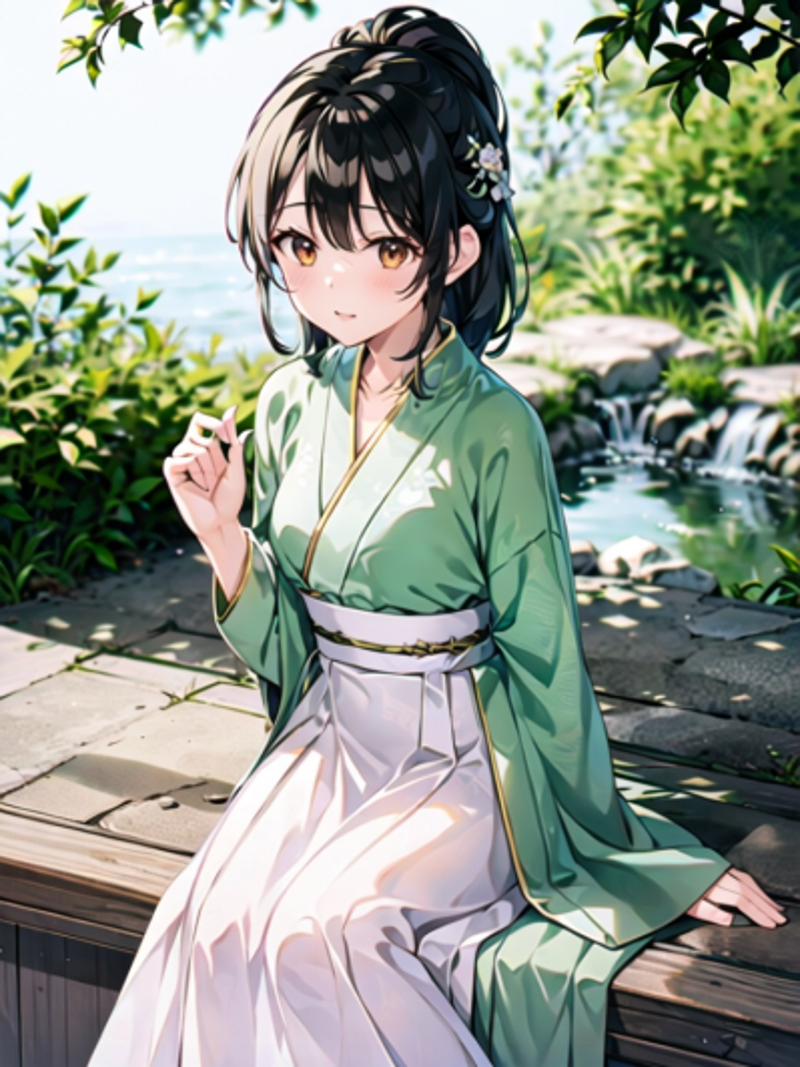
For example, in the image below, we can observe extremely rigid lines, exaggerated color blocks in the hair, an overall glossy appearance, and overfitting textures. These are typical manifestations of overfitting. However, if we want to lower the weight of controls, the generated image may not resemble the character we desire. The method mentioned below is aimed at addressing this issue.
Direct click
Modify the weight of the LoRA model to half of its previous value, adjust the redraw intensity to around 0.6, and once the parameters are set, click on "Generate" directly.
Okay, problem solved!
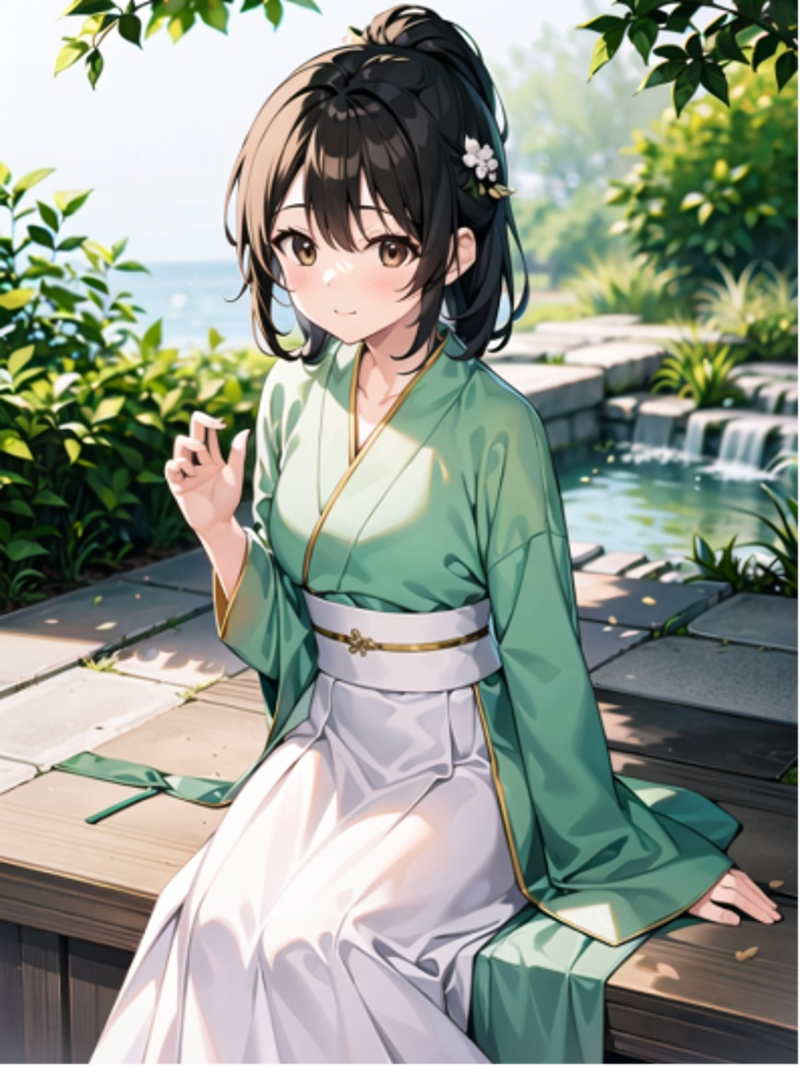
Certainly, masks can be utilized to incorporate two distinct characters or character LoRA models into a single image.like this:
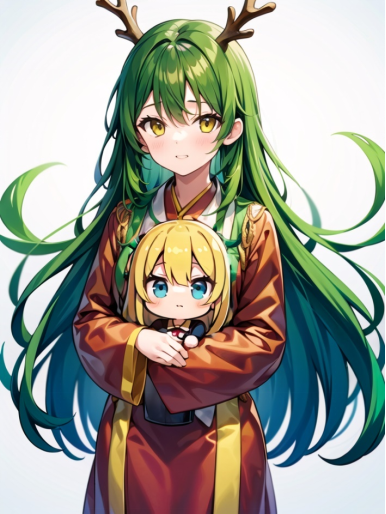
I believe that after reading the previous content, you should know how to handle it.
Picture enlargement
I recommend using stableSR directly.
pkuliyi2015/sd-webui-stablesr: StableSR for Stable Diffusion WebUI - Ultra High-quality Image Upscaler (github.com)
Please refer to the readme.md directly, as it is not necessary to reiterate the information here.
Proposition composition
The application scenario in this case involves the comprehensive use of various diffusion functions to achieve a specific purpose. So, let's start with the given topic: A girl sitting by the window, looking out from the perspective outside the window.So, let's start by roughly sketching the composition. Please note that no artistic skills are required here, and your drawing level can be as simple as the example below:
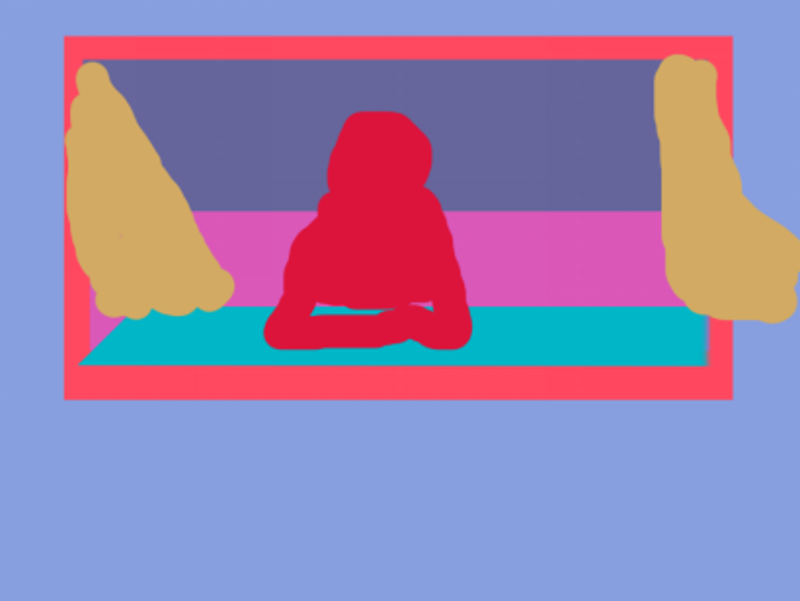
To upload to Controlnet, select "None" for the preprocessor, choose the "seg" model, fill in the corresponding prompts, and generate the output.Generate multiple times until you are satisfied with the result.

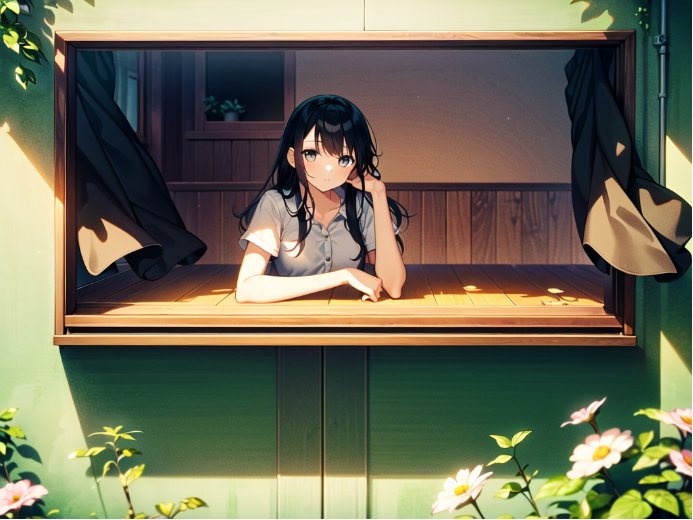
After using "Hires.fix," the room in the image has been significantly enhanced, but unfortunately, the curtains that I wanted have disappeared.
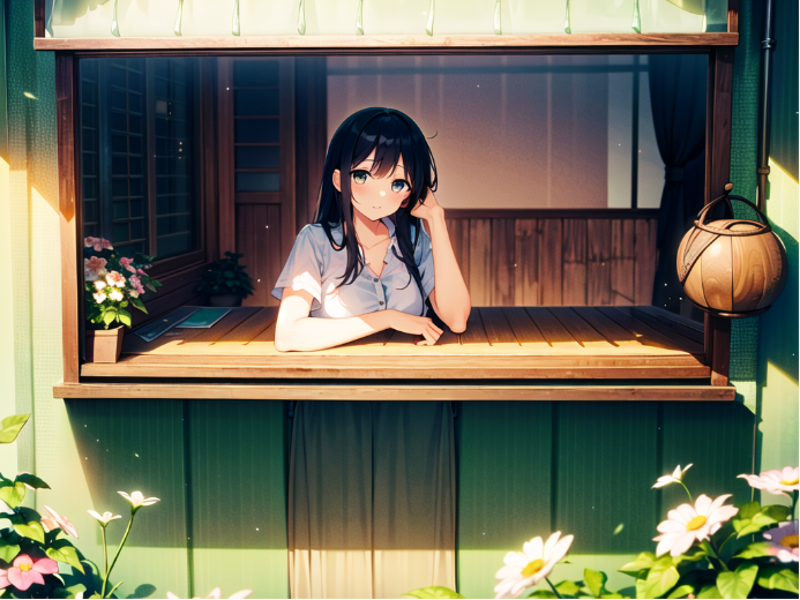
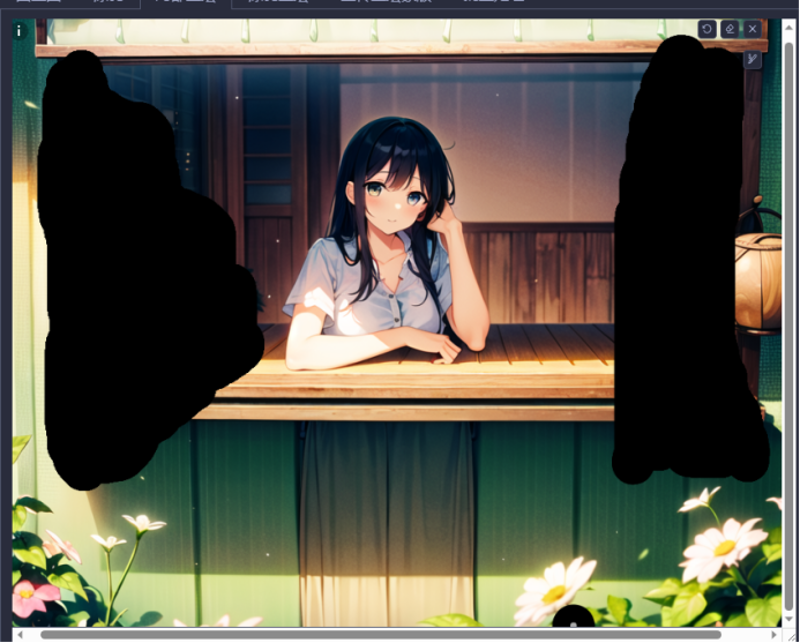
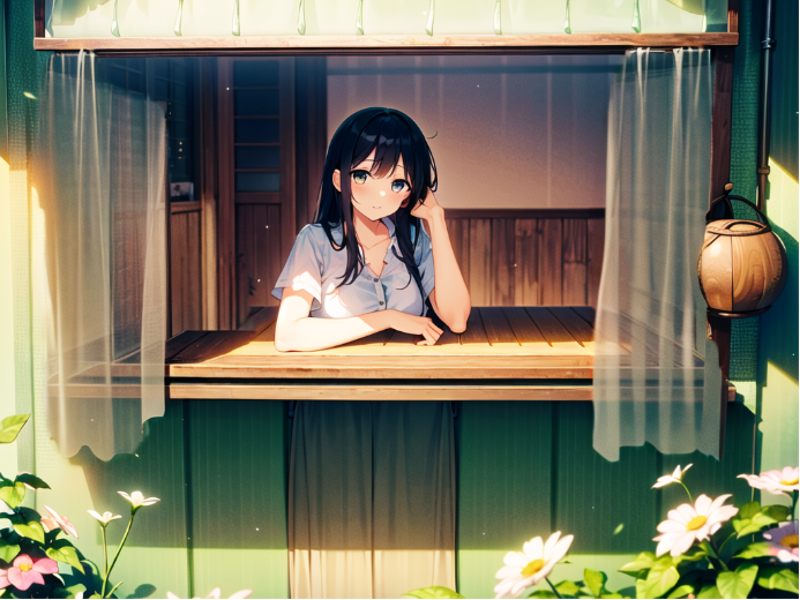
At this point, using inpaint should solve the issue.
Research section
Part of the research is not thorough, and the use of GPT translation may cause some misunderstandings, so I will not put it up for the time being

