Creating Ultra-Realistic Videos Using VFX with A1111 WebUI
Creating ultra-realistic videos with VFX workflows in the A1111 WebUI involves breaking down complex video-to-image and image-to-video processes into manageable steps. This guide will walk you through the setup, usage, and best practices to achieve high-quality results.
1. Introduction to VFX Workflow with A1111 WebUI
The VFX Workflow Extension for the A1111 WebUI allows creators to:
Extract frames from videos.
Generate masks for blending and stylization.
Extract keyframes for focused processing.
Integrate seamlessly with Stable Diffusion's Img2Img Batch Processor.
Package outputs for tools like EBSynth to recompose the final video.
By combining these tools with Stable Diffusion, you can stylize and refine videos to produce ultra-realistic results.
2. Setting Up the Environment
Prerequisites
Python 3.8 or higher installed on your system.
Stable Diffusion WebUI (A1111) installed and functional.
ffmpegandffprobeinstalled for video processing:sudo apt install ffmpeg
Installing the VFX Workflow Extension
Clone the VFX Workflow repository into the
extensions/folder of your A1111 WebUI:git clone https://github.com/babydjac/vfx_workflow.gitRestart the A1111 WebUI.
Once installed, the extension appears as a new tab titled VFX Workflow.
3. Navigating the VFX Workflow Extension
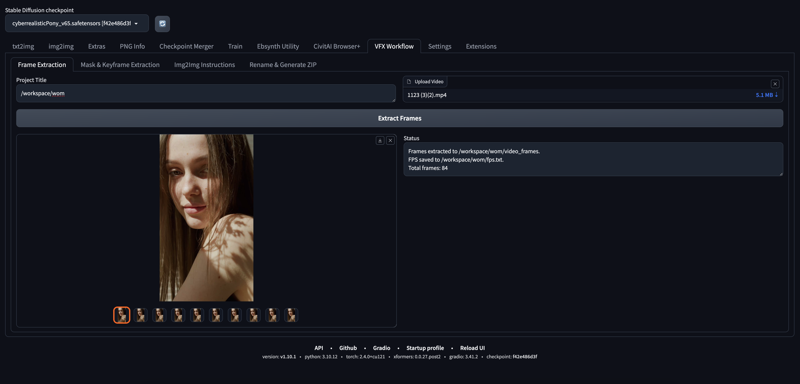
Tab 1: Frame Extraction
Upload a video file in
.mp4,.mov, or.aviformat.Specify a Project Title to organize outputs.
Click Extract Frames to:
Convert the video into sequentially numbered PNG frames.
Save the video's FPS into a
fps.txtfile for accurate video reconstruction.
Best Practices:
Use high-resolution video inputs for better results during stylization.
Ensure the frame extraction directory is accessible for later steps.
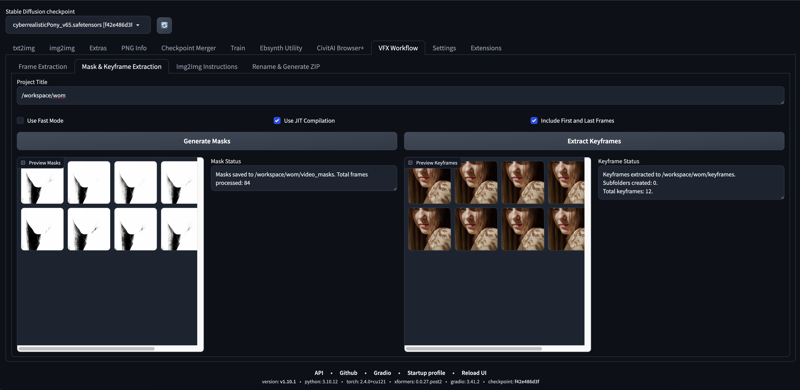
Tab 2: Mask & Keyframe Extraction
Generate Masks:
Enable Fast Mode or JIT Compilation for faster processing.
Click Generate Masks to create grayscale masks for blending and stylization.
Extract Keyframes:
Optionally enable Include First and Last Frames.
Click Extract Keyframes to:
Select representative frames.
Automatically split keyframes into subfolders if the count exceeds 20.
Use Cases:
Masks: Improve blending between original and stylized frames.
Keyframes: Focus processing on critical moments for stylistic consistency.
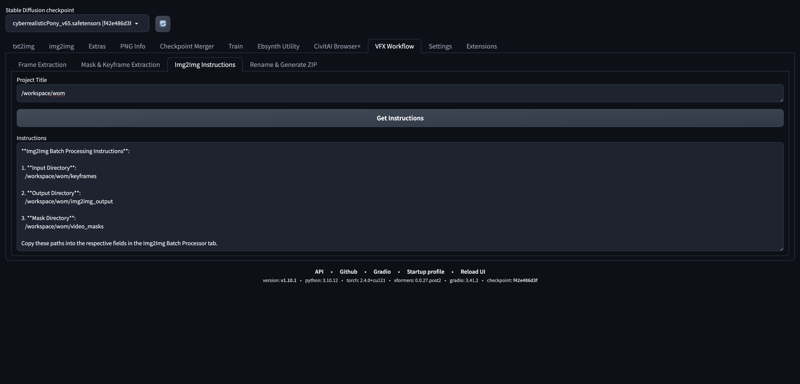
Tab 3: Img2Img Instructions
This tab provides dynamically generated paths for seamless integration with the Img2Img Batch Processor.
Input Directory: Location of extracted keyframes.
Mask Directory: Location of generated masks.
Output Directory: Where the stylized frames will be saved.
Copy these paths into the Img2Img Batch Processor within the WebUI to stylize your frames.
Example:
Stylize keyframes using a custom prompt like "ultra-realistic, cinematic lighting, 8K resolution."
Use masks to preserve specific areas, such as faces or objects.
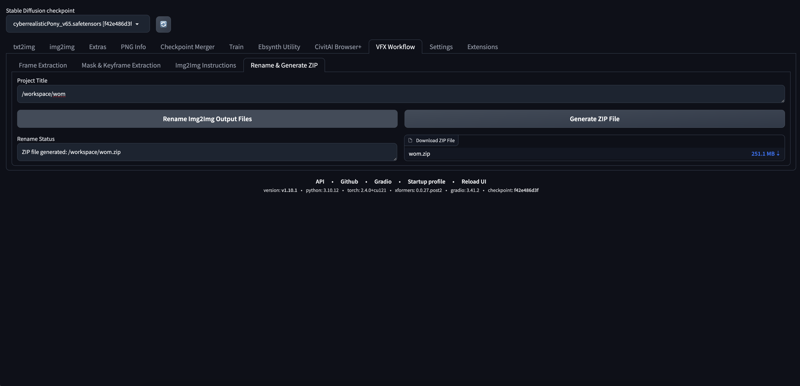
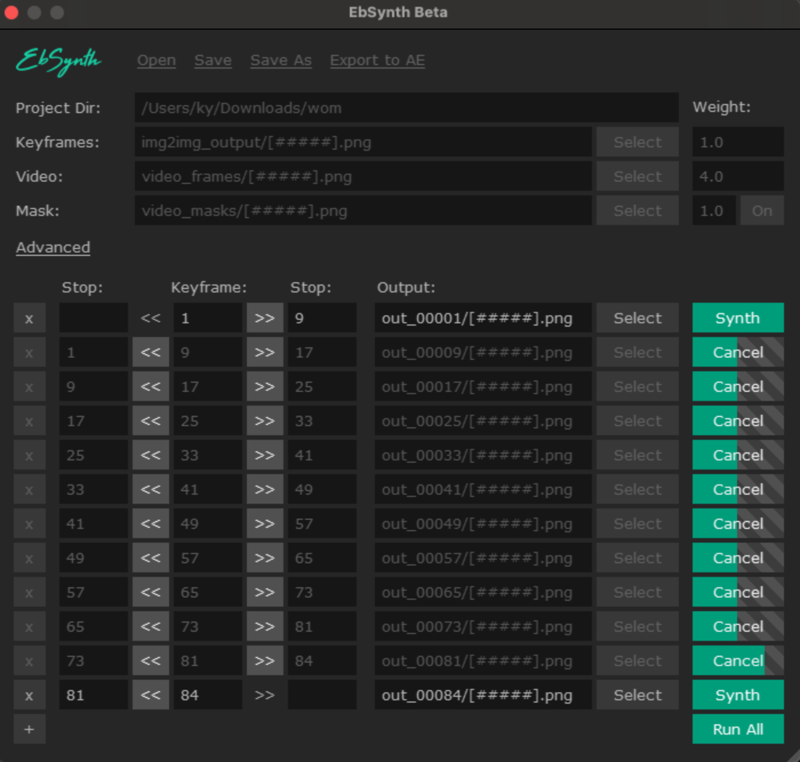
4. Using EBSynth for Video Reconstruction
After processing the frames in Img2Img, use EBSynth to recompose the stylized frames into a video with smooth transitions.
Step 1: Organize Folders
Place the
img2img_outputfolder into the Keyframes Section in EBSynth.Place the original
video_framesfolder into the Video Section.Place the
video_masksfolder into the Mask Section.
Step 2: Generate EBSynth Settings
Open EBSynth and load the folders as described above.
Adjust the
Keyframesettings and select the appropriate stylistic frame-to-mask mapping.
Step 3: Run EBSynth
Click Start in EBSynth to generate the stylized video frames.
The output will be saved in a new folder, ready for further composition.
5. Advanced Techniques
Using ControlNet with Img2Img
Load ControlNet models for edge detection, depth maps, or segmentation.
Apply them during the Img2Img process to maintain structure and enhance realism.
Refining Results with Additional Passes
For finer details, consider running processed frames through Img2Img again with adjusted prompts and settings.
6. Troubleshooting
Frames Not Extracted: Ensure
ffmpegandffprobeare installed and accessible.Masks Missing: Check the paths in the project directory.
EBSynth Errors: Verify that the folders are correctly loaded into their respective sections.
7. Conclusion
The VFX Workflow Extension unlocks the full potential of Stable Diffusion for video stylization. By leveraging tools like frame extraction, mask creation, and keyframe management, creators can produce ultra-realistic results. Using EBSynth, these outputs can be recomposed into smooth, cinematic videos with minimal effort.
.jpeg)
