Samplers, Schedulers, and Sigmas, Oh My!
NEW! Companion workflow with some advanced techniques and more implementation examples: https://civitai.com/models/987817
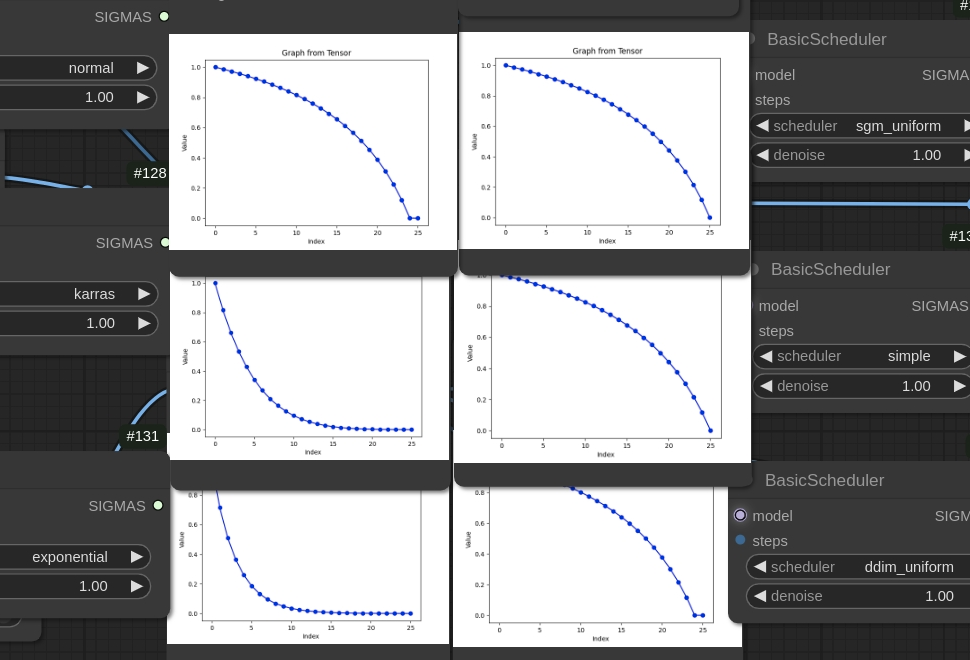
Samplers and schedulers are an intrinsic part of AI image generation, but confusing vocabulary and lack of information can shroud these concepts in mystery. The reality is actually quite boring - they dictate the formula used for the 'noise' added to and taken from images during training and image creation, and they specify and sometimes guide the strength of image creation in each step, typically by dividing the steps evenly along a xy curve (see above graphic depicting the curves of some popular schedulers).
Sigmas: The Step Weights
Sigmas are simply a list of numbers that control how strong each denoising step is:
Example:
[17, 15.2, 12.0, 10.3, 7.3, 3.0, 2.1, 3.2, 0, 0]Some schedulers add redundant zeros at the end, others don't
Higher numbers = stronger denoising (image generation) steps
Schedulers: The Step Managers
Schedulers are rule sets that:
Generate sigma weights for your requested steps
Only need to know the model's proper range (starting number)
Create steps using specific curve formulas
In ComfyUI, this is all that "samplers" actually do
More advanced schedulers can:
Evaluate predicted noise shifts
Adjust weights based on actual vs. predicted noise shifts
Perform other optimizations
Samplers: The Noise Controllers
These define the mathematical patterns for:
Adding noise during training
Driving the AI's noise prediction algorithms during image creation
The Denoising Parameter: Just the final % of steps
1.0 for txt2img
0.01-0.8 for img2img
Specifies where in the sigma schedule to start/stop
Example: 0.2 denoise = using only the final 20% of sigma steps
How Steps and Denoise Interact in Most ComfyUI Nodes
When you set:
0.2 denoise at 10 steps
System calculates 10/0.2 = 50 total steps
Gets all 50 steps from scheduler
Uses only the final 10 steps (last 20%)
Alternative approach:
Some nodes allow you to specify total steps and start/end points directly
50 total steps, starting at step 40 = identical to 0.2 denoise/10 steps
More transparent for what's actually happening
Easier to automate
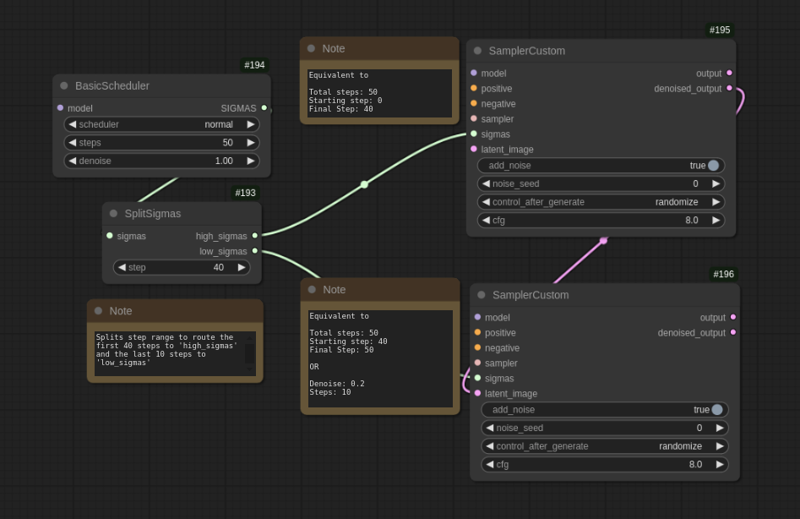
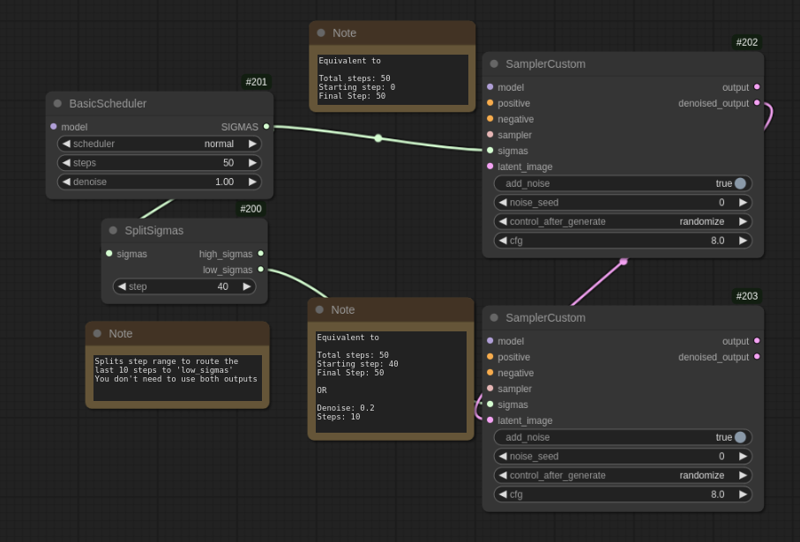
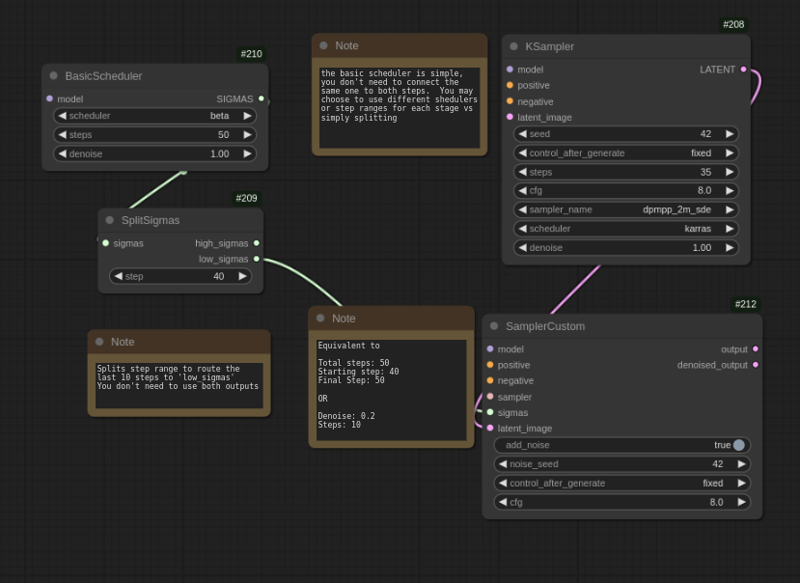
ComfyUI's 'split sigmas' nodes can divide steps between different operations
(see example images below)
Key Takeaways
Understanding that denoise is simply the percentage of steps where you start during img2img, and that sigmas are just a list of step strengths (high to low), you can more confidently use different interfaces and also set up more complex workflows. This knowledge enables you to 'split sigmas' between different schedulers, changing settings, prompt or lora weights, upscaling, or more.
A final note to leave with - not all platforms implement schedulers the same way, and you can get more out of them if you use software that supports a more advanced scheduler. The diffusers back end implements flowmatch schedulers that are capable of adjusting sigma weights during generation for better results (and in fewer steps). That being said, you can still get similar quality with simpler schedulers, it will usually just take more steps and more tweaking.
Here's a link to some good information on schedulers: https://huggingface.co/docs/diffusers/api/schedulers/overview
EXAMPLE WORKFLOW
companion workflow pictured below - download it and try out some of the different techniques!
https://civitai.com/models/987817
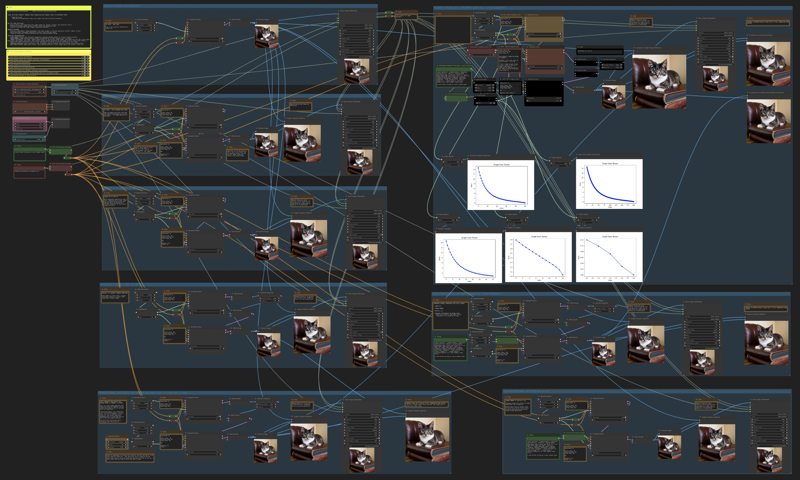
and here are some basic configurations for reference (these do not contain specific setting suggestions, but simply illustrate how to wire the split sigmas node)
