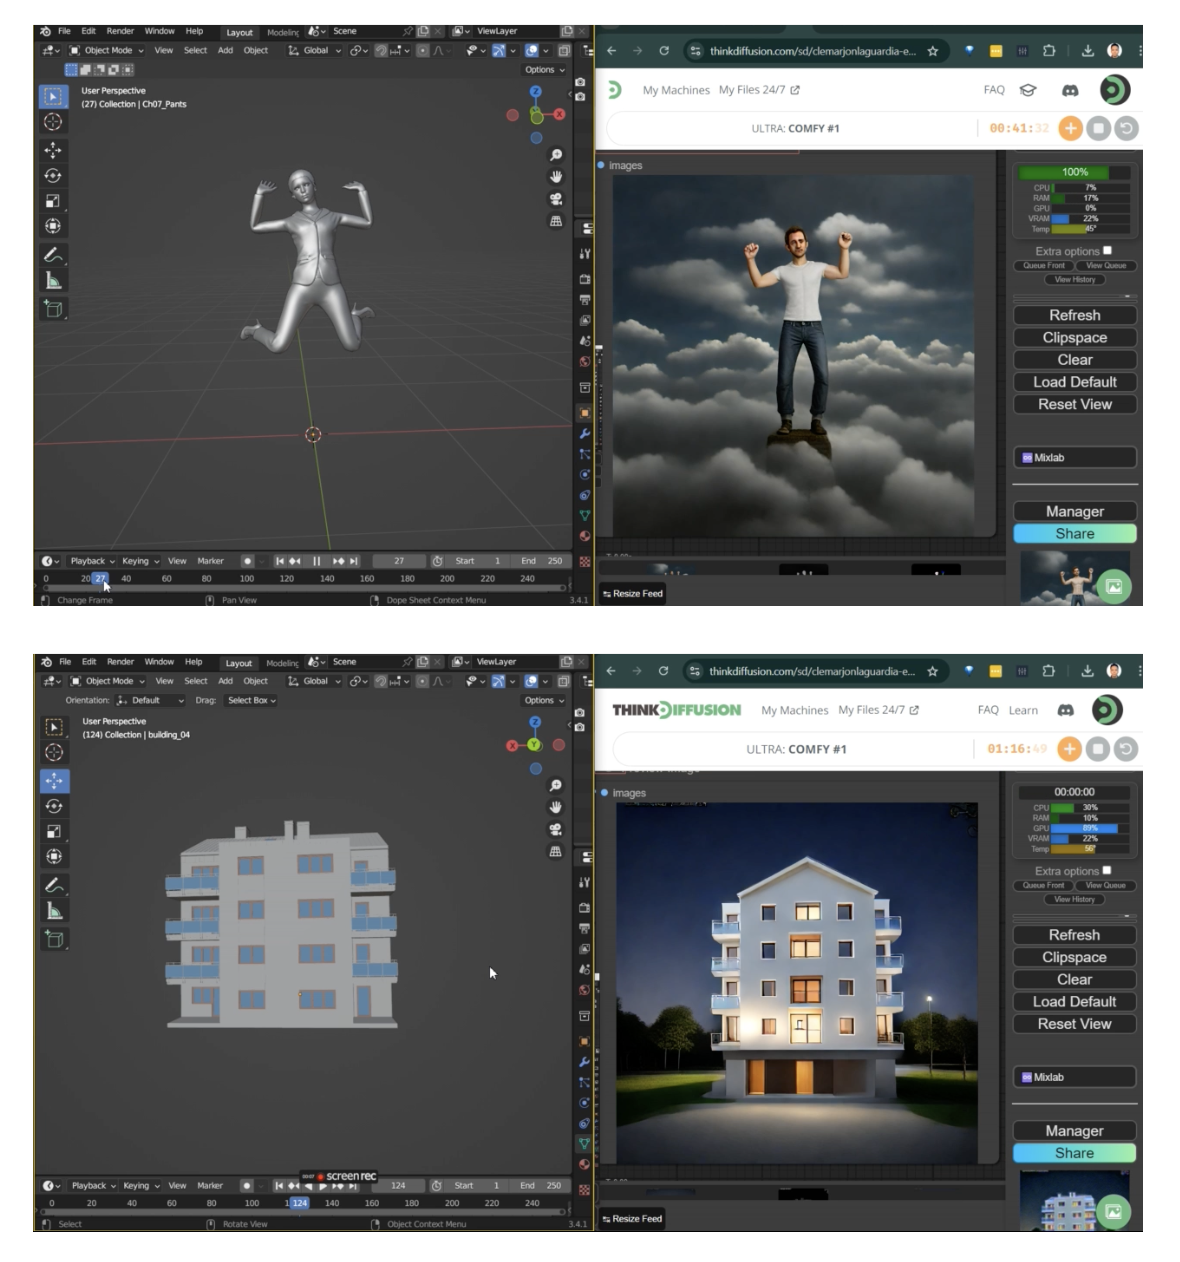
In the realm of 3D art, seamless platform integration can be a game-changer.
Today, we’ll explore how to use Hyper Stable Diffusion with ComfyUI and Blender. Blender, celebrated for its powerful 3D modeling and rendering capabilities, pairs exceptionally well with ComfyUI for enhanced creative workflows.
By the end of this guide, you'll understand how to integrate these tools effectively and unlock their full potential in real-time. Let’s dive in!
What is Hyper Stable Diffusion?
ByteDance has demonstrated its dedication to both speed and innovation with the introduction of Hyper-SD. It is designed to speed up generation time significantly.
With increased speed, it also ensures that images are sharper, more detailed and visually appealing.
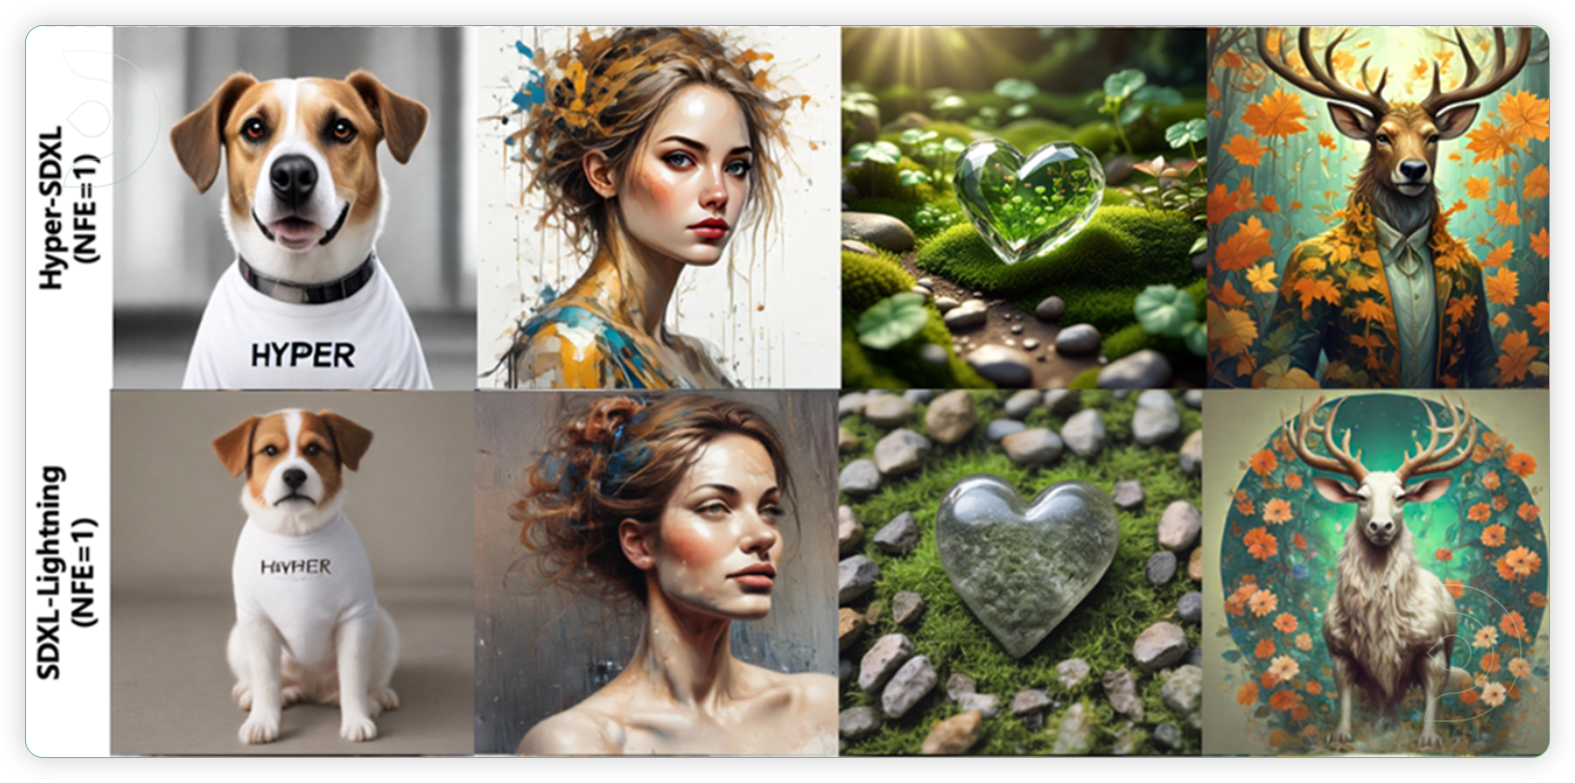
Credits: ByteDance Hyper-SD
The image above is a comparison between Hyper SD and SDXL Lightning using 1 step. Tests show that Hyper-SD has better quality and works faster than earlier models such as SDXL-Lightning.
What is Blender?
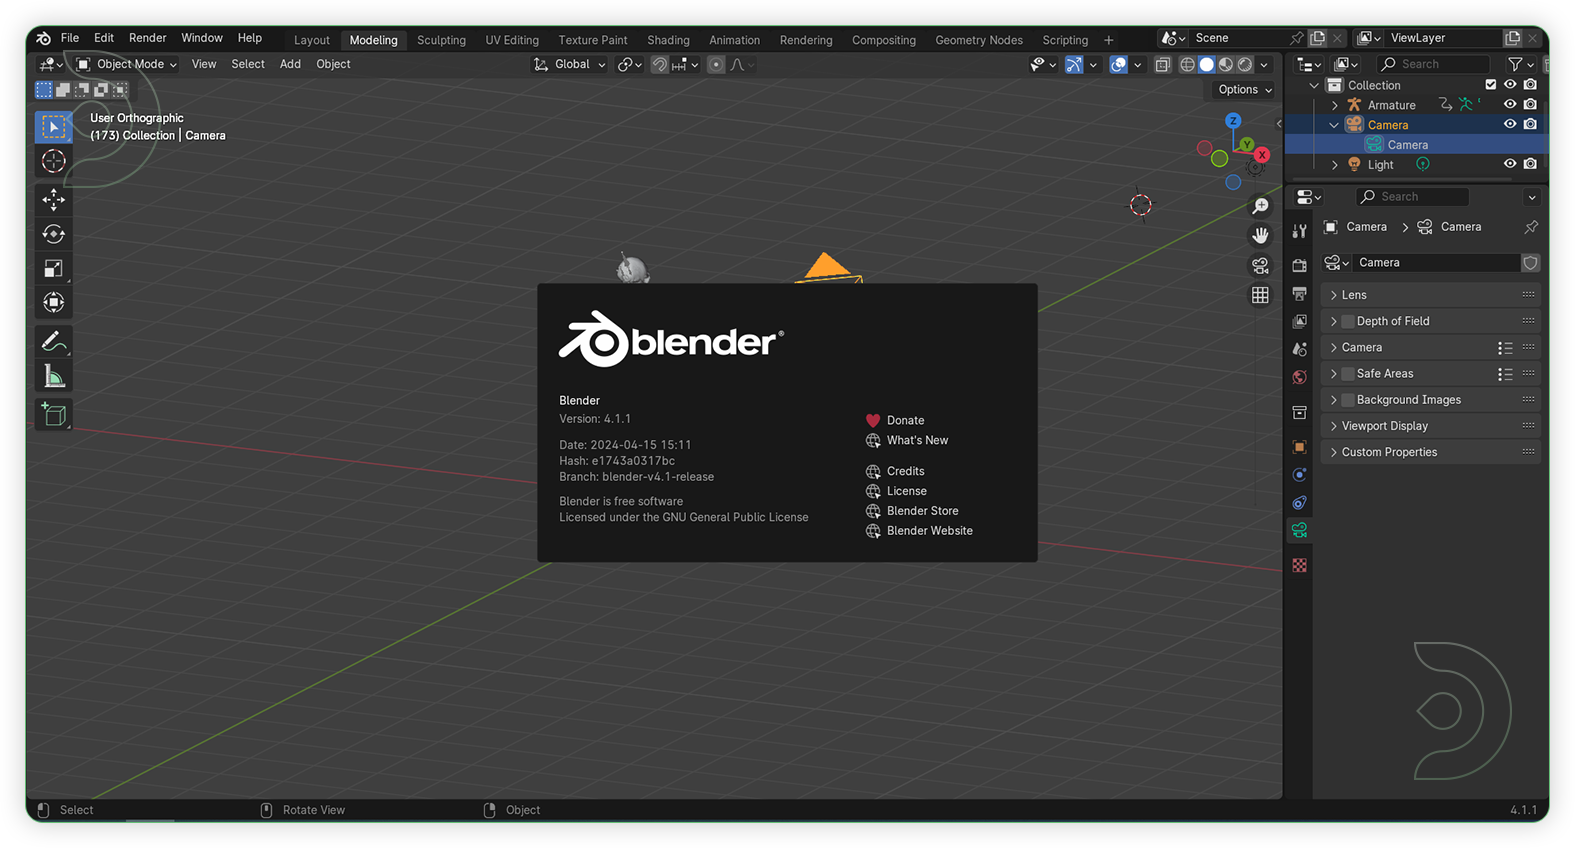
If you're looking for 3D software, one option is Blender. It is a free and open-source software for creating 3D models, animations and images. It allows users to build, shape and paint objects in three dimensions, making it a powerful tool for artists and designers. With Blender, you can create detailed characters, elaborate scenes and stunning effects for movies, video games and digital art. The software is supported by a passionate community that shares tips, tutorials and plugins to help each other improve their skills.
Blender and Hyper SD in ComfyUI
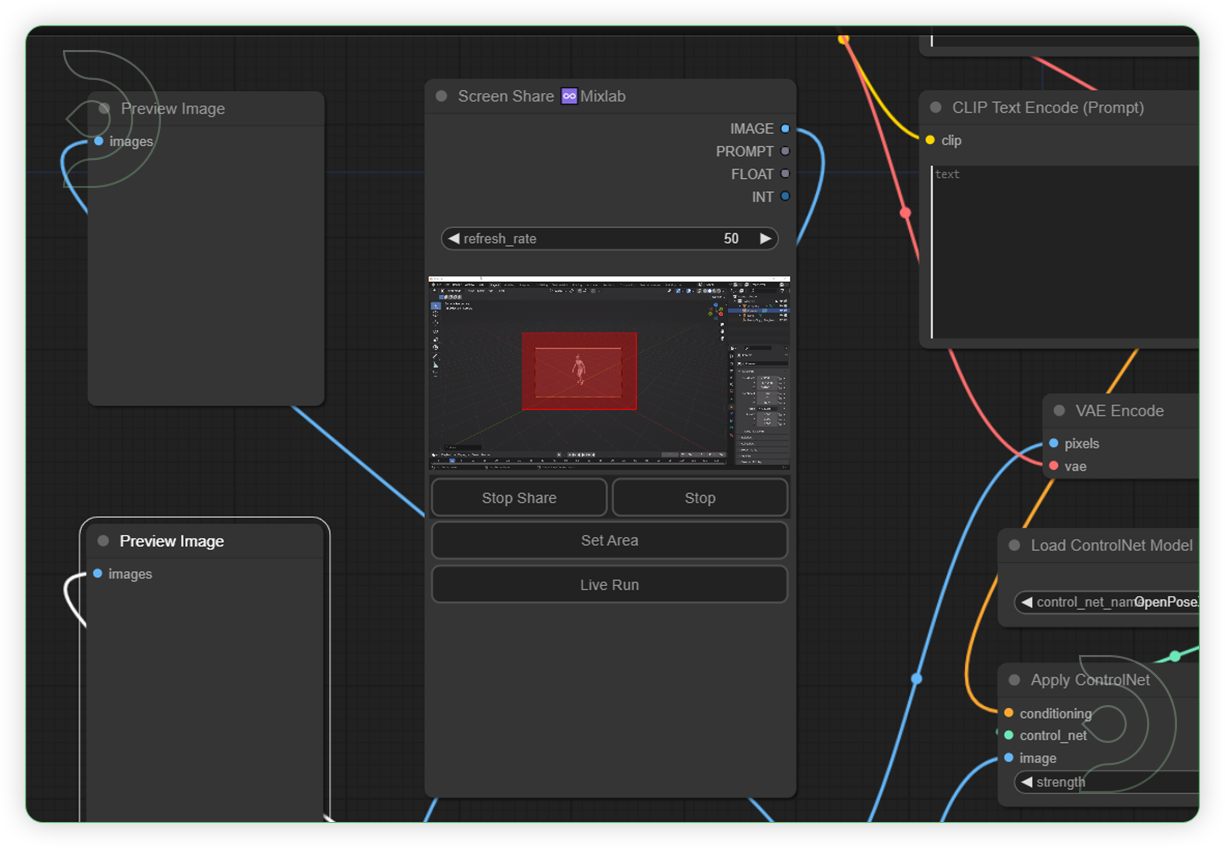
Ever wondered how we can integrate Blender into ComfyUI? ComfyUI can connect to Blender with the custom node MixLab. This seamless integration ensures consistent and reliable results, which are essential for any professional projects. We would like to credit Andrea Baioni for his outstanding work in the development of this ComfyUI workflow where he combines the Hyper SD base model, Blender and ComfyUI.
How to Use
ComfyUI - One-Time Setup
HyperSD + Blender workflow v10.json
💡
Download the workflow and drag & drop it into your ComfyUI window, whether locally or on ThinkDiffusion. If you're using ThinkDiffusion, it's necessary to use at minimum the Turbo 24gb machine, but we do recommend the Ultra 48gb machine.
Custom Nodes
If there are red nodes in the workflow, it means that the workflow lacks the certain required nodes. Install the custom nodes in order for the workflow to work.
Go to ComfyUI Manager > Click Install Missing Custom Nodes
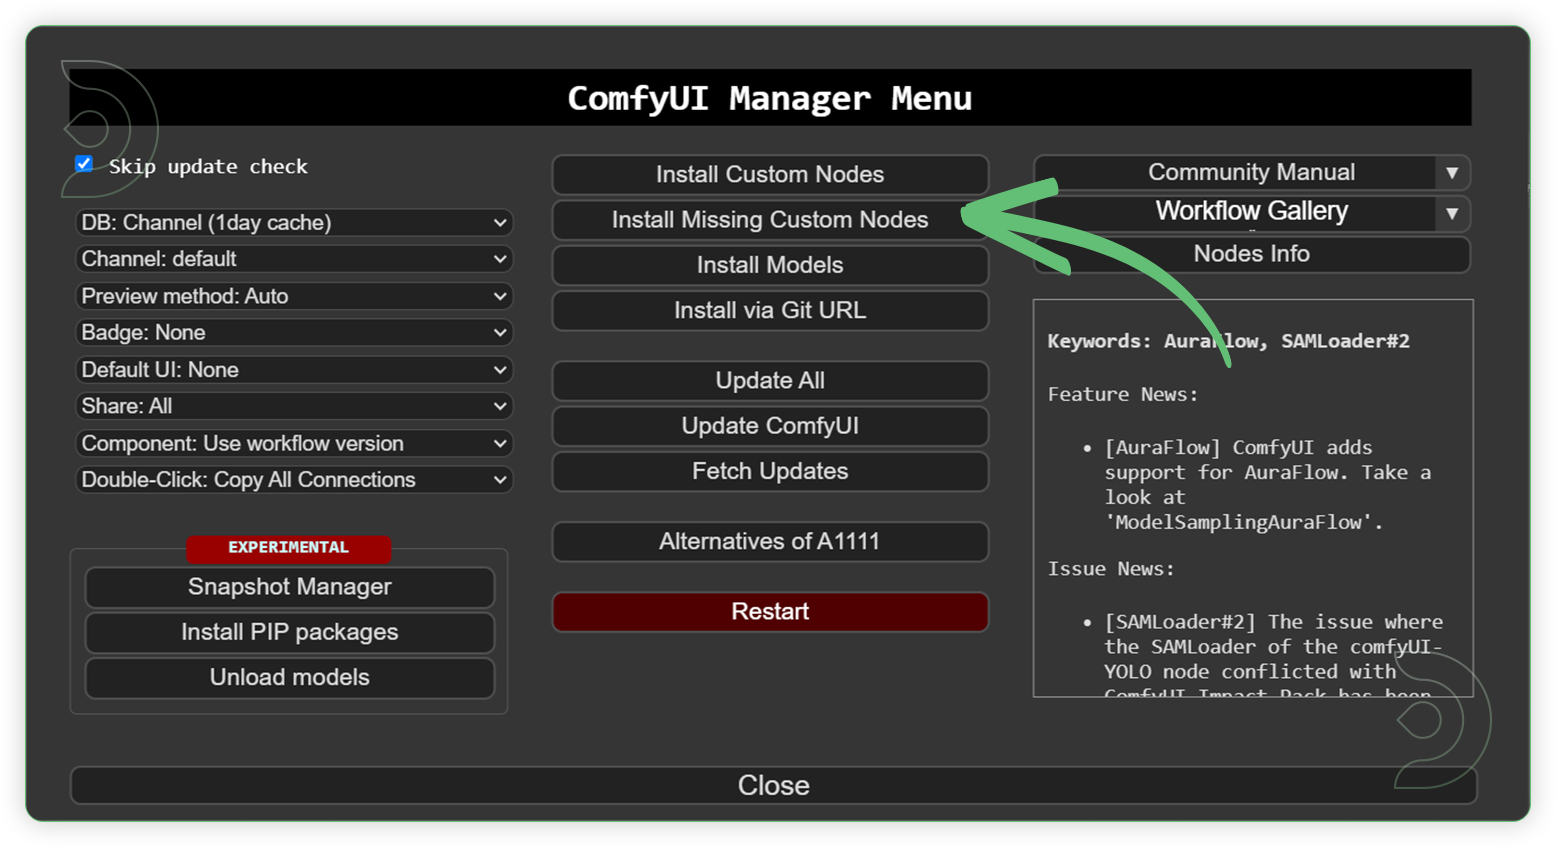
Check the list below if there's a list of custom nodes that needs to be installed and click the install.

Models
Download the recommended models (see list below) using the ComfyUI manager and go to Install models. Refresh or restart the machine after the files have downloaded.
Go to ComfyUI Manager > Click Install Models
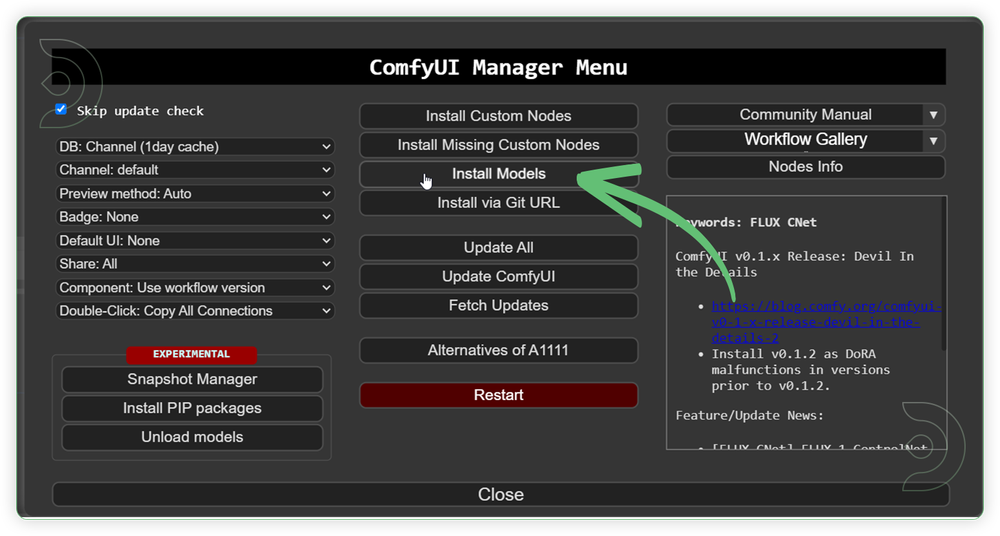
When you find the exact model that you're looking for, click install and make sure to press refresh when you are finished.
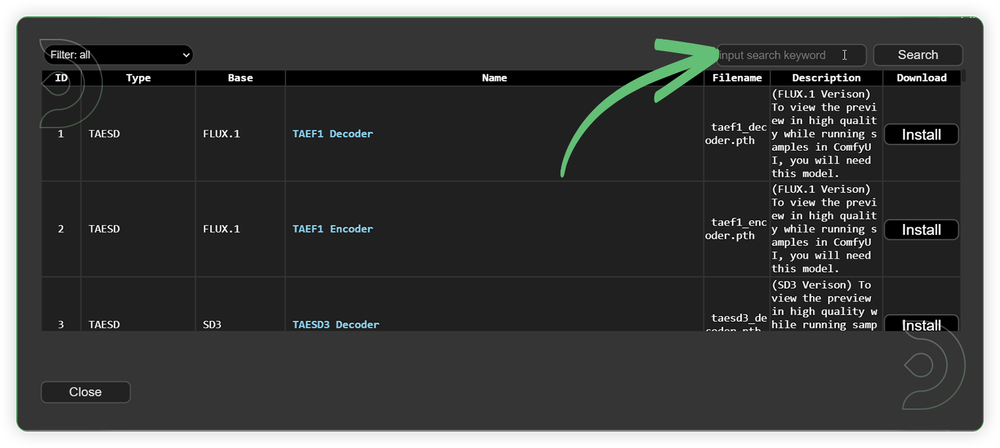
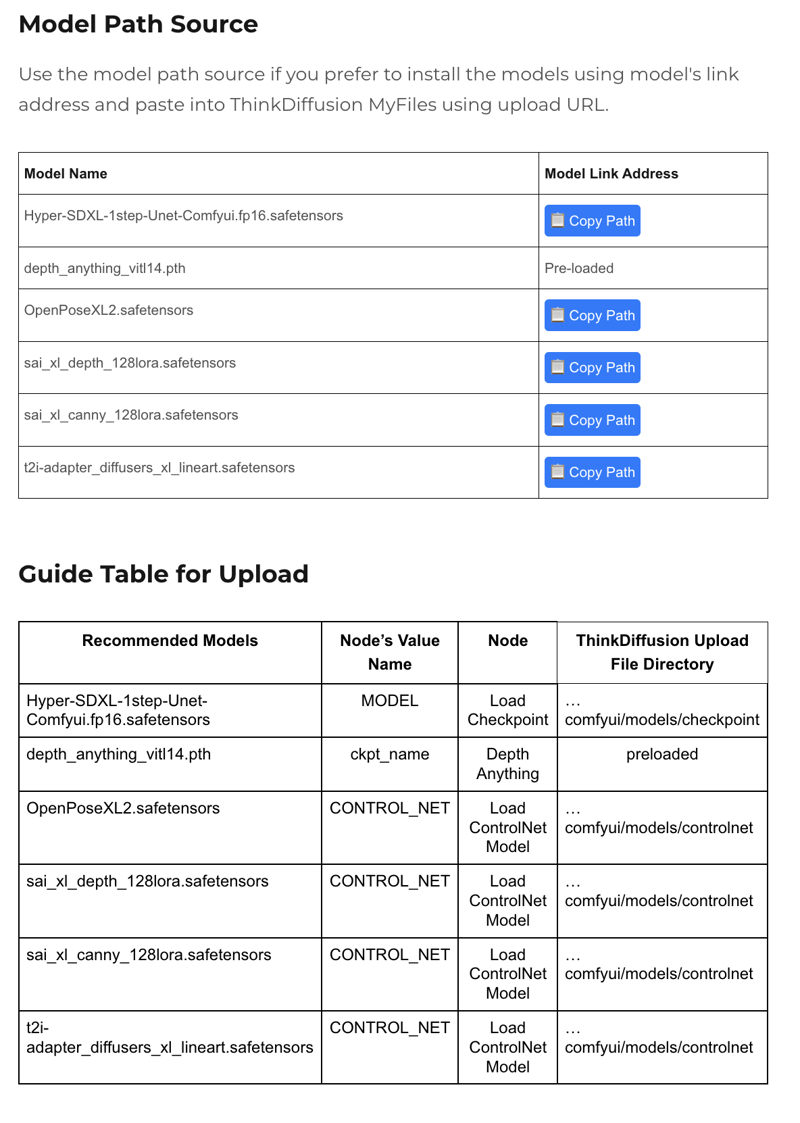
Reminder
💡
Refresh or restart the machine after uploading the files in ThinkDiffusion My Files.
💡
You can upload models by copying the link address of download button/icon from Civitai or Huggingface and paste into the Upload section of ThinkDiffusion My Files using the copied URL.
Blender - One-Time Setup
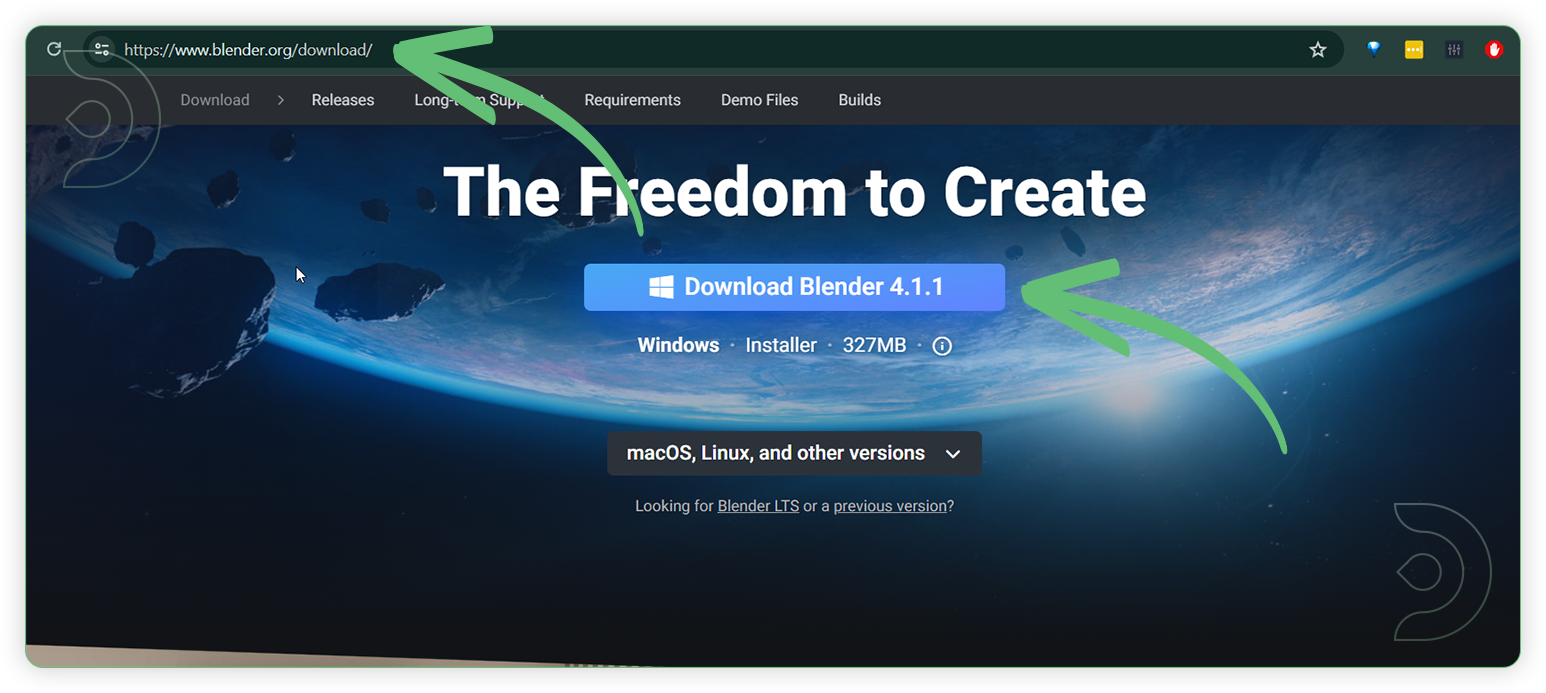
Download Blender here https://www.blender.org/download/. Read about the Blender system requirements here https://www.blender.org/download/requirements/
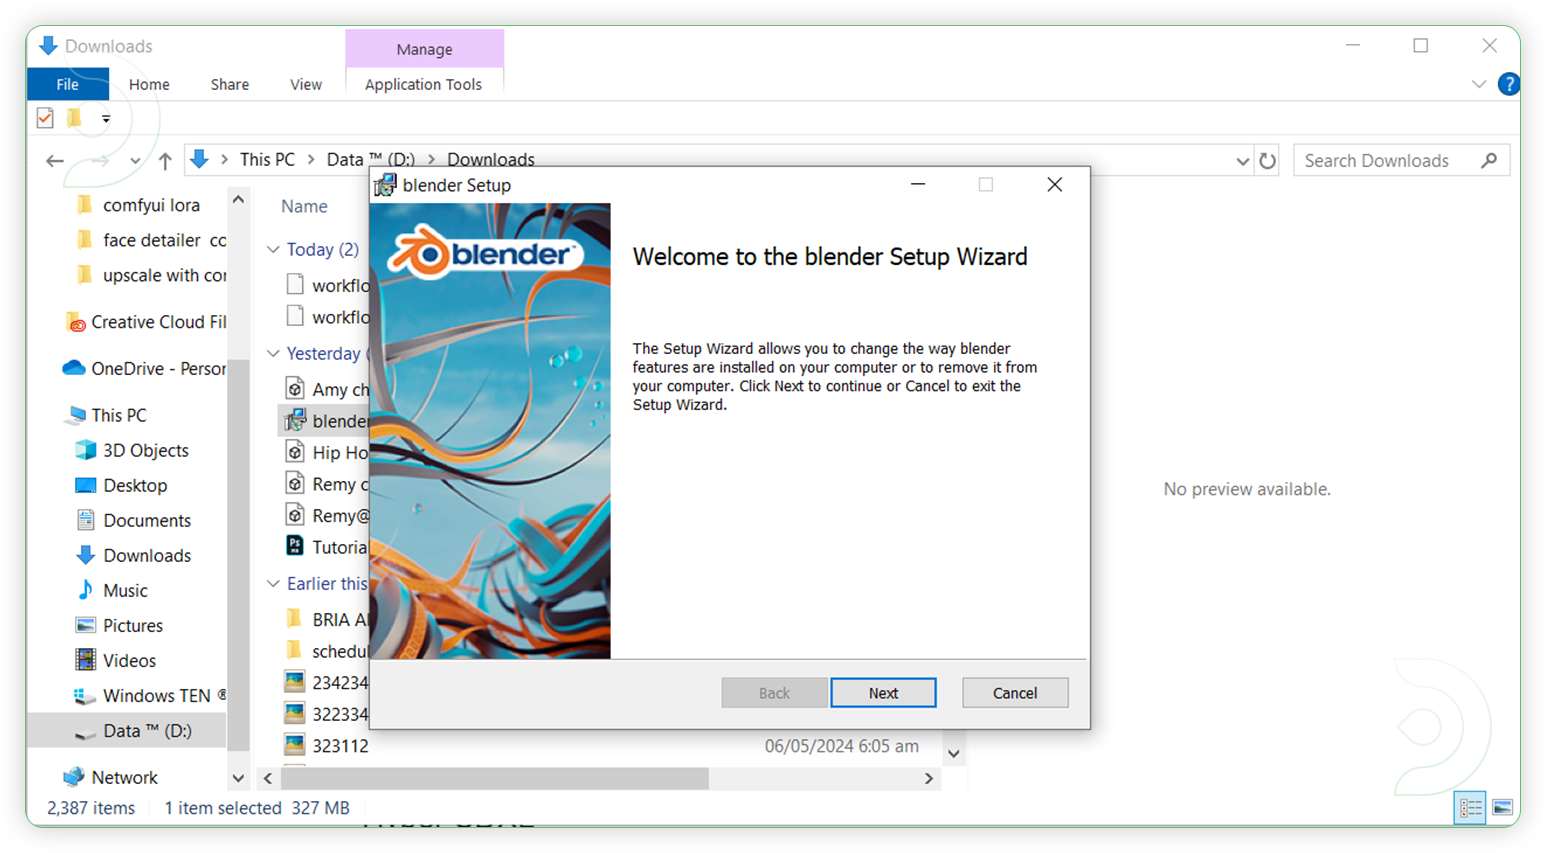
Install Blender onto your device
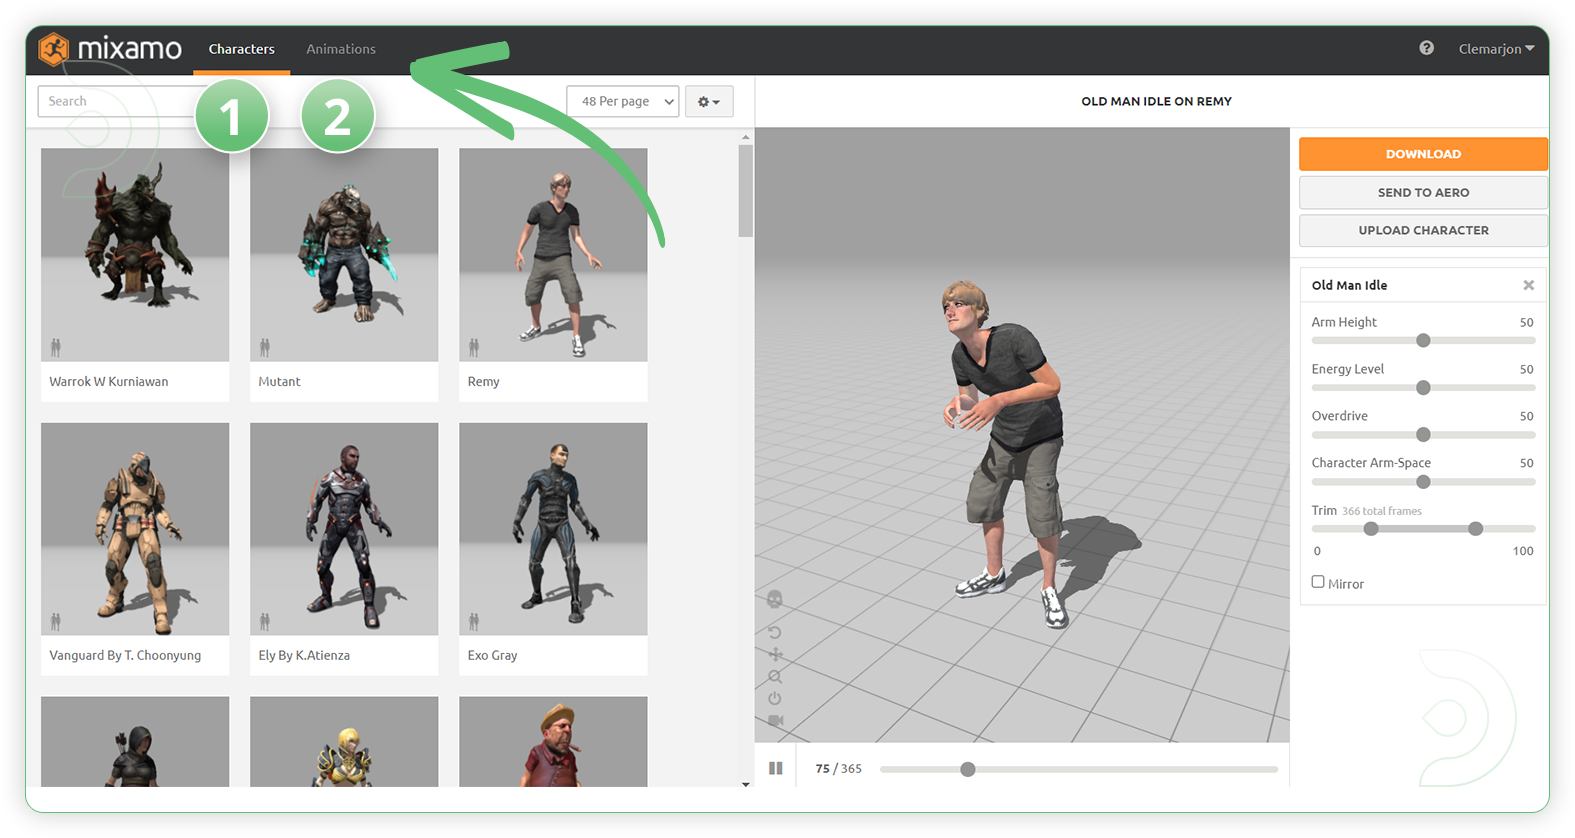
Go here https://www.mixamo.com/#/?page=1&type=Character Choose 3D characters in Characters tab then Click the Animations tab to choose what kind of movement you want for your character.
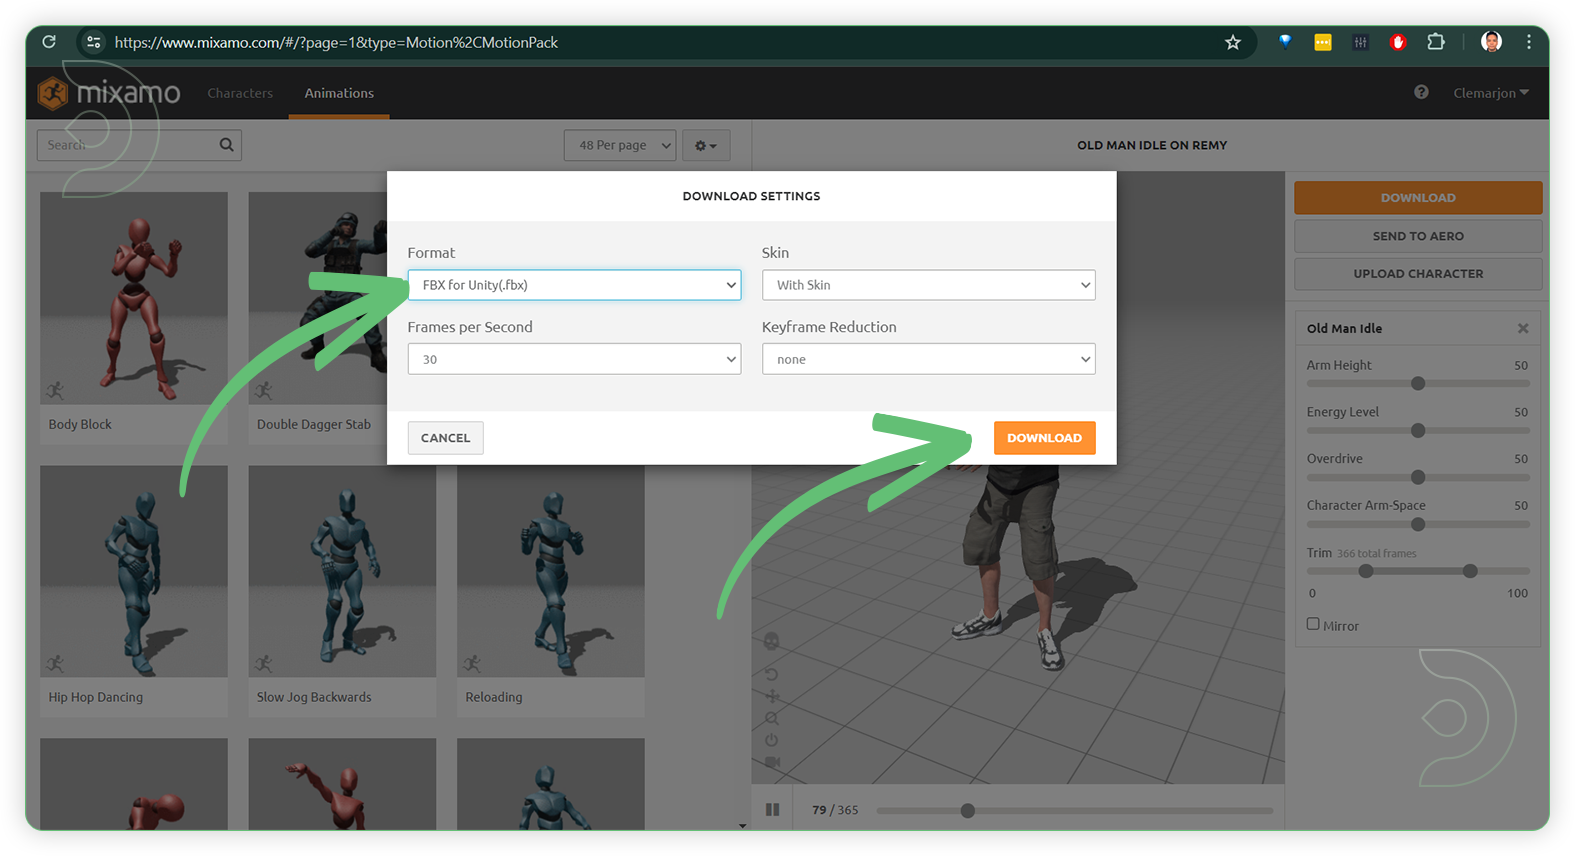
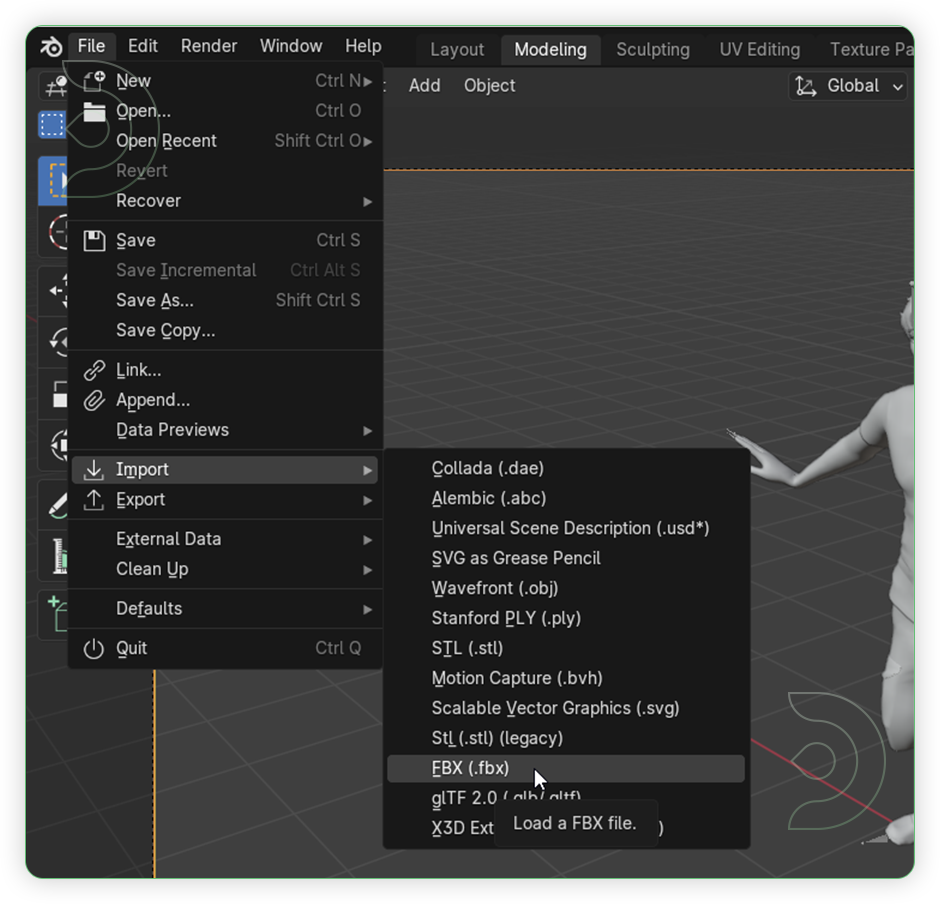
Download the Animated Character as FBX for Unity or you may choose any FBX version to test the compatibility of your version of Blender.
Open Blender and delete the default object Cube. Click the Select tool and click the cube and hit delete.
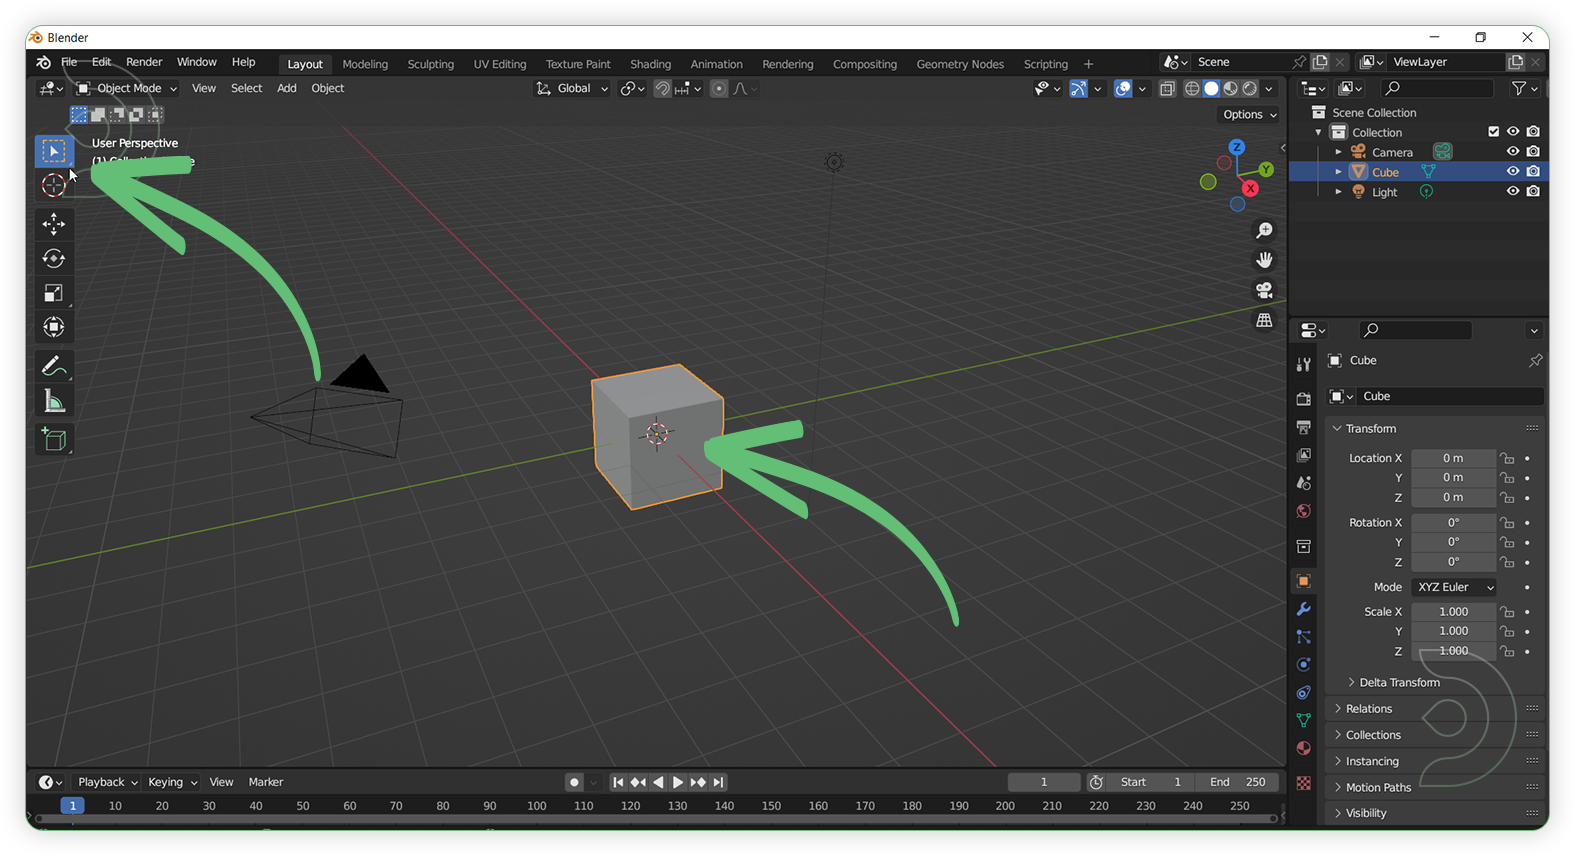
Import the .fbx file to Blender
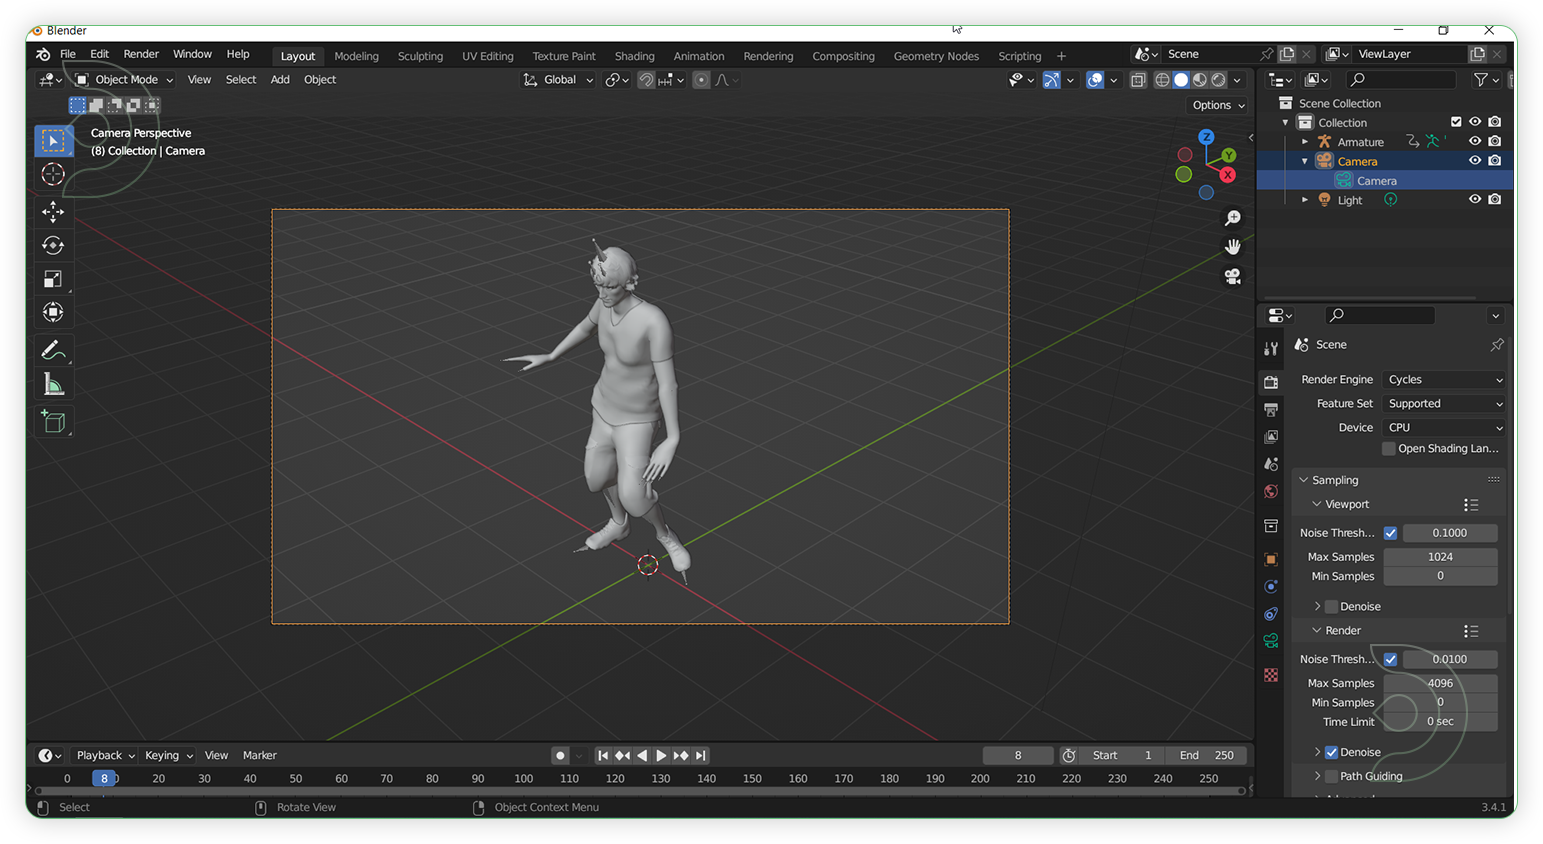
After importing, you can see the Blender interface with its imported 3D model that will be used for the HyperSD workflow. For more info about Blender, you can read here Getting Started with Blender manual.
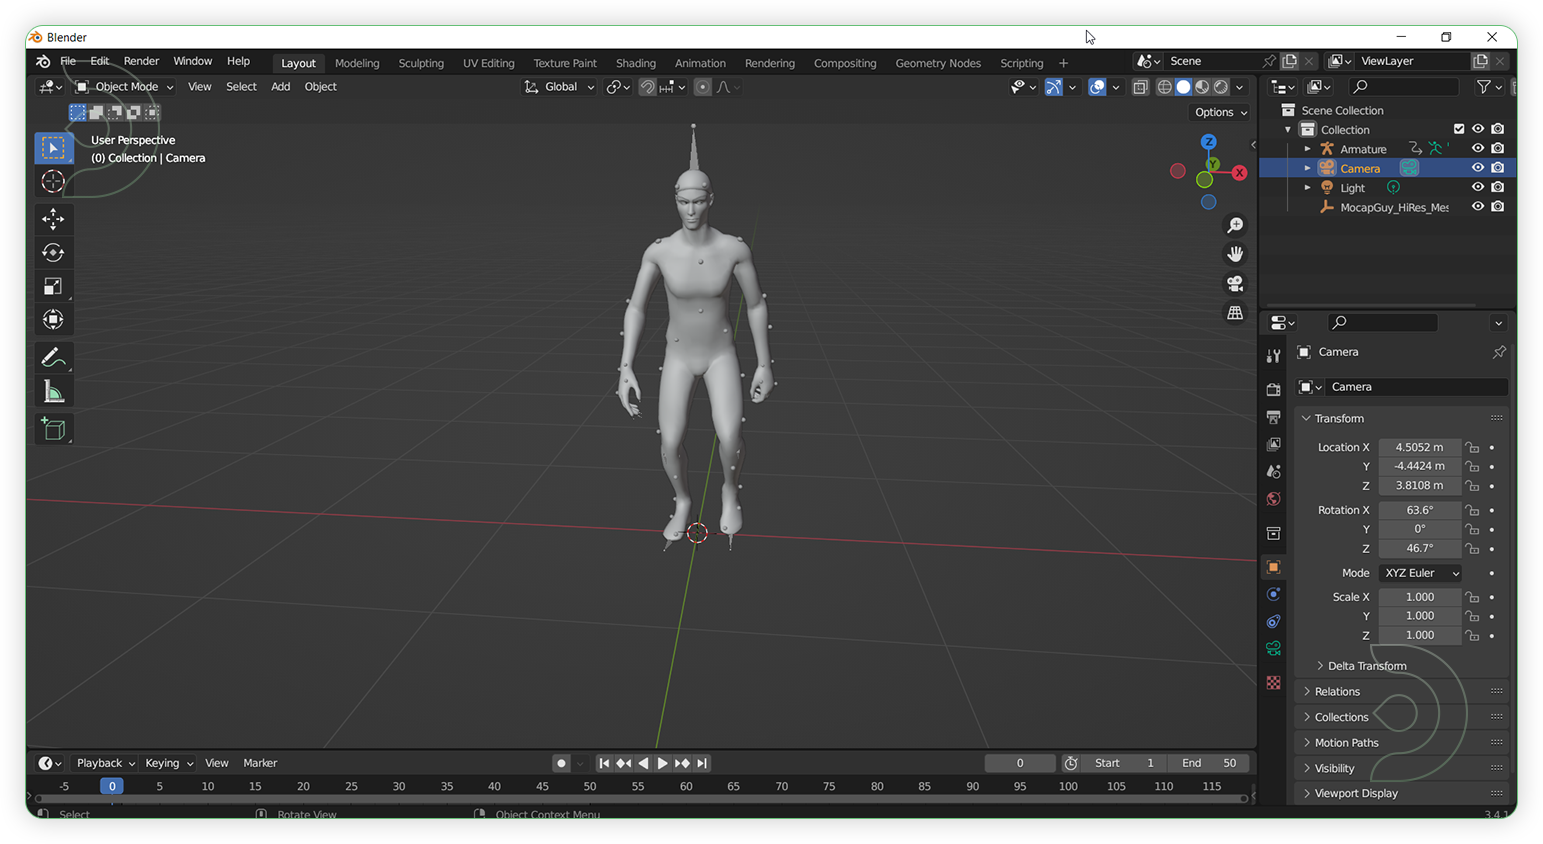
The ideal perspective view of a 3D model character that will be used for the workflow.
💡
Aside from Mixamo, you can use other sources for your 3d model such as:
1. free3d.com
2. cgtrader.com
3. sketchfab.com
4. 3dexport.com
and more...
💡
3D file types that are compatible for Blender and good to be used for this tutorial guide: ABC, USD, OBJ, FBX, PLY, STL
💡
This tutorial guide is not limited to human 3D character only. You can use other 3D models too such as architecture, vehicle, animals, sports, etc.
Procedures
Now that the hard work is out of the way, let's get creative. You need to follow the steps from top to bottom. The workflow is a one-click process after everything has been set up.
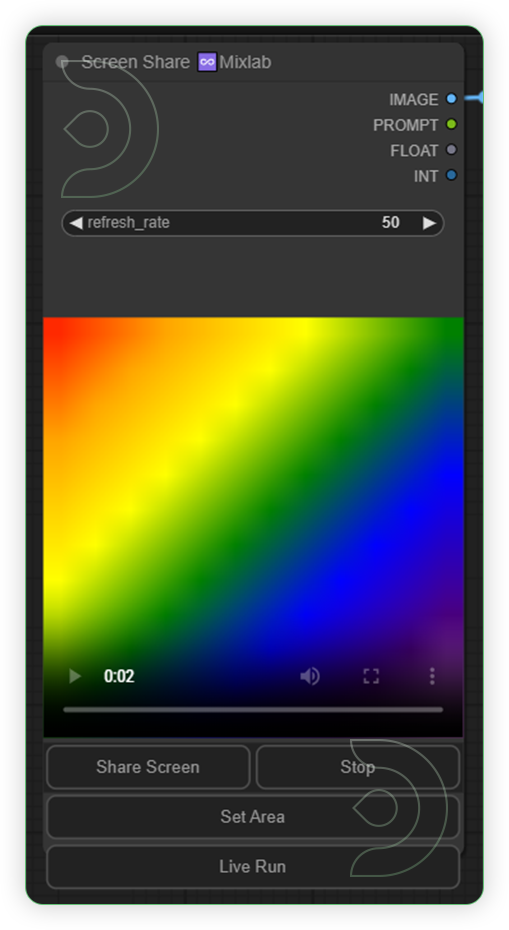
StepsDetailed StepsDefault NodesStart Screen Share1. Click Share Screen
2. In Pop-up dialog window, select Blender screen in its window tab.
3. Click the Set Area and create a box
4. Click Live Run to establish Live connection
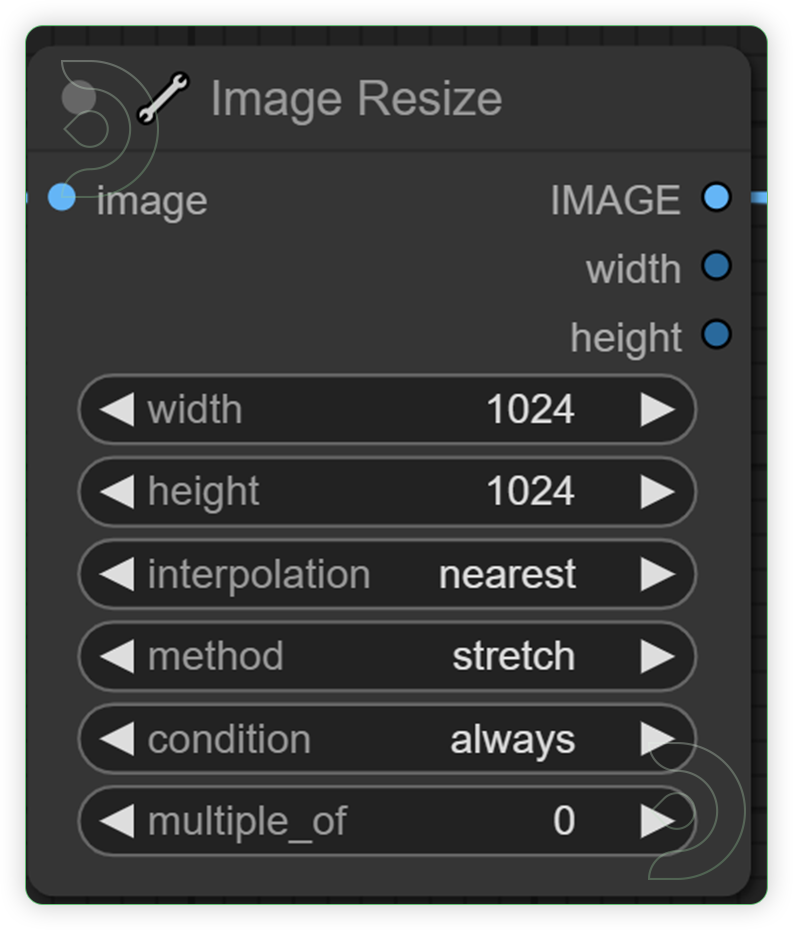
Set the Image Size
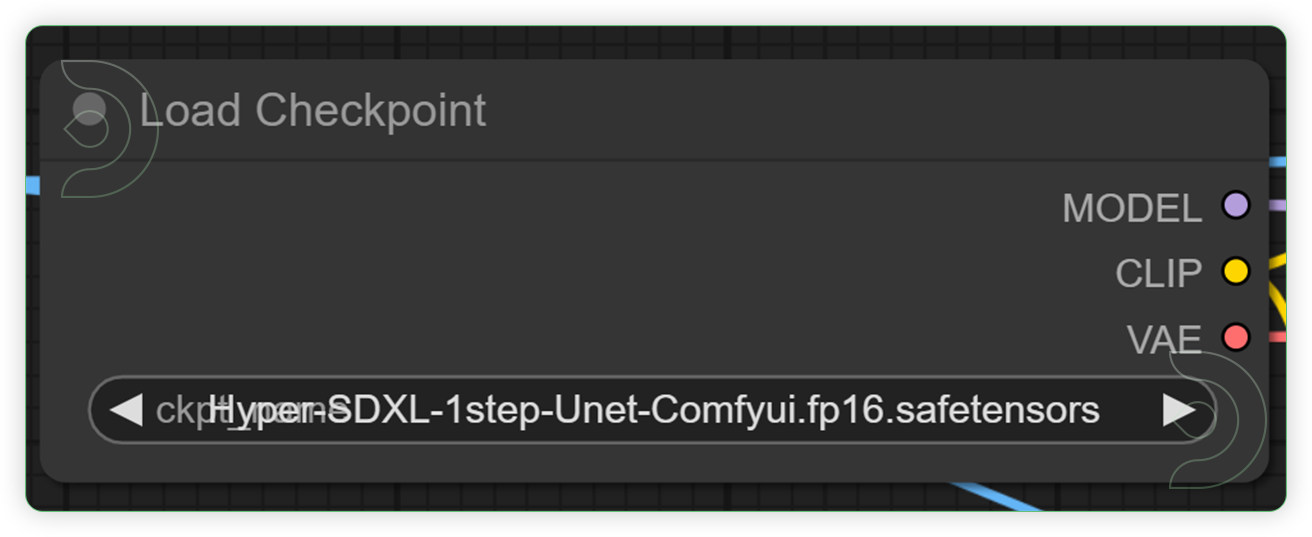
Set the Base Model
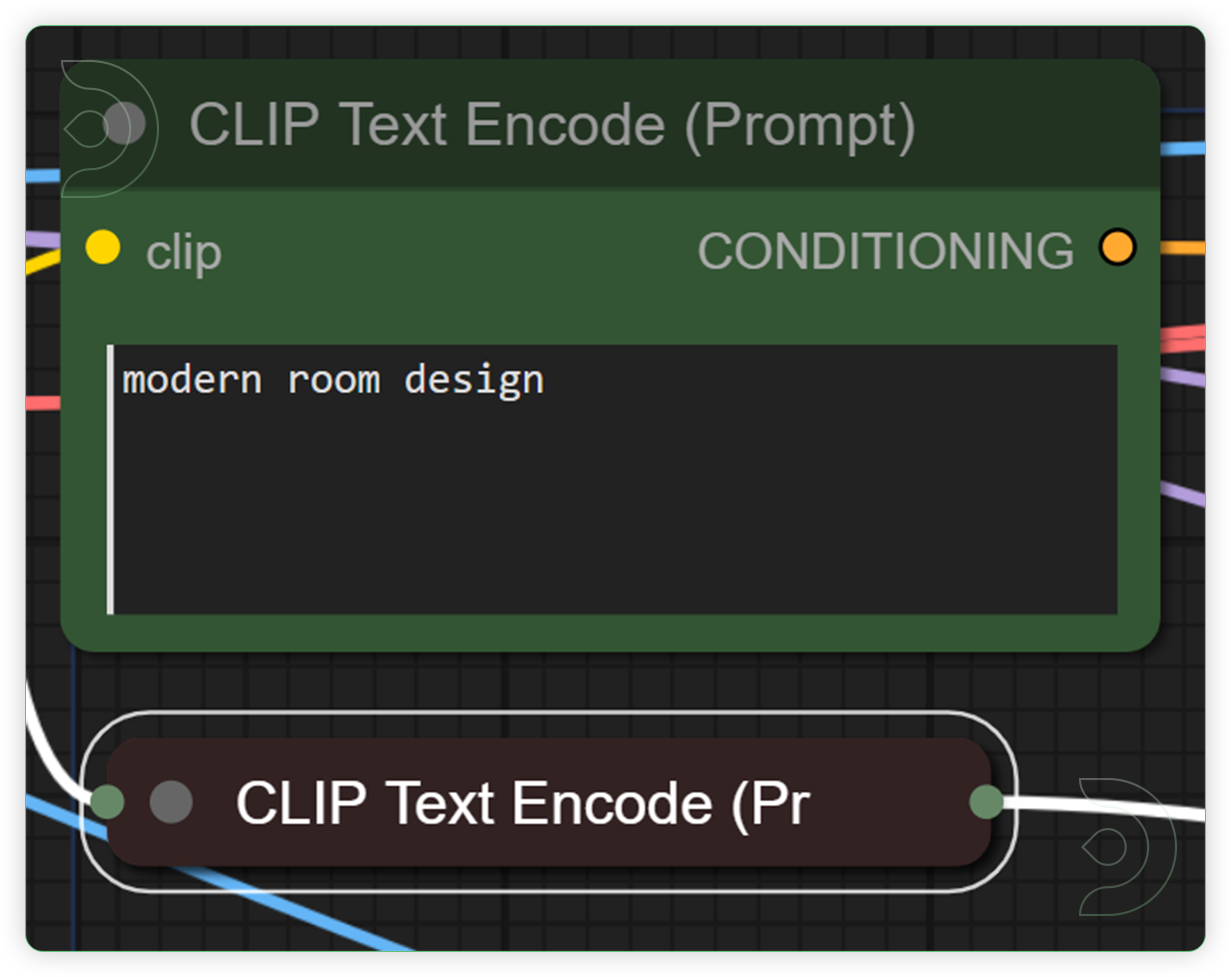
Write a PromptWrite a prompt of what you want to be in your 3D model
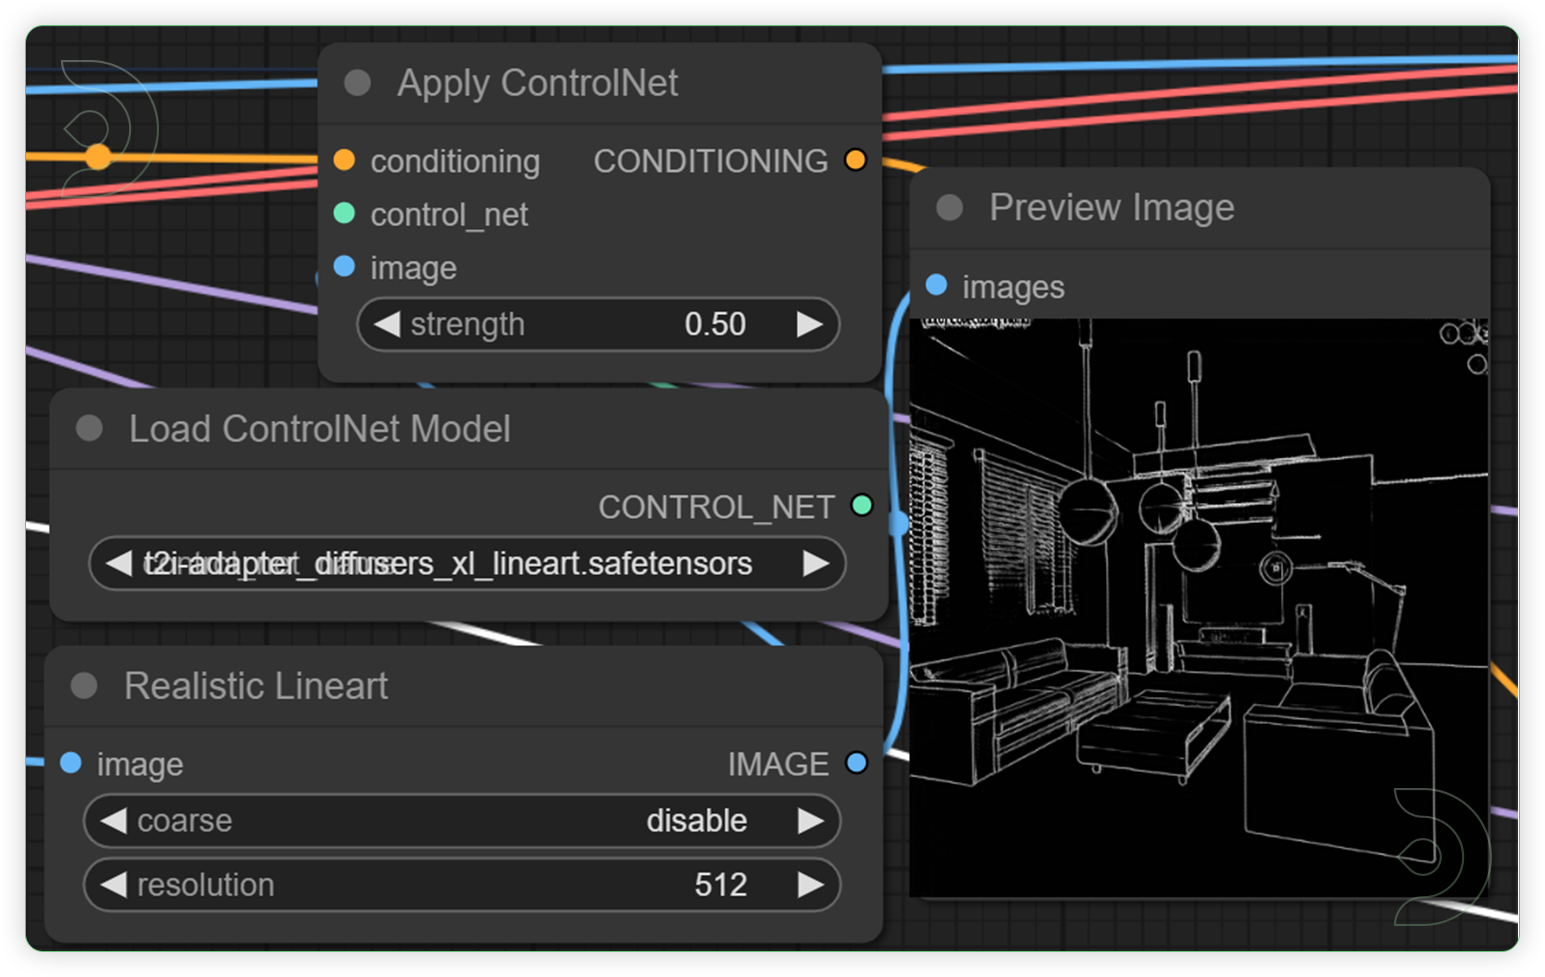
Set the ModelSet the model as seen on the image.
Check the Settings and Run the Queue PromptSet the step only in 1 and sampler name to lcm only.
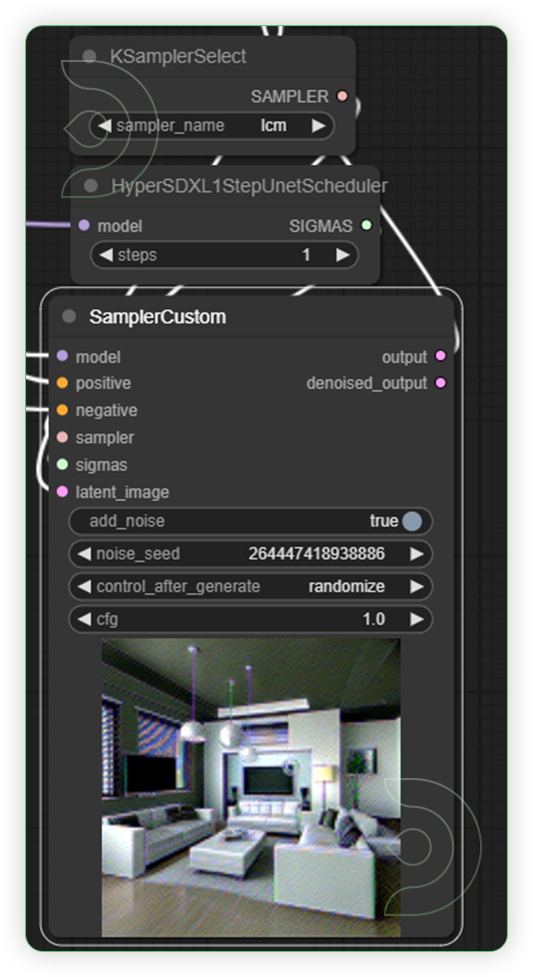
Check the Image PreviewCheck the preview and you can test the 3d live preview by moving or rotating the view of the 3D model in blender.

Reminders
💡
If you get deformed generation results, just go back to Screenshare node to Set Area box again.
💡
If you don't use a character model and prefer other model such as nature, architecture, shapes, etc, disconnect the openpose controlnet node and use depth, lineart or canny.
Hyper SD + Blender Image Examples
BlenderText PromptComfyUI
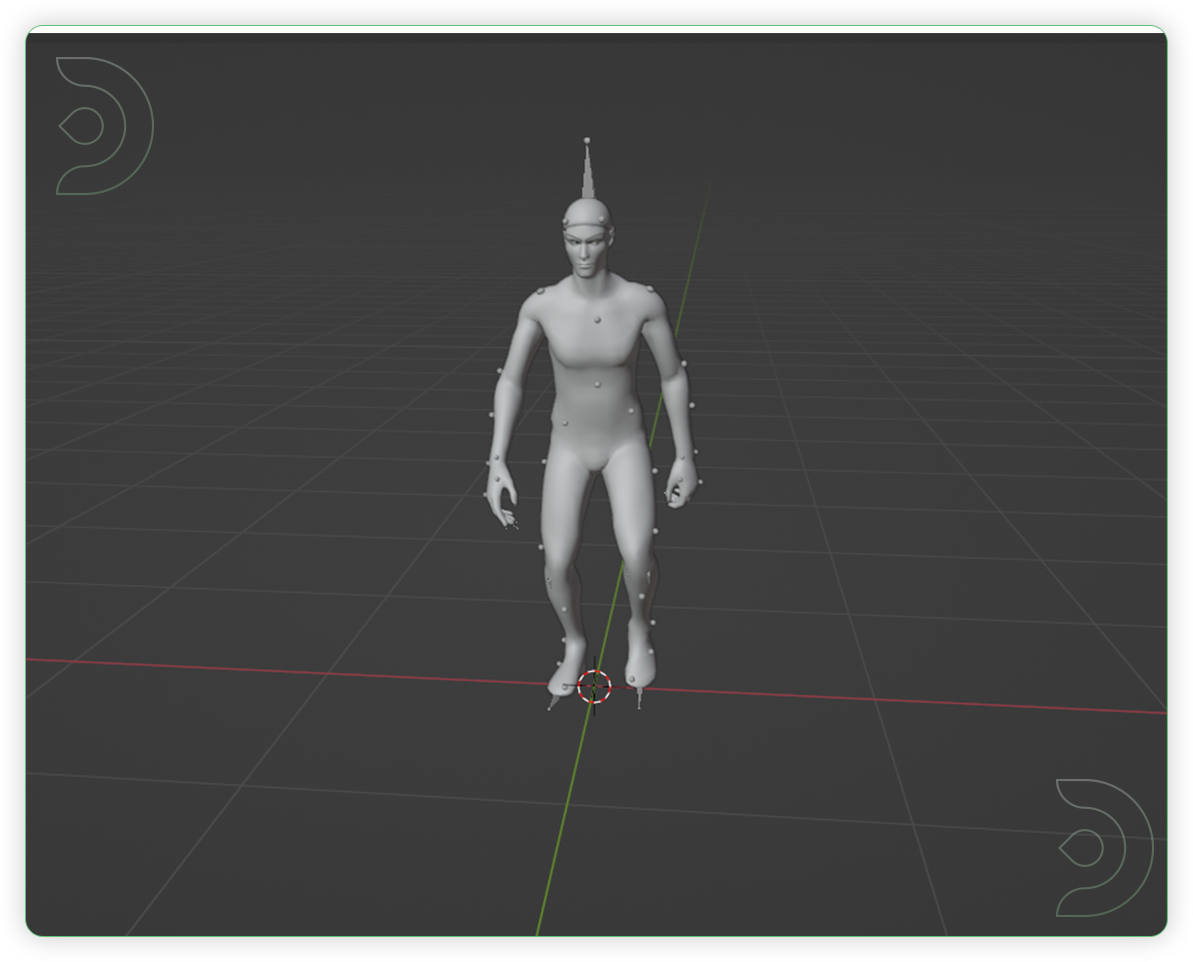
Superman, background is city buildings

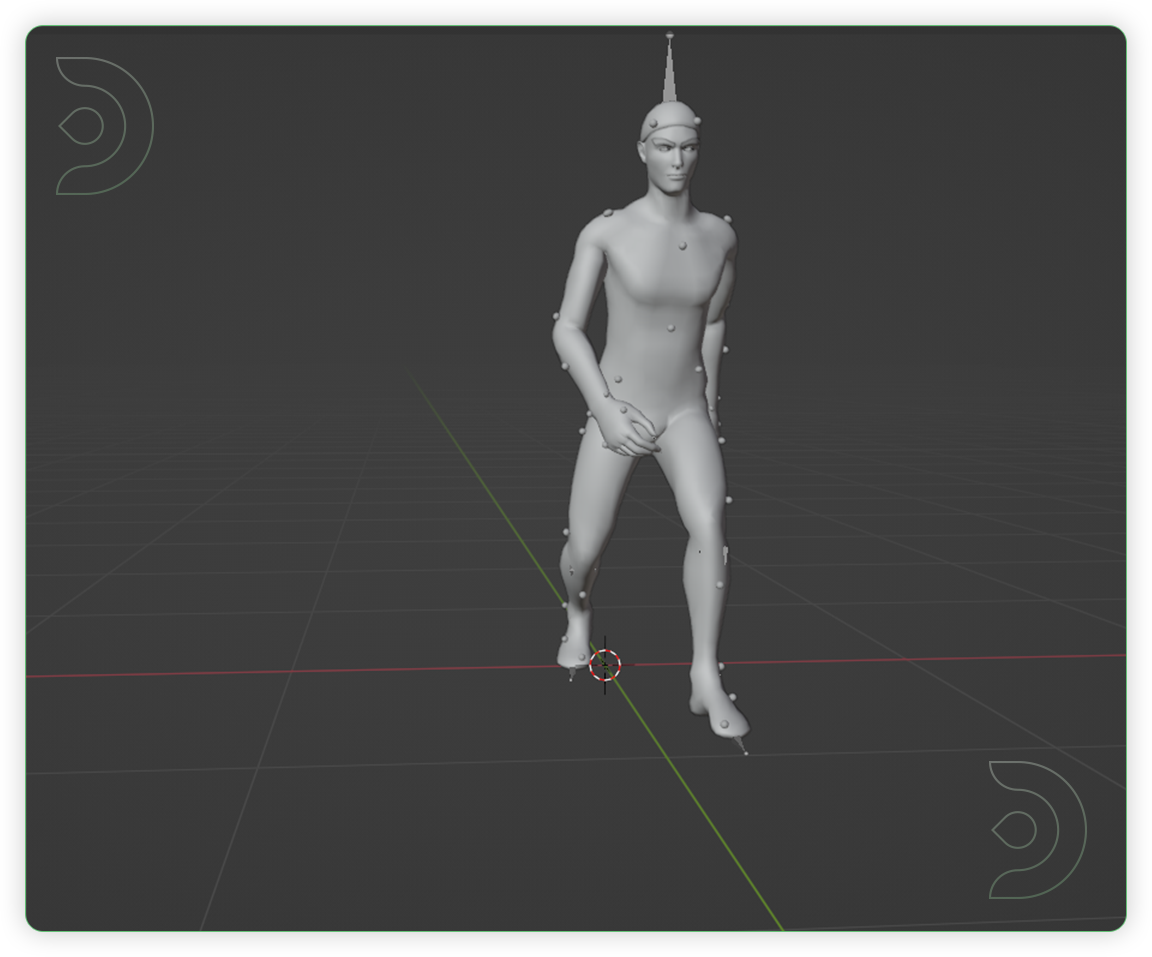
Spiderman, walking, background scary dungeon

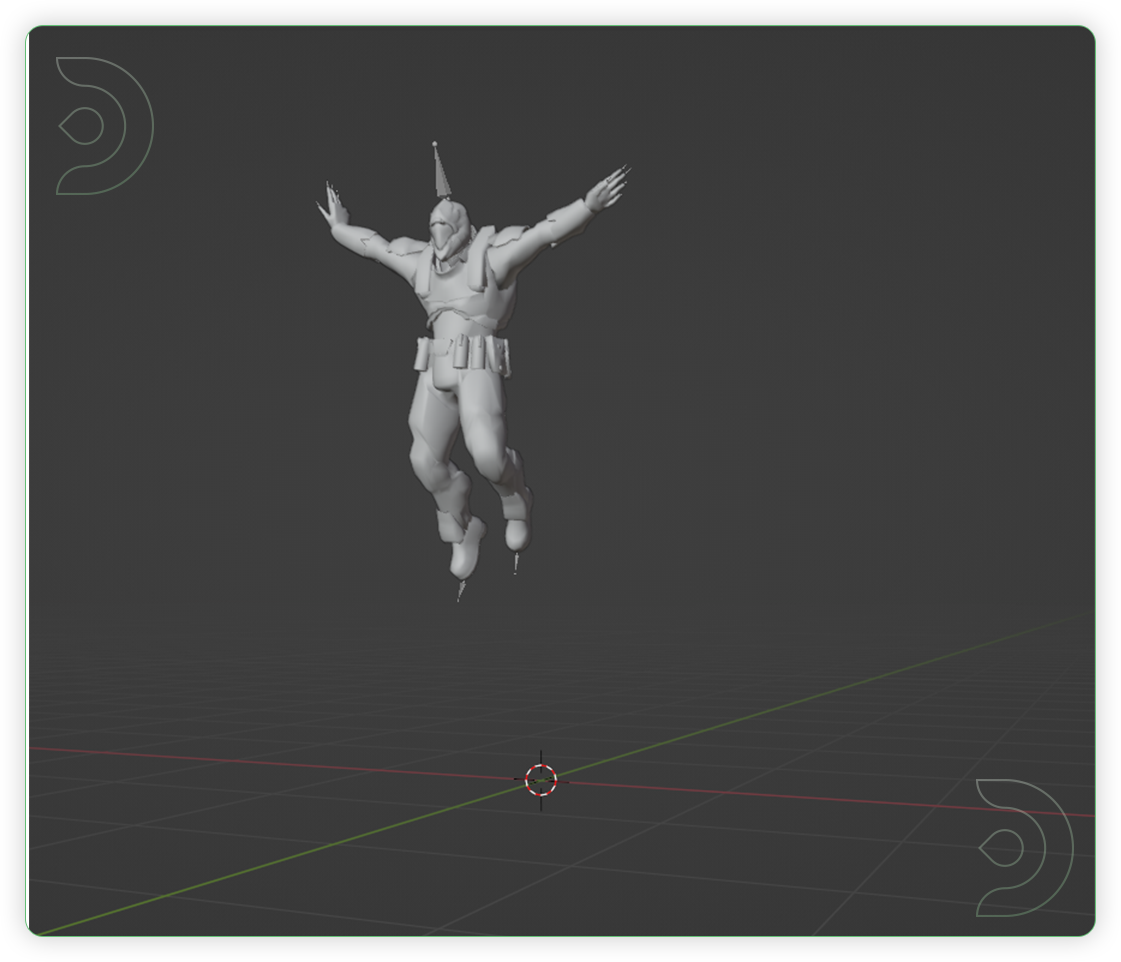
Assassin, jumping, background is forest

Original article can be found here: https://learn.thinkdiffusion.com/real-time-creativity-leveraging-hyper-sd-and-blender-with-comfyui/


