While we are waiting for release of v-pred version of checkpoint EPS https://civitai.com/models/833294?modelVersionId=1116447 version is generally frowned upon. But I think it is really good can produce awesome outputs with few tricks. And it is more consistent due to being finished.
Be sure to read official guides first. But they miss details on using ForgeUI, so here is my workflow. Hope it will help you to get your generations on new level.
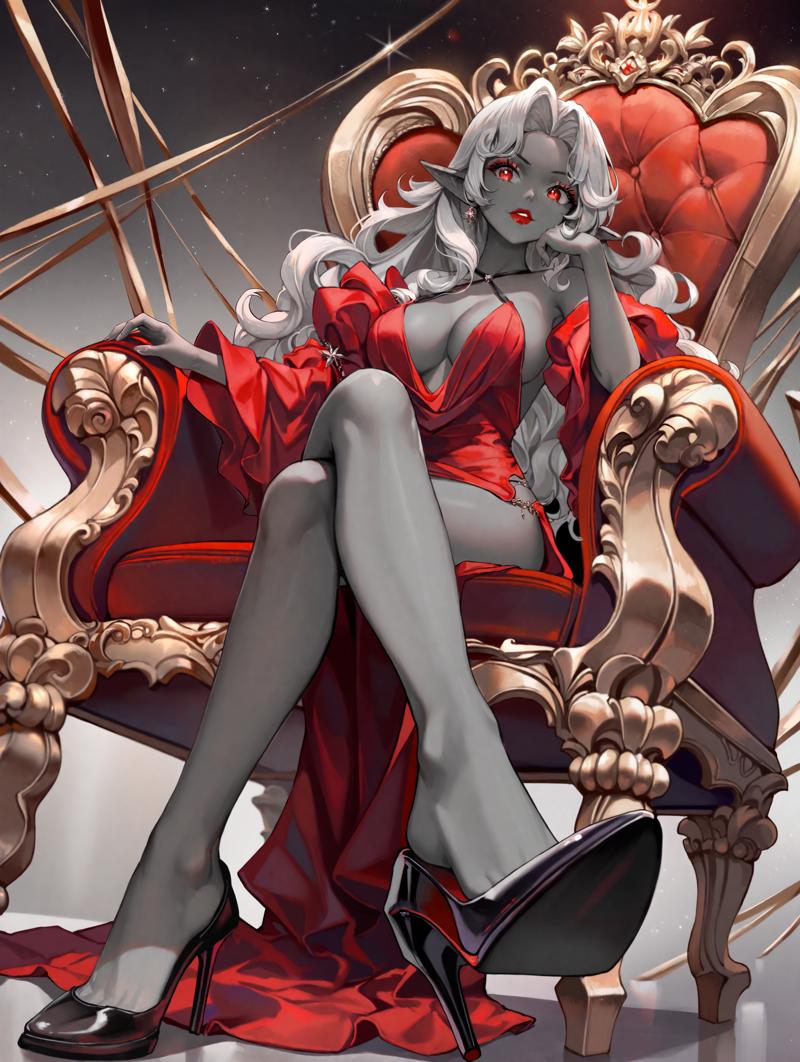
Link to resulting image: https://civitai.com/posts/10273189 You can check prompt from there.
Basic prompt tips:
Describe what you want to see in positive.
Get on https://danbooru.donmai.us/ check for tag and artist tags.
Use X/Y/Z plot script (Prompt S/R) on fixed seed to check how artist tags work, combine a bunch that you like. Do not like eyes? Search for an artist with 40+ images and detailed eyes, add tag to prompt. Getting lolies on every image? Search for large breasts or mature and add another artist to compensate. In my case I specifically searched for artisits with detailed arts and nice backgrounds. Then add bunch of negatives to negate shift towards clothing etc introduced by that tags. Don't forget that you can play with weights.
Install https://github.com/DominikDoom/a1111-sd-webui-tagcomplete extension for booru tags galore.
Here is the list of my extensions for Forge:
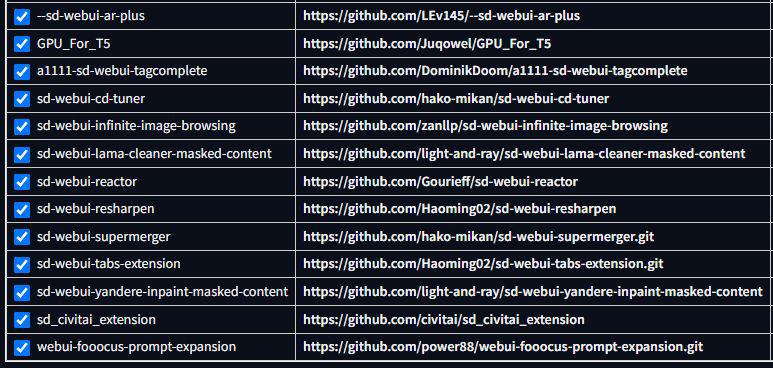
Everything beside Supermerger is a must. And Supermerger don't work properly on Forge, but I am too lazy to uninstall it :)
Txt2img generation
Extensions parameters:
CD Tuner: Detail(d1) 2
ReSharpen: Sharpness 0.9 Scaling 1-Cos. There is also Detail Daemon extension doing same stuff, but it was incomplete last time I checked, may be it is better now.
SelfAttentionGuidance: on, default.
LatentModifier: RescaleCFG phi 0.7. Does not change much as v-pred version, but allows to lower cfg. Other parameters Did not affect image in good enough way for me to use them.
FreeU. Trickiest. For all checkpoints I always used SDXL preset with start at 0.2 and it was good. But not in this case. Check the result:
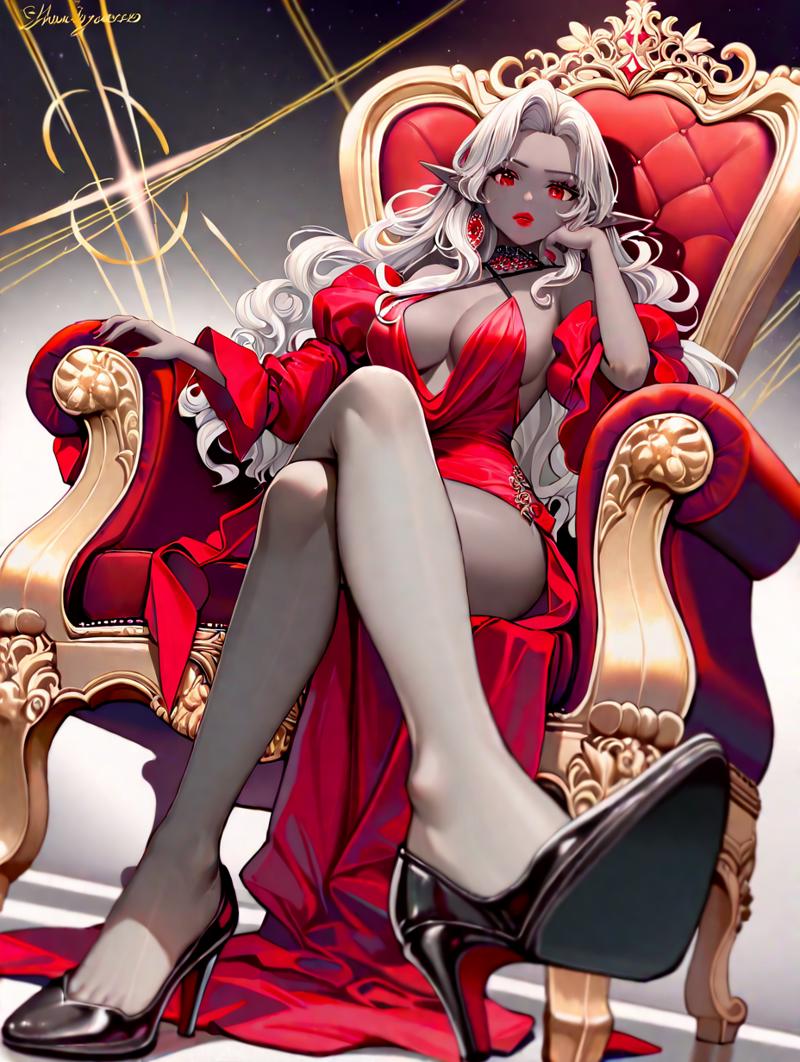
It definitely adds more consistency and details make more sense but it completely breaks coloring, destroys backgrounds and empathises weird hues.
Same seed but Freeu disabled:
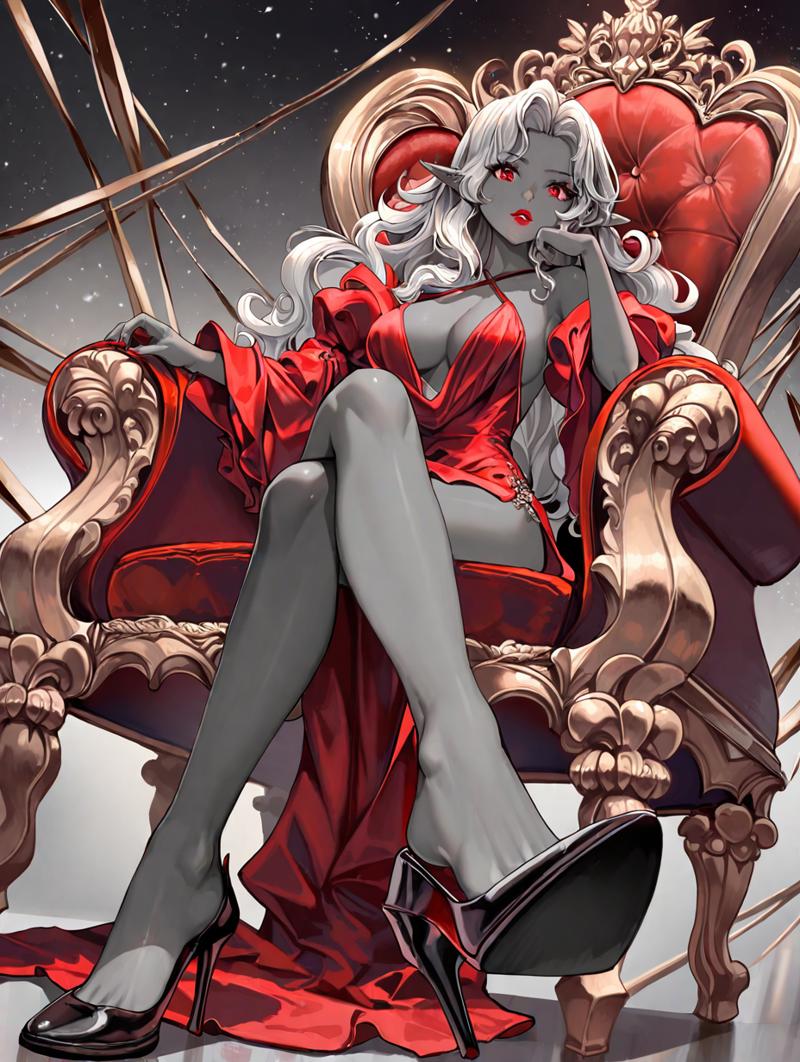
Aethetically I like it more, but some details just dont make sense. So after some testing I ended up with SDXL preset and Start step 0.6, end step 0.8. It gives enough time to fix smaller details and does not change coloring much.
Here is the prompt without loras and extensions off:
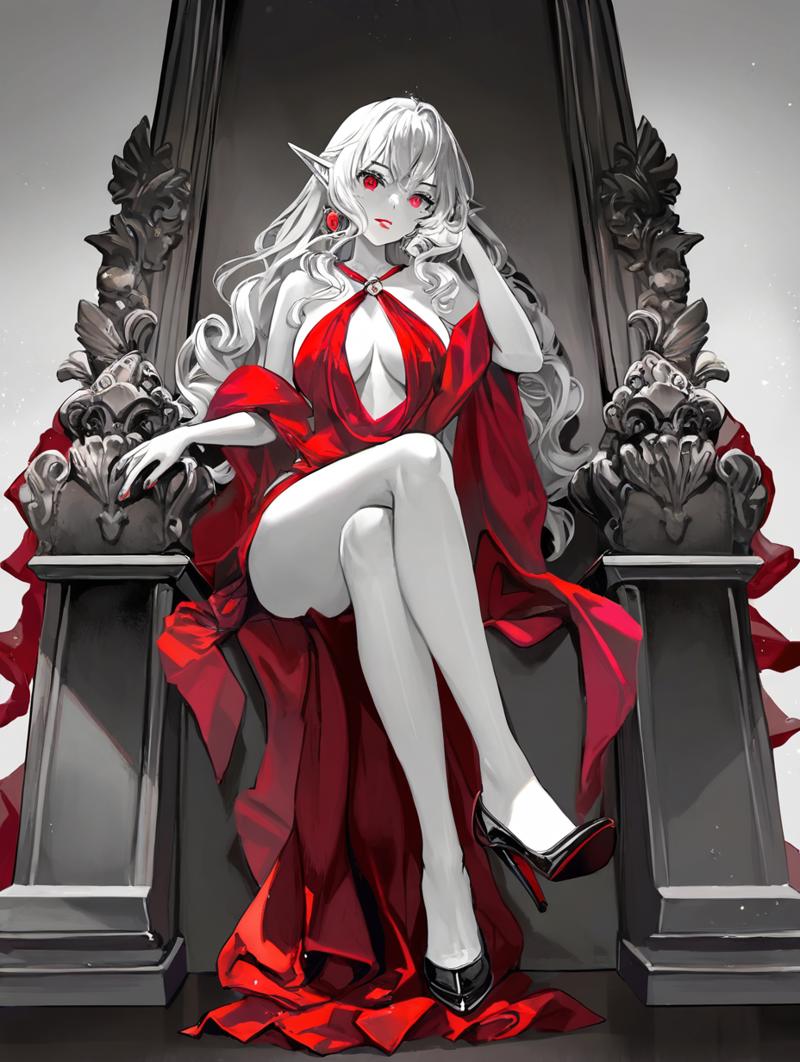
Here is result with no loras and extensions on:
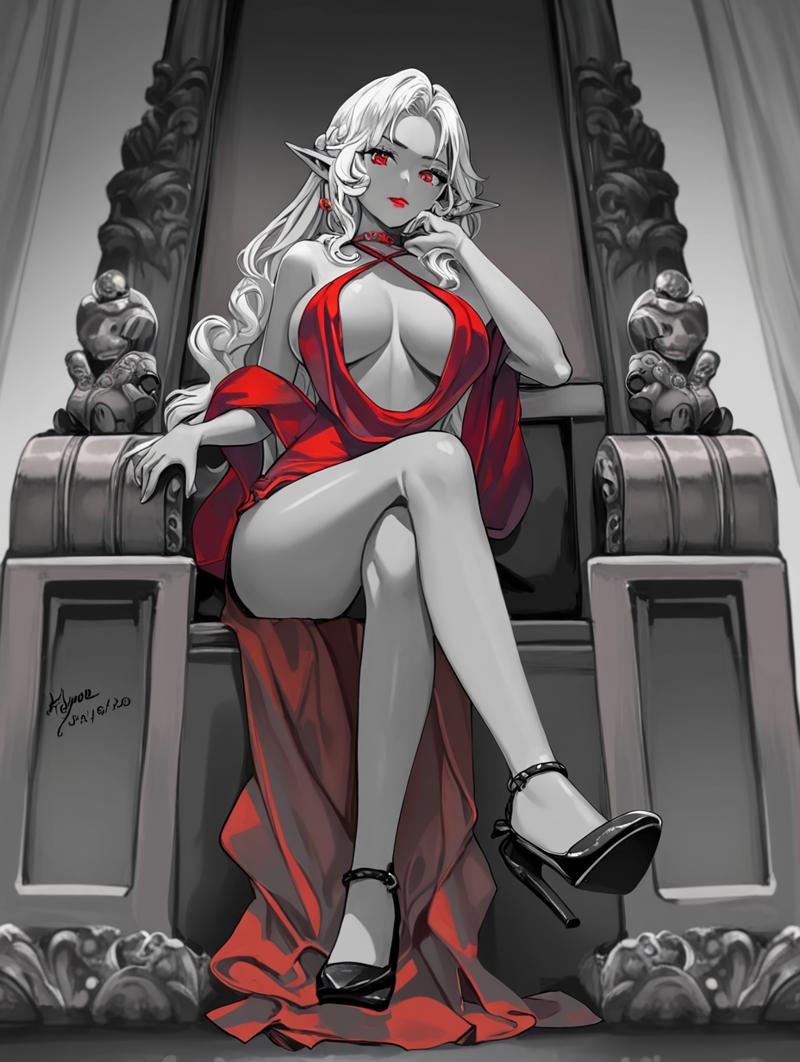
Lora
I advise always using detailer extension that I made specifically for this checkpoint NoobAI-XL Detailer 0.5 version is just a basic detailer you can just slap it on and forget. 1.0 is a more sophisticated version that changes image more.
Another general good detailer is SPO
It tried to compare it with my 1.0 version, but results are so random that I was not able to get to any conclusion: https://civitai.com/posts/10199065On some seeds one or another tend to introduce drastical changes to image. So now I just slap them both on and hope for better.
Also I was not satisfied with skin tone, so I add https://civitai.com/models/856285/pony-peoples-works?modelVersionId=1133973 this lora at 0.65 weight purely for tone. It has really good quality and diversity.
Of course feel free to use loras that you want, but keep in mind that introducing artist tag with similar style can help you create better images.
Image with loras and extensions on:
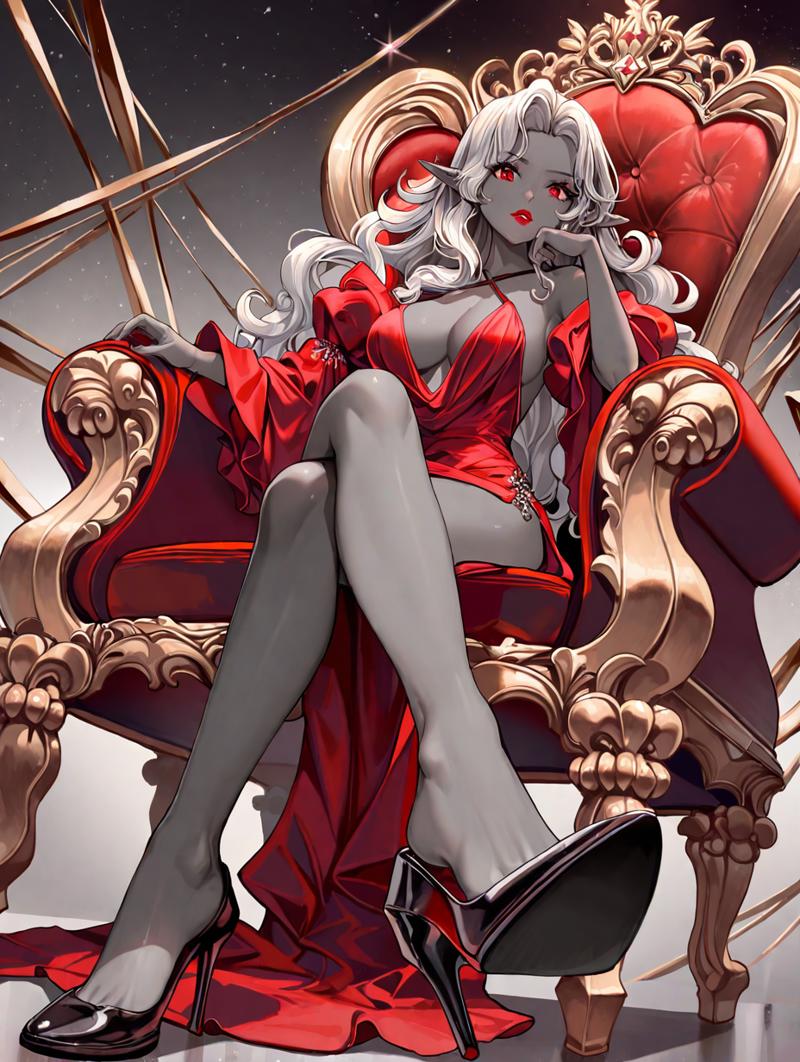
As you can see with freeu decorations, face, and hand make much more sense. Despite detail decrease.
Almost there, but there are few issues. Face is meh, hand on it is kinda crooked and throne has fifth leg. Let's fix it. Send generated image to inpaint via button below and adjust generation parameters.
Inpainting
First and biggest tip: load SDXL VAE separately. For whatever reason baked in vae produce worse results despite no difference in txt2img.
Second tip: Add following fields to quicksettings list and restart UI

SDXL clip skip is of no use here, but others are crucial for img2img. Adjust colors for img2img can help you keep consistent coloring, without it skin tone can be changed too much. Also img2img LOVES extra noise. Just try it once on generated image, it is easier to see result yourself.
Now your top row should look like this:

Don't forget to switch Soft inpainting ON. It is really reliant on Mask blur and likes to have it high. But be careful, high values on mask blur will break padding. If you try to inpaint something small (eyes for example) and see no difference - lower mask blur. Bigger inpaint area - higher mask blur, smaller inpaint area - lower mask blur. I use 44 on really big areas and 4 on small details.
Regarding other options - check inpainting guides, there are plenty.
With all extensions enabled I got to following denoise parameters:
0.3-4 fix lines
0.5 redraw kinda same
0.6 Redraw with more difference but fitting in image (I use this most of the time to fix faces and details)
0.65 Redraw (I usually use this to fix hands and other stuff that is just wrong)
more - get wild
I was still getting meh results with this checkpoint and solution was increasting noise multiplier. A LOT. I ended with safe value of 0.2 multiplier for inpaint and 0.05-0.07 for img2img. You will have to play with it to get used to it.
Add tags to prompt if you are inpainting stuff that is not in base prompt. Delete irrelevant if they are leaking (for example when you have 2 characters). Otherwise leave base prompt as it is, this is what allows us to get this high on denoise and quality of inpainting.
Sometimes it is better to increase mask size to get more consistency. For example if you went 0.7 on denoise to redraw legs completely but get another 1girl fit in instead of a leg. If you don't want other stuff redrawn, but need to increase mask - place small point outside:
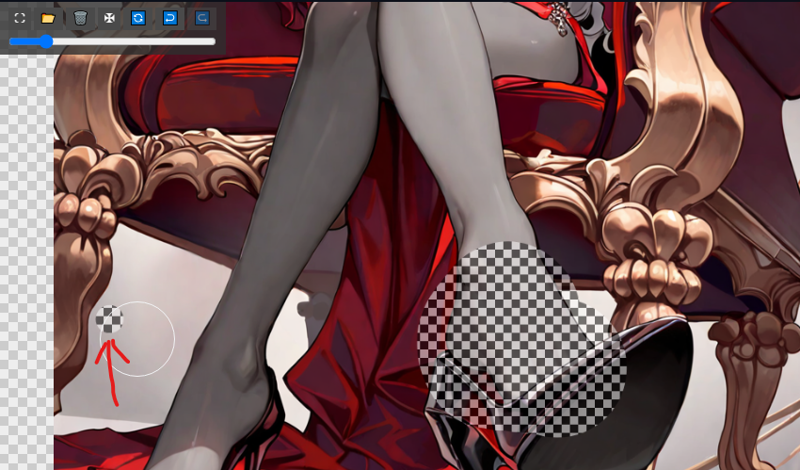
Technicaly you are supposed to increase Only masked padding, pixels parameter in this case, but in tends to decrease quality. Then give it a second pass with original masked area at lower denoise, but dont forget to lower noise multiplier accordingly.
Sometimes if you just cannot get waht you want - it is easier to stop and do basic manual paint "MSPAINT" style and then lower denoise. I use Krita tool for that since it is free and support all majot need features (brush and airbrush for shading lol)
After you are satisied with the image, upscale x2 using this workflow:
https://civitai.com/articles/4560/upscaling-images-using-multidiffusion
Don't forget to lower noise multiplier to 0.05, otherwise you will get weird artifacts.
You can check and result at the beginning of this article. It is kinda random so quality colud have been better, but I gust rolled with basic prompt to get something good enought for illustration.
Regarding base generation parameters, I ended up with DPM SDE Normal, CFG 4, 35 steps.
Big comparison grid: https://civitai.com/posts/10275915
Why slowest DPM SDE? It is not ancestral, so resharpen gives better results and overall style and consistency is less wild and more fitting.
