Download
1 variant available

511
2K


A workflow to train SDXL LoRAs.
This workflow is based on the incredible work by Kijai (https://github.com/kijai/ComfyUI-FluxTrainer) who created the training nodes for ComfyUI based on Kohya_ss (https://github.com/kohya-ss/sd-scripts) work. All credits go to them. Thanks also to u/tom83_be on Reddit who posted his installation and basic settings tips.
What it does:
As the name suggests, it trains LoRAs for SDXL models. You have to select your picture folder, it generates the tags for them, then starts training. It does so in 4 loops with separate LoRAs generating for each step values (eg: you use 2000 steps for teaching, you'll have 500/1000/1500/2000 step LoRAs generated).
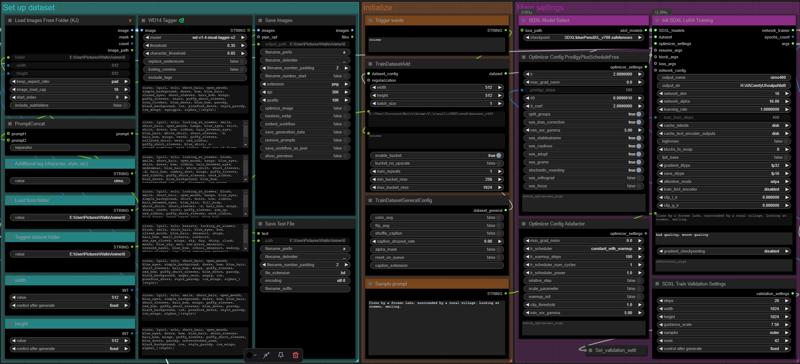 I have colored the nodes for each category of setting up the dataset, initializing data and selecting main settings.
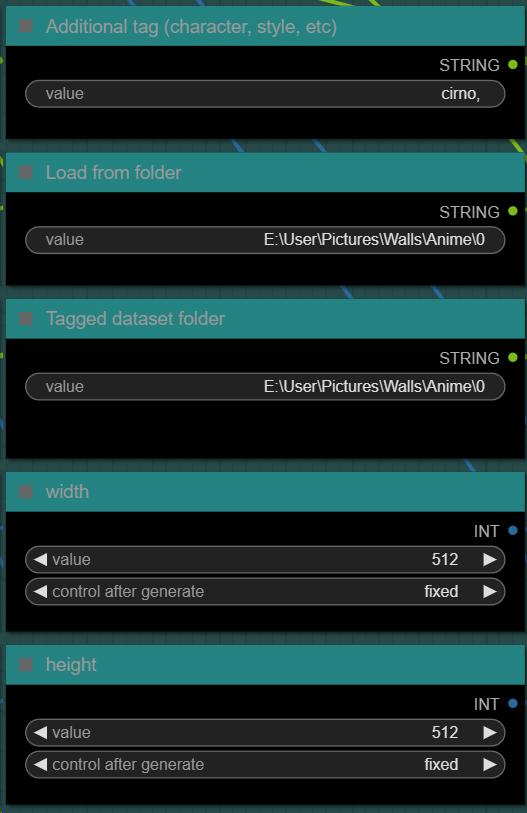
Set up dataset
Additional tag: If your character is less known, or you want something added in addition to the automatic tags, you can set it up here.
Load from folder: The folder you placed your pictures in.
Tagged dataset folder: This is the folder where your pictures along with its textual tags will be generated, resized, copied. The training data for your LoRA.
Width/height: resized your image data to these values. I recommend 1024x1024, but 512 and 768 works as well.
Initialize
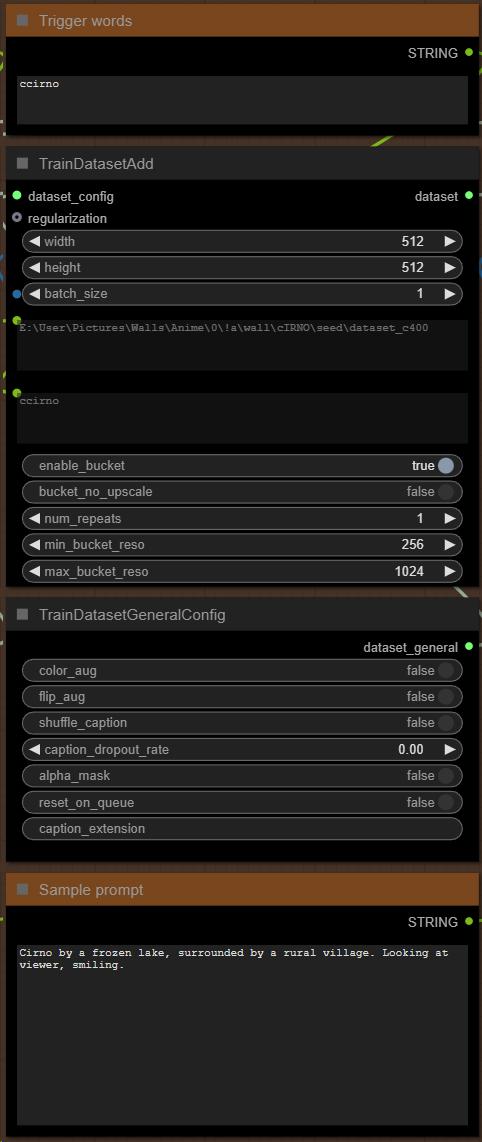
Trigger words: If you want your LoRA to use a specific trigger word or a collection of words, you type them here.
Sample prompt: This will be used to generate the preview for each training loop, just some peace of mind and progress tracking.
Main settings
SDXL model select: Select the SDXL model you train your LoRA with. Note that while your LoRA might work well for other models, especially merges of similar ones, results may vary greatly based on checkpoints, as is the case for every LoRA.
Init SDXL LoRA Training: These are the main training variables. You can play around with them as much as you like, especially if you're more of an expert than me, but setting up output name for your LoRA and output directory should be done regardless. You can leave the rest as is, or experiment with them, as well as the non-colored nodes; for simplicity's sake now I'm only going to explain what I myself use, too.
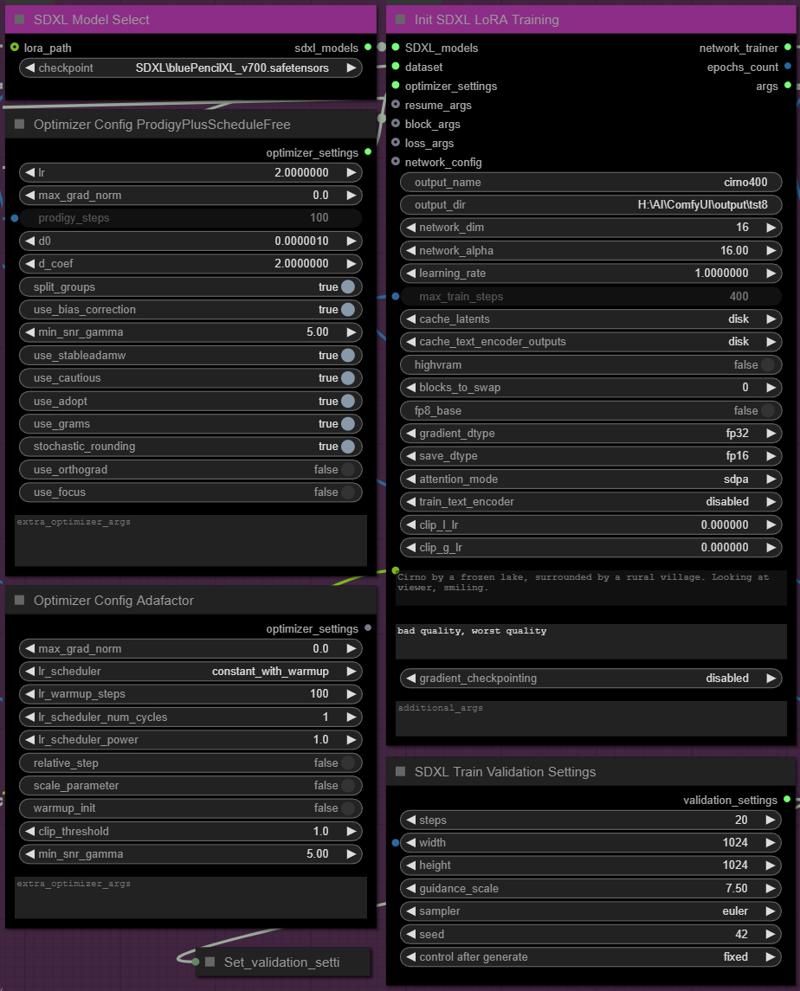
Last but not least, you're going to decide on the learning steps you will use for your LoRA.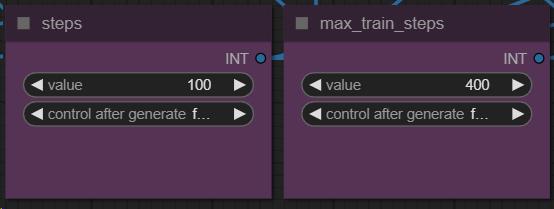 Since there are 4 training loops, I use it like this: X number for each step, max_train_steps are the total (4 times X steps) number. For the example I'll be showing my LoRA training with 900 steps.
Rest of the workflow with no need for manual input
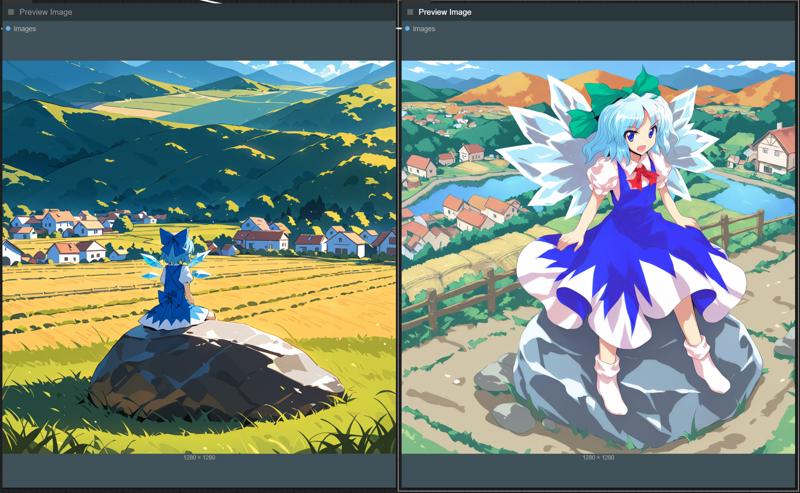
A preview of the training dataset. I used a pretty well defined model for showcasing low step training.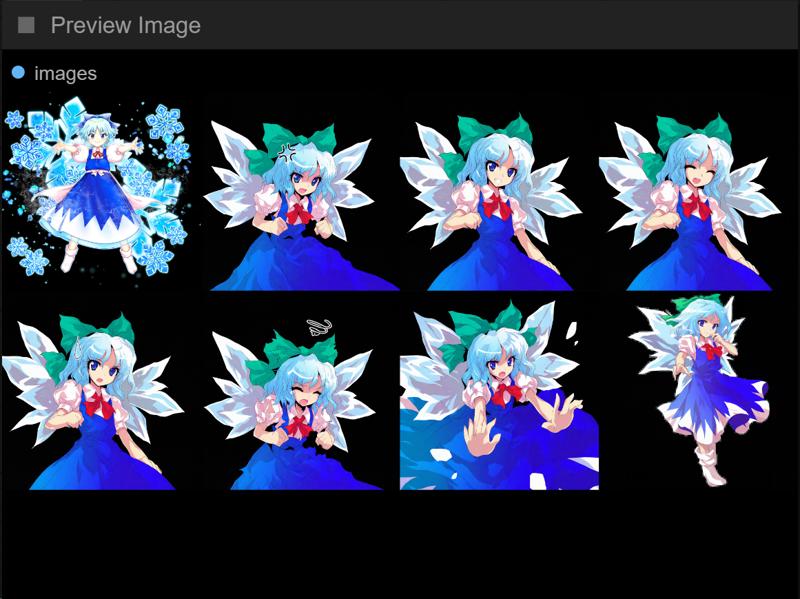
The training loop, where you can see the generated LoRA for each initial steps (for this one it's 225, 450, 675 and 900 steps). Note that while the recommended total steps range from 2000 to 3000, for this one 900 did a fine job, and it took about 15 minutes (on a 4090).
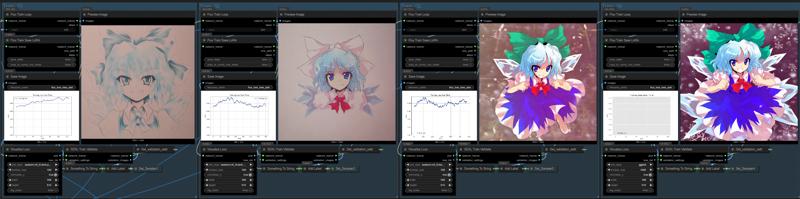
Finalize nodes create a trainer sheet and miscellaneous things that you can see here.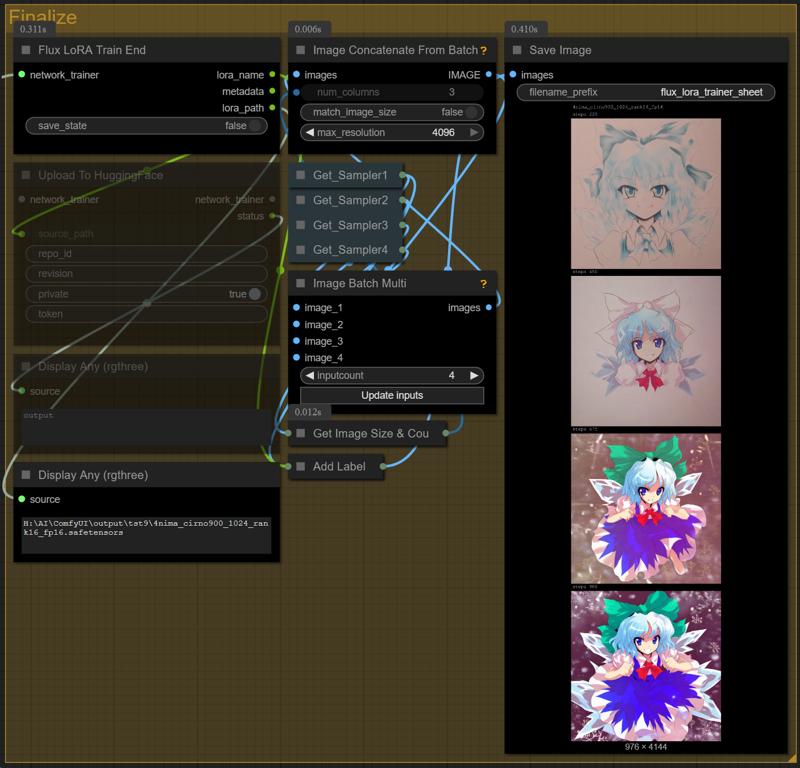 A comparison of the checkpoint I used (4nimapencil) with and without the LoRA.