These workflows can be used as standalone utilities or as a bolt-on to existing workflows
XY Grid - Demo Workflows
The XY grid nodes and templates were designed by the Comfyroll Team based on requirements provided by several users on the AI Revolution discord sever.
The code is based on nodes by LEv145.
These nodes can be used to XY any pair of paramaters in any workflow.
The templates have the following use cases:
Evaluating different model and LoRA combinations
Evaluating different sampler setting
Evaluating any pair of parameters in a workflow
Fine tuning settings for masking and detailing
Creating batches of noise patterns
The XY nodes can be used with SDXL or SD1.5.
List of Templates
Demo 1a - XY List - Halftone
Demo 1b - XY From Folder - Halftone
Demo 2a - XY Interpolate - Ksampler
Demo 2b - XY From Folder - Ksampler
Demo 3a - XY List - Model and LoRA
Demo 3b - XY List - Model and LoRA
Demo 4a - XY Interpolate - Freeu
Demo 4b - XY From Folder - FreeU
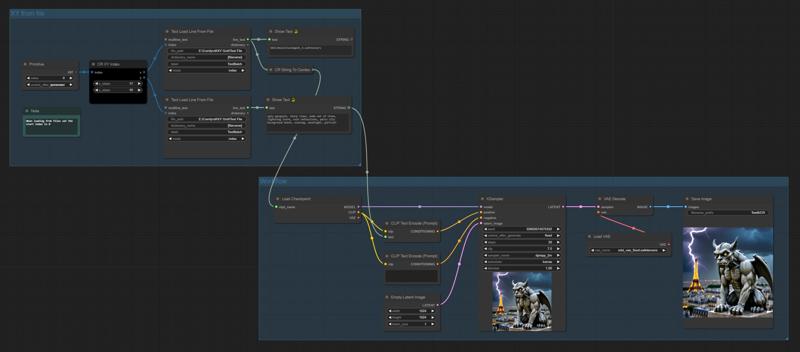
Demo 5a - XY Index - Model and Prompt
Demo 5b - XY Index - Model and Prompt
Demo 5c - XY Index - Model and Prompt
Demo 5d - XY Index - Model and Prompt
Demo 6a - XY List - Model and Prompt
You can copy XY Grid nodes from the aboves templates and paste them into your existing workflow.
XY Grid Methods
There are 3 basic methods:
XY List
This can be used to XY any pair of widgets
This includes widgets with the following data types
Integer (use CR String To Number node)
Float (use CR String To Number node)
Text / String
Combo (use CR String To Combo node)
XY Interpolate
This can be used to XY any pair of integer or float widgets
The node calculates the values for you based on a start value and step
XY Index
This can be used for various special use cases including:
generating XY indexes for extracting data from files into columns and rows
Understanding Indexes
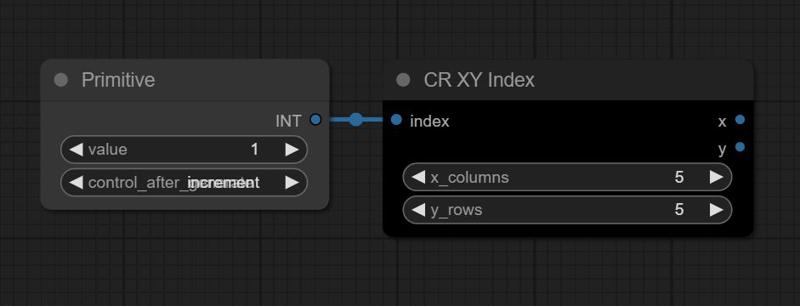
These CR XY nodes are designed to be used in iterative workflows. The three methods above each need a primitive node to generate an incremental index on each iteration.

When using the XY nodes always set the index to start at 1 (not 0). This makes grid calculations much easier.
The index provides a counter that is used to calculate the X and Y coords on each iteration.

When configuring your XY grid, first work out how many columns and rows you want.
Multiply these together to calculate the end index.
E.g. 3 columns x 4 rows = 12 images, so the end index will be 12.
To start generating the images you need to configure the batch count in the Comfy Menu.
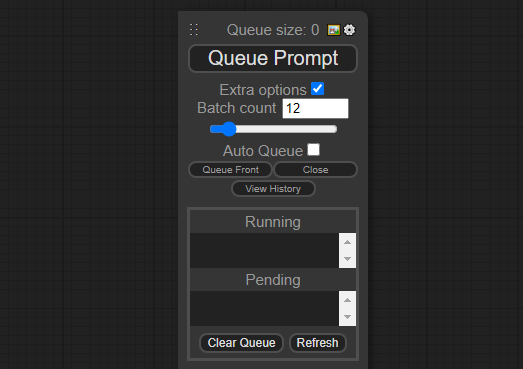
First tick Extra options, and View Queue, then enter the end index in the batch count. This will ensure 12 images are created each using unique X and Y combinations.
The filename prefix on your Save Image node should include a subfolder. For example 'TestImages/CR' will save the images in ComfyUI\output\TestImages and each image will be prefixed with CR.
Generating the XY Grid Image
There are two methods for producing the XY Grid images, you can either
generate the image using a separate workflow (see demos 1b and 2b for examples)
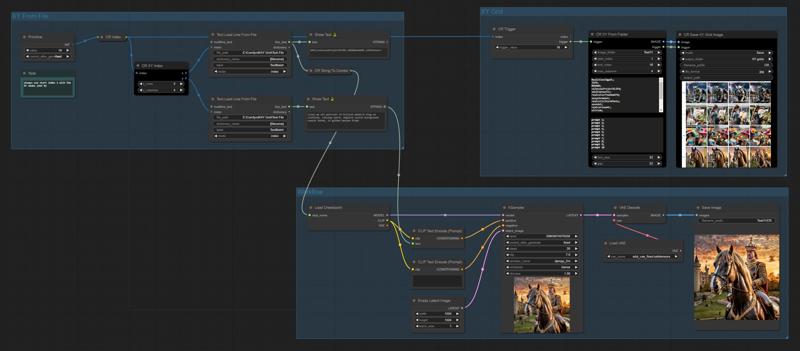
or generate it within the same workflow (see demos 3b, 4a or 5d)
The separate workflow method is recommended for beginner and intermediate level users.
For both methods, you will need to configure the following:
the image folder containing the images that will be compiled into the XY grid image
this should be a subfolder in ComfyUI\output (e.g. ComfyUI\output\TestImages)
with the single workflow method, this must be the same as the subfolder in the Save Image node in the main workflow
the start and end index for the images
the start index will usually be 0
the end index will usually be columns * rows
the annotations that you want to appear on each column and row
the output folder for the grid image (e.g. ComfyUI\output\XY grids)
this should be different to the image folder
the output image format (e.g. webp, jpg, png, tif)
Note that PNG images are a lot larger than jpg and webp images, and may take longer to generate. The webp format is recommended.
If you want to just output a few rows from the middle of a set of images, then you can configure the start and indexes to just select the rows that you want to see. For example if you have 50 images aranged in 5 columns, you would normally get 10 rows of images based on a start index of 0 and an end index of 50. But if you set the start index to 21 and the end index to 40 then the output grid will only include rows 5, 6, 7 and 8.
Configuring Annotations
Annotations can be currently be configured in two ways:
within the XY List, or XY Interpolate nodes,
or within the XY From Folder node
When using the two workflow method you will need to manually enter the annotations in the XY From Folder node.
When using a single workflow annotations can be generated by the XY List or XY Interpolate nodes and then be automatically passed to the output nodes. Both nodes allow you append or prepend text to the annotations (x-prepend-annotation and y_prepend_annotation). For example if you have a value of 10, you can prepend it with 'cfg ' to get 'cfg 10'.
It is planned to add a node that allows loading annotations from file.
How does the single workflow work?
The single workflow method will produce the grid image when the index is equal to the end index. For example if you have a batch count of 25 producing 25 images, the XY grid image will generate when the index reaches 25. This can be automatically triggered from XY List (see demo 3a) or XY Interpolate (see demo 4a), or from the CR Trigger node (see demo 5d).
Demo Workflows
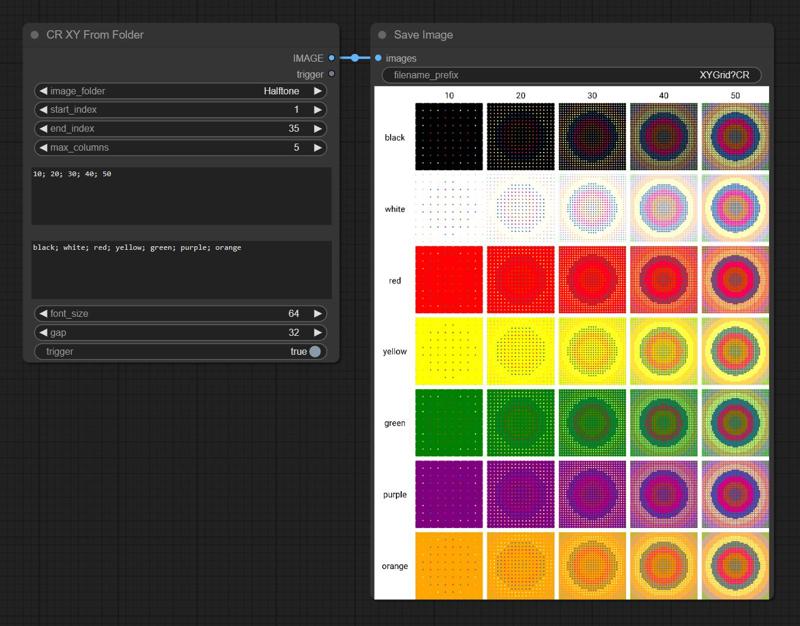
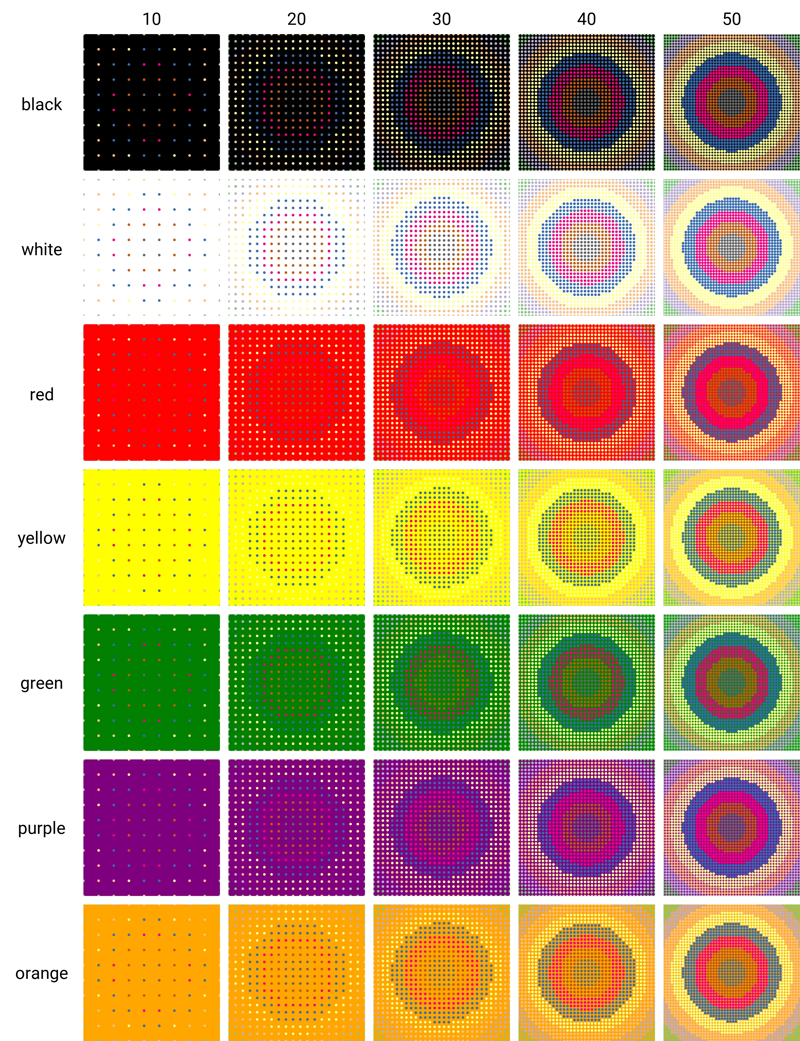
Demo 1 - Halftone
This demo uses the XY List method
It creates a 5 x 7 grid of halftone images
The XY grid is output using a second workflow

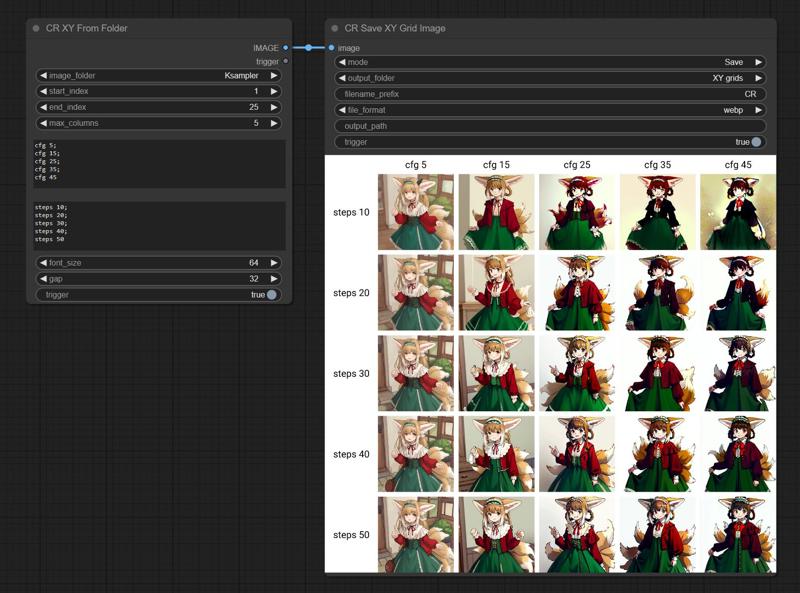
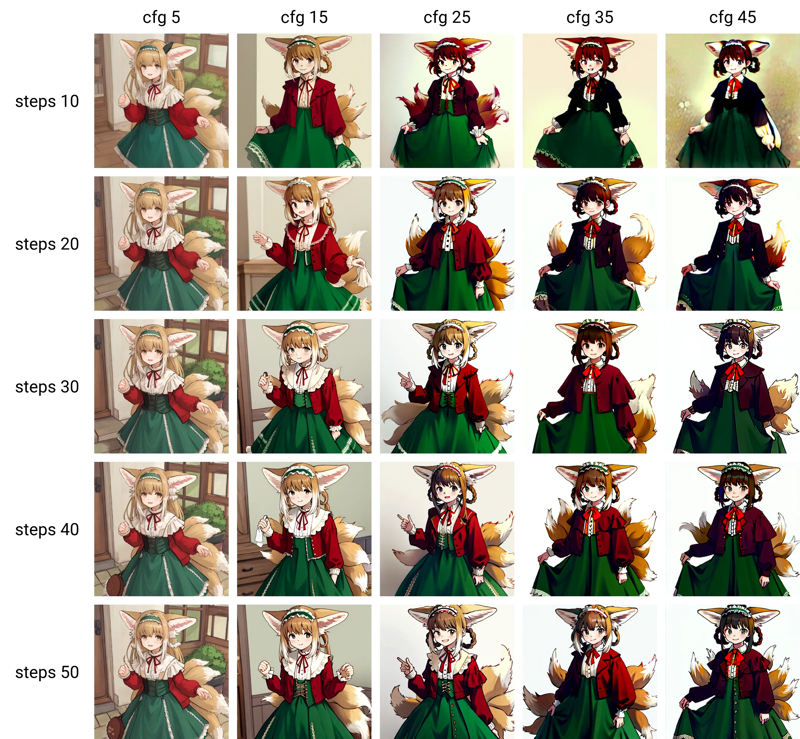
Demo 2 - Ksampler
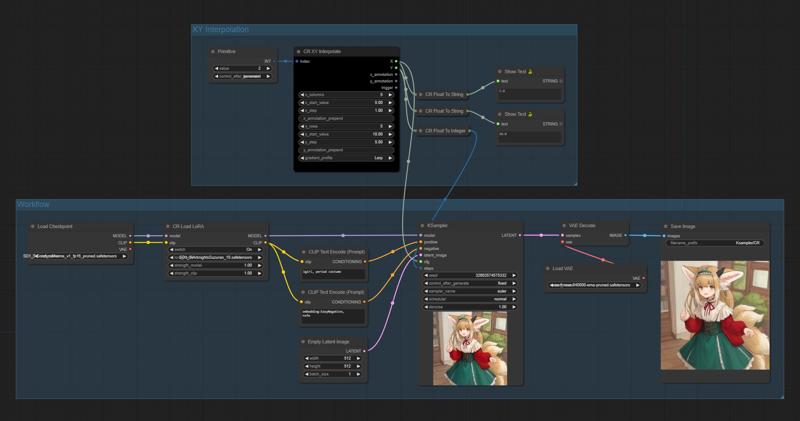
This demo uses the XY List method
It creates a 5 x 5 grid based on the Ksampler cfg and steps
The XY grid is output using a second workflow
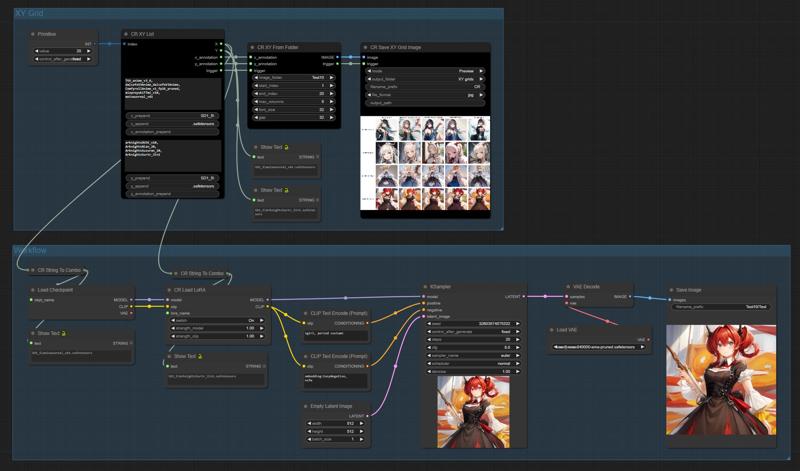
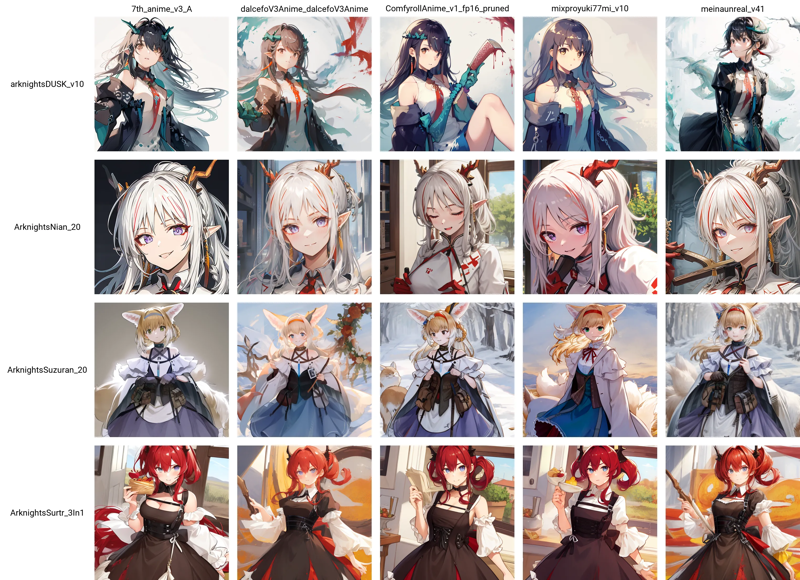
Demo 3 - Model and LoRA
This demo uses the XY List method
It creates a 5 x 4 grid based on the the selected models and LoRAs
The output nodes for the XY grid are included in the same workflow
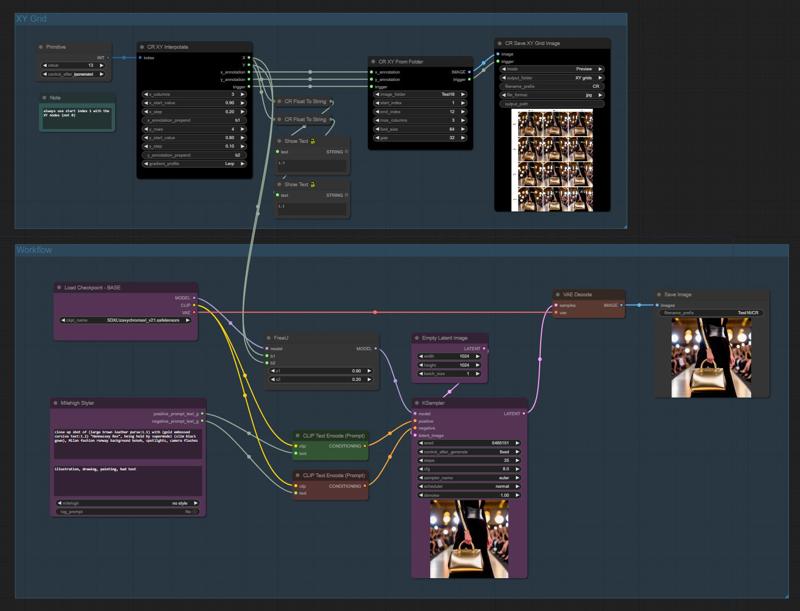
Demo 4 - FreeU
This demo uses the XY Interpolate method
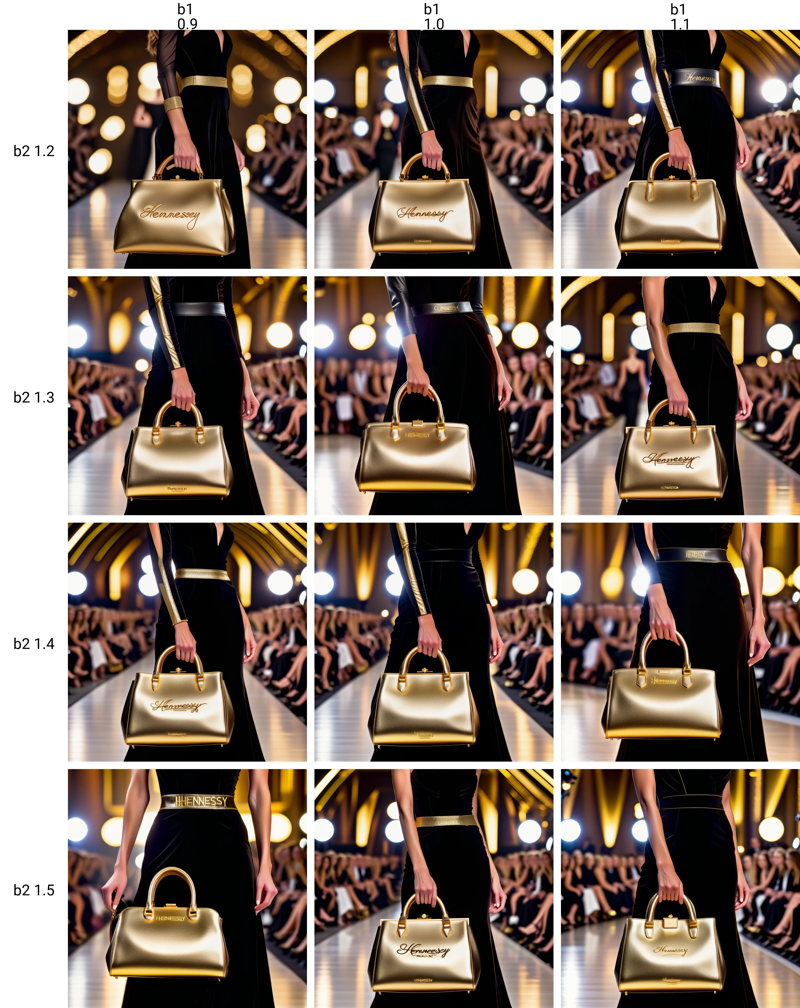
It creates a 4 x 4 grid based on the FreeU b1 and b2 parameters
The output nodes for the XY grid are included in the same workflow
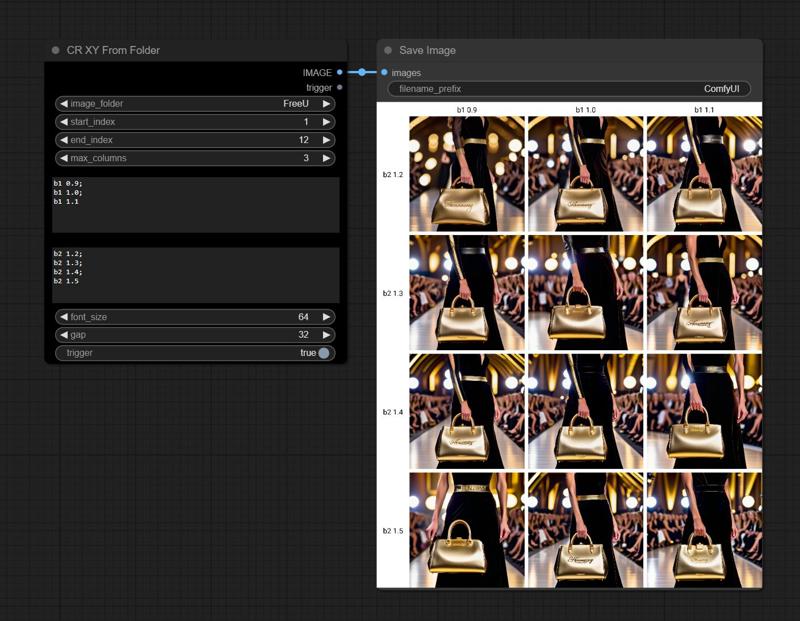
You can also produce the XY grid at any time directly from the image folder
Demo 5 - Model and Prompt
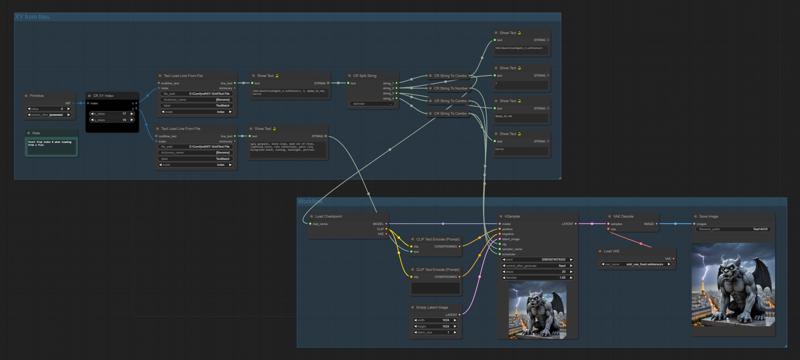
This demo use the XY Index method
The index is used to cross-join the model and prompt data from two files
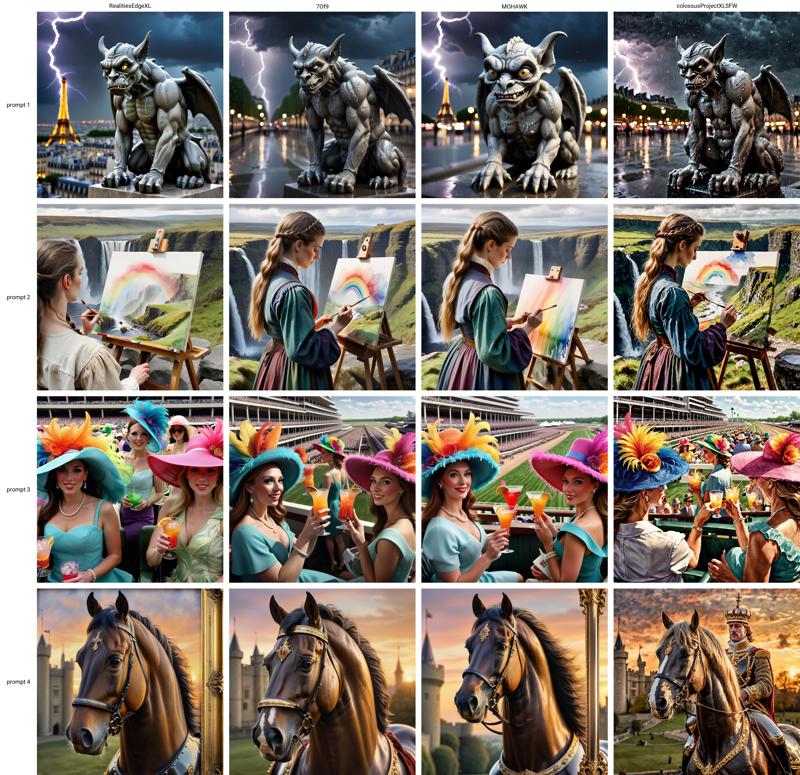
It creates a 4 x 4 grid based on model and prompt inputs from the files
three example files are included in the download
SDXL Models.txt
SDXL Prompts.txt
SDXL Model config.txt (for demo 5c)
you can edit the example files to use models that you already have or to change the subfolder for the models, or to change the prompts
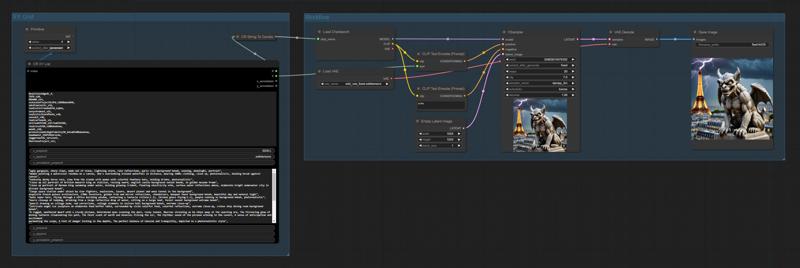
The output nodes for the XY grid are included in demo 5d
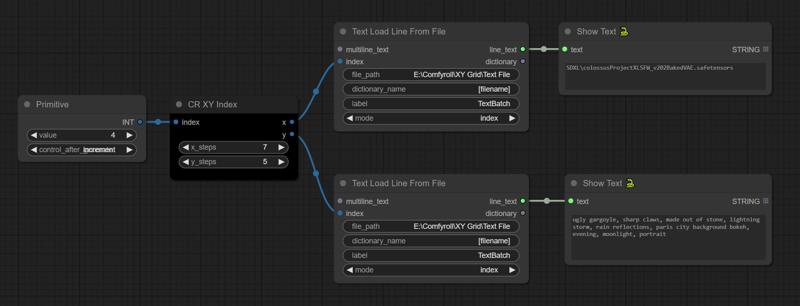
Demo 5b
Demo 5c - Example of splitting lines from a file to update multiple widgets
Demo 5d - Includes the output nodes for the XY grid
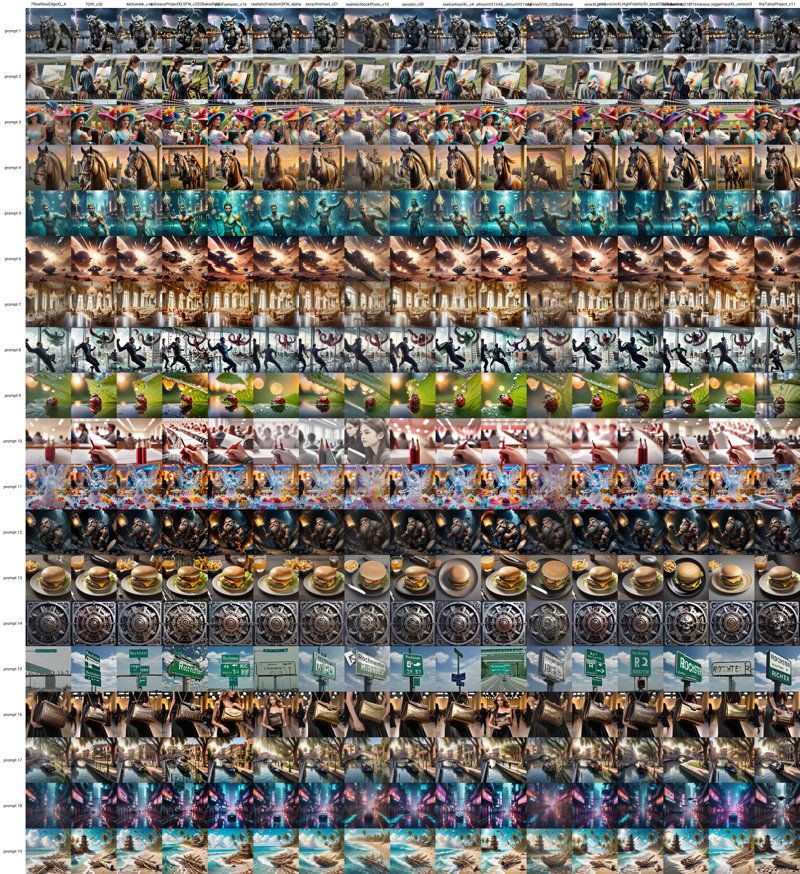
This is the output from Demo 5d
Demo 6 - Model and Prompt
This demo use the XY List method
It cross-joins model and prompt data
It produces a large set of images that can be assembled into an XY grid
Nodes
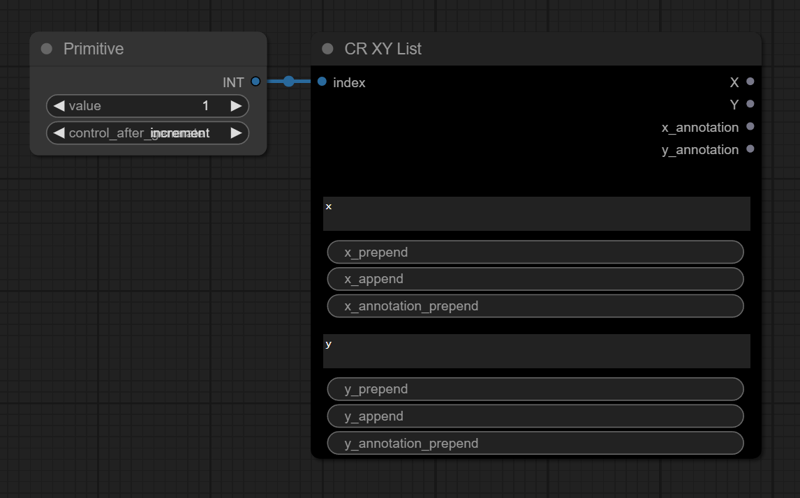
CR XY List
Convert index to input and connect a primitive node
List values should be comma separated
e.g. 0.4, 0.5, 0.6, 0.7,
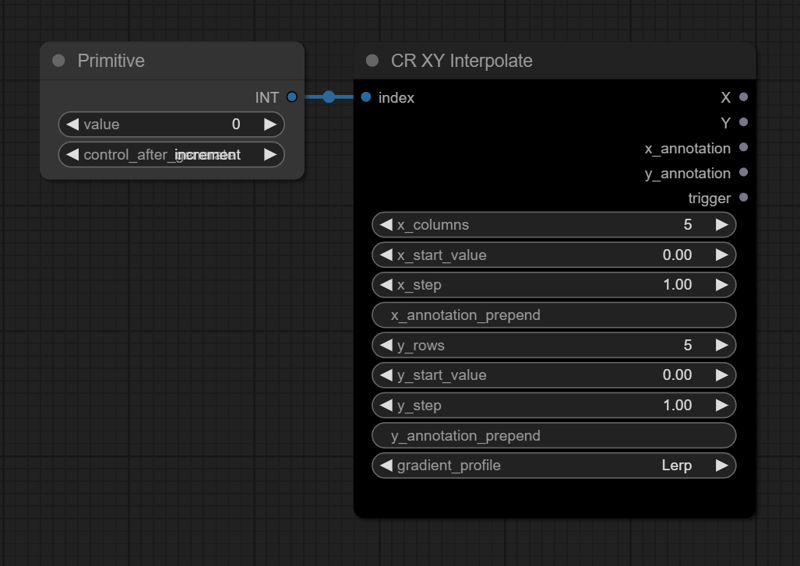
CR XY Interpolate
Convert index to input and connect a primitive node
List values should be comma separated
e.g. 0.4, 0.5, 0.6, 0.7,
CR XY Index
Convert index to input and connect a primitive node
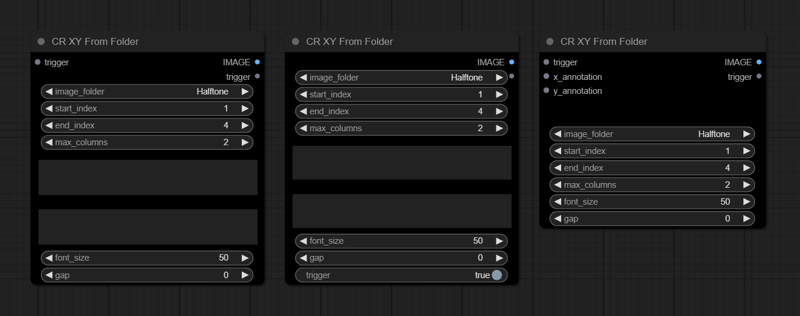
CR XY From Folder
Several configurations can be used
Optionally convert trigger, x_annotation, and y_annotation to input
If trigger is not used as an input, then don't forget to activate it (true) or the node will do nothing
Annotion list values should be semi-colon separated
e.g. prompt 1; prompt 2; prompt 3; prompt 4
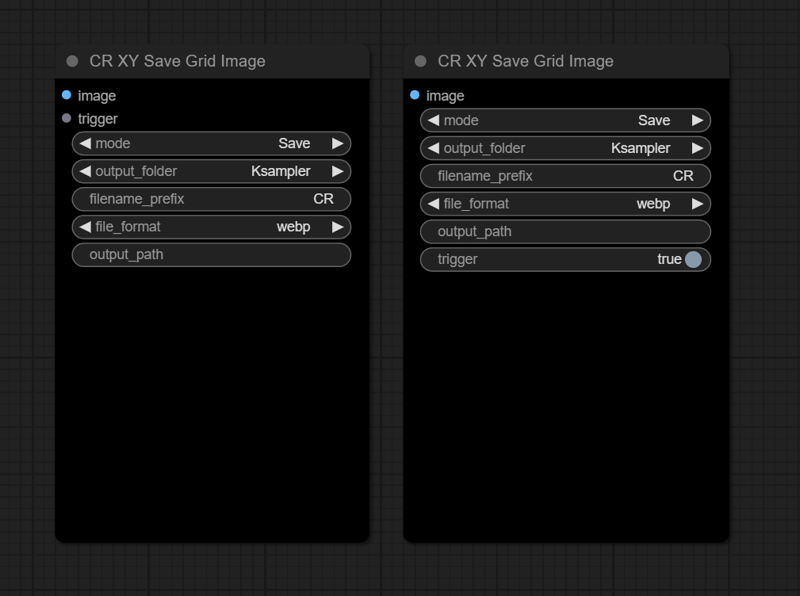
CR XY Save Grid Image
The trigger can be converted to input or used as a widget
If trigger is not used as an input, then don't forget to activate it (true) or the node will do nothing
Tips
Always start the index on the Primitive node at 1 (not 0). This makes it easier to calculate indexes based on columns and rows.
You can control multiple values on each axis by using a file input and splitting lines (see demo 5C)
You can make single column or single row grids for comparing images in 1 dimension
X and Y can be attached to different nodes
You can copy the XY Grid nodes from the above templates and paste them into your existing workflow
You can build an XY Grid Image from existing images in a folder. For example if you have produced images in an appropraite sequence using another workflow, they can be assembled using CR XY From Folder and CR XY Save Grid Image.
Installation
Download the workflows
Install or update the following custom nodes
for Text Load Line From File node
for the CR XY nodes
On first use
Select a template from the list above
Create an output folder for the image series as a subfolder in ComfyUI/output e.g. 'XY test'
Create an output folder for the grid image in ComfyUI/output, e.g. 'XY grids'
Select a checkpoint model and LoRA (if applicable)
Do a test run
Save a copy to use as your workflow
Known Issues
The CR XY Save Grid Image node sometimes misses the last image in a grid. It is likely this is do to the order in which nodes are processed. A simple workaround is to re-run the last iteration. For example, with a 25 image grid, if the last image is missing reset the primitive node to 25 and the run a batch count of 1.
The CR XY Save Grid Image node in Preview mode looks for the ComfyUI/temp folder. If it doesn't find it, it currently throws an error. This will be fixed in the next patch. A workaround is to manually add the temp folder.

list index out of range
This error can occur when the index on the Primitive node is higher than the index of your last image (end index). An error message will be added for this scenario.
Pressing ctrl-enter to run the Queue may result in no iterations. You need to press the Queue button directly.
Troubleshooting
Please see our CivitAI article
Credits
Grockster, King Lord and THM - for assisting with requirements and beta testing the nodes
LEv145 - for the original code


